 , not that bad at all.
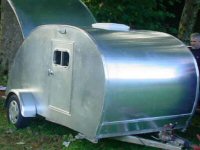
The Poet Creek Express - Foamie Hybrid
Moderator: eaglesdare
Re: The Poet Creek Express - Foamie Hybrid
![]() by OP827 » Sat May 23, 2015 11:41 am
by OP827 » Sat May 23, 2015 11:41 am
I agree, was just curious, I also use mostly mechanical cut power tools, a bit messy but with my saw dust collect big plastic barrel maintenance free shop vac separator , not that bad at all.
, not that bad at all.-

OP827 - Donating Member
- Posts: 1595
- Images: 414
- Joined: Fri Apr 25, 2014 7:27 pm
- Location: Bruce County Ontario
Re: The Poet Creek Express - Foamie Hybrid
![]() by KCStudly » Sat May 23, 2015 7:47 pm
by KCStudly » Sat May 23, 2015 7:47 pm
I brought my shop vac from home today and had a bit of a cleanup before getting started; needed doing as I have been reluctant to load up Karl’s new vac. Despite being much louder and not as convenient to use (short stiff hose and no remote start feature) it seemed to move a lot more air and made short work of picking up all of the accumulated debris.
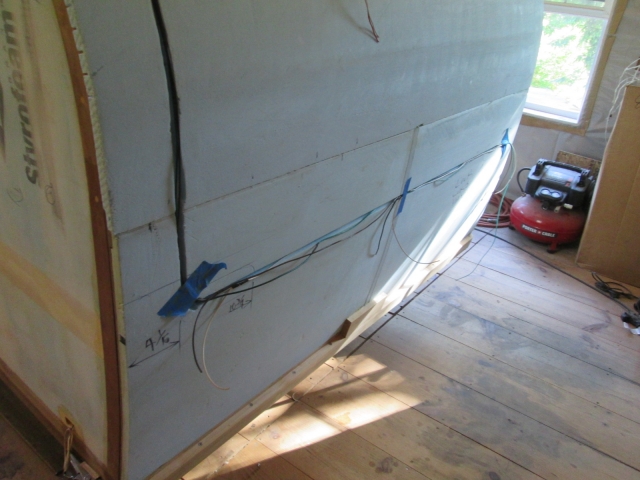
The router had bobbled off of the wireway grommet making an Eeyore (donkey track), so rather than trying to route the grommet fair to the bottom of the wireway I just chiseled out a little and rounded the entry into the hole.
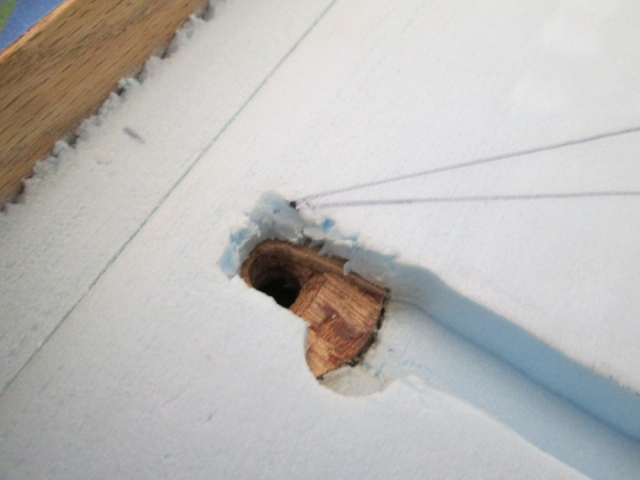
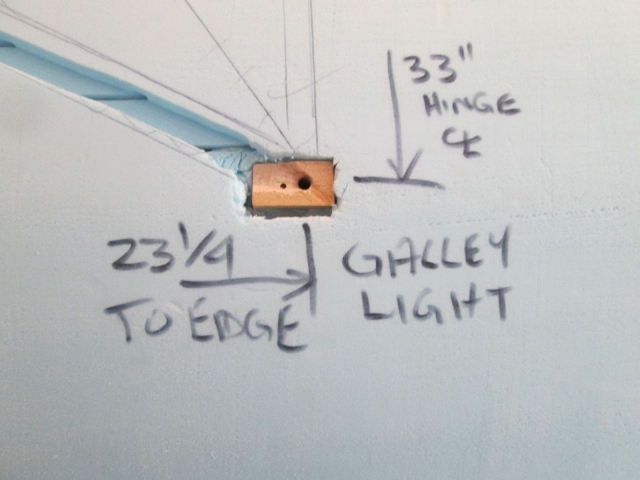
I had already rolled the entry into the galley light block slightly with a drill bit, but the approach angle had changed slightly and I wanted to take it down even with the bottom of the wireway (1/2 wide x 1/2 deep) so I chiseled that out a bit, too. Made sure not to get into the tip of the light mounting screw coming up from the other side (down in the smaller hole).

A little out of sequence, I shaved a couple of small pieces of foam and shoved them into the small gaps around the light block; mostly just to prevent dead ends and unwanted catch points should I ever need to fish wires blindly.
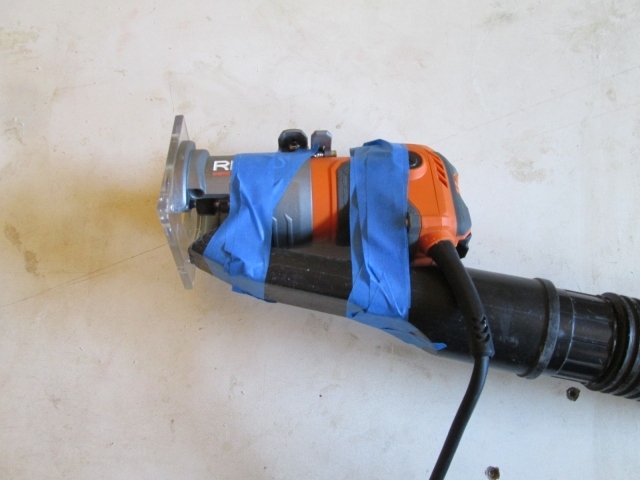
Getting ready to router the horizontal wireway for the hatch clearance lights, I adapted the shop vac nozzle with blue tape. This would prove to be awkward because the hose was kind of short and would have to be held up very high.
I made a short stick to prop the hatch open just enough to get some spring clamps under the edges, but not so high that I couldn't reach while standing on the step stool. The Red Grandis stick used as a guide fence is the same one I have been using as a temporary hatch prop.
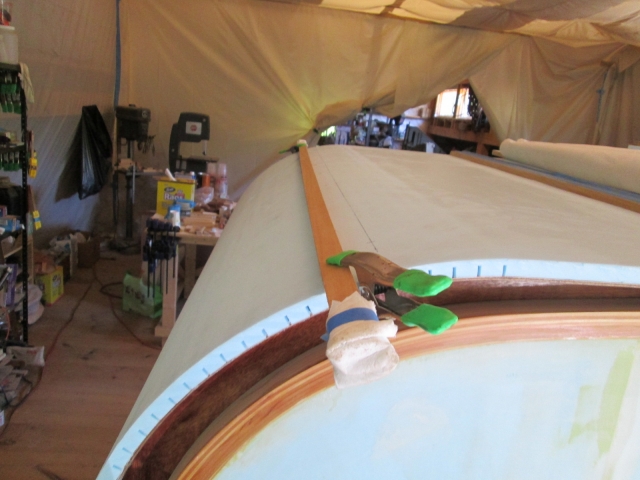
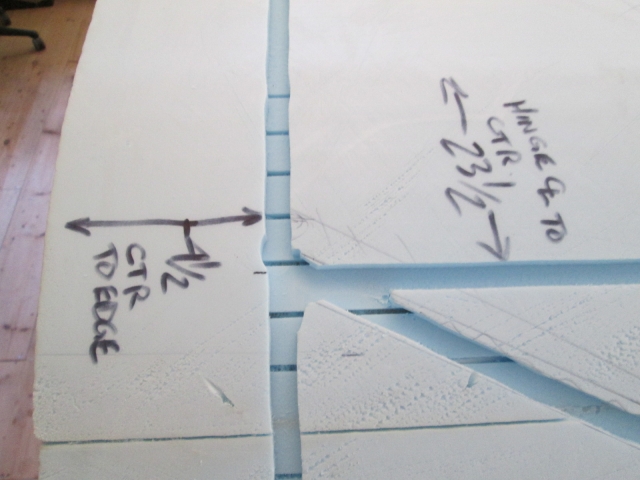
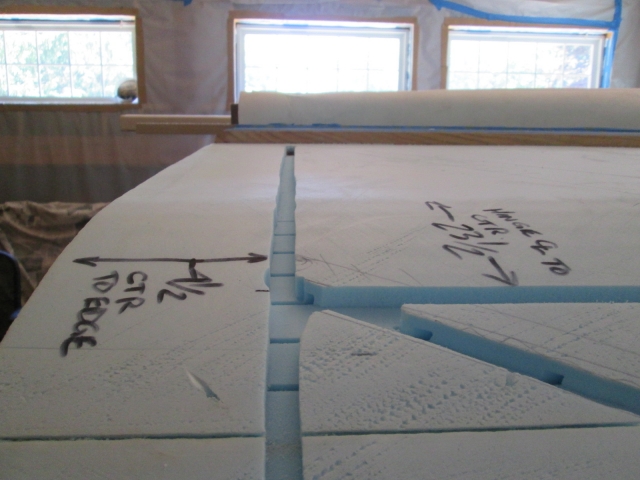
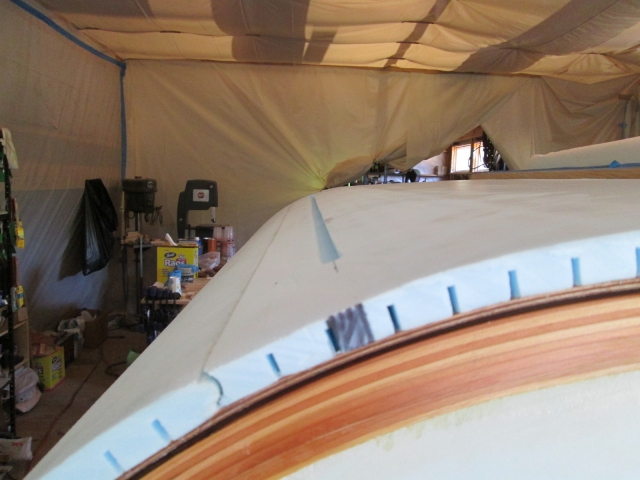
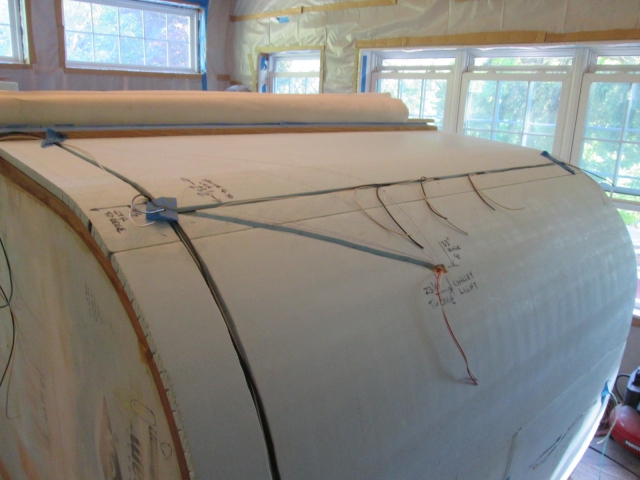
Photo documentation locating the wire ways so that I can find them again after the top layer of foam goes on. This is the main junction that will be located under the upper left clearance light blister.
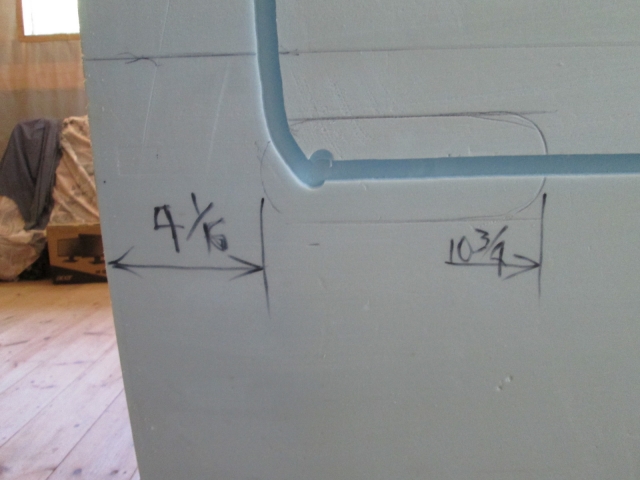
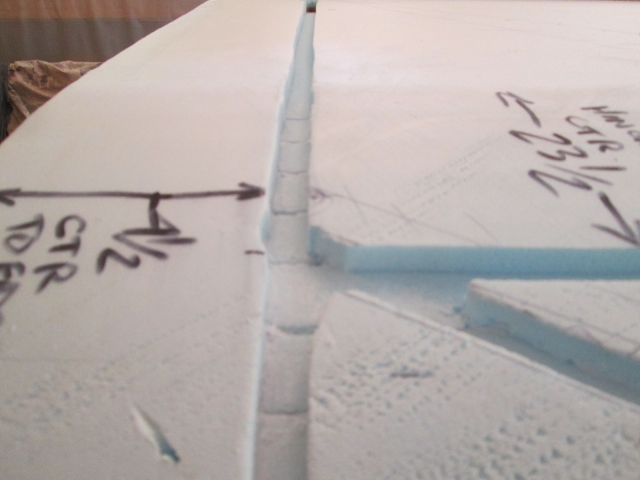
Left taillight. The oval area will be routed out some more to allow space for the pigtail plug and back of the light housing. Still thinking about the sequence on that one.
Galley light block location dim’s.
Black sharpie marks on edge of hatch foam in line with horizontal wire ways will also help locate after top layer of foam goes on.
Used the PL300 to seal all of the exposed kerfs in the wire ways.

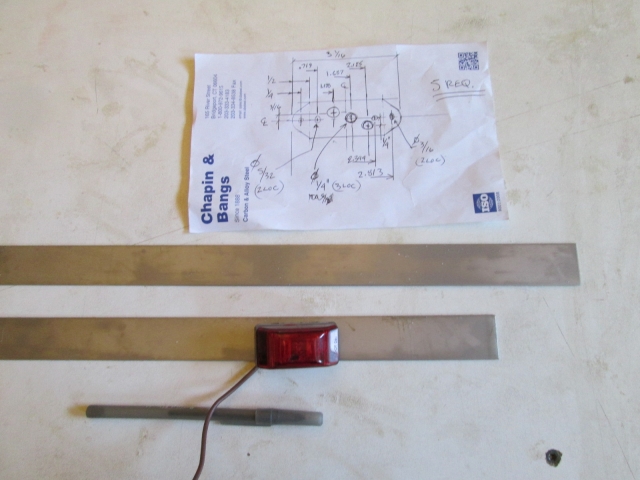
Chris and Karl had relatives visiting; gave tour of build to his brother in law. I heard Karl demonstrating the shear and break press, and shortly thereafter he brought me these 18 gauge x 1-1/8 wide strips of stainless steel that I had requested for the clearance light mounting plates. Now that the weather is good I’ll get back to those when they are needed. I’ll drill all of the holes on the mill before cutting the individual plates out.
Speaking of the weather, it was a beautiful blue sky day today with lovely cool temps.
No better time than the present to prefab the wire harness for the hatch. I laid the ground (white) and running light (brown) wires in to the troughs with a little blue tape to hold them in place and marked where all of the T-splices needed to be. My fancy wire gripper strippers worked well to cut and spread the insulation midway on the main runs so that I could add pigtails for each fixture. I figured this would be an easier way to fish the pigtails out where I can join them with the fixtures, rather than having to find slack in the main runs later. Soldered, cleaned away flux and shrink wrapped all connections.
Where the upper and lower runs crossed I bared both wires and twisted them together in a four way connection (rather than cutting the wires), resulting in the pigtails for the clearance light there (in my hand). This is that main junction under the upper left clearance light, and probably the point that I will pull all of these wires from, pulling out to the ends of the three different branches (right taillight, right clearance light and main grommet).
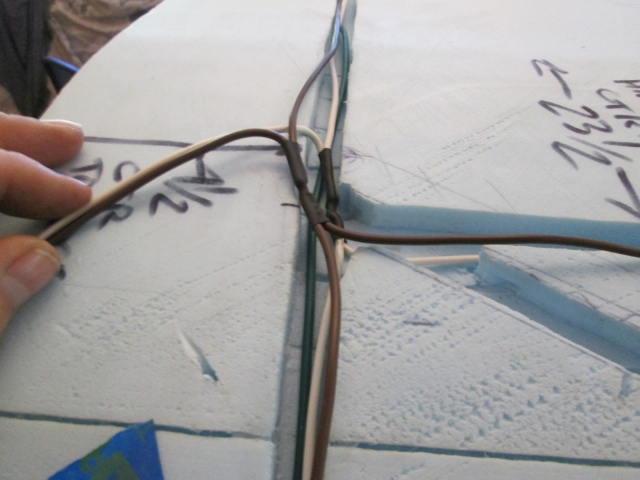
The green (right turn/stop) is just a straight run to that fixture and is laid in below these. The yellow (left turn/stop) and pair for the galley light (red/hot and white/ground) are yet to come. I’ll set those up tomorrow, do some filling of gaps here and there, and hopefully get into the second layer of foam.
I spotted Karl's old dead shop vac under the stairs and figure that would be a good starting point for a cyclone separator; already has the right sized connections, plenty of volume and already mounted on wheels, but is another project for another day.
The router had bobbled off of the wireway grommet making an Eeyore (donkey track), so rather than trying to route the grommet fair to the bottom of the wireway I just chiseled out a little and rounded the entry into the hole.
I had already rolled the entry into the galley light block slightly with a drill bit, but the approach angle had changed slightly and I wanted to take it down even with the bottom of the wireway (1/2 wide x 1/2 deep) so I chiseled that out a bit, too. Made sure not to get into the tip of the light mounting screw coming up from the other side (down in the smaller hole).
A little out of sequence, I shaved a couple of small pieces of foam and shoved them into the small gaps around the light block; mostly just to prevent dead ends and unwanted catch points should I ever need to fish wires blindly.
Getting ready to router the horizontal wireway for the hatch clearance lights, I adapted the shop vac nozzle with blue tape. This would prove to be awkward because the hose was kind of short and would have to be held up very high.
I made a short stick to prop the hatch open just enough to get some spring clamps under the edges, but not so high that I couldn't reach while standing on the step stool. The Red Grandis stick used as a guide fence is the same one I have been using as a temporary hatch prop.
Photo documentation locating the wire ways so that I can find them again after the top layer of foam goes on. This is the main junction that will be located under the upper left clearance light blister.
Left taillight. The oval area will be routed out some more to allow space for the pigtail plug and back of the light housing. Still thinking about the sequence on that one.
Galley light block location dim’s.
Black sharpie marks on edge of hatch foam in line with horizontal wire ways will also help locate after top layer of foam goes on.
Used the PL300 to seal all of the exposed kerfs in the wire ways.
Chris and Karl had relatives visiting; gave tour of build to his brother in law. I heard Karl demonstrating the shear and break press, and shortly thereafter he brought me these 18 gauge x 1-1/8 wide strips of stainless steel that I had requested for the clearance light mounting plates. Now that the weather is good I’ll get back to those when they are needed. I’ll drill all of the holes on the mill before cutting the individual plates out.
Speaking of the weather, it was a beautiful blue sky day today with lovely cool temps.
No better time than the present to prefab the wire harness for the hatch. I laid the ground (white) and running light (brown) wires in to the troughs with a little blue tape to hold them in place and marked where all of the T-splices needed to be. My fancy wire gripper strippers worked well to cut and spread the insulation midway on the main runs so that I could add pigtails for each fixture. I figured this would be an easier way to fish the pigtails out where I can join them with the fixtures, rather than having to find slack in the main runs later. Soldered, cleaned away flux and shrink wrapped all connections.
Where the upper and lower runs crossed I bared both wires and twisted them together in a four way connection (rather than cutting the wires), resulting in the pigtails for the clearance light there (in my hand). This is that main junction under the upper left clearance light, and probably the point that I will pull all of these wires from, pulling out to the ends of the three different branches (right taillight, right clearance light and main grommet).
The green (right turn/stop) is just a straight run to that fixture and is laid in below these. The yellow (left turn/stop) and pair for the galley light (red/hot and white/ground) are yet to come. I’ll set those up tomorrow, do some filling of gaps here and there, and hopefully get into the second layer of foam.
I spotted Karl's old dead shop vac under the stairs and figure that would be a good starting point for a cyclone separator; already has the right sized connections, plenty of volume and already mounted on wheels, but is another project for another day.
Last edited by KCStudly on Mon Aug 03, 2020 8:06 am, edited 2 times in total.
KC
My Build: The Poet Creek Express Hybrid Foamie
Poet Creek Or Bust
Engineering the TLAR way - "That Looks About Right"
TnTTT ORIGINAL 200A LANTERN CLUB = "The 200A Gang"
Green Lantern Corpsmen
My Build: The Poet Creek Express Hybrid Foamie
Poet Creek Or Bust
Engineering the TLAR way - "That Looks About Right"
TnTTT ORIGINAL 200A LANTERN CLUB = "The 200A Gang"
Green Lantern Corpsmen
-

KCStudly - Donating Member
- Posts: 9640
- Images: 8169
- Joined: Mon Feb 06, 2012 10:18 pm
- Location: Southeastern CT, USA


