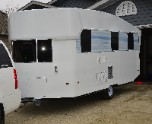
Slipstream

...ask your questions in the appropriate forums BUT document your build here...preferably in a single thread...dates for updates, are appreciated....

Re: Slipstream

Postby noseoil » Thu Jun 11, 2015 6:45 am

You can make a cardboard template of the outside radius as a shaping guide. Just cut the cardboard & keep holding it up against the curve as you remove material. If it is a true section of a sphere, a simple edge to follow will give you the three dimensional curve you need at the corners. Once it's close enough, some sanding with coarse paper should be all you need for a nice curved surface which is faired in well enough to skin.
Build log: viewtopic.php?f=50&t=60248
The time you spend planning is more important than the time you spend building.........

137905
User avatar
noseoil
1000 Club
1000 Club
 
Posts: 1822
Images: 670
Joined: Sun Apr 27, 2014 8:46 am
Location: Raton, New Mexico, living the good life!

Re: Slipstream

Postby OP827 » Thu Jun 11, 2015 12:17 pm

Robot wrote:KC, I like your attitude. If machining has taught me anything, it's that there are at least 5 different ways to do anything, and each will have its pros and cons.

My "good" corner plug and the second plug made from the "good" mold both flattened out after sitting out of the mold for a couple hours. I think there is just so much foam under tension that once it has nothing holding it back it "stress relieves". So much for the mold being the best method .

In a fit of frustration I installed the skeleton frame in the remaining 3 corners, duct taped the corner from the inside, and built up spray foam on the outside. I did not take pictures.
I was going to have to hand shape the corners regardless, and by spraying it directly on the trailer, it will encapsulate the corner skeleton, making a stronger unit.

Hopefully.


I like KCs and your attitude too. I guess we all doing what works for each of us best and most important we are there to have fun during the build process. The ups and downs will always be there, it is ok to get frustrated. I sometimes get and then resist an urge to demolish the thing I just made because there is something that went wrong with it, then I take a deep breath, relax and think of it [at least a 10 second and up to 10+ days pause :) ] ... and later on I am so glad I did that, because I thought of it and figured out how to fix it. I found that everything can be fixed and every piece of build I do next I do it better, because I learned something and I took care of it next time to have a better result.

Keep on it, you are doing a fantastic job Robot! :thumbsup:
User avatar
OP827
Donating Member
 
Posts: 1595
Images: 414
Joined: Fri Apr 25, 2014 7:27 pm
Location: Bruce County Ontario

Re: Slipstream

Postby Robot » Thu Jun 11, 2015 11:42 pm

Noseoil, I love the cardboard template idea. I will definitely be using it!

I spent many years in a mom & pop photo lab printing from 35mm film. When a negative would get a scratch, the industry trick was to wipe your finger on the side of your nose and then wipe it on the scratch. The nose oil was just enough to distort the light around the scratch and make it invisible on the print.

So that's what I think of every time I see your name.

Thanks for the words of encouragement everyone. I am having fun building this thing. Here's a shot of the corners with the spray foam. I still have to build them up a little more. I'll use the cardboard template idea to cut out the high spots and see where I need more filler.
uploadfromtaptalk1434084115475.jpg
uploadfromtaptalk1434084115475.jpg (96.7 KiB) Viewed 3530 times
User avatar
Robot
Teardrop Advisor
 
Posts: 78
Joined: Mon Mar 30, 2015 3:06 pm
Top

Re: Slipstream

Postby KCStudly » Fri Jun 12, 2015 6:39 am

Robot, "Now you're cooking with gas!"

Robot wrote:Noseoil, ... that's what I think of every time I see your name.


For me it is how my dad taught me to assemble a fly rod; roll the male ferrules in the corner of your nose before inserting them into the female ferrules. That way the rod comes apart easier when you go to take it apart. Just enough assembly lube to do the job. :thumbsup:
KC
My Build: The Poet Creek Express Hybrid Foamie

Poet Creek Or Bust
Engineering the TLAR way - "That Looks About Right"
TnTTT ORIGINAL 200A LANTERN CLUB = "The 200A Gang"
Green Lantern Corpsmen
User avatar
KCStudly
Donating Member
 
Posts: 9640
Images: 8169
Joined: Mon Feb 06, 2012 10:18 pm
Location: Southeastern CT, USA
Top

Re: Slipstream

Postby OP827 » Fri Jun 12, 2015 9:27 am

Nice foam application Robot :thumbsup: ! This should work better as the foam is now affixed at the edges and has a backing you put there. your work reminded me this car built with foam - http://justsomething.co/old-junk-car/ :thumbsup:
User avatar
OP827
Donating Member
 
Posts: 1595
Images: 414
Joined: Fri Apr 25, 2014 7:27 pm
Location: Bruce County Ontario
Top

Re: Slipstream

Postby Sheddie » Fri Jun 12, 2015 3:58 pm

KCStudly wrote:Robot, "Now you're cooking with gas!"

Robot wrote:Noseoil, ... that's what I think of every time I see your name.


For me it is how my dad taught me to assemble a fly rod; roll the male ferrules in the corner of your nose before inserting them into the female ferrules. That way the rod comes apart easier when you go to take it apart. Just enough assembly lube to do the job. :thumbsup:

:thumbsup: it is always interesting to know where these names come from :thinking: My uncle did a similar thing with his rods by giving it a rub on his forehead to use a bit of natural hair oil ;)
User avatar
Sheddie
1000 Club
1000 Club
 
Posts: 1499
Images: 1129
Joined: Mon Jul 01, 2013 3:26 pm
Location: Whangarei, New Zealand
Top

Re: Slipstream

Postby dales133 » Fri Jun 12, 2015 6:50 pm

Love your work!
Your realy making this look easy despite some learning curves on the corners.
How do you plan on finishing off the inside, particuly the corners?
User avatar
dales133
4000 Club
4000 Club
 
Posts: 4605
Images: 1
Joined: Mon Oct 13, 2014 5:26 pm
Top

Re: Slipstream

Postby Robot » Sat Jun 13, 2015 10:51 am

Thank you! On the inside, the wall starts turning into the arch at 46". I'm thinking the birch plywood paneling on the wall, and bedsheets on the arch & ceiling...painted white. Then run a line of rope lights behind the top of the plywood for some nice soft light. The lower corners will prove a challenge, I'd assume I should kerf the back and maybe give it a steam bath prior to installation.
User avatar
Robot
Teardrop Advisor
 
Posts: 78
Joined: Mon Mar 30, 2015 3:06 pm
Top

Re: Slipstream

Postby dales133 » Sat Jun 13, 2015 12:05 pm

Sounds like a good plan.
I'll keep a watch out
User avatar
dales133
4000 Club
4000 Club
 
Posts: 4605
Images: 1
Joined: Mon Oct 13, 2014 5:26 pm
Top

Re: Slipstream

Postby Robot » Sat Jun 13, 2015 1:02 pm

uploadfromtaptalk1434217195480.jpg
uploadfromtaptalk1434217195480.jpg (66.55 KiB) Viewed 3388 times


In many of the areas I cut down the high spots with a bread knife. The next day, each head has formed a slightly concave surface. Maybe I didn't let it cure long enough before I cut it?
User avatar
Robot
Teardrop Advisor
 
Posts: 78
Joined: Mon Mar 30, 2015 3:06 pm
Top

Re: Slipstream

Postby OP827 » Sat Jun 13, 2015 2:47 pm

You should be ok, just need to be a little more patient with this GS spray foam. Usually it takes longer time, sometime few days to fully cure deep inside. I would just keep fairing and then add or cut the foam as needed to the shape until it is completely cured and stabilized. It is important for the foam to cure completely whole depth with access to air moisture, otherwise later it may unexpectadly bulge from inside, but I don thinnk it is hte case here, you are opening the pores by cutting the foam and let more air inside the thickness.
User avatar
OP827
Donating Member
 
Posts: 1595
Images: 414
Joined: Fri Apr 25, 2014 7:27 pm
Location: Bruce County Ontario
Top

Re: Slipstream

Postby Robot » Mon Jun 15, 2015 1:00 am

Good progress this weekend!
I did a lot of filling, shaping, and sanding on the corners. Unfortunately, I need to let this stuff cure for several days before I carve it.. A lot of my nice smooth spots were concave the next morning. But the stuff that had sat on there for a couple days prior to shaping stayed nice and flat.
uploadfromtaptalk1434347825150.jpg
uploadfromtaptalk1434347825150.jpg (66.42 KiB) Viewed 3332 times


Here is the inside from the front, showing tentative placement of the AC and the bed frame. You can see the duct tape on one corner, the other you can see how the foam wrapped around the corner frame.
uploadfromtaptalk1434347813866.jpg
uploadfromtaptalk1434347813866.jpg (75.21 KiB) Viewed 3332 times
.
Attachments
uploadfromtaptalk1434347665046.jpg
uploadfromtaptalk1434347665046.jpg (113.9 KiB) Viewed 3332 times
User avatar
Robot
Teardrop Advisor
 
Posts: 78
Joined: Mon Mar 30, 2015 3:06 pm
Top

Re: Slipstream

Postby Robot » Mon Jun 15, 2015 1:08 am

I also got the door hung. I need do do a little more work on panel alignment, but so far it's looking good. I'm debating putting a window in the door. It raises up like a hatch, so I don't think a Wiley window will work. I'm ok with a fixed window I need to look at more old airstream pictures and see what they did in terms of placement, size, and shape.

I had trouble getting a tight enough bend in the pvc for the door frame, so I ended up using 45deg fittings.

uploadfromtaptalk1434348507475.jpg
uploadfromtaptalk1434348507475.jpg (88.29 KiB) Viewed 3331 times
uploadfromtaptalk1434348355727.jpg
uploadfromtaptalk1434348355727.jpg (101.92 KiB) Viewed 3331 times
User avatar
Robot
Teardrop Advisor
 
Posts: 78
Joined: Mon Mar 30, 2015 3:06 pm
Top

Re: Slipstream

Postby Robot » Mon Jun 15, 2015 2:36 am

I'm wondering if I can get the corners 90% smooth & round, then use some sort of body filler for the myriad of little cracks & holes. Something like Bondo, but doesn't require mixing. Anyone have any similar experience or advice?
User avatar
Robot
Teardrop Advisor
 
Posts: 78
Joined: Mon Mar 30, 2015 3:06 pm
Top

Re: Slipstream

Postby Fred Trout » Mon Jun 15, 2015 6:33 am

I'm wondering if I can get the corners 90% smooth & round, then use some sort of body filler for the myriad of little cracks & holes.


Paper mache comes to mind. Easy, cheap, light, quick. Keep in mind the foam assemblage will need good waterproofing & strengthening whatever you come up with.
User avatar
Fred Trout
The 300 Club
 
Posts: 396
Joined: Fri May 08, 2015 4:30 pm
Location: SW Montana
Top

PreviousNext

Return to Build Journals

Who is online

Users browsing this forum: No registered users and 8 guests