notre larme - Modified Gruman 2

...ask your questions in the appropriate forums BUT document your build here...preferably in a single thread...dates for updates, are appreciated....

notre larme - Modified Gruman 2

Postby Strop » Wed Oct 21, 2015 1:41 am

Well I decided to sand down the edges along the high parts of the floor. Levelled it up ok.
ImageUploadedByTapatalk1445409231.002555.jpg
ImageUploadedByTapatalk1445409231.002555.jpg (112.55 KiB) Viewed 1282 times


I also prepared the walls for fastening down drilling pocket holes every 150mm (6")

ImageUploadedByTapatalk1445409349.665496.jpg
ImageUploadedByTapatalk1445409349.665496.jpg (107.57 KiB) Viewed 1282 times


It was also my intention to have a raised floor for storage underneath. So I am going to fix the walls then glue and screw a side support to the wall and also screw it into the floor. That should give me pretty massive connection to the floor and walls.

ImageUploadedByTapatalk1445409509.506973.jpg
ImageUploadedByTapatalk1445409509.506973.jpg (116.18 KiB) Viewed 1282 times


I have 12 bolts holding floor to trailer.

Finally, intend to put glue on end of cupboards and through a combination of pocket screws and ordinary screws fix wall to cupboards bracing structure.

Laurie
Last edited by Strop on Wed Oct 21, 2015 3:32 am, edited 2 times in total.
Strop
Teardrop Master
 
Posts: 148
Images: 10
Joined: Wed May 15, 2013 3:12 pm
Location: Armidale, NSW, Australia

notre larme - Modified Gruman 2

Postby Strop » Wed Oct 21, 2015 1:46 am

Noseoil, forgot to add that I am doing the same with the side. My sides will be fibreglass panels that will end level with bottom of trailer chassis. I will then put trim and sealant to waterproof.

Plan anyway.

Laurie
Strop
Teardrop Master
 
Posts: 148
Images: 10
Joined: Wed May 15, 2013 3:12 pm
Location: Armidale, NSW, Australia

Re: notre larme - Modified Gruman 2

Postby Strop » Sat Oct 31, 2015 10:15 pm

Ok I am seeking some advice.

I got to a dry fit of my ceiling and was very happy. All looking good.
IMG_1268.jpg
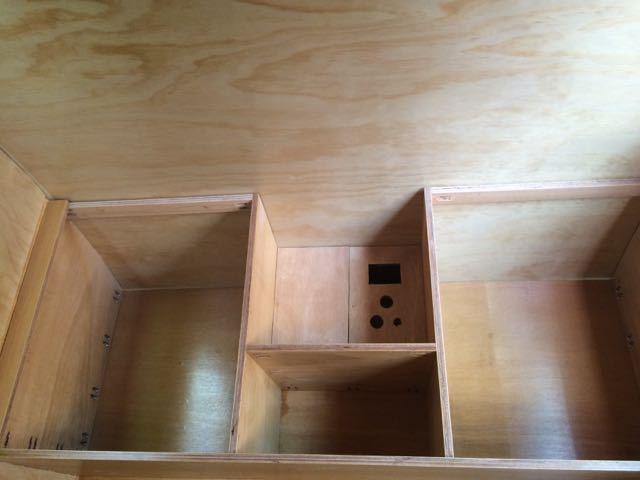
IMG_1268.jpg (31.77 KiB) Viewed 1201 times


I made a measuring mistake and I don't have enough space to fit in my insulation as planned. I am using Steve Fredericks method of doing the walls, ceiling & roof. I have place my spacers between the roofing spars in place and they are sitting about 4-5mm proud of the top of the wall. The building method would normally call for me to run along this edge with a belt sander to level them with the wall.

IMG_1271.jpg
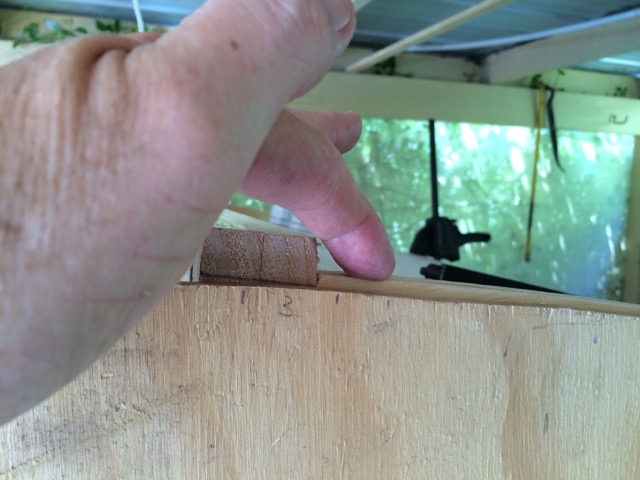
IMG_1271.jpg (70.87 KiB) Viewed 1204 times


What I have done is not made the slot the ceiling fits big enough. It is only 20mm deep, it should have been 25mm. 25mm with a 4mm ceiling sheet left me 20mm for insulation and spars 20mm x 30mm in size. The 20mm with a 4mm ceiling sheet leaves me 15mm for insulation and spars 15mm x 30mm in size. I don't think the insulation comes in 15mm sheets but will have to check on Monday. 10 & 20mm only I think. So what I was thinking of doing was leaving the spacers at their height so I can fit 20mm of insulation in and make the spars that little bit bigger

IMG_1275.jpg
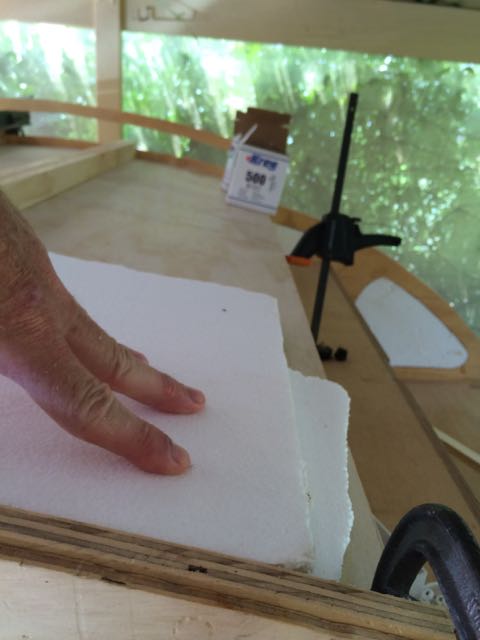
IMG_1275.jpg (34.11 KiB) Viewed 1204 times


The roof spars would also be trimmed to the correct size.

I would then have to fit the roof and use a router to trim it back to the sides. This would then leave me a gap of around 5mm around the side - which can be seen under my finger in the first photo.. I could then fill this with builders bog to make the side smooth.

This would then leave me with a problem with the hatch as the roof line back to the hatch would be raised slightly (4-5mm). I could then overcome this by placing two layers of ply on the outside of the hatch.

So, is it ok to use builders bog in this case?
Are spars 15mm x 36mm big enough if there is 15mm insulation available?
Do I gain anything by going to 20mm x 36mm spars if I can get 15mm insulation?
Can anyone see any other issues?

Edit: My roof spars are currently pine and measure 42mm x 38mm. I can put them through a thicknesses to make them 42mm x 15 or 20mm or have them 38mm x 15 or 20mm.

Thanks

Laurie
Last edited by Strop on Sat Oct 31, 2015 10:28 pm, edited 1 time in total.
Strop
Teardrop Master
 
Posts: 148
Images: 10
Joined: Wed May 15, 2013 3:12 pm
Location: Armidale, NSW, Australia
Top

Re: notre larme - Modified Gruman 2

Postby dales133 » Sat Oct 31, 2015 10:26 pm

What are you claddi g the outside with?
I guess this would determine the gap issue.
15mm is probably be getting on the thin side
User avatar
dales133
4000 Club
4000 Club
 
Posts: 4605
Images: 1
Joined: Mon Oct 13, 2014 5:26 pm
Top

Re: notre larme - Modified Gruman 2

Postby Strop » Sat Oct 31, 2015 10:53 pm

outside if fibreglass sheeting - pre made.

Laurie
Strop
Teardrop Master
 
Posts: 148
Images: 10
Joined: Wed May 15, 2013 3:12 pm
Location: Armidale, NSW, Australia
Top

Re: notre larme - Modified Gruman 2

Postby dales133 » Sat Oct 31, 2015 10:59 pm

So tbe fiberglass will cover the gap alright?
User avatar
dales133
4000 Club
4000 Club
 
Posts: 4605
Images: 1
Joined: Mon Oct 13, 2014 5:26 pm
Top

Re: notre larme - Modified Gruman 2

Postby dales133 » Sat Oct 31, 2015 11:00 pm

If so id fill the gap and go that way i reco
User avatar
dales133
4000 Club
4000 Club
 
Posts: 4605
Images: 1
Joined: Mon Oct 13, 2014 5:26 pm
Top

Re: notre larme - Modified Gruman 2

Postby Sheddie » Sat Oct 31, 2015 11:10 pm

Hi Laurie, personally I would not go that thin with the spars. You get the most strength across a span with the spars on their edge, not on their side. That is with the bigger measurement vertical not horizontal making them wider won't add much support. I have 42mm x 20mm, the 42mm being the vertical dimension.
If you don't want to drop the ceiling height down, you could look at laminating a strip along the top of the walls to build them up to level with the top of the spars. Unfortunately this may mean a redesign of the hatch.
Keep up the good work it is looking nice. :thumbsup:
User avatar
Sheddie
1000 Club
1000 Club
 
Posts: 1499
Images: 1129
Joined: Mon Jul 01, 2013 3:26 pm
Location: Whangarei, New Zealand
Top

Re: notre larme - Modified Gruman 2

Postby Strop » Sun Nov 01, 2015 1:39 am

What if I sacrifice weight for strength and use hardwood spars?

I have spars every 30cm .

Why do you need a lot of strength here anyway. If you are not planning to walk on it isn't their main purpose to hold the walls together?

Laurie
Strop
Teardrop Master
 
Posts: 148
Images: 10
Joined: Wed May 15, 2013 3:12 pm
Location: Armidale, NSW, Australia
Top

Re: notre larme - Modified Gruman 2

Postby Strop » Sun Nov 01, 2015 1:40 am

What if I sacrifice weight for strength and use hardwood spars?

I have spars every 30cm .

Why do you need a lot of strength here anyway. If you are not planning to walk on it isn't their main purpose to hold the walls together?

Laurie
Strop
Teardrop Master
 
Posts: 148
Images: 10
Joined: Wed May 15, 2013 3:12 pm
Location: Armidale, NSW, Australia
Top

Re: notre larme - Modified Gruman 2

Postby dales133 » Sun Nov 01, 2015 1:45 am

Franks right mate and id use hardwood anyway.
I used 19x35 and 35x35 for the fan spars.
You could ad more but these spars stop the cabin from wracking and give the whole structure its strengh.
More than happy for you to call me if you like might be easier to help you.
If you can explain to me a few things we might be able to bounce some ideas.
Cheers dale
User avatar
dales133
4000 Club
4000 Club
 
Posts: 4605
Images: 1
Joined: Mon Oct 13, 2014 5:26 pm
Top

Re: notre larme - Modified Gruman 2

Postby Strop » Sun Nov 01, 2015 1:59 am

Ok before calling Dale. Both walls have a lip so the end of the spars sit on the lip.
ImageUploadedByTapatalk1446360996.085442.jpg
ImageUploadedByTapatalk1446360996.085442.jpg (37.54 KiB) Viewed 1183 times


In the photo you can see the ceiling us sitting on the lip.

What about running a couple of pieces of steel across the edge of the spars. Would only need to be 20mm wide piece of flat on its side?

Laurie
Strop
Teardrop Master
 
Posts: 148
Images: 10
Joined: Wed May 15, 2013 3:12 pm
Location: Armidale, NSW, Australia
Top

Re: notre larme - Modified Gruman 2

Postby dales133 » Sun Nov 01, 2015 2:05 am

So you only have 15mm from the ceiling to the outter wall edge wall
User avatar
dales133
4000 Club
4000 Club
 
Posts: 4605
Images: 1
Joined: Mon Oct 13, 2014 5:26 pm
Top

Re: notre larme - Modified Gruman 2

Postby Strop » Sun Nov 01, 2015 2:16 am

25mm.

I could make it 30 if I fill the gap with bog after putting the roof ply on.

Laurie
Strop
Teardrop Master
 
Posts: 148
Images: 10
Joined: Wed May 15, 2013 3:12 pm
Location: Armidale, NSW, Australia
Top

Re: notre larme - Modified Gruman 2

Postby dales133 » Sun Nov 01, 2015 2:18 am

You could sikaflex a rip of bendy ply of masonite around the wall edge to make up the difference.
I recon it would be preferable to bog.
More flexable
User avatar
dales133
4000 Club
4000 Club
 
Posts: 4605
Images: 1
Joined: Mon Oct 13, 2014 5:26 pm
Top

PreviousNext

Return to Build Journals

Who is online

Users browsing this forum: jdeleon and 3 guests