The Poet Creek Express - Foamie Hybrid
Moderator: eaglesdare
Re: The Poet Creek Express - Foamie Hybrid
![]() by Atomic77 » Fri Nov 27, 2015 1:11 pm
by Atomic77 » Fri Nov 27, 2015 1:11 pm
Beautiful and looks delish. Glad you had a happy time and a full belly!
Michael
"The Strength is in the Sum of the Parts..."
The Astroliner
Follow The Astroliner Blog Here!
Check out our YouTube video
"The Strength is in the Sum of the Parts..."
The Astroliner
Follow The Astroliner Blog Here!
Check out our YouTube video
-

Atomic77 - 1000 Club

- Posts: 1463
- Images: 309
- Joined: Tue Oct 08, 2013 5:29 pm
- Location: Fort Wayne Indiana
Re: The Poet Creek Express - Foamie Hybrid
![]() by KCStudly » Fri Nov 27, 2015 10:30 pm
by KCStudly » Fri Nov 27, 2015 10:30 pm
It was a very nice meal, and I didn’t feel too stuffed afterward, either. Had leftovers for dinner tonight, too. 
Today was one of those days where it felt like I didn’t get much done, but did spend some time contemplating my approach to the next few steps. I may take a different approach to glassing the hatch than I had originally thought, and perhaps save a few steps in the process; so maybe time well spent.
I started by peeling the last of the old masking tape off of the seal lip on the hatch. Then I began masking the prefinished areas in prep for glass. Along the straight sections at the hinge spar and sill I used the 2 inch wide (now 1.88 inch… ) tape, and for the arch of the ribs I used the more flexible 1 inch (.94 inch… ).
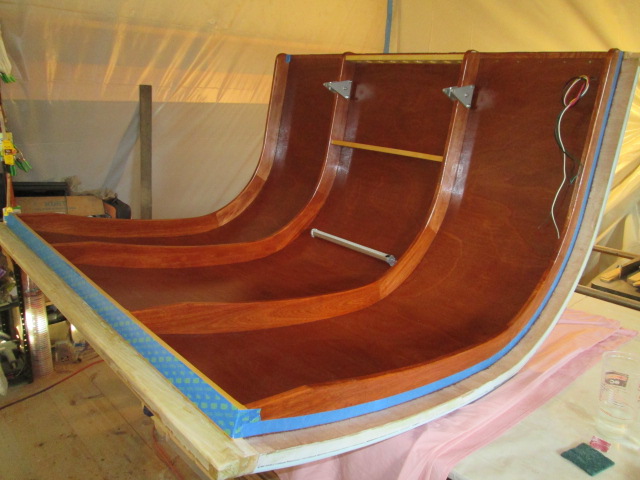
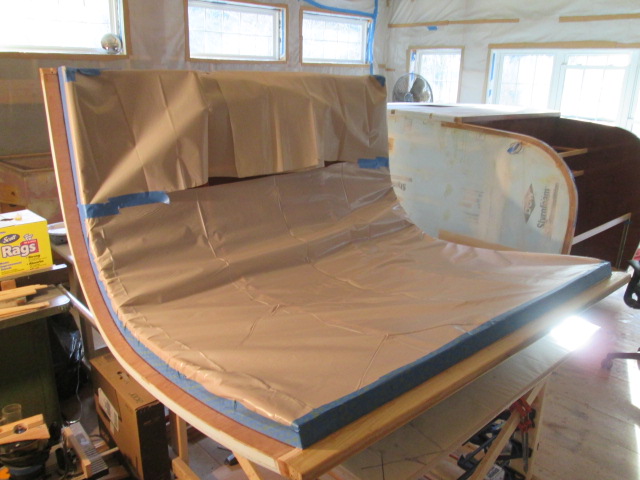
This got me the crisp edges needed and enough of a start to use some of the scrap plastic sheeting to cover up the rest of it. I did end up piecing the top section together. Probably a little overkill, but better safe than sorry.
Next I made a little mockup of the edge of the hatch so that I can do a couple of tests on the method for glassing. I have some rolls of glass tape that are a pretty light weight weave and I want to test some before going forward. I forgot to take a pic of that.
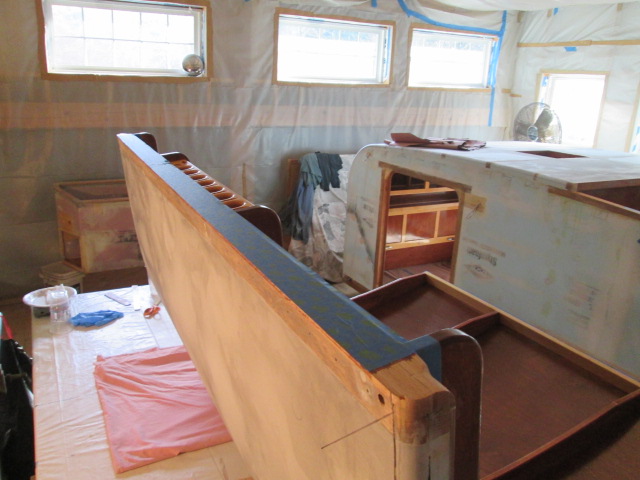
Next I started masking the galley wall edges.
At first I did this by placing the first piece of tape flush to the inside then wrapped the excess onto the outside face. Then I put strips of tape on the outside face of the wall along the edge and folded the tails up onto the top edge of the wall. Then the thought process went into creative mode and I had to stop and think.
One of the glassing techniques I have seen used on Long EZ builds is to use modeling clay as a temporary bridge or dam. This lets you glass over a gap or form without sticking or sagging at an edge or depression.
So with that in mind I was trying to wrap my mind around what sequence I might use and how I might go about glassing the whole hatch and cabin as one using clay in the gaps to seal things up, prevent epoxy dripping inward and forming a bridge for the glass to cross. The area that has me scratching my head is how to do the sharp corner edge of the hatch along the sides.
Option 1 would be to glass the underside lip of the hatch edge, using either strips of the 6oz cloth or the finer rolled tape; then back gouge the side edge for a flox corner; sand that fair to the outside face; then place the hatch, clay the gap, and glass the lot. The thing I don’t like about this option is that I would lose the hard reference along the edge of the ply when doing the gouge, leaving just foam and the narrow edge of the underside glass as my reference.
Option 2 would be to mask the underside of the hatch lip now; mount the hatch; do the clay; do the big glass work; split the hatch back off; then peel the tape up; use the Dremel with a burr to back gouge the underside of the corner, excavating the corner of the ply up to the inside of the side glass; flox the corner and then lay the tape on the underside of the lip capping the flox.
The flox corner is what would let me keep a sharp edge, still have the ends of the cloth adhere right up to the corner and be able to trim and sand excess cloth w/o exposing the plywood edge.
I wish I could figure out a way to bevel the edge for the flox using a router to save a bunch of detail cutting work, but that would involve having to build a dam to lay the flox corner up, and still doesn’t maintain the hard reference edge.
For either of these options I still need to glass the inside and underside of the bumper sill, and I’d like to glass under the hinge on both sides before mounting the hatch again. I think I can layup the first 6 to 8 inches on either side stepping the two plies so that the lap seams are staggered for the main layup. I want to have the hinge in place to lock the hatch shape and location in. With just the two deck screws, one at either corner, the hinge gap tends to open up a tad, and the hatch sagged a little in the middle. Another option would be to cut up the drop piece of the hinge into three pieces; use those as temporary alignment tabs; glass around them; and then back fill the areas where the temporary hinges had been after the fact. I think I like the first method better. It means a bigger area to make even and fair but it would be a more uniform method.
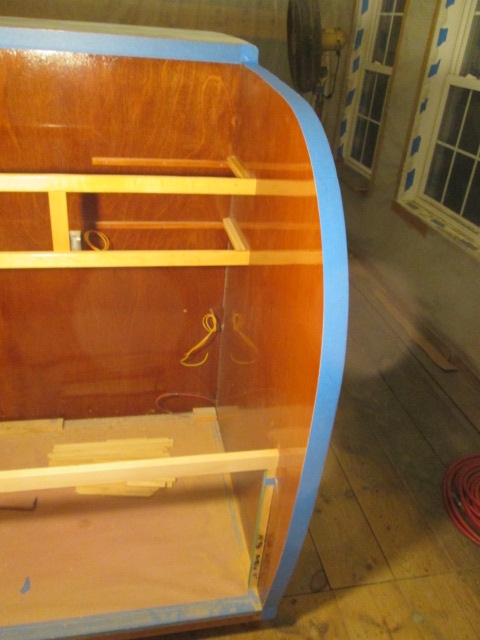
Anyway, with all of this running around in my mind I decided to take the masking tape back off of the side face of the wall (I had only done the street side at this point). Once that was done I used the utility knife to scrape and shave the edge of the top tape in order to peel off the little wrapped edge.
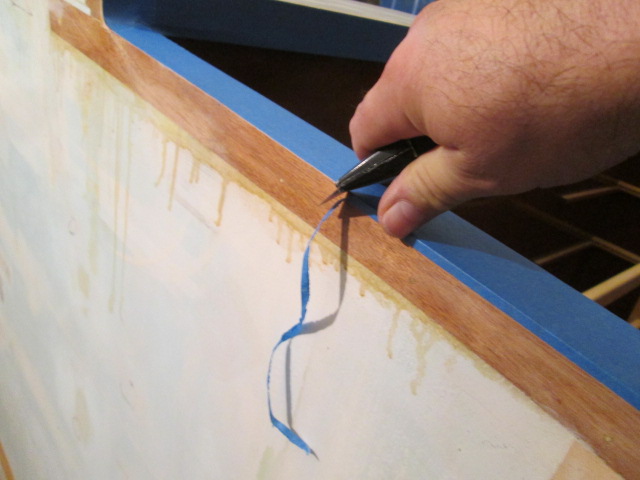
And then did the same on the other side.

In hindsight I should have left the side wall tape on until after the clay was stuffed in. The clay can be a little oily, so you have to be careful not to contaminate with it.
So hopefully my test piece will help me decide which of the above options will work best.
Today was one of those days where it felt like I didn’t get much done, but did spend some time contemplating my approach to the next few steps. I may take a different approach to glassing the hatch than I had originally thought, and perhaps save a few steps in the process; so maybe time well spent.
I started by peeling the last of the old masking tape off of the seal lip on the hatch. Then I began masking the prefinished areas in prep for glass. Along the straight sections at the hinge spar and sill I used the 2 inch wide (now 1.88 inch…
) tape, and for the arch of the ribs I used the more flexible 1 inch (.94 inch… ).This got me the crisp edges needed and enough of a start to use some of the scrap plastic sheeting to cover up the rest of it. I did end up piecing the top section together. Probably a little overkill, but better safe than sorry.
Next I made a little mockup of the edge of the hatch so that I can do a couple of tests on the method for glassing. I have some rolls of glass tape that are a pretty light weight weave and I want to test some before going forward. I forgot to take a pic of that.
Next I started masking the galley wall edges.
At first I did this by placing the first piece of tape flush to the inside then wrapped the excess onto the outside face. Then I put strips of tape on the outside face of the wall along the edge and folded the tails up onto the top edge of the wall. Then the thought process went into creative mode and I had to stop and think.
One of the glassing techniques I have seen used on Long EZ builds is to use modeling clay as a temporary bridge or dam. This lets you glass over a gap or form without sticking or sagging at an edge or depression.
So with that in mind I was trying to wrap my mind around what sequence I might use and how I might go about glassing the whole hatch and cabin as one using clay in the gaps to seal things up, prevent epoxy dripping inward and forming a bridge for the glass to cross. The area that has me scratching my head is how to do the sharp corner edge of the hatch along the sides.
Option 1 would be to glass the underside lip of the hatch edge, using either strips of the 6oz cloth or the finer rolled tape; then back gouge the side edge for a flox corner; sand that fair to the outside face; then place the hatch, clay the gap, and glass the lot. The thing I don’t like about this option is that I would lose the hard reference along the edge of the ply when doing the gouge, leaving just foam and the narrow edge of the underside glass as my reference.
Option 2 would be to mask the underside of the hatch lip now; mount the hatch; do the clay; do the big glass work; split the hatch back off; then peel the tape up; use the Dremel with a burr to back gouge the underside of the corner, excavating the corner of the ply up to the inside of the side glass; flox the corner and then lay the tape on the underside of the lip capping the flox.
The flox corner is what would let me keep a sharp edge, still have the ends of the cloth adhere right up to the corner and be able to trim and sand excess cloth w/o exposing the plywood edge.
I wish I could figure out a way to bevel the edge for the flox using a router to save a bunch of detail cutting work, but that would involve having to build a dam to lay the flox corner up, and still doesn’t maintain the hard reference edge.
For either of these options I still need to glass the inside and underside of the bumper sill, and I’d like to glass under the hinge on both sides before mounting the hatch again. I think I can layup the first 6 to 8 inches on either side stepping the two plies so that the lap seams are staggered for the main layup. I want to have the hinge in place to lock the hatch shape and location in. With just the two deck screws, one at either corner, the hinge gap tends to open up a tad, and the hatch sagged a little in the middle. Another option would be to cut up the drop piece of the hinge into three pieces; use those as temporary alignment tabs; glass around them; and then back fill the areas where the temporary hinges had been after the fact. I think I like the first method better. It means a bigger area to make even and fair but it would be a more uniform method.
Anyway, with all of this running around in my mind I decided to take the masking tape back off of the side face of the wall (I had only done the street side at this point). Once that was done I used the utility knife to scrape and shave the edge of the top tape in order to peel off the little wrapped edge.
And then did the same on the other side.
In hindsight I should have left the side wall tape on until after the clay was stuffed in. The clay can be a little oily, so you have to be careful not to contaminate with it.
So hopefully my test piece will help me decide which of the above options will work best.
Last edited by KCStudly on Tue Apr 05, 2022 7:18 pm, edited 1 time in total.
KC
My Build: The Poet Creek Express Hybrid Foamie
Poet Creek Or Bust
Engineering the TLAR way - "That Looks About Right"
TnTTT ORIGINAL 200A LANTERN CLUB = "The 200A Gang"
Green Lantern Corpsmen
My Build: The Poet Creek Express Hybrid Foamie
Poet Creek Or Bust
Engineering the TLAR way - "That Looks About Right"
TnTTT ORIGINAL 200A LANTERN CLUB = "The 200A Gang"
Green Lantern Corpsmen
-

KCStudly - Donating Member
- Posts: 9640
- Images: 8169
- Joined: Mon Feb 06, 2012 10:18 pm
- Location: Southeastern CT, USA


 Something of a "sanding - make work" project. Ooops!


 cut the cheese.