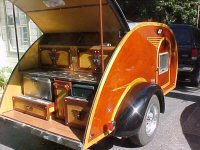
The Poet Creek Express - Foamie Hybrid

Canvas covered foamies (Thrifty Alternatives...)

Moderator: eaglesdare

Re: The Poet Creek Express - Foamie Hybrid

Postby KCStudly » Sun May 01, 2016 10:37 pm

Thanks!!! :D
KC
My Build: The Poet Creek Express Hybrid Foamie

Poet Creek Or Bust
Engineering the TLAR way - "That Looks About Right"
TnTTT ORIGINAL 200A LANTERN CLUB = "The 200A Gang"
Green Lantern Corpsmen
User avatar
KCStudly
Donating Member
 
Posts: 9640
Images: 8169
Joined: Mon Feb 06, 2012 10:18 pm
Location: Southeastern CT, USA

Re: The Poet Creek Express - Foamie Hybrid

Postby Prototear » Mon May 02, 2016 1:54 am

Wow KC. This continues to be an amazing build and a similarly amazing build journal with so much detail. Keep up the good work!
:applause:
Steve
First Build: viewtopic.php?f=50&t=57021
User avatar
Prototear
Silver Donating Member
 
Posts: 161
Images: 412
Joined: Wed May 15, 2013 3:13 pm
Location: Lake Forest Park, Washington

Re: The Poet Creek Express - Foamie Hybrid

Postby GPW » Mon May 02, 2016 6:39 am

:thumbsup: 8) :beer:
There’s no place like Foam !
User avatar
GPW
Gold Donating Member
 
Posts: 14920
Images: 546
Joined: Thu Feb 09, 2006 7:58 pm
Location: New Orleans
Top

Re: The Poet Creek Express - Foamie Hybrid

Postby KCStudly » Mon May 02, 2016 7:06 am

Thank you gentlemen. I appreciate the kind words and support. It keeps me going strong!

I am anxious to see how this one turned out. :twisted:
KC
My Build: The Poet Creek Express Hybrid Foamie

Poet Creek Or Bust
Engineering the TLAR way - "That Looks About Right"
TnTTT ORIGINAL 200A LANTERN CLUB = "The 200A Gang"
Green Lantern Corpsmen
User avatar
KCStudly
Donating Member
 
Posts: 9640
Images: 8169
Joined: Mon Feb 06, 2012 10:18 pm
Location: Southeastern CT, USA
Top

Re: The Poet Creek Express - Foamie Hybrid

Postby Ned B » Mon May 02, 2016 1:57 pm

:applause: looks great!!
User avatar
Ned B
1000 Club
1000 Club
 
Posts: 1036
Joined: Sat Apr 16, 2011 10:25 am
Location: Syracuse NY (ish)
Top

Re: The Poet Creek Express - Foamie Hybrid

Postby KCStudly » Mon May 02, 2016 2:41 pm

Thank you, thank you very much. 8)
KC
My Build: The Poet Creek Express Hybrid Foamie

Poet Creek Or Bust
Engineering the TLAR way - "That Looks About Right"
TnTTT ORIGINAL 200A LANTERN CLUB = "The 200A Gang"
Green Lantern Corpsmen
User avatar
KCStudly
Donating Member
 
Posts: 9640
Images: 8169
Joined: Mon Feb 06, 2012 10:18 pm
Location: Southeastern CT, USA
Top

Re: The Poet Creek Express - Foamie Hybrid

Postby KCStudly » Mon May 02, 2016 10:52 pm

Tonight was clean up of yesterday’s layup. The plastic strips came right off. There was a little fringe on the street side of the locker that I trimmed away with the utility knife; a few drips that ran down the street side lower front that I scraped off; and then it was straight into washing amine.

Where the creases were in the plastic strips (from how it came folded and rolled in the OEM box) it actually created slightly low spots. Not really low, but leaner. Whereas where the plastic was squeegeed down and stayed down it tended to draw epoxy to it filling the weave and zipper edge, yet still leaving a smoother transition to the surrounding area. The top only required a quick scuff with the small block and 80 grit.
Image

Even though the lower wall below the sparettes will be covered by rock guards, I went ahead and faired the “zippers” there (the cured fringe along the edge of the weave); nothing too crazy, just knocked them down close. The end of the locker top only needed a little sanding and touchup of the fillet where it wrapped from horizontal to vertical.
Image

After working along the top of the locker, I moved up and faired the zippers along the profile. I used the 36 grit medium block some, then switched back to the small block to finish up. Curb side first then street side.
Image
Image

One more of the street side looking over the profile radius downward.
Image

I finished up by lowering the front of the cabin back down level and wiping it all down with a slightly damp paper shop rag one more time.

Next things on the agenda are to get the hatch flipped over to fair the other edge; and prep for glassing the rest of the roof. That involves masking the roof vent opening (or at least moving the doors out from underneath and putting some cardboard inside under the opening), and going over it all with the fox tail brush and vacuum cleaner. I’m trying to decide if I want to try and do dry on wet and stack the plies as I go, or do it 2 plies dry on dry. I’m leaning toward dry on dry at the moment.
KC
My Build: The Poet Creek Express Hybrid Foamie

Poet Creek Or Bust
Engineering the TLAR way - "That Looks About Right"
TnTTT ORIGINAL 200A LANTERN CLUB = "The 200A Gang"
Green Lantern Corpsmen
User avatar
KCStudly
Donating Member
 
Posts: 9640
Images: 8169
Joined: Mon Feb 06, 2012 10:18 pm
Location: Southeastern CT, USA
Top

Re: The Poet Creek Express - Foamie Hybrid

Postby OP827 » Tue May 03, 2016 6:23 pm

Great work KC. Dry on dry worked fine for me one layer at a time, I think it could be less work than a wet method you were using, but I did not do wet method myself, so if you go dry on dry route, let me know what you think in comparison.
User avatar
OP827
Donating Member
 
Posts: 1596
Images: 414
Joined: Fri Apr 25, 2014 7:27 pm
Location: Bruce County Ontario
Top

Re: The Poet Creek Express - Foamie Hybrid

Postby KCStudly » Tue May 03, 2016 8:29 pm

.
Thanks OP.

The wet on wet using the PMPP technique is by far the most controlled way of doing a vertical or awkward surface that I have tried. Small layups are very manageable, as are medium size, depending on the "angle of the dangle". It's like contact cement; it works best if you get it aligned properly before the two surfaces touch too much. With two people tugging on the plastic sheet it takes all of the tension and doesn't skew like the woven cloth can. Also, you don't pull strands out of place like you can when tugging on the cloth directly; so it works good an larger layups, too, so long as you have help.

When I did larger dry on dry layups, I did at least some of them by pushing the epoxy thru both layers. It seemed to take longer than doing two individual plies, but there was no rush to getting the plies into position, no premature sticking in the wrong spot and no wadded up cloth. For larger areas, working alone, this seemed to be the least awkward/most successful option.

For the roof, the last of the big layups, I am toying with thoughts of getting both pieces of cloth into position and then folding them over on themselves half way. Wet half of the foam, unfold half a ply, wet, unfold, reverse fold dry back on itself, reverse fold other dry, wet other end foam, unfold, wet, unfold, wet it all. But that could get ugly if epoxy soaks up thru the dry folds prematurely.

If I thought I could unroll the second ply over the wet first ply from a spool and have it line up right w/o puckers, wrinkles or creases, I might try that, but I don’t think that is likely.

The two best options seem to be, if I am by myself, to place the glass first and push the epoxy thru; or, if I have help, wet out the foam, stretch and place the dry cloth over, then wet it, and then repeat.

It doesn’t seem to matter which technique I use, there are always a certain number of fish eyes. Sometimes ripples. I haven’t figured out how to completely eliminate the fish eyes. They seem to want to wet out and disappear, at least briefly when actively rolling or stippling, but then they show back up. The ripples are probably from over aggressive scraping with the squeegee, buckling up the first ply under the second.

I had thought some of the fish eyes were over local depressions and the glass was springing up off of the low spots in the foam from tension in the fibers, but on this last layup I got some that seemed to be blistered out ever so slightly. Wondering if I have been perspiring onto the cloth(?). Gave half a thought to something in the foam or spackle gassing off, or just thermal expansion pockets. Dunno.

The only thing I haven’t tried is using a slurry of filler in the base wet coat, and/or vacuum bagging.

The bag setup I used for laminating the inner wall plywood skins was okay for that task, but I’m not sure I could get something that rudimentary to work well here; and I don’t have a suitable vacuum pump.

It’s kind of late in the game to make any drastic changes, too. Funny thing is that with all of the techniques I have tried, the results have all been more or less similar, and any differences can’t necessarily be attributed solely to the method. All of it has been suitable, or at least has been after minor corrections, repairs and/or touch-ups.

I still haven’t decided what my tolerance level is for the fish eyes; do I want to try and drill-n-fill all of them (using the hypo)? Will the little slivers of air expand later and make blisters in the paint? Most of these are smaller than my pinkie fingernail. Some much smaller. SWAG, if I were to count them all there might be 40 or so over the whole camper (so far). Some you really have to look hard to see with a light, and even then I can’t always be sure of what I’m seeing.

Part of me just wants to roll on by and call it good. If I had any confidence at all that they won’t manifest in paint flaws later, I’d just keep going. I have no concern about structural integrity whatsoever. We’re talking something like less than 1/2 a percent of the total area, probably even a lot less. It’s not an airplane (or hydroplane) structure and won’t be subjected to those types of flying forces, so a few minimal flaws can be tolerated in that regard.

One more thought… I’m really pleased with how the hatch stiffened up. It no longer twists enough to drag on the inside of the street side wall. When resting on the centrally located temporary prop, when I lift up on one corner of the bumper it only moves up about 1/4 inch before coming off of the stick. I don’t recall making a note of the amount of twist prior to glassing, but would hazard to say that it would have been at least an inch, perhaps 1-1/2 using the same method, to the point that I avoided cycling it that way. Now I have no concerns. It’s what I expected to happen, but it is still a relief that it actually did!
:thumbsup:
KC
My Build: The Poet Creek Express Hybrid Foamie

Poet Creek Or Bust
Engineering the TLAR way - "That Looks About Right"
TnTTT ORIGINAL 200A LANTERN CLUB = "The 200A Gang"
Green Lantern Corpsmen
User avatar
KCStudly
Donating Member
 
Posts: 9640
Images: 8169
Joined: Mon Feb 06, 2012 10:18 pm
Location: Southeastern CT, USA
Top

Re: The Poet Creek Express - Foamie Hybrid

Postby OP827 » Tue May 03, 2016 11:35 pm

KC, Thanks for sharing your thoughts and experience on different layup methods. I can only say that I did not experience "fish eyes" or in other words " air bubbles" on my layups when I did one layer at a time dry on dry. Sometimes I did a second cloth layer within 12 hours after first layup which does not require any surface preparation like sanding or washing, sometimes I did second layer while the first was still wet or semi-wet. Sometimes I did second layer after several days after first layup in which case I had to wash the surface and sand it. The results were similar, i.e. good. I only had air bubbles once as reported in my build thread when I did small holes on the surface and did not fill them with glass balloons thickened epoxy first, but started my layup dry on dry right then and that was not a good decision, will not do that again. It is also important not to heat or warm the layup after the it is done and curing as it can cause air bubbles, I had that experience when I put an infrared heater over a panel thinking that it will speed up curing and that was a mistake, lots of air bubbles resulted from that. I found once some experience is gained working with glass cloth and epoxy, the outcome is good and consistent.
:thumbsup: Cheers!
User avatar
OP827
Donating Member
 
Posts: 1596
Images: 414
Joined: Fri Apr 25, 2014 7:27 pm
Location: Bruce County Ontario
Top

Re: The Poet Creek Express - Foamie Hybrid

Postby GPW » Wed May 04, 2016 5:24 am

All looks Good to me !!! JMHO :thumbsup: 8)
There’s no place like Foam !
User avatar
GPW
Gold Donating Member
 
Posts: 14920
Images: 546
Joined: Thu Feb 09, 2006 7:58 pm
Location: New Orleans
Top

Re: The Poet Creek Express - Foamie Hybrid

Postby KCStudly » Wed May 04, 2016 7:24 am

Yes, GPW, we are probably picking at nits, but that's all part of the grand try-and-test experiment, isn't it? It is always good to know what went right and why, what went wrong, and what can be improved upon.

OP, usually I finish my layups in the early evening or later, and if anything the sun is going down, so temps are dropping. If it is sunny out the loft does tend to get more light and thermal gain after about 2pm, so, even tho the windows are modern (sealed pane and presuming that they have thermal coatings or films) that may have contributed to the bubbles I saw on the curb side; either that or I can just see them better because of the better light! :lol:

I guess it won't be too much effort to go around and drill all of the suspicious spots, mix up a small batch of wet, and go around and squirt them.

If I decide to do the roof on wet, I think I might mix a small amount of filler into the base coat and just be careful not to drag the cloth too hard with the squeegee.
KC
My Build: The Poet Creek Express Hybrid Foamie

Poet Creek Or Bust
Engineering the TLAR way - "That Looks About Right"
TnTTT ORIGINAL 200A LANTERN CLUB = "The 200A Gang"
Green Lantern Corpsmen
User avatar
KCStudly
Donating Member
 
Posts: 9640
Images: 8169
Joined: Mon Feb 06, 2012 10:18 pm
Location: Southeastern CT, USA
Top

Re: The Poet Creek Express - Foamie Hybrid

Postby GPW » Wed May 04, 2016 9:03 am

Re: “ bubbles “ ... To prove a point , you could drill those and inject more epoxy ... but thinking the real concern here is not 100% adhesion to the substrate (foam) but more or less the uniform ( or close eh) thickness of the “skin” , which in ‘glass is like a nice hard skin, the epoxy gets less flexible as it ages.. 8)
There’s no place like Foam !
User avatar
GPW
Gold Donating Member
 
Posts: 14920
Images: 546
Joined: Thu Feb 09, 2006 7:58 pm
Location: New Orleans
Top

Re: The Poet Creek Express - Foamie Hybrid

Postby KCStudly » Wed May 04, 2016 11:11 am

With two plies of 6oz fully saturated and adhered it starts out about as firm as 10oz canvas, TB2 and paint, maybe just a little firmer. After a couple of days it is much harder, but if you push somewhat firmly you can flex it a little. At no time has there been any evidence of delam, even when pressing and flexing it a little, the foam is attached and seems to flex back with the glass as best that I can tell. Again, we aren't talking marshmallow here, just minor localized flexing. I might expect the same from 1/8 inch plywood over foam.

Now with a bubble, those two plies of glass can behave a little more independently, leaving a spot that is a little softer. So by my count there are three things to be slightly concerned about the bubbles: (1) if they are high and you sand them off you might have a thin soft spot, whereas if you fill them first you may still break into the weave of a high spot, but at least it is firm and stable; (2) if the bubble is encapsulated it could expand or shrink with temperature changes and might perhaps become visible in the finished paint (if you are inclined to do an automotive grade paint, and that kind of thing matters to you... I am not going for show quality, but then again I don't want boogers to bite me in the ass either, so to speak... the paint job can only be as good as the base, no better, and all along I have been trying to give a little... okay a lot... of extra attention to quality and details... so I see no reason to pull up short now, I may still just do a rolled on latex paint job, but still want it to be as nice as I can get it); and (3) ... what was the third thing? Oh yeah, if the bubbles are soft they won't necessarily behave the same as surrounding areas and might take paint prep differently, pressing down when sanded and then springing back up (although that would be more limited to any of the larger spots... a relative term... that I will likely fill regardless.

Or maybe I am over thinking things and will never see them again after paint. :whistle:
KC
My Build: The Poet Creek Express Hybrid Foamie

Poet Creek Or Bust
Engineering the TLAR way - "That Looks About Right"
TnTTT ORIGINAL 200A LANTERN CLUB = "The 200A Gang"
Green Lantern Corpsmen
User avatar
KCStudly
Donating Member
 
Posts: 9640
Images: 8169
Joined: Mon Feb 06, 2012 10:18 pm
Location: Southeastern CT, USA
Top

Re: The Poet Creek Express - Foamie Hybrid

Postby KCStudly » Wed May 04, 2016 11:18 pm

The last time I had a visitor to the loft and was giving a tour I couldn’t get the front locker door to open. I knew it wasn’t locked, but the door would barely budge. I suspected that the hinged strut had somehow managed to invert and bind. I figured I would take a look at it later, but more or less forgot about it for the time being.

Well I’m expecting a visit soon from a fellow TNTTT’er who has traveled a long way, and I wanted to get that sorted out before giving the next tour. I could get the door ajar enough to slide a thin stick in thru the side to try and push on the strut, but that didn’t change anything. Then I tried to come in from the bottom to get behind the strut and see if I could knuckle it forward; still no good. Finally I got my flashlight out, laid down on the floor and looked up under the door. I could see right away what the problem was likely to be.

Remember these?
Image

I had stowed the rifle rests sitting loose in the locker and when I jacked the cabin from the side they slid over to the strut side. When the door goes closed the elbow end of the strut actually sweeps past bottom dead center and rises up slightly as it goes back the last 10 deg or so. Here’s a pic of the locker door open with the strut unfolded and extended out to hold the door open.
Image

Compare that to this pic as the door is going closed. The strut is nearly folded back on itself. One leg of the strut is slightly longer with the detents formed in it that engage the other leg extending past the hinge point. Because of the articulating link style of hinge that I chose, that extended part of the strut elbow sweeps up at the end of the travel just as the door shifts up on the hinges upon closing.
Image

So when the rifle rests slid under the strut they blocked it from sweeping back downward, acting like an internal door stop, or wedge, preventing the door from opening. Essentially it became a locked cabinet with no key or access to open it.

I was able to bend a piece of welding wire so that I could snake it up under the door and nudge the rests out from under the strut, which allowed me to get the door open again.

The offending rifle rest suffered a minor dent, which can be sanded back out and reoiled.
Image

I have never much liked the brass colored strut, so will look for one of those spring style props to replace it. The spring would be flexible enough that it shouldn’t be able to get hung up on anything inside of the locker. The other option would be to install a thin partition creating a dividing panel that the strut slips behind, preventing things from being able to shift under the strut elbow.

Karl helped me flip the hatch onto its street side edge so that I could clean up the rough cut glass along the curb side sealing edge. Here it is after scraping and sanding, hinge end first then bumper end. Note that I had also started peeling off the blue tape. You can also see the spots where polyurethane got lifted by previous applications of masking. I'll fix that all later during the final finish out stages.
Image
Image

I used the hair dryer to soften the tape, hedging against more poly damage, and for the most part it went okay, except on the front of the hinge spar where more poly peeled off.
Image
Image

Moving on.
Last edited by KCStudly on Thu May 05, 2016 8:37 am, edited 1 time in total.
KC
My Build: The Poet Creek Express Hybrid Foamie

Poet Creek Or Bust
Engineering the TLAR way - "That Looks About Right"
TnTTT ORIGINAL 200A LANTERN CLUB = "The 200A Gang"
Green Lantern Corpsmen
User avatar
KCStudly
Donating Member
 
Posts: 9640
Images: 8169
Joined: Mon Feb 06, 2012 10:18 pm
Location: Southeastern CT, USA
Top

PreviousNext

Return to Foamies

Who is online

Users browsing this forum: No registered users and 5 guests