Alright folks, I'm back.
I did get the canvas on on Labour day, sorry it has taken me this long to get back on here...
And now for the last week's recap:
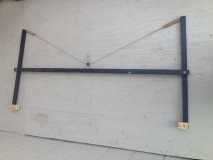
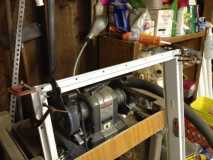
I started with the challenge of how to radius the front corners, and what I ended up doing was building a huge bow-style hot knife. I used 19 gauge stainless steel wire (because if it's high resistance) and hooked it up to a car charger. The assembly drew about 6 amps at 12 volts, which was just what the charger could supply; perfect! To do the cut, I had someone help me by holding the bottom end of the knife while I held the top. I marked every inch around the radius, and then we called out numbers as we cut around the curve, to make sure we stayed in sync. It turned out pretty good.
Next up, I used a can of spray foam (the doors and windows version) to fill all gaps and cracks, and to build up any dents in the foam. After the spray foam dried overnight, I cut it off flush with the walls to make a nice even surface across the entire trailer. This ended up being a bad idea and backfired on me.
I would strongly recommend that no-one ever do this if they are planning to use the same procedure that I did. More on that later...
Then I had an inventive streak come upon me...
I realized that the vertical radiuses on my trailer are somewhat atypical for the builds found on this forum; most people put the radius across the top. There are pros and cons to each, and while I am glad I chose what I did, it presented me a unique challenge: I couldn't lay my canvas from the top down like most people do, I had to wrap it around the sides. To do this I would either have to have someone holding the roll of canvas as I applied it, or I would have to make a canvas holder. I opted for the latter.

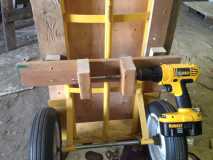
What it is, is a rack that cradles the vertical rails on a hand truck. The rack has the roll of canvas in the center, and a large flat panel on the side, with a clamp to hold the canvas while I rolled it with paint. On the backside I build a drill-powered winch system that I could use to raise and lower the rack on the hand truck to make sure it was at the optimal height relative to the trailer as I moved it around applying the canvas. When I built it I was thinking it was a tad excessive and unnecessary; but I can tell you know that it would have been
impossible for me to apply my canvas by myself without this device! Engineering for the win!

Next, was cutting the canvas. I didn't bother to wash it because it was already only barely big enough to do the job, and I didn't want it shrinking on me... It turns out that the stuff shrinks as you apply it(?) because I thought I would have an extra 4" the long direction (and I measured), but it turned out that I had enough by only 1/4"!!!

Word of the wise:
Have way more canvas than you need! After the canvas was cut, it was 4 hours of madly rushing around painting and rolling the canvas onto the trailer. The initial results looked sooo promising!
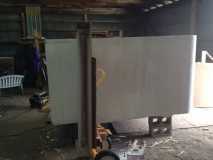
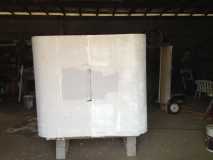
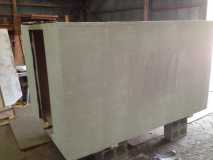
After the sides went on, I did the top. ...which was a breeze, compared to the sides... PMF is a simple process, but that by no means makes it an easy one...
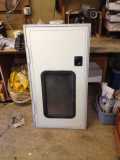
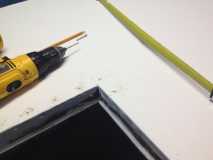
While I was letting that dry, I went back to work finishing my resized door. The only thing left to do was resize the frame, which had been welded together. I didn't have access to a welder, so I made some little steel splints and JB welded them in place. It worked perfectly.
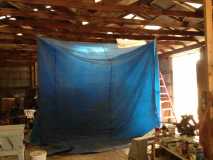
And then my luck ran out, and my dry, hot, and sunny weather turned into rain coulds and humidity anywhere from 75% to 100%...

Well, a good builder makes do, so I scrounged around for some tarps and a dehumidifier, and made a tent. In the next week, that dehumidifier pulled over 5 gallons of water out of the air!
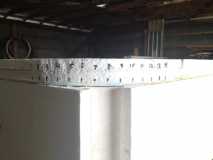
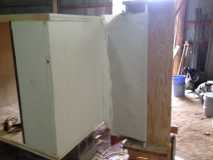
In that week, I applied 5 more coats of paint to the canvas. I ran out of Gripper primer putting the canvas on, so I fell back to a 5 gallon bucket of Gladden PVA primer a friend let me use. The application of the canvas used up 2 gallons of Glidden Gripper, and with the first sizing coat, the canvas soaked up a gallon of primer, followed by another gallon with 2 more coats. By this point the canvas was sufficiently buried so I applied a final 2 topcoats with 1 gallon of Gladden exterior paint.
And now, for the sad part:
Remember that spray foam I used to make the trailer "smooth"? Well I dunno what happened, but I think it actually soaked up the gripper primer and expanded, because everywhere that I put that foam, the canvas bulged.

I know it's not bubbling because I did have to deal with a few bubbles,and there definitely is a difference. I don't have any pictures of it right now, I'll try to upload some later. This is a big bummer, because the trailer sides (specifically the edges near the top and bottom) are anything but smooth. I suppose this isn't that uncommon for a PMF foamie, but I could have avoided it simply by
not using that spray foam... The silver lining is that I'm very confident the bulges are still well adhered to the trailer walls. Oh well... It's my first build, and the learning curve is steep. I suppose I'm content with the outcome.
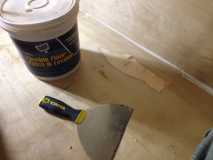
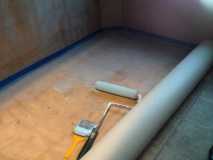
While I was painting the outside of the trailer, I also prepped and installed some vinyl flooring that was given to me. There was a small spot in the floor's plywood veneer that had delaminated already, so I had to sand it out and build it up again. That's what I get for buying cheap-cheap home depot plywood I suppose. I haven't seen this happening anywhere else, yet, so hopefully after I seal the interior with some poly it won't be a problem. I also put some screws all the way through the floor and down into the support boards underneath. That way, even if the primer that is supposed to hold the flooring together never dries out, it can't fall apart on me. I hope...

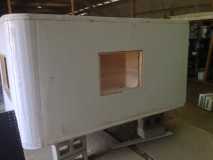
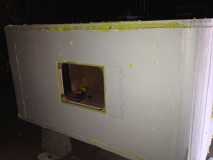
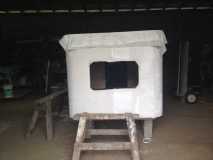
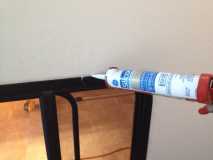
After the outside had dried out, I started installing the door and windows! My old RV windows were designed for a wall that was exactly 2" thick, and my trailer walls are closer to 2.5" thick, so I designed the window frames to be recessed. I was planning on using some RV butyl tape around the windows to seal them, but I'd made the clearances too tight and that didn't fit... I guess some silicone caulk should seal it just as well, whatever.

Lastly was installing the door and roof vent. The door as problem free, but while screwing the vent down in place I discovered just how fragile foamies can be. My drill slipped and... well, there goes my perfect rooftop...
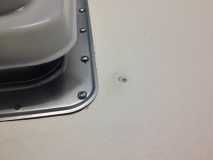
Fortunately it's an easy fix. I stuffed the hole with some extra styrofoam, and leveled it off with some silicone caulk. you can't hardly tell what happened, fortunately.
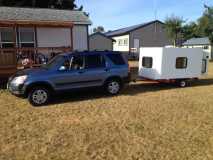
And that's where it sits at the moment. the inside is far from finished, but I couldn't wait to use it, so I took it out for a night. I'm sure you all know the pride and satisfaction of falling asleep in a camper that you designed and built with your own blood sweat and tears, and now I do too!

Up next this week:
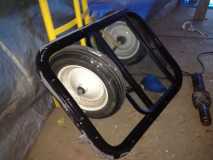
I want to make some modifications to my trailer suspension: It rides very stable when it is loaded down, but if I hit any potholes the suspension bottoms out. I'm gonna try to raise the axle a touch, and remove some excess bolt that is causing the early bottoming out.
Also, I still need to finish the interior! I think for the sake of expenses I'm going to use some simple white moulding around the corners, and then a coat or two of poly on the wood to seal it, while preserving the natural look. Then I'll add the shelves above the windows.
Other than that, I have almost a full can of red spray paint left over, maybe I'll put a stripe around the exterior to smarten it up a bit.


