Plastic Hinge install questions - Pictures and Q's added

Anything to do with mechanical, construction etc

Postby Steve_Cox » Sat Jun 23, 2007 8:09 am

John,

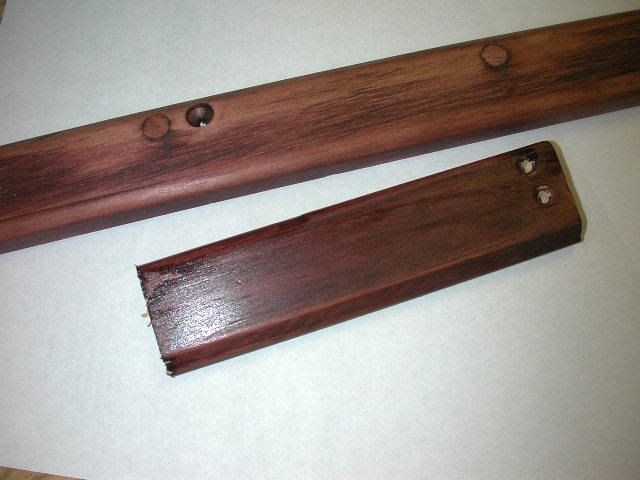
I used urethane base adhesive under and over the hinge and between the wood pieces this time. I sealed my hinge a year and a half ago with silicone because I wasn't sure how the hinge would hold up and wanted to be able to remove it without too much de-construction. The silicone cracked open at the wood to wood side of the things, after about 17 months, the Florida sun was just too much for it. The hinge is going to last a long, long time, I put it back together permanently with construction adhesive since it is a Wood to wood seal. I think Jack is prolly right about using the stuff for windshields. I know not much sticks to the plastic the hinge is made of though and that seal surface is mostly from the compression of the screws holding things together with the sealant more of a gasket than a sealant on the plastic side, or so it seems. :)
Steve
User avatar
Steve_Cox
4000 Club
4000 Club
 
Posts: 4903
Images: 196
Joined: Sun Apr 03, 2005 8:46 am
Location: Albuquerque New Mexico

Postby Geron » Sat Jun 23, 2007 8:18 am

I used the "putty in a tape" which is kinda like a gasket and caulk. I used it primarily for two reasons.

It's been universally used in literally millions of application (tried and true)

Relatively easy de-construction of it proves necessary.

Oh, a third one.
Absolutely easiest to clean up.

Used it on windows and hinges.
If it's not broken, you're not trying hard enough.
User avatar
Geron
1000 Club
1000 Club
 
Posts: 1522
Images: 173
Joined: Tue Jan 18, 2005 6:23 am
Location: Georgia, Cherrylog

Postby Mary K » Sat Jun 23, 2007 2:18 pm

MJ, Geron, and Steve, Thank you SOOO Much!!! You Boys ROCK!! :thumbsup: :thumbsup:


I am off to find some wood and adheasive and wood plug makerthingie... :oops:

Wish me luck!!!

Mk
Mary K

I don't know half of you half as well as I should like; and I like less than half of you half as well as you deserve. Bilbo Baggins
User avatar
Mary K
6000 Club
6000 Club
 
Posts: 6425
Images: 44
Joined: Wed Aug 02, 2006 3:07 pm
Location: Florida, Pensacola
Top

Postby Micro469 » Sat Jun 23, 2007 3:03 pm

Thanks from me too guys :thumbsup: :thumbsup: :thumbsup:
John
Image
User avatar
Micro469
Super Lifetime Member
 
Posts: 3185
Images: 382
Joined: Mon Nov 07, 2005 10:46 pm
Location: Brampton,Ontario,Canada
Top

Postby Mary K » Sun Jul 01, 2007 9:40 pm

Well, I have the trim ready to install. Just need to glue and screw it :D

Image

Image
It is overhanging a lot, but will be cut back so don't panic. ;)

It only took me 4 1x2's to get 2 pieces of trim for the hatch. :oops: But I had to practice with the new table saw.

QUESTIONS:::::

Q#1: To be specific, I can use the PL Urethane Adhesive to install the hinge and trim right? I have not found the black stuff, but I do have 2 tubes of PL. This is okay right? It will seal it up but be flexible?

Q#2: ....... :scratchthinking: humm....DAMN, I can not remember... :oops:

Guess it can wait till later.... :oops: :oops:

Thanks, Mk
Mary K

I don't know half of you half as well as I should like; and I like less than half of you half as well as you deserve. Bilbo Baggins
User avatar
Mary K
6000 Club
6000 Club
 
Posts: 6425
Images: 44
Joined: Wed Aug 02, 2006 3:07 pm
Location: Florida, Pensacola
Top

Postby Micro469 » Sun Jul 01, 2007 11:19 pm

Mary... I like your wood detail. How thick is that...1/2"? I know you saw mine... it's 3/4" thick, almost looks too bulky. I might take it off and put al or steel down, so it doesn't stick up so high. Let me know how yours works out.....

:thumbsup: :thumbsup:
John
Image
User avatar
Micro469
Super Lifetime Member
 
Posts: 3185
Images: 382
Joined: Mon Nov 07, 2005 10:46 pm
Location: Brampton,Ontario,Canada
Top

Postby madjack » Sun Jul 01, 2007 11:24 pm

MK, leave the hinge a 1/2" overhang on each side and make a small diveter(outta wood) to go underneath it(on the sides) to help channel water away while driving.....
madjack 8)
...I have come to believe that, conflict resolution, through violence, is never acceptable.....................mj
User avatar
madjack
Site Admin
 
Posts: 15128
Images: 177
Joined: Thu Dec 02, 2004 5:27 pm
Location: Central Louisiana
Top

Postby Mary K » Sun Jul 01, 2007 11:36 pm

Micro469 wrote:Mary... I like your wood detail. How thick is that...1/2"? I know you saw mine... it's 3/4" thick, almost looks too bulky. I might take it off and put al or steel down, so it doesn't stick up so high. Let me know how yours works out.....

:thumbsup: :thumbsup:


Well, it was 3/4" thick. But I thought it was too thick. So, with my branny new Table Saw I split it to 1/2" and then routered the outside edges with a roundy bit thingy ... took me 30 min to get the bit height adjusted. :? :fb

After taking some 150 grit and then some 220 grit and sanding it by hand, it smothed out the 45* angle cut on the inside edge. My elebow is killing me now. :o

Mk


Mk
Mary K

I don't know half of you half as well as I should like; and I like less than half of you half as well as you deserve. Bilbo Baggins
User avatar
Mary K
6000 Club
6000 Club
 
Posts: 6425
Images: 44
Joined: Wed Aug 02, 2006 3:07 pm
Location: Florida, Pensacola
Top

Postby Geron » Mon Jul 02, 2007 4:33 am

Well whooop teeee dooooo!!!!!!!

If I ever make it to a rally where you are, I'm gonna hide my hinge(s).

Lukin' guud.

g
If it's not broken, you're not trying hard enough.
User avatar
Geron
1000 Club
1000 Club
 
Posts: 1522
Images: 173
Joined: Tue Jan 18, 2005 6:23 am
Location: Georgia, Cherrylog
Top

Postby Steve_Cox » Mon Jul 02, 2007 6:41 am

Mk,

Nice photos :thumbsup:

That wood trim looks really nice. That question about the PL, I dunno, I used the PL products once and went back to the Liquid Nails Ultra Duty Poly 4X, others swear by the PL products.
Steve
User avatar
Steve_Cox
4000 Club
4000 Club
 
Posts: 4903
Images: 196
Joined: Sun Apr 03, 2005 8:46 am
Location: Albuquerque New Mexico
Top

Postby Miriam C. » Mon Jul 02, 2007 8:57 am

:( Now I am gonna have to redo mine. It is not pretty like yours. 8) You did a beautiful job on the hinge trim Mary K. ;) :thumbsup: :applause:

GitRdun! Image
“Forgiveness means giving up all hope for a better past.â€
User avatar
Miriam C.
our Aunti M
 
Posts: 19675
Images: 148
Joined: Wed Feb 15, 2006 3:14 pm
Location: Southwest MO
Top

Postby diverguy » Mon Jul 02, 2007 9:27 am

MK,
that looks sweet, i think YOU have YOUR callin in woodworking. i really like the lower profile of hte wood trim. i am so proud of you for not cutting a finger off on the saw yet. i still have all ten myself but that could change.
working on my cabinets this weekend i poked my finger on brad sticking out, never felt it but i bled all over my cabinets. i just rubbed it in and now i call them relatives.

the trim look great, really liking the way they are coming out. great job.
you are a craftsman. wait, craftswoman.
User avatar
diverguy
The 300 Club
 
Posts: 320
Images: 192
Joined: Wed Mar 07, 2007 11:37 am
Location: Arkansas, Cabot
Top

Postby bledsoe3 » Mon Jul 02, 2007 10:55 am

Mary, I think you've done a really good job on wood trim. :applause:
If you do what you've always done, you'll get what you've always got.
User avatar
bledsoe3
3000 Club
3000 Club
 
Posts: 3694
Images: 112
Joined: Tue Jun 07, 2005 5:55 am
Location: Oregon, Portland
Top

Postby Mary K » Mon Jul 02, 2007 11:16 am

Thanks everybody! :thumbsup:

DG, Stop, your embarrassing me... :oops: :oops: :oops: :R


Steve C, Okay, thanks. I can take em back and exchange them :thumbsup:

Mk
Mary K

I don't know half of you half as well as I should like; and I like less than half of you half as well as you deserve. Bilbo Baggins
User avatar
Mary K
6000 Club
6000 Club
 
Posts: 6425
Images: 44
Joined: Wed Aug 02, 2006 3:07 pm
Location: Florida, Pensacola
Top

Postby Mary K » Tue Jul 03, 2007 2:28 pm

Image

Testing out some trim stain on practice pieces.

The top piece is not a well sanded and I wiped on the stain with a rag. It sure does have an antique / distressed look about it. :thinking:

I was thinking of added the plugs after stain and having them as a decorative thing...but I just think I will plug it all and stain it.

Bottom piece is cut off from the actual installed trim so it is somewhat sanded and stain applied thick with a brush and wiped down after a few min.

Just thought Id post... :D

Mk
Mary K

I don't know half of you half as well as I should like; and I like less than half of you half as well as you deserve. Bilbo Baggins
User avatar
Mary K
6000 Club
6000 Club
 
Posts: 6425
Images: 44
Joined: Wed Aug 02, 2006 3:07 pm
Location: Florida, Pensacola
Top

PreviousNext

Return to Teardrop Construction Tips & Techniques

Who is online

Users browsing this forum: No registered users and 8 guests