Wood Plugs, Any tips & tricks from the experts?

Anything to do with mechanical, construction etc

Wood Plugs, Any tips & tricks from the experts?

Postby Mary K » Fri Aug 03, 2007 11:57 am

John (Micro) You might be interested in this too.

I will be plugging my trim work this weekend and was wondering if you kind folks have any advice.

I have some plugs I made with a plug bit, and a bag of plugs to try out, and also a dowel stick to try also.

The plugs I made with the bit are not very pretty. I used a drill press here at work. I think it was cutting to slow and I couldn't figure out how to make it run faster....:?

Any tips and advice would be welcome.

Thanks a bunch!!

Mk
Mary K

I don't know half of you half as well as I should like; and I like less than half of you half as well as you deserve. Bilbo Baggins
User avatar
Mary K
6000 Club
6000 Club
 
Posts: 6425
Images: 44
Joined: Wed Aug 02, 2006 3:07 pm
Location: Florida, Pensacola

Postby rbeemer » Fri Aug 03, 2007 12:07 pm

Rick

If ducks had scales, would fish quack?
rbeemer
500 Club
 
Posts: 997
Images: 13
Joined: Sun Apr 03, 2005 11:35 pm
Location: Oregon, Tigard

Postby 48Rob » Fri Aug 03, 2007 12:41 pm

Hello Mary,

An expert is a position I have yet to qualify for, but...

I've discovered that most do it yourself plug cutters are far from sharp, and thus chip and splinter.
You can drill a batch, then carefully belt sand the tops to get back to good wood, before popping them out.

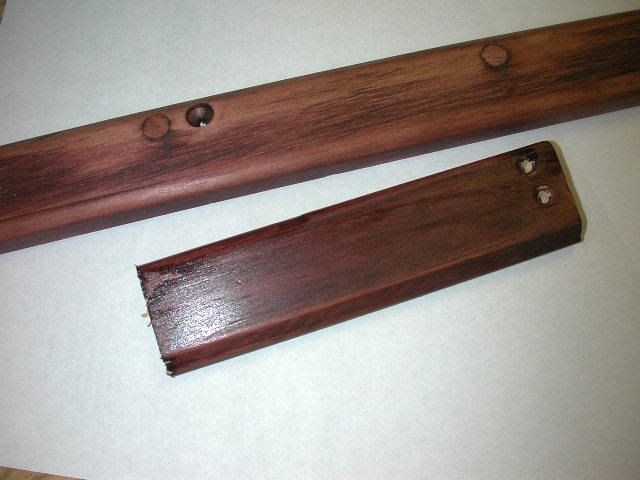
When ever I'm not trying to make the plug "dissapear" I prefer beveled hardwood plugs, as once glued and driven in, they compress the wood around them, leaving no gaps.
Once flush cut and sanded, the contrasting look can't be beat.
When I don't want them to stand out, I'll cut some from the same stock they're going into.

Most Drill presses have a set of pulleys, one on the motor, one on the spindle.
Each has several positions, like the sprocket on the back of a 10 speed bicycle.
Changing which slot the belt runs in, determines the speed of the spindle.
There is generally a diagram inside the lid or cover to give you the speed versus position.

Rob
Waiting for "someday" will leave you on your deathbed wondering why you didn't just rearrange your priorities and enjoy the time you had, instead of waiting for a "better" time to come along...
User avatar
48Rob
Super Lifetime Member
 
Posts: 3882
Images: 4
Joined: Thu Nov 17, 2005 6:47 pm
Location: Central Illinois
Top

Postby Gerald_G » Fri Aug 03, 2007 1:00 pm

Here's some tips that I've had success with. Mileage may vary.

1: dont cut the plugs all the way through - make them out of stock thicker than the plug depth and then "pop" them out with a screwdriver.

2: make them a bit taller than required, so that when driven in you have a bit to sand off. This make the best smooth top IMHO.

3: use a bit that makes tapered plugs.

4: Align grain when glueing in.
User avatar
Gerald_G
Teardrop Master
 
Posts: 160
Images: 85
Joined: Wed Mar 08, 2006 1:31 pm
Location: Alberta, Canada
Top

Postby Steve_Cox » Fri Aug 03, 2007 1:15 pm

Yup Mk, what they said :lol:
Steve
User avatar
Steve_Cox
4000 Club
4000 Club
 
Posts: 4903
Images: 196
Joined: Sun Apr 03, 2005 8:46 am
Location: Albuquerque New Mexico
Top

Postby Mary K » Fri Aug 03, 2007 1:38 pm

Rick, Thanks. I'm so spoiled here I often forget to search the Web for answers. :oops:

Rob, :thinking: The plugs I cut were okay on the tops, but the sides were very jagged, if figured it was the slow speed of the drill.

I want my plugs to stand out, so I will look for the HW beveled plugs you suggest. Thank you.

Gerald, Good tips. :thumbsup: :thinking: I didn't know they made a tapered plug bit... You boy's have all the coolest toys. :lol: Thanks Bunches!!

Steve, What I said to them.. :lol:

Mk
Mary K

I don't know half of you half as well as I should like; and I like less than half of you half as well as you deserve. Bilbo Baggins
User avatar
Mary K
6000 Club
6000 Club
 
Posts: 6425
Images: 44
Joined: Wed Aug 02, 2006 3:07 pm
Location: Florida, Pensacola
Top

Postby tonyj » Fri Aug 03, 2007 2:10 pm

Most plug cutters produce a tapered plug, but the taper is very slight. If I drop one (so I don't know which was tapered), I can usually roll it between my finger and thumb to tell which end is thicker.

The rough edges you describe are a result of the cutter, not the speed. They make cutters with one cutting surface up to four individual cutters. It is possible the rough surface won't make any difference unless the gap shows up when you cut or sand the plug to the surface.

I cut my plugs from a blank, not cutting all the way through. Instead of popping them out with a screwdriver, I put a piece of duct tape across the top of the board (the surface I cut) covering the plugs, flip the board on its side and run it through a bandsaw (if you can get access to one.). I cut the plus longer than the hole, install them so there is plug exposed, then either trim with a sharp chisel, or preferably, cut with a flush cut saw (0 degree tooth set). Then a light touch up with a random orbit sander.

I would use store bought plugs over cutting from a dowel--you really need that taper and you can't get that with a dowel.

Here's the plug cutter I use from Woodworker supply:
http://woodworker.com/cgi-bin/FULLPRES.exe?PARTNUM=908-386
Still graced with two eyes and ten fingers (due in no small part to luck!).

Just when you think a problem is solved, an uglier result replaces it.

tony
User avatar
tonyj
Super Lifetime Member
 
Posts: 2468
Images: 160
Joined: Mon Sep 26, 2005 10:18 pm
Location: Texas, Corpus Christi
Top

plugs

Postby sHoootR » Fri Aug 03, 2007 2:18 pm

You might try here,this is what I used.......
http://www.craftparts.com/mall/Pegs_Other.asp

Image

Hopee that helps................ :thinking:
sHoootR (Guy) & SemiSweets (Vickie)
Image
Image
User avatar
sHoootR
Gold Donating Member
 
Posts: 257
Images: 85
Joined: Mon Sep 05, 2005 7:23 am
Location: Nixa, Missouri
Top

Postby Mary K » Fri Aug 03, 2007 2:27 pm

Awesome Tony!!! :thumbsup:

All the little unknows are coming into light for me.

These are 2 plugs I practiced on a few weeks ago. Testing the stain more than anything really. I will be trying for a darker more even stain on my trim though than what is pictured.

Image
Is the darker stain around the edges typical? Ah, I will just practice tonight on them and hopefully get better by the morning when I need to start on the real stuff. Times a ticking for me....tick tock...


Mk

Mk
Mary K

I don't know half of you half as well as I should like; and I like less than half of you half as well as you deserve. Bilbo Baggins
User avatar
Mary K
6000 Club
6000 Club
 
Posts: 6425
Images: 44
Joined: Wed Aug 02, 2006 3:07 pm
Location: Florida, Pensacola
Top

Re: plugs

Postby Mary K » Fri Aug 03, 2007 2:38 pm

sHoootR wrote:You might try here,this is what I used.......
http://www.craftparts.com/mall/Pegs_Other.asp

Image

Hopee that helps................ :thinking:


Guy, WOW cool. I have not seen pictures of your TD before now. That is a nice looking Woody.

Thanks for the link. :thumbsup:

Mk
Mary K

I don't know half of you half as well as I should like; and I like less than half of you half as well as you deserve. Bilbo Baggins
User avatar
Mary K
6000 Club
6000 Club
 
Posts: 6425
Images: 44
Joined: Wed Aug 02, 2006 3:07 pm
Location: Florida, Pensacola
Top

Postby Mary K » Fri Aug 03, 2007 2:43 pm

Guy, I was just going thorough your Gallery and I love the your porch lights. :applause:

I have been hemhawing around on buying them because I could not find any I liked. This gives me something to think about on making my own.

:thinking: How many Watts does one need for a porch light.

I just hijack my own thread. :embarassed:

Mk
Mary K

I don't know half of you half as well as I should like; and I like less than half of you half as well as you deserve. Bilbo Baggins
User avatar
Mary K
6000 Club
6000 Club
 
Posts: 6425
Images: 44
Joined: Wed Aug 02, 2006 3:07 pm
Location: Florida, Pensacola
Top

Postby tonyj » Fri Aug 03, 2007 2:51 pm

Yes, the darker ring is usual, caused by the wood fiber soaking up more stain. I find that using a contrasting wood for the plug tricks the eye into not seeing the ring. Also caused by the glue holding the plug in (if you are using any).

Another option to lessen that ring is to use a preconditioning wood sealer (Minwax) on the bare wood. It also helps get a more even stain because less stain soaks into the soft wood. You can, of course, apply additional layers of stain to darken. I've started using it as a primer on everything I'm covering with poly. It might also lessen the wood filler difference you are getting.
Still graced with two eyes and ten fingers (due in no small part to luck!).

Just when you think a problem is solved, an uglier result replaces it.

tony
User avatar
tonyj
Super Lifetime Member
 
Posts: 2468
Images: 160
Joined: Mon Sep 26, 2005 10:18 pm
Location: Texas, Corpus Christi
Top

Postby Mary K » Fri Aug 03, 2007 3:21 pm

Thanks Tony. I will get some practice in tonight.

I sure hope that one day I can give back as much advice and help to others on this forum as I have received here.

Thanks Folks.

Mk
Mary K

I don't know half of you half as well as I should like; and I like less than half of you half as well as you deserve. Bilbo Baggins
User avatar
Mary K
6000 Club
6000 Club
 
Posts: 6425
Images: 44
Joined: Wed Aug 02, 2006 3:07 pm
Location: Florida, Pensacola
Top

Postby apratt » Fri Aug 03, 2007 3:44 pm

Mary K wrote:Awesome Tony!!! :thumbsup:

All the little unknows are coming into light for me.

These are 2 plugs I practiced on a few weeks ago. Testing the stain more than anything really. I will be trying for a darker more even stain on my trim though than what is pictured.

Image
Is the darker stain around the edges typical? Ah, I will just practice tonight on them and hopefully get better by the morning when I need to start on the real stuff. Times a ticking for me....tick tock...


Mk

Mk


Mary, I kinda like the rings. It gives a contrasting patern. Looks good.
Arthur,

ASL spoken here
User avatar
apratt
Gold Donating Member
 
Posts: 966
Images: 16
Joined: Fri Feb 24, 2006 11:43 pm
Location: Washington, Chehalis
Top

Postby tonyj » Fri Aug 03, 2007 3:55 pm

Mary K wrote:I sure hope that one day I can give back as much advice and help to others on this forum as I have received here.

Mk


Until I found this forum, I don't know how many times I said I was so sad that woodworking seemed to be a dying art, and that you could look long and hard and not meet anyone who shared that interest. This place has given me hope, and you will pass on the knowledge, Grasshopper.
Still graced with two eyes and ten fingers (due in no small part to luck!).

Just when you think a problem is solved, an uglier result replaces it.

tony
User avatar
tonyj
Super Lifetime Member
 
Posts: 2468
Images: 160
Joined: Mon Sep 26, 2005 10:18 pm
Location: Texas, Corpus Christi
Top

Next

Return to Teardrop Construction Tips & Techniques

Who is online

Users browsing this forum: No registered users and 5 guests