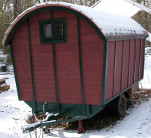
Patches - Popup to Roundtop Standy Conversion

Design & Construction of anything that's not a teardrop e.g. Grasshoppers or Sunspots

Postby Tcurr » Fri Oct 26, 2007 6:49 am

Looks awsome. Great pics and details. You are almost camping :applause:
My Idea of plans are a tape measure, a saw and a dream.

Tom & Brenda
Westerville, Ohio
User avatar
Tcurr
Silver Donating Member
 
Posts: 304
Images: 92
Joined: Thu Aug 23, 2007 1:00 pm
Location: Westerville, Oh

Postby depatty » Fri Oct 26, 2007 8:31 am

Mike C. wrote:Dave,

Nice job, lots of detail. :thumbsup:

Looks like you are getting there. :) Appreciate all the pictures
because it helps me to understand what you are bulding. :thinking:

Now all you need to do is GitRDun!!!!! :applause: :applause:


Thanks for the kind words. Yea I think I am getting closer. Keep telling myself I am anyway.

As for what I am building, some days I wonder too. :? Started out to build a 6x10 teardrop looking trailer but as a standie. Got the walls up 4 feet and decided to go with flat panels to make life easier, then got to looking at an old Shelter II book and made the mistake of looking at the Gypsy wagon. It all fell apart/in place and this is the result. :roll: Gave up drawing out plans and just went to making it up as I go along. But I am taking plenty of pix so I can see later what I did and more important what to NOT do next time. :lol:

Later,
dave
User avatar
depatty
Teardrop Master
 
Posts: 280
Images: 175
Joined: Thu Oct 04, 2007 10:39 am
Location: Weaver, Alabama

Postby depatty » Fri Oct 26, 2007 8:41 am

Tcurr wrote:Looks awsome. Great pics and details. You are almost camping :applause:


Thanks!

I had hoped to take it out this weekend but the fates have spoken and tis not to be. :cry: Though I have to be here instead, we may try camping in it down in the field over the weekend just to see how it sleeps/lives anyway. 8) Will try to get it on the road for a short run next week to see how it handles.

Later,
dave
User avatar
depatty
Teardrop Master
 
Posts: 280
Images: 175
Joined: Thu Oct 04, 2007 10:39 am
Location: Weaver, Alabama
Top

Progress pictures Oct 26

Postby depatty » Fri Oct 26, 2007 11:31 pm

Shore power is in. Got the base level kitchen cabinet framing about done. Still got some paneling to get done. Getting closer and closer. ;)

<img alt="Checking Spacing for Fridge and water jug" src="http://www.technoprimitive.org/wordpress/wp-content/uploads/2007/10/camperpixchecking-spacing-for-fridge-and-water-jug.jpg" width="500" height="375" />
Checking spacing for fridge and water jug.

<img alt="Front view" src="http://www.technoprimitive.org/wordpress/wp-content/uploads/2007/10/camperpixfront-view1.jpg" width="500" height="375" />
Got just enough room if I use plastic for the side panels.

<img alt="Close but will fit" src="http://www.technoprimitive.org/wordpress/wp-content/uploads/2007/10/camperpixclose-but-will-fit.jpg" width="500" height="375" />
Close but should fit with no problem.

<img alt="Just right" src="http://www.technoprimitive.org/wordpress/wp-content/uploads/2007/10/camperpixjust-right.jpg" width="500" height="375" />
Clearance is just right. :thumbsup:

<img alt="Putting in shore power" src="http://www.technoprimitive.org/wordpress/wp-content/uploads/2007/10/camperpixputting-in-shore-power.jpg" width="500" height="375" />
Putting in shore power box. Note red jumper at of breaker panel. It is use to jump both sides together so all breakers get power. I may change this and use one side for the inverter and the other for mains power. :thinking:

<img alt="Using rightmost breaker for main cutoff" src="http://www.technoprimitive.org/wordpress/wp-content/uploads/2007/10/camperpixusing-rightmost-breaker-for-main-cutoff.jpg" width="500" height="375" />
This box isn't set up for a master disconnect so I put the power in on the rightmost breaker which is a 20 amp and use it for the panel master disconnect. The branch breakers are all 15 amp.

<img alt="Camper power cord" src="http://www.technoprimitive.org/wordpress/wp-content/uploads/2007/10/camperpixcamper-power-cord.jpg" width="500" height="375" />
Camper power cord and wall feedthrough.

<img alt="Cover on" src="http://www.technoprimitive.org/wordpress/wp-content/uploads/2007/10/camperpixcover-on.jpg" width="500" height="375" />
Cover on and power cord run.

<img alt="Building wall enclosure" src="http://www.technoprimitive.org/wordpress/wp-content/uploads/2007/10/camperpixbuilding-wall-enclosure.jpg" width="500" height="375" />
Electrical enclosure framed in. Still got to install the 12 volt stuff and 300 watt inverter.

<img alt="Framing going up around wheelwell" src="http://www.technoprimitive.org/wordpress/wp-content/uploads/2007/10/camperpixframing-going-up-around-wheelwell.jpg" width="500" height="375" />
Getting the framing up around the wheel well. White plastic and paneling also had to be cut and installed prior to doing this.

<img alt="Getting closer" src="http://www.technoprimitive.org/wordpress/wp-content/uploads/2007/10/camperpixgetting-closer.jpg" width="500" height="375" />
Another view showing back wall. I used white here to lighten the underside of the counter. Didn't want it on the counter back cause it's so hard to keep looking clean in a kitchen. :roll:

<img alt="Storage area floor framing done" src="http://www.technoprimitive.org/wordpress/wp-content/uploads/2007/10/camperpixstorage-area-floor-framing-done.jpg" width="500" height="375" />
Storage area floor framing done. Got to cut the plywood and then put in the divider framing and skin this section. Then will put a solid plywood top on and then build the next level and countertop on it. Should save a few cuts in the plywood dodging framing.

That's it for today. More as I get to it. ;)
User avatar
depatty
Teardrop Master
 
Posts: 280
Images: 175
Joined: Thu Oct 04, 2007 10:39 am
Location: Weaver, Alabama
Top

Progress Update Oct 31

Postby depatty » Thu Nov 01, 2007 12:11 am

Been doing wiring and trying to finish up the kitchen. Still got bits of both to do but getting closer. Put in a bunch of outlets and still got at least 3 more to go. Got to take the couch/bed plywood off to get to where I can do them though. Should have waited till the end to put the frame in. Will know better next time. Bottom course of counter is done. Still got to skin the electrical area but still got 12 volt stuff that goes in there too. And more smurf conduit to run to the tongue box which I have still got to build. And so on and so forth. :roll: On to the pix... ;)

<img alt="Wiring in Conduit" src="http://www.technoprimitive.org/wordpress/wp-content/uploads/2007/10/camperpixwiring-in-conduit.jpg" width="500" height="375" />
Decided to put all the wiring in conduit. Makes it easy to surface mount and doesn't look TOO bad. The shelf that is there now will hold the microwave and some plastic drawers. The right end will be a table for the couch. The piece of plywood at the bottom is the end of the counter top and a splash shield and shelf support.

<img alt="More conduit" src="http://www.technoprimitive.org/wordpress/wp-content/uploads/2007/10/camperpixmore-conduit.jpg" width="500" height="375" />
More conduit. The outlet on the left is for the AC. The one on the right is for the light and is switched. Fan will be controlled via thermostat with switch override. I figure with the low current draw of these fans I can just use the mercury type and switch it directly without having to go through a relay. :thinking: Will find out soon anyway.

<img alt="Test fitting plywood." src="http://www.technoprimitive.org/wordpress/wp-content/uploads/2007/10/camperpixtest-fitting-plywood..jpg" width="500" height="375" />
Test fitting the plywood. Will cover this side with plastic for water protection. And more outlets. One at bottom is for the microwave. Center one is for counter top use. One duplex on each end of counter top will hopefully be enough.

<img alt="Table" src="http://www.technoprimitive.org/wordpress/wp-content/uploads/2007/10/camperpixtable.jpg" width="500" height="375" />
Table side of plywood. Outlet above is for whatever. Figured that 4 should be enough for that side. Still got some at the end and the other table to put in. Hope to get that done tomorrow. Those are the ones I have to remove the plywood from the futon frame to get done.

<img alt="Wash tub storage" src="http://www.technoprimitive.org/wordpress/wp-content/uploads/2007/10/camperpixwash-tub-storage.jpg" width="500" height="375" />
Wash tub and other storage. Note yet another outlet at the left under the counter. That one is for the refrigerator. And yes the picture is blurry. I should have extended the monopod instead of holding the camera by it...
:oops:

More as I get to it. ;)
User avatar
depatty
Teardrop Master
 
Posts: 280
Images: 175
Joined: Thu Oct 04, 2007 10:39 am
Location: Weaver, Alabama
Top

Postby Miriam C. » Thu Nov 01, 2007 7:19 am

:applause: Good conduit work! Are you leaving it exposed? This is going to be nice AND comfy when you get it done. :thumbsup:
“Forgiveness means giving up all hope for a better past.â€
User avatar
Miriam C.
our Aunti M
 
Posts: 19675
Images: 148
Joined: Wed Feb 15, 2006 3:14 pm
Location: Southwest MO
Top

Postby 2old2tent » Thu Nov 01, 2007 8:52 am

I'm planning for my wiring to be in conduit also. I hate burying wiring where I can't get to it. :thumbsup:

Jack
Image
User avatar
2old2tent
Teardrop Master
 
Posts: 185
Images: 41
Joined: Thu Jul 13, 2006 10:46 am
Location: Kansas, Melvern
Top

Postby depatty » Thu Nov 01, 2007 9:09 am

Miriam C. wrote::applause: Good conduit work! Are you leaving it exposed? This is going to be nice AND comfy when you get it done. :thumbsup:


Thanks!
Yes, will be exposed. Most likely will get painted but what you see is what will be.
User avatar
depatty
Teardrop Master
 
Posts: 280
Images: 175
Joined: Thu Oct 04, 2007 10:39 am
Location: Weaver, Alabama
Top

Postby depatty » Thu Nov 01, 2007 9:14 am

2old2tent wrote:I'm planning for my wiring to be in conduit also. I hate burying wiring where I can't get to it. :thumbsup:

Jack


When I started on this project it just made the most sense to me. I thought about using romex in routed out groves under the inside skin, but with conduit don't have to worry about running a screw or nail though it or having a mouse or other critter chew on it and start a fire. 8)
User avatar
depatty
Teardrop Master
 
Posts: 280
Images: 175
Joined: Thu Oct 04, 2007 10:39 am
Location: Weaver, Alabama
Top

Postby bobhenry » Thu Nov 01, 2007 9:20 am

Your a smart man.

I buried mine in the wall without any type of conduit. My ac is fine but I have a dead short in the dc side because I used a decaying power cord. It looked good on the outside but the inside insulation was crumbling. That's what I get for being cheap!

The conduit will also make additions and /or corrections much easier
Growing older but not up !
User avatar
bobhenry
Ten Grand Club
Ten Grand Club
 
Posts: 10368
Images: 2623
Joined: Fri Feb 09, 2007 7:49 am
Location: INDIANA, LINDEN
Top

Postby Kens » Thu Nov 01, 2007 9:45 am

All I can say is WOW :applause: :applause:
Good day every day!
User avatar
Kens
500 Club
 
Posts: 580
Images: 26
Joined: Mon Aug 01, 2005 5:18 pm
Location: Valencia Pa.
Top

Postby tonyj » Thu Nov 01, 2007 12:22 pm

Yours is a very unique and amazing build--especially the cost. Great job!! :thumbsup: :applause: :thumbsup:
Still graced with two eyes and ten fingers (due in no small part to luck!).

Just when you think a problem is solved, an uglier result replaces it.

tony
User avatar
tonyj
Super Lifetime Member
 
Posts: 2468
Images: 160
Joined: Mon Sep 26, 2005 10:18 pm
Location: Texas, Corpus Christi
Top

Postby depatty » Thu Nov 01, 2007 1:01 pm

bobhenry wrote:Your a smart man.

I buried mine in the wall without any type of conduit. My ac is fine but I have a dead short in the dc side because I used a decaying power cord. It looked good on the outside but the inside insulation was crumbling. That's what I get for being cheap!

The conduit will also make additions and /or corrections much easier


The pop-up camper that this is built from had critters get in the wiring the only time i ever took it out back in 85. We ended up coming back early to outrun a hurricane that changed course and was headed directly for where we were staying. When it got time to turn on the lights, we had none with the camper plugged in. Got underneath after we got home and had chewed wiring shorting to the frame. Don't want that again. ;)
User avatar
depatty
Teardrop Master
 
Posts: 280
Images: 175
Joined: Thu Oct 04, 2007 10:39 am
Location: Weaver, Alabama
Top

Postby depatty » Thu Nov 01, 2007 1:11 pm

Kens wrote:All I can say is WOW :applause: :applause:

Thanks!
User avatar
depatty
Teardrop Master
 
Posts: 280
Images: 175
Joined: Thu Oct 04, 2007 10:39 am
Location: Weaver, Alabama
Top

Postby depatty » Thu Nov 01, 2007 1:26 pm

tonyj wrote:Yours is a very unique and amazing build--especially the cost. Great job!! :thumbsup: :applause: :thumbsup:


Thanks! The cost is the result of a lifetime of never throwing anything away. :roll: The general design comes from my longtime love of old gypsy wagons. Figured I'd never have a real one so this is the next best thing. ;)
The biggest cost, that I can't even begin to figure out, has been in time hunting stuff I know I squirreled away umpteen years ago for when I got around to building something with it, but where... :thinking: Just counted it up in my head and unless I missed something we now have 9 buildings, mobile homes, campers, and portable buildings full of crap. That doesn't count the old cars, trucks, and trailers piled with stuff in the field. :oops: :? But the up side is I don't have to go to the store for much anymore. ;)
User avatar
depatty
Teardrop Master
 
Posts: 280
Images: 175
Joined: Thu Oct 04, 2007 10:39 am
Location: Weaver, Alabama
Top

PreviousNext

Return to Non-traditional Designs

Who is online

Users browsing this forum: No registered users and 0 guests