My New VegasTeardrop Construction Has Begun.

Anything to do with mechanical, construction etc

My New VegasTeardrop Construction Has Begun.

Postby Ken Fincher » Sat Mar 15, 2008 7:40 pm

Well I have begun :twisted:
This Teardrop will be 5'4" wide and 10' long not including the tongue.

I WILL BE POSTING PICTURES & EXPLANATIONS AS THE TEARDROP TRAILER IS BEING BUILT.
****WELL IT IS TIME TO START BUILDING****
:woohoo:

This picture is of the tubing and the channel that I picked up to build my new Teardrop Trailer.
Image

Well after looking at the steel that I had bought for my TD for awhile I decided it was a little heavier then I realy needed, so I used the steel in picture above to build a flatbed trailer out of it.http://vegasteardrop.com/flatbed_trailer_build_08p1.html

So I picked up some smaller steel tubing to use for my Teardrop Trailer.
The angle in this pic was used on my flatbed trailer.
Image

Here I cut up some of the tubing.

Image

Here I am using the flatbed trailer frame for a work bench to lay out the teardrop trailer frame.
Image

Here all of the cross braces & side pieces and the front & rear pieces have been cut and laid out,Then they we're tac welded so the frame would stay square & after this side was all tacked up & rechecked to make sure it was still squared up (Looked good) now it was welded up.
Image

Now the frame was flipped over and this side was welded up.
Image

Here the spring shackles and springs are being welded on.
Image

Here the coupler has been welded on to two pieces of tubing.
Image

Here the tongue has been lined up and vise gripped on and then it was welded.
Image

Here a center tubing was centered and welded.
Image

I will be posting more pictures real soon.

And you can also follow this build and others on my web page at
( www.VegasTeardrop.com )

If there is any questions or Ideas as I building this Teardrop Trailer let me know I am not building this TD from plans or copying any other Teardrop Trailers, My plans are in my head,hundreds of ideas the only sure thing about this TD build is that it will be able to accomodate a Queen Size Bed :) And everything else I will do as I go.

I figure some of the best trips that we have been on have been the one's that we made no plans.
We just hit the road and we end up were ever we end up.
This is the way I will be building this TD.

The Sin City Teardropper.
Ken F.
( www.VegasTeardrop.com )
Thanks to the Highways & Byways & our National & State Parks,What a beautiful Country we live in.
Image

( www.VegasTeardrop.com )
User avatar
Ken Fincher
The 300 Club
 
Posts: 378
Images: 28
Joined: Sat Aug 18, 2007 1:07 am
Location: Las Vegas,Nevada

Postby emiller » Sat Mar 15, 2008 9:06 pm

As much as you travel Ken how do you find time. See you soon.
Eddie
User avatar
emiller
Donating Member
 
Posts: 3421
Images: 157
Joined: Sun Jun 13, 2004 11:00 pm
Location: Arizona, Phoenix

Postby Ken Fincher » Sun Mar 16, 2008 12:11 am

Eddie
We have not done to much traveling this year yet.(But it will not be long before we start traveling we are getting the bug to hit the pavement.)
I may be doing a few trips by myself this summer, Jan has had to fight tooth and nail to get any time off, due to the derelicts she has working under her some of them have been there for 7+ years and they still do not even know how to due thier job, It is sad that most of these big corporate companies will not fire anyone, I think they are afraid of law suits.
Well enough of that it gets my adrenalin going just to talk about it.

We will see you in a couple of weeks at the the Perris gathering.
P.S. We have another big prime rib we are going to cook in the dutch oven, MMMM makes me hungry just thinking about it :Flippin Burger:

The Sin City Teardropper.
Ken F.
( www.VegasTeardrop.com )
Thanks to the Highways & Byways & our National & State Parks,What a beautiful Country we live in.
Image

( www.VegasTeardrop.com )
User avatar
Ken Fincher
The 300 Club
 
Posts: 378
Images: 28
Joined: Sat Aug 18, 2007 1:07 am
Location: Las Vegas,Nevada
Top

Postby Ken Fincher » Sun Apr 06, 2008 11:15 pm

Well I have extended & put my axle on, And have also painted the frame & axle.
Image
Image
Image

I also cut up a piece of diamond plate & mounted it on my tongue.
Image

And also picked up my new tires & chrome rims.

Image

You can also go to my construction page on my website where I will give a better explanation & more pictures as I am building, Here is a direct link
to my construction page. ( http://www.vegasteardrop.com/TD_and_Misc_Const_.html )

If there are any questions feel free to ask or if there are any words of wisdom or ideas do not hesitate to let them be known.

The Sin City Teardropper. (s)
Ken F.
( www.VegasTeardrop.com )
Thanks to the Highways & Byways & our National & State Parks,What a beautiful Country we live in.
Image

( www.VegasTeardrop.com )
User avatar
Ken Fincher
The 300 Club
 
Posts: 378
Images: 28
Joined: Sat Aug 18, 2007 1:07 am
Location: Las Vegas,Nevada
Top

Postby Ken Fincher » Mon Apr 07, 2008 5:20 pm

Well it is starting to get warm here in Vegas, So I think it is time to clean up my work area, what a mess, So when my wood arrives I can get right to work.
This may be a project in itself, Where dose it all come from?
Image

It is hard to believe that my TV is back there somewhere.
It is hard to believe that I cleaned up this area a few months ago, & it was a lot worse then this I could have been in the running for the
messiest work area contest, if I can find a picture I will have
to post it.
Image

I hope my wood gets here soon, I'm getting anxious to get moving along with my build.

The Sin City Teardropper.(s)
Ken F.
( www.VegasTeardrop.com )
Thanks to the Highways & Byways & our National & State Parks,What a beautiful Country we live in.
Image

( www.VegasTeardrop.com )
User avatar
Ken Fincher
The 300 Club
 
Posts: 378
Images: 28
Joined: Sat Aug 18, 2007 1:07 am
Location: Las Vegas,Nevada
Top

Postby Miriam C. » Tue Apr 08, 2008 9:20 am

:lol: 
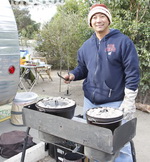
Looks like mine. Save those pictures, you never know when a contest will break out. 8) 
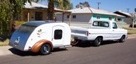
Thanks for the table leg info and your new trailer looks wonderful. :thinking:
“Forgiveness means giving up all hope for a better past.â€
User avatar
Miriam C.
our Aunti M
 
Posts: 19675
Images: 148
Joined: Wed Feb 15, 2006 3:14 pm
Location: Southwest MO
Top

Postby Ken Fincher » Sun Apr 20, 2008 5:47 pm

:) Well I sold my black TD :( I sure will miss it :crying2:


Oh NO! :shock: That means that I need to get to work :cry:

Well I picked up my wood for my sides & floor.

As you can see I did a little cleaning :lol:


Image
It fits :roll:

Here I am burning the midnight oil, cutting my floor pieces.
Image

Man they fit like a glove, Darkness & all.
Image

Here I have drawn out a couple of different possible rear hatch angles.
Now I just have to figure out which one I will go with?
Image

I picked the radiouses I liked & I begain to cut them up.
Image

In the next pic. I layed the wood that I cut on top of another piece of wood that will be used on the other side outer wall & clamped them together, now it is ready for the router.
(This will make both walls exactly the same :thumbsup: )
Image

I do have a bunch more pic's that I will have up real soon.

The Sin City Teardropper.(s)
Ken F.
Last edited by Ken Fincher on Fri May 30, 2008 11:35 pm, edited 1 time in total.
Thanks to the Highways & Byways & our National & State Parks,What a beautiful Country we live in.
Image

( www.VegasTeardrop.com )
User avatar
Ken Fincher
The 300 Club
 
Posts: 378
Images: 28
Joined: Sat Aug 18, 2007 1:07 am
Location: Las Vegas,Nevada
Top

Postby cuyeda » Mon Apr 28, 2008 5:57 pm

Ken Fincher wrote::) Well I sold my black TD :( I sure will miss it :crying2:
...snip...
The Sin City Teardropper.(s)
Ken F.


Ken,

That must have been real tough to see your black teardrop drive away after all that work you put into it. Someone has a nice teardrop!

I am sure your new one will even be better than the black one. Looking forward to seeing the finished product.
Why just dance, when you can Salsa!
Cliff & Vanessa
User avatar
cuyeda
Platinum Donating Member
 
Posts: 1924
Images: 17
Joined: Fri Sep 22, 2006 12:09 am
Location: California, Long Beach
Top

Postby Ken Fincher » Mon May 26, 2008 6:01 am

It's been awhile since my last update.

I have made a lot of progress and over the next few days I will bring this thread up to date.

Here I'm cutting out my door.
Image

Building my inner wall.
Image

Now I am ready to insulate.
Image

Insulation instaled.
Image

Here the inner wall & outer wall are atatched together then I routered out the door.
Image

Do you think this is low enough?
Image

I will post some more pic's later today.

The Sin City Teardropp.(s)
Ken F.
Thanks to the Highways & Byways & our National & State Parks,What a beautiful Country we live in.
Image

( www.VegasTeardrop.com )
User avatar
Ken Fincher
The 300 Club
 
Posts: 378
Images: 28
Joined: Sat Aug 18, 2007 1:07 am
Location: Las Vegas,Nevada
Top

Postby Ken Fincher » Sat May 31, 2008 12:50 am

Well the reason my frame is so low to the ground is because it's upside down, so that I could make & install some aluminum on the bottom of the frame.
Image

Here you can see that my under carriage is now all covered.
Image

Here I started to run some conduit for my electrical.
Image

I also picked up some fenders, I thought that I would clamp them on to see how they looked.
Image

I also changed my mind & picked up some 7" electric brakes & a break away kit & also ordered an axel.
Image

Well I finished installing my conduit.
Image

Now I started to insulate the floor.
Image

Before I could finish insulating we welded on some tubing on both sides of the trailer, These will be used to support my running boards & the fenders.
Image

It's started to get hot so I went out & bought a new awning since my last one blew to pieces a few gatherings ago :(
Image

Fun Fun the pre wiring has begun.
Image
Image

I also drilled 2 holes threw the frame & I put a couple of bolts in the holes & welded them in place,these are to hold my spare tire.
Image

Floor is all insulated.
Image

Now the floor is being installed & I used stainless steel screws to fasten it down.
Image
Image

After the floor was fastened down I laid down some linolium.
Image

Here I cut out some notches in the walls so they would fit over the new tube that we're welded on.
Image

Well there has been another change in my build :shock: It will make a little extra work for me, But I could not pass these doors up.
Image

I had to beef up the walls where I pre cut out the holes for a different type of door,By the time I'm done reconstructing my walls they will be alot stronger then they we're to begain with.
(a little heavier too :cry:)
Image
Image
Image

Fits like a glove :thumbsup:
Image

well I still have quite a few more pics to catch up to where I am at with my build, I will try to get some more pics up real soon.

The Sin City Teardropper.(s)
Ken F.
Thanks to the Highways & Byways & our National & State Parks,What a beautiful Country we live in.
Image

( www.VegasTeardrop.com )
User avatar
Ken Fincher
The 300 Club
 
Posts: 378
Images: 28
Joined: Sat Aug 18, 2007 1:07 am
Location: Las Vegas,Nevada
Top

Postby Miriam C. » Sat May 31, 2008 1:31 pm

:applause: :applause: :thumbsup: You are really making progress. At this rate you can go camping when it gets really hot :R :lol: Looking good!
“Forgiveness means giving up all hope for a better past.â€
User avatar
Miriam C.
our Aunti M
 
Posts: 19675
Images: 148
Joined: Wed Feb 15, 2006 3:14 pm
Location: Southwest MO
Top

Doors

Postby HossHoffer » Sat May 31, 2008 4:53 pm

Where can I get some of those doors! They look great. :thumbsup:

Hoss
HossHoffer
Teardrop Master
 
Posts: 100
Images: 7
Joined: Fri Feb 09, 2007 9:01 pm
Location: Aurora, CO
Top

Postby Ken Fincher » Sun Jun 01, 2008 1:11 am

Miriam
I am a lot closer to being done then the pic's show I will try to post some more in a hour or so.

Hoss
the doors that I am using we're originally to be used on a large motor home they are the cargo doors, I found these at a local rv dealer these doors we're special ordered a few years ago and we're never used I found these up in thier attic they let me go up and go threw a bunch of misc. stuff that they have special ordred over the years and have not used, let me tell you I was like a kid in a candy store I bought everything and anything they had that I thought I could possibly use in the future, I made a pile of stuff and made an offer then I loaded up my HHR Panel & drove home with a smile :)
The doors I was told if they had to reorder them they would be $300 to $400 a piece, There was a tag on them with the model # I pulled it off and put it somwhere where I would not loose it.
Guess what :scratchthinking: :roll: I will try to find it,& let you know, I do know that they are out of Onterio Canada.
( I may have misspelled Onterio? )
Hoss
Just a suggestion you might go to a couple of your local rv dealers walk threw thier trailers and motorhomes if you see a window or a door or anything that you may be able to use for your TD wright down the model,make and vin# & the measurments of what you are interested in and go to thier parts & acces. area & most likely they could get a price on it, or you may be able to contact the vehicle manufacture & do the same.

I have done this in the past.

I did find some nice car sun roofs that I was going to use for my windows but they are about a 1/4" taller then the space I have between the top & the handle :( But I think I may be able to make them work with a little trimming) At $350 for the pair it could be a expensive experiment :twisted:
The windows I realy would like to put in are all nickle plated (chrome)
Boat or ship windows $1000 + each a little high :(

The Sin City Teardropper.(s)
Ken F.
Thanks to the Highways & Byways & our National & State Parks,What a beautiful Country we live in.
Image

( www.VegasTeardrop.com )
User avatar
Ken Fincher
The 300 Club
 
Posts: 378
Images: 28
Joined: Sat Aug 18, 2007 1:07 am
Location: Las Vegas,Nevada
Top

Postby Ken Fincher » Sat Jun 28, 2008 5:34 am

It's been awhile scince I have updated my build, I do apoligize :(

Well I better get you you all up to date scince there is only about 2 weeks until I must be hitting the road to attend a couple of gatherings in Calif.

My constuction page on my website is up to date and I do have alot more pic's & info. ( www.vegasteardrop.com/5X10_td_build_p1.html )

Well here we go.
The walls are going up.

Image

Framing in my front radius.
Image

Starting to frame in the galley area.
Image

Image

Here is a pic of a couple drawers in the galley.
Image
Image

Here I started to frame in the cupboards in the cabin area.
I also sat the stove in the spot where I plan to put it in, I wanted to check how it fit.
Image

After framing up the front I checked to see how the A/C unit & the window fit.
Image :thumbsup:

Here I have hung up some FRP.


Image

Now I have started to frame in my front lower cupboards.
Image

Time to do some more painting.
Image
Image

It is 4:11 am in the morning I better try to get some sleep so I can get back to work in a couple of hours.

I will post some more pic's later today, Hopefully I can get this page up to date.

Ken F.
P.S. I hope to get my roof skinned with aluminum & stainless today and maybe the sides. :)
Thanks to the Highways & Byways & our National & State Parks,What a beautiful Country we live in.
Image

( www.VegasTeardrop.com )
User avatar
Ken Fincher
The 300 Club
 
Posts: 378
Images: 28
Joined: Sat Aug 18, 2007 1:07 am
Location: Las Vegas,Nevada
Top

Postby pathdoc2 » Sun Jun 29, 2008 2:56 pm

Looking great. I've never seen aluminum on the bottom of the floor like that before. Looks slick.
pathdoc2
Teardrop Builder
 
Posts: 40
Joined: Sat Jun 07, 2008 3:25 am
Location: Allen, TX
Top

Next

Return to Teardrop Construction Tips & Techniques

Who is online

Users browsing this forum: No registered users and 9 guests