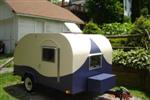
The LT... Thomas' Luxury Tent

...ask your questions in the appropriate forums BUT document your build here...preferably in a single thread...dates for updates, are appreciated....

Postby Kens » Mon Nov 24, 2008 1:10 pm

I like your ac install but have a ?. Where does the fresh cool air come in the TD for the back of the AC. I don't see it in your pics but maybe I am looking wrong. I am planning my next build. Ken
Good day every day!
User avatar
Kens
500 Club
 
Posts: 580
Images: 26
Joined: Mon Aug 01, 2005 5:18 pm
Location: Valencia Pa.

Postby Classic Finn » Mon Nov 24, 2008 4:16 pm

Thomas that tear is beautiful...Great craftsmanship. Course I new that when you started that this gentleman is going to build a beauty..And sure enough a Beauty it is..

Congrats on a great looking tear Thomas. :applause: :applause: :applause:

I love it.

Classic Finn :thumbsup:
Royal Teardrop Society Scandinavian Bureau Chief of Staff

Image
User avatar
Classic Finn
Midnight Sun Voyager
 
Posts: 17488
Images: 146
Joined: Fri Apr 29, 2005 4:29 am
Location: Country of Finland

Postby 2bits » Tue Nov 25, 2008 12:44 am

Kens wrote:I like your ac install but have a ?. Where does the fresh cool air come in the TD for the back of the AC. I don't see it in your pics but maybe I am looking wrong. I am planning my next build. Ken


This is a hot topic! I have posted to similar topics twice in the past week!

The VERY back of the AC is exhaust only and the side back of the unit is the fresh air intake and must be physically separated when it is enclosed like this. The exhaust is separated into a "box" being vented out using a bathroom vent fan down through the floor, the front of the box will be covered by a fake drawer door, to match the other drawers once I get to that part:

Image

The air intake on the sides and top of the unit is sucked in through a vent on the side of the tear on one side, and through the open galley cavity for the top and other side.
Image
Thomas

Image
User avatar
2bits
2bit Member
 
Posts: 5132
Images: 8
Joined: Thu Dec 27, 2007 6:04 pm
Location: Lake Tawakoni, TX
Top

Postby 2bits » Tue Nov 25, 2008 12:50 am

Classic Finn wrote:Thomas that tear is beautiful...Great craftsmanship. Course I new that when you started that this gentleman is going to build a beauty..And sure enough a Beauty it is..

Congrats on a great looking tear Thomas. :applause: :applause: :applause:

I love it.

Classic Finn :thumbsup:


Thank you VERY much kind sir! While I enjoy doing the structure, I LOVE doing the visual stuff, where every stage is another addition of something that looks cool!
Thomas

Image
User avatar
2bits
2bit Member
 
Posts: 5132
Images: 8
Joined: Thu Dec 27, 2007 6:04 pm
Location: Lake Tawakoni, TX
Top

Postby 2bits » Sat Nov 29, 2008 10:42 pm

Did some more work on the roof today, the roof is complete except for sealing and screwing in the skylight!

First I got the lower angle piece in. I was at a loss on how to get it in since the roof end was sitting right on top of the frame and there was absolutely no wiggle room at all. It finally came to me when I said to myself that I just need to lift the trailer off the frame... So that's what I did. There are only four bolts holding it down so I loosened then up about an inch and got my floor jack and jacked up the trailer and after a min getting the metal to separate from the roof tar that had bonded to it, I then had plenty of space! This one went on easily after that.

Image

Going to add some more sealant to the bare wood/aluminum joint, then cover the wood in the roofing tar.
Image

Next I installed the roof vent. I am very glad I painted it, It looks very good black. I sanded it, put three coats of primer, three of paint and three of clear coat. The last piece went on after that, I didn't plan too good for the overlap since the cross piece sits right on top of the edge of the vent, but it looks good there and sealed well. I didn't put any screws in the front piece of the roof vent and just let the aluminum sill plate screws do that job.

Image
Image
Thomas

Image
User avatar
2bits
2bit Member
 
Posts: 5132
Images: 8
Joined: Thu Dec 27, 2007 6:04 pm
Location: Lake Tawakoni, TX
Top

Postby Classic Finn » Sun Nov 30, 2008 8:14 am

Thomas question for you. Did you buy that aluminum precolored or prepainted? Does it also come in different colors if so ?


Looking Finntastic there Thomas. Sure has been great watching your build. :applause: :applause:

Classic Finn :thumbsup:
Royal Teardrop Society Scandinavian Bureau Chief of Staff

Image
User avatar
Classic Finn
Midnight Sun Voyager
 
Posts: 17488
Images: 146
Joined: Fri Apr 29, 2005 4:29 am
Location: Country of Finland
Top

Postby 2bits » Sun Nov 30, 2008 10:52 am

Hi, Thanks! Yes the aluminum sheets were prepainted, I would never attempt such a feat! They come in different colors too, but I just got lucky and these were for sale from an individual, otherwise I probably couldn't have afforded it.
Thomas

Image
User avatar
2bits
2bit Member
 
Posts: 5132
Images: 8
Joined: Thu Dec 27, 2007 6:04 pm
Location: Lake Tawakoni, TX
Top

Postby aggie79 » Sun Nov 30, 2008 7:10 pm

:applause: The vent does look better in black. Your incredible work continues.
Tom (& Linda)
For build info on our former Silver Beatle teardrop:
Build Thread

93503
User avatar
aggie79
Super Duper Lifetime Member
 
Posts: 5405
Images: 686
Joined: Tue Aug 07, 2007 5:42 pm
Location: Watauga, Texas
Top

Postby 2bits » Sun Nov 30, 2008 8:38 pm

Thanks, I just boogered up my moonroof hole real bad with the rotozip. I am quitting for the night!
Thomas

Image
User avatar
2bits
2bit Member
 
Posts: 5132
Images: 8
Joined: Thu Dec 27, 2007 6:04 pm
Location: Lake Tawakoni, TX
Top

Postby john » Mon Dec 01, 2008 12:17 am

Hate to hear it.

The things do sometimes have a mind of their own. :(
Build I -- Scenic ---
http://www.flickr.com/photos/8121727@N04/
Goto the Tear Build file

Build II -- Scenic II ---
viewtopic.php?t=29603

Build III -- Scenic Solo---
viewtopic.php?f=50&t=50324

Travel Blog----Now without Political Commentary
http://polifrogblog.blogspot.com/2009/0 ... -2009.html

The Constitution was ratified, not an interpretation thereof...

Penomeli ikibobo
john
User avatar
john
500 Club
 
Posts: 663
Images: 261
Joined: Tue Oct 05, 2004 6:26 pm
Location: eden nc
Top

Postby tinksdad » Mon Dec 01, 2008 1:11 am

Ooooh!!!! I have been watching your progress to judge where I am at (definitely not in the same league, you're way ahead of me); but all the same, I can feel your pain.
User avatar
tinksdad
500 Club
 
Posts: 966
Images: 155
Joined: Mon May 05, 2008 9:20 pm
Location: Olive Branch, MS
Top

Postby 2bits » Mon Dec 01, 2008 9:23 am

Thanks guys, it's my own mistake. I needed to trim off 1/8" of the headliner so the moonroof trim would seat down all the way, and everything went perfectly until I got near the ends and I was freehanding the curve and went too wide... now there is a gap. I am going to need to build a wooden frame for it to sit on which will look fine, maybe even better, but that just means cutting, sanding staining, and polyurethaning which equals time. Price I pay though.
Thomas

Image
User avatar
2bits
2bit Member
 
Posts: 5132
Images: 8
Joined: Thu Dec 27, 2007 6:04 pm
Location: Lake Tawakoni, TX
Top

Postby planovet » Mon Dec 01, 2008 10:25 am

At least the mistake is hideable! Nice job so far :applause:
ImageMark (& Cindi)
Visit our website: Little Swiss Teardrop

I was wondering why the water balloon was getting bigger... and then it hit me.

ImageImageImageImage
User avatar
planovet
The Cat Man
 
Posts: 5583
Images: 3
Joined: Tue Nov 27, 2007 4:48 pm
Location: Plano, Texas
Top

Postby del » Mon Dec 01, 2008 11:02 am

Call it a design feature, and then only the thousands of people who watch this thread will know. I believe the trailer is shaping up quite nicely.

del
User avatar
del
5000 Club
5000 Club
 
Posts: 5674
Images: 410
Joined: Fri Sep 08, 2006 3:27 pm
Location: washington, yakima but tell Mary K Fairbanks
Top

Postby 2bits » Tue Dec 02, 2008 9:09 pm

Thanks for the support, I think it will look very good with the frame around it. Yes, I really just trimmed it out to look nice :lol:
Thomas

Image
User avatar
2bits
2bit Member
 
Posts: 5132
Images: 8
Joined: Thu Dec 27, 2007 6:04 pm
Location: Lake Tawakoni, TX
Top

PreviousNext

Return to Build Journals

Who is online

Users browsing this forum: No registered users and 15 guests