Changing Room

Anything to do with mechanical, construction etc

Changing Room

Postby LDK » Fri Mar 12, 2010 8:59 pm

I'm curious, has anyone ever tried to attach a shower curtain to the side of their teardrop to make a changing room?? A changing / bathroom?? :)
LDK
Gold Donating Member
 
Posts: 1419
Images: 1
Joined: Fri Jan 22, 2010 8:29 pm

Postby Gage » Fri Mar 12, 2010 9:15 pm

Several have done that, but I think it looks tacky. This is what I did. Very simple. :thumbsup:

Image
Image Image Image
Remember 'Teardrop Time'.......Take your time, you don't have to have it finished NOW.
User avatar
Gage
8000 Club
8000 Club
 
Posts: 8321
Images: 28
Joined: Sat Apr 17, 2004 9:14 pm
Location: Palmdale, CA

Changing Room

Postby LDK » Fri Mar 12, 2010 10:08 pm

It would probably be better to just have a stand alone changing room tent placed right next to the teardrop. I seen a picture somewhere that had a teardrop with a shower rod that went around the door and it had a shower curtain attached to it. I was just wondering if anyone else has tried to do that.
LDK
Gold Donating Member
 
Posts: 1419
Images: 1
Joined: Fri Jan 22, 2010 8:29 pm
Top

Postby PapaGene » Fri Mar 12, 2010 10:34 pm

We tried that but had multiple problems trying to keep it in place, no roof so the dew or rain was a problem. We gave up on it and purchased the small room from "Camp Inn". It will fit on most any trailer. It is totally enclosed with a floor, even enclosed the space from trailer wall to ground. Has windows with screens with zipper shades, provisions for hanging up clothes, light etc. Provision for holding the trailer door open. The room door way has a screen as well as a door with zippers. Has withstood some severe wind and also hard rain. Has become #1 priority with Grani for our extra equipment.

Gene
User avatar
PapaGene
Gold Donating Member
 
Posts: 39
Images: 20
Joined: Fri Feb 02, 2007 10:28 pm
Location: Tulsa, OK
Top

Postby Ageless » Fri Mar 12, 2010 10:46 pm

There are several. Mike ( Fishfinder) do a good job on his.

Look here: http://www.tnttt.com/viewtopic.php?t=35379
Strangers on this road we are on; we are not two, we are one - Raymond Douglas Davies
User avatar
Ageless
Platinum Donating Member
 
Posts: 1603
Images: 8
Joined: Tue Aug 04, 2009 8:34 am
Location: Pt. Orchard, WA
Top

Postby Rickxr2 » Fri Mar 12, 2010 10:47 pm

We love our shower curtain. Lightweight, compact and economical. We have also used a vinyl table cloth, works great and lots of patterns to choose from.

Image
Image Image Image
User avatar
Rickxr2
The 300 Club
 
Posts: 389
Images: 125
Joined: Sat Mar 05, 2005 10:17 pm
Location: Oklahoma, Broken Arrow
Top

Postby MceeD » Fri Mar 12, 2010 11:38 pm

I'm planning on using gull-wing door and setting it up to clip on a curtain to the under side of the door to accommodate a changing area. I might try and have the curtain installed permanently and tuck it into a pocket.

Not something that would be up for long periods, Good thing sounds like rain and dew could be an issue.
User avatar
MceeD
Donating Member
 
Posts: 36
Images: 43
Joined: Sat Apr 25, 2009 11:29 pm
Location: PDX
Top

Postby bobhenry » Sat Mar 13, 2010 1:06 am

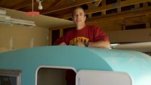
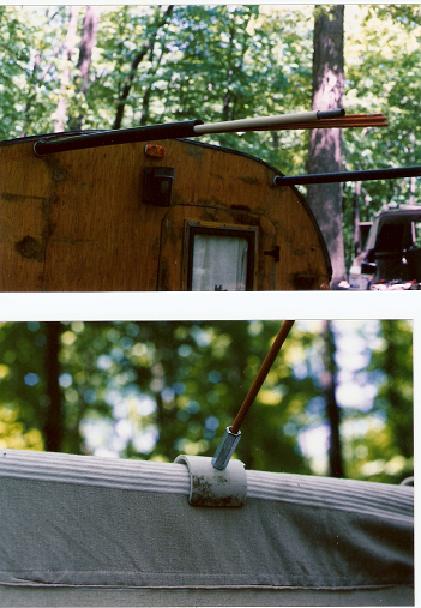
Mine telescopes out thru the side !

Image

-------------------------------------------------------------------------------

but you gotta be careful where ( hit deadon a roof spar even though I measured twice ) OOPS

Image

-------------------------------------------------------------------------------

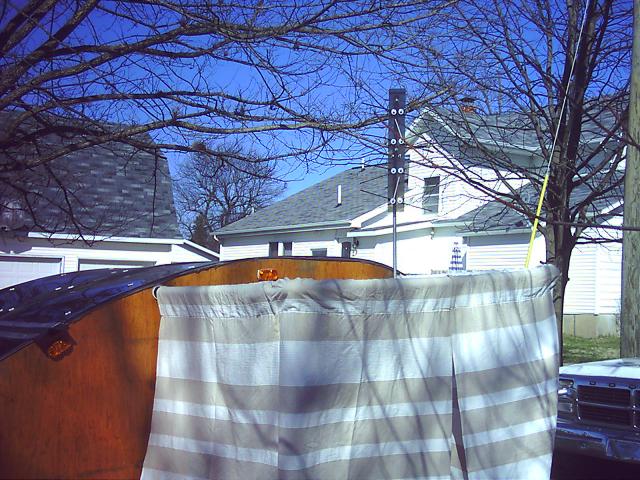
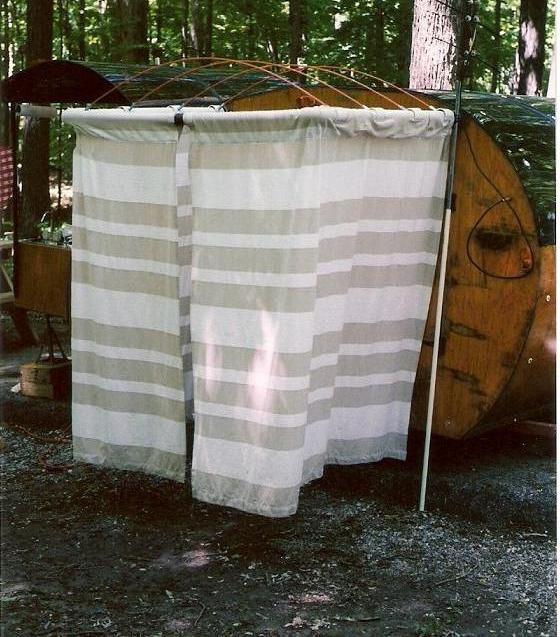
My curtain don't look tacky does it Gage ? well at least I love it ! I did choose to use the outer dress panel of a shower curtain rather than the inner water proof vinyl inner panel. They are dressier and come in a multitude of prints. I did one thing right in that I hemmed the BOTTOM of the curtain to slide on the rod this leaves the button holes that were for the curtain rings available as a place to fasten a weight at the bottom of your privacy curtain.

Image

---------------------------------------------------------------------------------
Here is a good argument for weights and maybe some
snaps to the sides. Wouldn't be quite as nervous about using the
porta potty on a windy day :o

Image

--------------------------------------------------------------------------

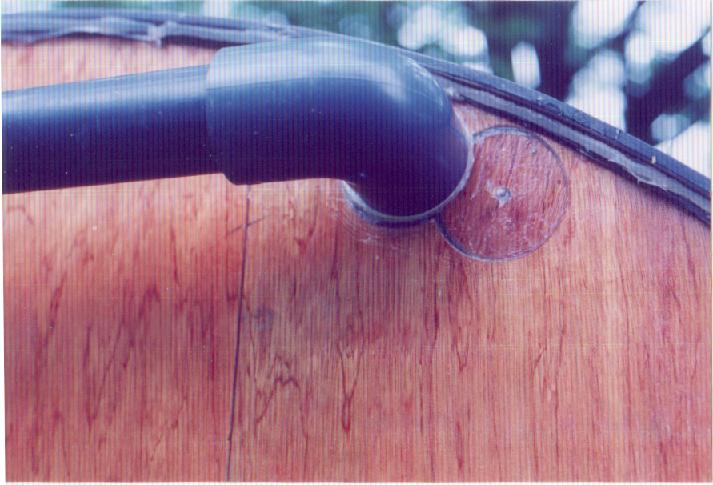
The 1 1/4 schedule 80 is tough and plenty stout and slides snugly into the 2 " schedule 40 pvc. I left one joint unglued as a place to break the horseshoe shaped rod and to slip on the curtain, it also provides storage for the roof spars. I cut sections of the 2" pvc into rings and removed a section so it will snap over curtain and added a joining nut by drilling a hole and installing a short bolt. This deep nut provides a pocket for a 1/4 fiberlass survey rod that was cut to make a hoop to support a roof

Image

-------------------------------------------------------------------------------
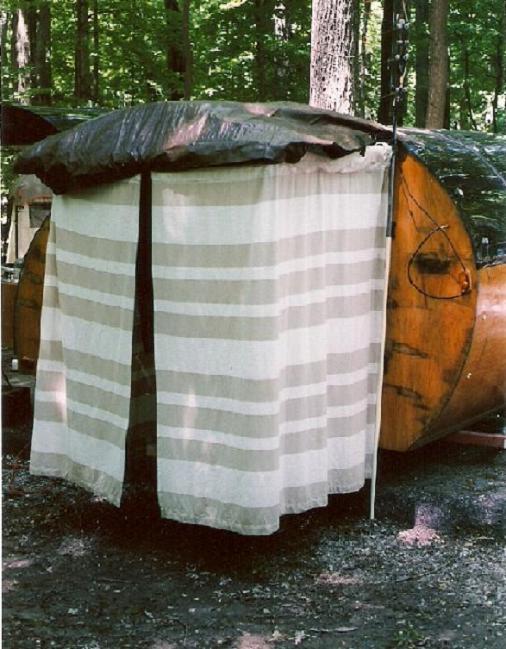
Tried it out with a very temporary tarp roof and I was damn glad that night there was a worm drownding rain

Image

-----------------------------------------------------------------------------

This was after the rain note the mud tossed up on the bottom hem. I let the curtain dry the next day just shook off the dirt and packed away wwith no problems

Image

-------------------------------------------------------------------------

I have a good friend with an upholstery business I intend to have him sew me up a top out of marine vinyl that will have pockets for the rods and will spill over the sides a bit to help protect from sun and rain
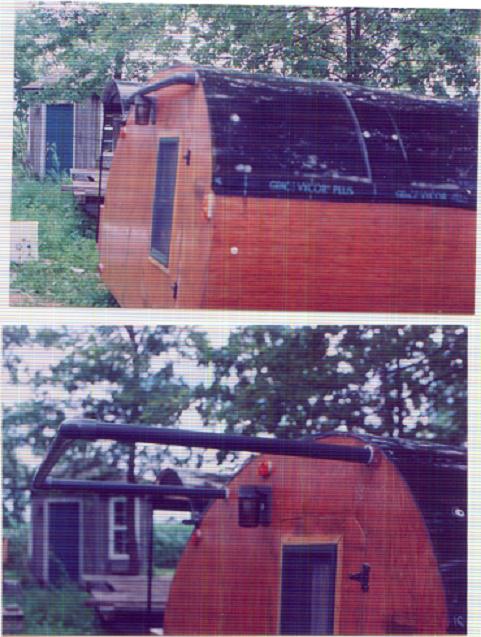
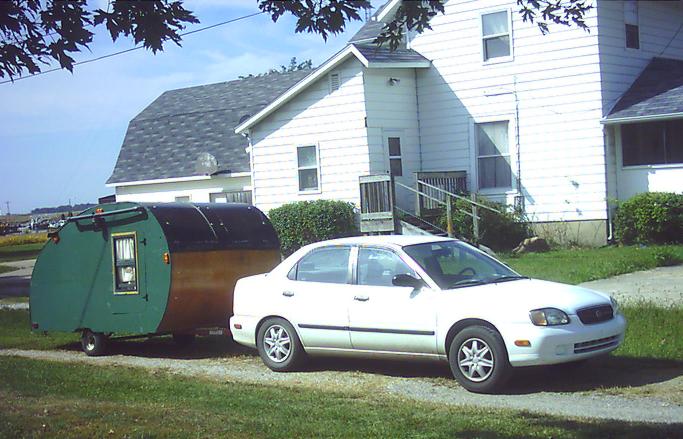
--------------------------------------------------------------------------

Same tear new paint :lol:

Here is the rod in transport mode. a simple stretch bolo cord attaches the rod to my porch lite to prevent the rod from sliding out in motion.

Image

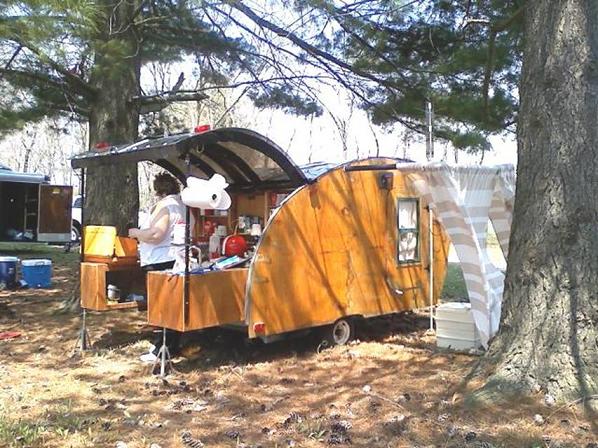
A changing room is a real big step up and ours is one of the 1st items we set up upon arrival. Takes about 3 minutes for the curtain ! The roof addition adds a few for about 10 minutes total.
Growing older but not up !
User avatar
bobhenry
Ten Grand Club
Ten Grand Club
 
Posts: 10368
Images: 2623
Joined: Fri Feb 09, 2007 7:49 am
Location: INDIANA, LINDEN
Top

Postby bobhenry » Sat Mar 13, 2010 3:36 am

Here is a past post on the same subject ......................

http://www.mikenchell.com/forums/viewtopic.php?p=651401&highlight=#651401
Growing older but not up !
User avatar
bobhenry
Ten Grand Club
Ten Grand Club
 
Posts: 10368
Images: 2623
Joined: Fri Feb 09, 2007 7:49 am
Location: INDIANA, LINDEN
Top

Postby bobhenry » Sat Mar 13, 2010 4:07 am

Cuyera's post of this weight .......

Image

set me to thinking how could you restrict the wind movement of the curtain without carrying a ton of weights with you.

Here is a few ideas.......

The best idea on the old post was the Gripper snap mounted to the trailer side and its mate attached to the curtain to hold it tight to the side of the trailer.

How about those old pantyhose ... cut off the leg at about the knee and fill with rocks or sand from the sight and pull nylon thru gromet and tie a knot or cord it closed and thread thru button hole.

How about the old mans socks just sew the hole in the toe shut and the same drill ~ add a few rocks or a bit of sand and cord it closed. and tie to the curtain.

a little fancier how about a few " rock bags " ~~sew up some fabric into the size of a small draw string close purse and place a grapefruit sized rock in it and pull the draw string closed and fasten or tie them to the bottom hem of the curtain.

Return the sand rocks or soil to it's origin and toss your curtain weight containers in a small tote bage with the curtain. Now you are not hauling the weight just the container. :thumbsup:

any one else have some good ideas ..................????.

I found these add water at site and use for weights too doing double duty water containers and curtain weights ????

Image

Little too expensive ? maybe a few 1/2 or one gallon milk jugs just add water.

I was trying to think of a rubber water tube and the only thing that comes to mind is a bicycle innertube filled with water for weight.

Don't they make a bandelaro style water bladder that slings over your shoulder ?
Last edited by bobhenry on Sat Mar 13, 2010 7:30 am, edited 1 time in total.
Growing older but not up !
User avatar
bobhenry
Ten Grand Club
Ten Grand Club
 
Posts: 10368
Images: 2623
Joined: Fri Feb 09, 2007 7:49 am
Location: INDIANA, LINDEN
Top

Postby prohandyman » Sat Mar 13, 2010 7:02 am

We attached ours to the roof rack
Image
Image
Dan
155200 Facebook group 164774163701
User avatar
prohandyman
Super Lifetime Member
 
Posts: 1919
Images: 785
Joined: Fri Dec 22, 2006 3:21 pm
Location: Greenwood, IN
Top

Postby prohandyman » Sat Mar 13, 2010 7:05 am

My current build will have the rods slide out if the Yakima racks
Dan
155200 Facebook group 164774163701
User avatar
prohandyman
Super Lifetime Member
 
Posts: 1919
Images: 785
Joined: Fri Dec 22, 2006 3:21 pm
Location: Greenwood, IN
Top

Postby bobhenry » Sat Mar 13, 2010 7:33 am

and IF the yakima DOESN'T rack..........????? :D

CAN I BUY AN "O" ?

just messin' with ya !! :rofl2:
Growing older but not up !
User avatar
bobhenry
Ten Grand Club
Ten Grand Club
 
Posts: 10368
Images: 2623
Joined: Fri Feb 09, 2007 7:49 am
Location: INDIANA, LINDEN
Top

Postby Dan & Julie CO » Sun Mar 14, 2010 7:57 am

Gage did you make your tent poles ? or are they store bought
and I have seen others with a similar set up how do you attach to the body of the tear ? Thanks Dan
User avatar
Dan & Julie CO
The 300 Club
 
Posts: 365
Images: 56
Joined: Sun Mar 29, 2009 8:33 pm
Location: Colorado
Top

Postby dwgriff1 » Sun Mar 14, 2010 10:09 am

[quote="prohandyman"]We attached ours to the roof rack

I had not wanted a roof rack at all, but you may change my mind. I am not remotely interested in making more holes in the side of my trailer, but a roof rack might be just the ticket to use to support a side tent.

Hmm.

dave
User avatar
dwgriff1
500 Club
 
Posts: 947
Images: 4
Joined: Mon Jul 04, 2005 4:20 pm
Location: SW Idaho
Top

Next

Return to Teardrop Construction Tips & Techniques

Who is online

Users browsing this forum: No registered users and 5 guests