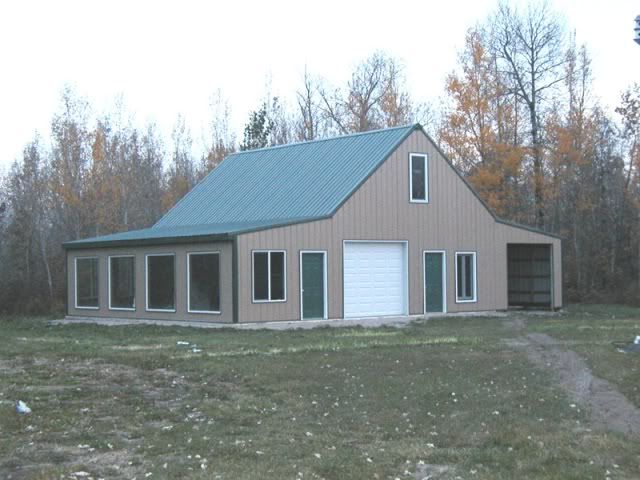
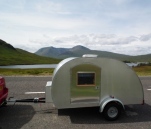
I am building something

This is the place where you can introduce yourself, and include a photo if so desired.

Postby BigAl » Fri Apr 02, 2010 3:52 am

Nice, a kind of 'maxi-tear'. How high are the walls? Can you stand up in there?
Kind Regards, BigAl.

Build Journal on T&TTT
User avatar
BigAl
Teardrop Master
 
Posts: 258
Images: 29
Joined: Sat Jan 02, 2010 4:42 am
Location: Glasgow, Scotland.

Postby NorthernMN » Mon Apr 05, 2010 10:49 pm

The wall height will be 75" max at the highest point. The back end is 60" hight. These are both exterior measurements. This will give me plenty of headroom on the inside as I am only 5' 7". And this way there is a fair chance visitors will be able to stand up inside as well.

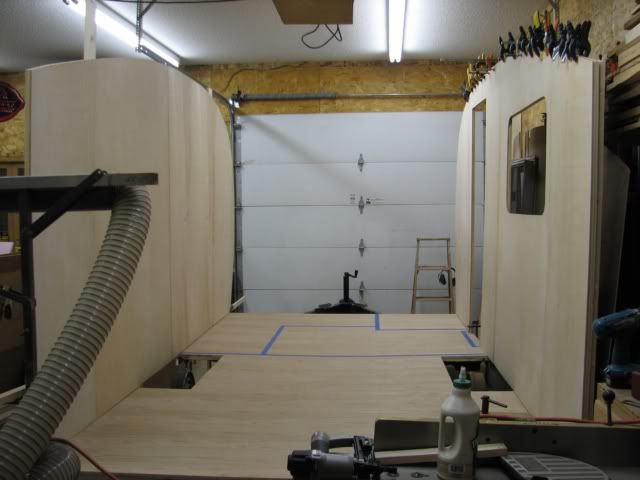
So I got cooking on the first interior wall. I have a bunch of 1/4" maple plywood that I picked up at an auction a couple years ago. I think now is a fine time to use it. There is probably a lot of different ways to go about what I am doing. I just flopped the sheets face down and glued the seams with 3/4" X 2" pine. I intend to do 3/4" insulated walls anyway so this seems like an easy way to get where I am going.

Image

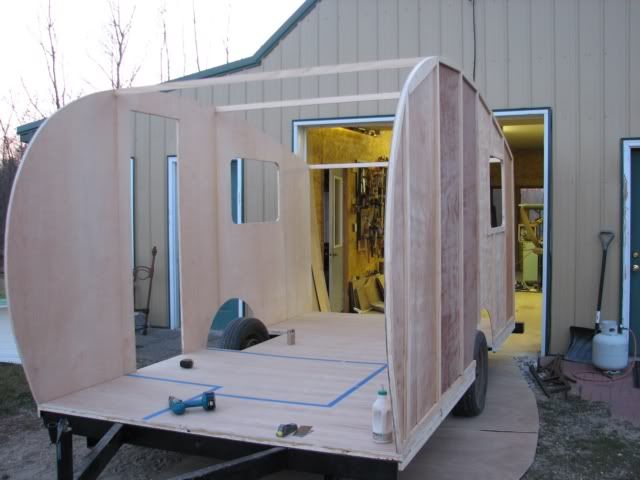
I happened to have these landscape edge stones and they were just right for this task. So tonight with some help from the boss/wife I flipped the wall over and put my template on it. I cut it out with the jigsaw and stood it up. Looking pretty good.

Image

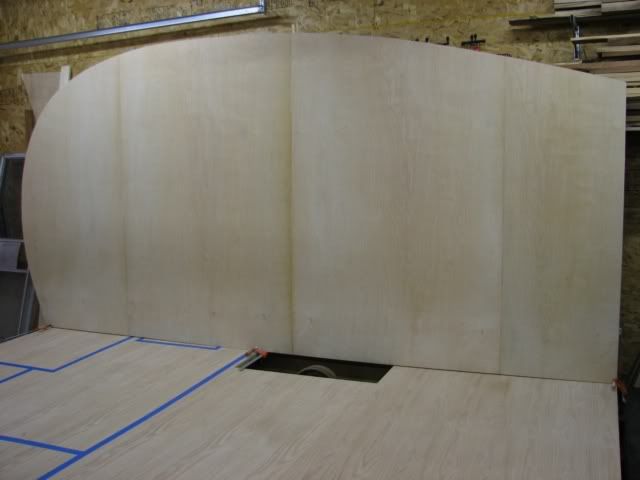
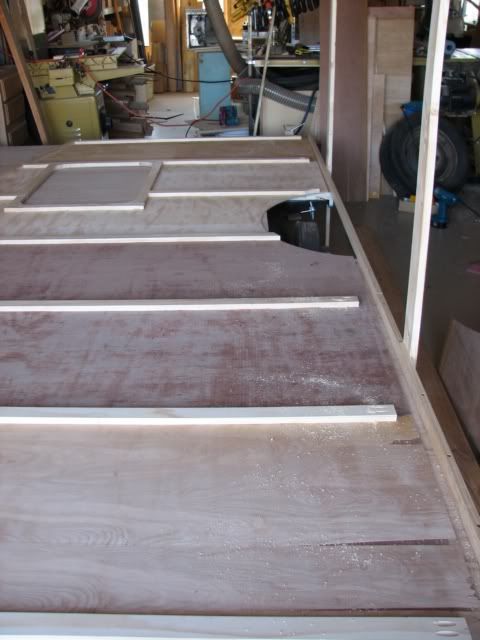
There is some discoloration at the edges of the sheets but that will blend with some stain. Now I need to mark out for the door and windows and get those cut out and start on the second wall.
User avatar
NorthernMN
Teardrop Builder
 
Posts: 33
Joined: Tue Aug 25, 2009 10:00 pm
Location: Minnesota

Postby doris s. » Tue Apr 06, 2010 10:11 pm

Looking great!

Doris
User avatar
doris s.
500 Club
 
Posts: 682
Images: 32
Joined: Mon Aug 31, 2009 5:15 pm
Location: jefferson, maryland
Top

Postby NorthernMN » Wed Apr 07, 2010 11:43 pm

I got brave enough to start cutting some holes in my walls tonight. I am going to reuse the original door and frame. The door will need some work but the frame is in pretty good shape. I bought windows off of Ebay. They are new with trim rings but I still felt like I paid a fair price. I wasn't brave enough to stick the window up there for the picture. Still need to cut out for the wheel wells.

Image
User avatar
NorthernMN
Teardrop Builder
 
Posts: 33
Joined: Tue Aug 25, 2009 10:00 pm
Location: Minnesota
Top

Postby ERV » Thu Apr 08, 2010 5:31 am

Very nice! Looks like your coming right a long.
Just looking at your last pic, will it still go through your door? Hate to see you just camping in the garage. :lol:

Erv
ERV & JAN
Medina, Ohio
User avatar
ERV
Silver Donating Member
 
Posts: 434
Images: 90
Joined: Wed Oct 15, 2008 9:31 pm
Location: Medina, Ohio
Top

Postby NorthernMN » Thu Apr 08, 2010 2:47 pm

It is going to be close for sure but I have measured it. It should clear the opening. I have the wheels off and it sitting on the stabilizer jacks so it will come down a little when I put the wheeles back on. As long as my tape measure and math still work I should have about 1 1/2" of clearance. If I do get stuck camping in my workshop I wouldn't be too sad. I rather like my time in there. You see my workshop is pretty nice. I have plenty of space, lots of tools, and even a loft with a comfortable sofa and recliner. I don't think my wife would be too happy if it didn't make it out of the workshop though.

Image
User avatar
NorthernMN
Teardrop Builder
 
Posts: 33
Joined: Tue Aug 25, 2009 10:00 pm
Location: Minnesota
Top

Postby steve smoot » Thu Apr 08, 2010 3:02 pm

I believe I could live in that workshop... :thumbsup:
I am not a complete idiot, some parts are missing...
User avatar
steve smoot
Lifetime member
 
Posts: 1355
Images: 62
Joined: Thu Sep 17, 2009 5:42 pm
Location: Boone NC
Top

Postby tom_germany » Mon Apr 12, 2010 12:25 am

great job! you´re doing!
best greets from germany-looking forward seein more pix
tom_germany
Teardrop Builder
 
Posts: 26
Joined: Sun Mar 15, 2009 5:00 pm
Location: Germany
Top

Postby NorthernMN » Mon Apr 12, 2010 11:08 pm

Well, I got the second wall up. I am moving right along. Starting to think about details like wiring, plumbing, and finishes. I hope I will be starting on the interior before the end of the week. 8)

Image
User avatar
NorthernMN
Teardrop Builder
 
Posts: 33
Joined: Tue Aug 25, 2009 10:00 pm
Location: Minnesota
Top

Profile

Postby Chuckles2153 » Wed Apr 14, 2010 3:23 pm

I like the profile you came up with.

NICE!!! :applause:
Chuckles2153
Teardrop Master
 
Posts: 154
Images: 74
Joined: Wed Mar 24, 2010 2:00 pm
Location: Franklin. Indiana
Top

Postby YuGun » Wed Apr 14, 2010 4:57 pm

I like it too, That is a HTT Huge Travel Trailer! :)
:applause:
I quest what it like look at finish.
Sincelery,
User avatar
YuGun
The 300 Club
 
Posts: 445
Joined: Sun Apr 11, 2010 1:25 pm
Location: Turkey
Top

Postby NorthernMN » Mon Apr 19, 2010 11:12 pm

Let the record show that it does in fact fit through the door. So there. :D

Image

I had it out in front of the shop tonight for about an hour. A couple people honked when they drove by. I am pretty sure some just gave me a strange look.
User avatar
NorthernMN
Teardrop Builder
 
Posts: 33
Joined: Tue Aug 25, 2009 10:00 pm
Location: Minnesota
Top

Postby hiker chick » Mon Apr 19, 2010 11:17 pm

So impressive!

Am enjoying seeing your project progress.


:thumbsup: :applause:
Hot Stuff Today, Dog Stuff Tomorrow

www.thegidg.com
User avatar
hiker chick
1000 Club
1000 Club
 
Posts: 1501
Images: 621
Joined: Sat Aug 18, 2007 6:26 pm
Location: Washington, D.C.
Top

Postby NorthernMN » Tue Apr 20, 2010 12:03 am

I know there is a whole thread somewhere about attaching the walls. Here is what I decided to do. I built the walls so that there were unattached from the floor. It is actually just the interior skin and the substructure. My walls will be 3/4" rigid foam with 1/4" skins on both the inside and outside. Could I get away with thinner? Probably. I am still going to use 1/4" on the inside and outside.

So I built the interior skin and substructure and left 1 1/2" gap all the way across the bottom. I then glued and screwed a 3/4" x 1 1/2" board on the edge of the floor to attach the wall to. I hope my picture will illustrate.

Image

The pocket holes are simple there to help hold the wall in place while the glue dries. The bond between the interior skin and the board is where the strength is. Of course the exterior skin will extend lower than the floor and this will increase the strength of the wall connection.

I am not sure if anyone else has done this but so far I am please with the result. I was able to stand up the walls and attach them by myself.
User avatar
NorthernMN
Teardrop Builder
 
Posts: 33
Joined: Tue Aug 25, 2009 10:00 pm
Location: Minnesota
Top

Postby parnold » Tue Apr 20, 2010 6:41 am

:applause:

Great progress!

It sure is a good feeling when the walls go up, isn't it? It really starts to look like something then.
User avatar
parnold
Donating Member
 
Posts: 2344
Images: 302
Joined: Mon Feb 08, 2010 4:49 pm
Location: Northwest New Jersey
Top

PreviousNext

Return to Newbies, Introduce yourselves

Who is online

Users browsing this forum: No registered users and 0 guests