Well you are coming along really good nice work you are doing.
  welcome to the best web page for info.
Teardrops n Tiny Travel Trailersor t n ttt for short (tnttt.com) |
![]() by S. Heisley » Tue Apr 20, 2010 9:03 am
by S. Heisley » Tue Apr 20, 2010 9:03 am
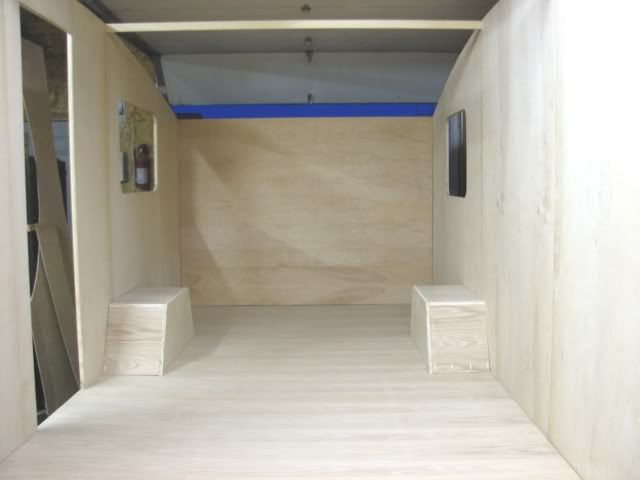
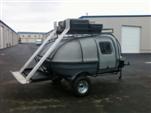
 The blue tape on the deck floor looks like where you're going to put cabinets; so, the bed is in the back with a standy kitchen in the front? Are you putting in a potty or wash room?
![]() by NorthernMN » Sat Apr 24, 2010 10:52 pm
by NorthernMN » Sat Apr 24, 2010 10:52 pm
S. Heisley wrote:You're making good progress!
It looks like your garage door is taller than the normal home garage door. How tall will your camper be inside and out, at its highest point?

![]() by NorthernMN » Sat Apr 24, 2010 11:02 pm
by NorthernMN » Sat Apr 24, 2010 11:02 pm
![]() by Ratfinkster » Sun Apr 25, 2010 8:05 am
by Ratfinkster » Sun Apr 25, 2010 8:05 am

![]() by NorthernMN » Wed Apr 28, 2010 11:08 pm
by NorthernMN » Wed Apr 28, 2010 11:08 pm
![]() by S. Heisley » Thu Apr 29, 2010 9:14 am
by S. Heisley » Thu Apr 29, 2010 9:14 am
Looks just fine.
![]() by Evil Skippy » Thu Apr 29, 2010 6:18 pm
by Evil Skippy » Thu Apr 29, 2010 6:18 pm

![]() by boxcar » Thu Apr 29, 2010 8:10 pm
by boxcar » Thu Apr 29, 2010 8:10 pm
![]() by NorthernMN » Sun May 02, 2010 11:27 pm
by NorthernMN » Sun May 02, 2010 11:27 pm

![]() by toolman » Wed May 05, 2010 9:47 am
by toolman » Wed May 05, 2010 9:47 am

![]() by NorthernMN » Fri Jun 04, 2010 12:48 pm
by NorthernMN » Fri Jun 04, 2010 12:48 pm
 [/img]
![]() by S. Heisley » Fri Jun 04, 2010 12:52 pm
by S. Heisley » Fri Jun 04, 2010 12:52 pm
Return to Newbies, Introduce yourselves
Users browsing this forum: No registered users and 4 guests