Aluminum sides - how to?

Anything to do with mechanical, construction etc

Aluminum sides - how to?

Postby Tackett » Tue Jun 15, 2010 3:55 pm

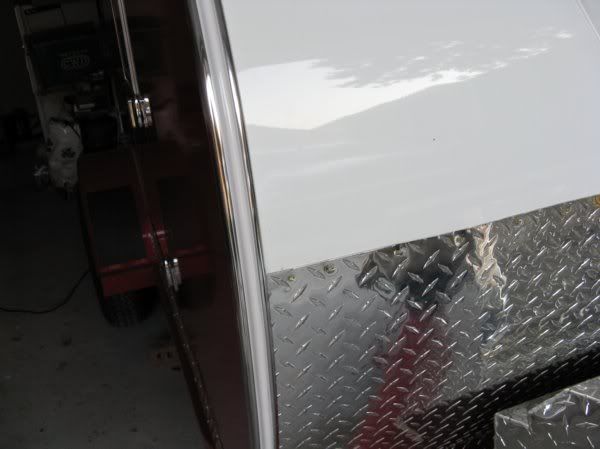
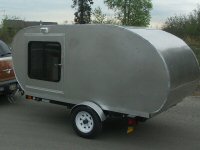
I'm going to skin the sides and top with thin aluminum.

I'm having difficulty finding 5' wide pieces. Where are folks finding that size?

What alloy of aluminum are you using, and how are you attaching it. How durable is mill finish .30 aluminum?

Thanks
Tackett
Teardrop Builder
 
Posts: 31
Joined: Tue Jun 02, 2009 7:00 pm

Re: Aluminum sides - how to?

Postby planovet » Tue Jun 15, 2010 4:02 pm

Tackett wrote:How durable is mill finish .30 aluminum?


I would think .30 aluminum would be quite durable if not heavy and a bear to bend. :lol: (Just giving you a hard time.)

I used white .040 for my roof and it is perfect. Easy to bend and very durable. I found my 5' wide material at a local sign shop. You can also find it at trailer repair places. Your color choices may be limited but just call around and you will find it.
ImageMark (& Cindi)
Visit our website: Little Swiss Teardrop

I was wondering why the water balloon was getting bigger... and then it hit me.

ImageImageImageImage
User avatar
planovet
The Cat Man
 
Posts: 5583
Images: 3
Joined: Tue Nov 27, 2007 4:48 pm
Location: Plano, Texas

Re: Aluminum sides - how to?

Postby Tackett » Tue Jun 15, 2010 4:13 pm

planovet wrote:
Tackett wrote:How durable is mill finish .30 aluminum?


I would think .30 aluminum would be quite durable if not heavy and a bear to bend. :lol: (Just giving you a hard time.)

I used white .040 for my roof and it is perfect. Easy to bend and very durable. I found my 5' wide material at a local sign shop. You can also find it at trailer repair places. Your color choices may be limited but just call around and you will find it.


.30 .030... what a decimal place worth? ;)

Unpainted is what they want - just straight up silver.
Did you glue it down with contact cement? It's going over 2 layers of 1/8" luan.
Tackett
Teardrop Builder
 
Posts: 31
Joined: Tue Jun 02, 2009 7:00 pm
Top

Postby planovet » Tue Jun 15, 2010 4:22 pm

To float or not to float, that is the question. Search and you will find compelling augments for both sides. I floated mine without any adhesive. It's just held on the edges by some staples and the trim. It worked great for me.
ImageMark (& Cindi)
Visit our website: Little Swiss Teardrop

I was wondering why the water balloon was getting bigger... and then it hit me.

ImageImageImageImage
User avatar
planovet
The Cat Man
 
Posts: 5583
Images: 3
Joined: Tue Nov 27, 2007 4:48 pm
Location: Plano, Texas
Top

Postby Tackett » Tue Jun 15, 2010 7:25 pm

planovet wrote:To float or not to float, that is the question. Search and you will find compelling augments for both sides. I floated mine without any adhesive. It's just held on the edges by some staples and the trim. It worked great for me.


I haven't been able to find much on the topic. I'm thinking that my search skills suck.

I've looked through the index, and still don't see much on the topic. Could I get you to point me in the right direction?

Thanks.
Tackett
Teardrop Builder
 
Posts: 31
Joined: Tue Jun 02, 2009 7:00 pm
Top

Postby madjack » Tue Jun 15, 2010 7:38 pm

Tackett, I float my AL skins...no adhesive...relying on vents, fenders lights, trim, etc. to hold it in place...I do use a couple or 3 air driven staples to hold the sides in place while installing, these staples are covered by the trim...this technique works very well and was first recommended to me by a commercial TD manufacturer...the problem with using adhesives is different expansion rates between the AL sheet and the substrate it is covering which can cause "oil caning"(bubbles under the skin)...folks have done it both ways successfully...I prefer to use this method since it eliminates a rather messy step in the build...if you do decide to use an adhesive, you may wish to lightly sand the AL to give some "tooth" for the adhesive to stick too..........................
madjack 8)

p.s. click the search button above and enter "float AND skins" for more info...enter it EXACTLY as I have typed it.....MJ
...I have come to believe that, conflict resolution, through violence, is never acceptable.....................mj
User avatar
madjack
Site Admin
 
Posts: 15128
Images: 177
Joined: Thu Dec 02, 2004 5:27 pm
Location: Central Louisiana
Top

Postby Tackett » Tue Jun 15, 2010 7:48 pm

madjack wrote:Tackett, I float my AL skins...no adhesive...relying on vents, fenders lights, trim, etc. to hold it in place...I do use a couple or 3 air driven staples to hold the sides in place while installing, these staples are covered by the trim...this technique works very well and was first recommended to me by a commercial TD manufacturer...the problem with using adhesives is different expansion rates between the AL sheet and the substrate it is covering which can cause "oil caning"(bubbles under the skin)...folks have done it both ways successfully...I prefer to use this method since it eliminates a rather messy step in the build...if you do decide to use an adhesive, you may wish to lightly sand the AL to give some "tooth" for the adhesive to stick too..........................
madjack 8)

p.s. click the search button above and enter "float AND skins" for more info...enter it EXACTLY as I have typed it.....MJ


Thanks MadJack.

I wasn't using the term "skins". Now I'm getting the search results I need.

:thumbsup:
Tackett
Teardrop Builder
 
Posts: 31
Joined: Tue Jun 02, 2009 7:00 pm
Top

Postby halfdome, Danny » Tue Jun 15, 2010 10:21 pm

My walls are more than 48" tall (wide) and I use 48" wide aluminum and place a starter strip 4" wider than needed and lay the 48" piece over it adhered with VHB tape.
It's easier for one person to handle a 48" wide sheet & the VHB tape works quite well.
I use contact cement ;) to glue down the aluminum & never had a single problem with the 3 teardrops I've built.
Like MadJack said "folks have done it both ways successfully". It's up to you. :D Danny
ImageImage
"Conditions are never just right. People who delay action until all factors are favorable do nothing". William Feather
Don't accept "It's Good Enough" build to the best of your abilities.
Image
Teardroppers Of Oregon & WashingtonImage
User avatar
halfdome, Danny
*Happy Camper
 
Posts: 5894
Images: 252
Joined: Sun Aug 14, 2005 11:02 pm
Location: Washington , Pew-al-up
Top

Postby Ageless » Tue Jun 15, 2010 10:27 pm

If you ever tear down a 'factory' trailer, they have a trick to make the skins lie flat. The skin is curled, then it is applied so that the 'curl is away from the framing. When the trim is applied, the skin stays flat due to the small amount of force of resistance.
Strangers on this road we are on; we are not two, we are one - Raymond Douglas Davies
User avatar
Ageless
Platinum Donating Member
 
Posts: 1603
Images: 8
Joined: Tue Aug 04, 2009 8:34 am
Location: Pt. Orchard, WA
Top

Re: Aluminum sides - how to?

Postby kennyrayandersen » Wed Jun 16, 2010 9:25 am

Tackett wrote:
.30 .030... what a decimal place worth?


A couple hundred pounds!
User avatar
kennyrayandersen
1000 Club
1000 Club
 
Posts: 1750
Images: 38
Joined: Sun Apr 29, 2007 10:27 pm
Location: TX
Top

Re: Aluminum sides - how to?

Postby planovet » Wed Jun 16, 2010 10:44 am

kennyrayandersen wrote:
Tackett wrote:
.30 .030... what a decimal place worth?


A couple hundred pounds!


And more than that in $$$
ImageMark (& Cindi)
Visit our website: Little Swiss Teardrop

I was wondering why the water balloon was getting bigger... and then it hit me.

ImageImageImageImage
User avatar
planovet
The Cat Man
 
Posts: 5583
Images: 3
Joined: Tue Nov 27, 2007 4:48 pm
Location: Plano, Texas
Top

Postby Tackett » Wed Jun 16, 2010 12:38 pm

madjack wrote:Tackett, I float my AL skins...no adhesive...relying on vents, fenders lights, trim, etc. to hold it in place...I do use a couple or 3 air driven staples to hold the sides in place while installing, these staples are covered by the trim...this technique works very well and was first recommended to me by a commercial TD manufacturer...


What do you use for corner trim (where the top meets the side panel)? The pieces I have are L shaped, with the long leg going on the top, and the short leg on the side.
Tackett
Teardrop Builder
 
Posts: 31
Joined: Tue Jun 02, 2009 7:00 pm
Top

Postby planovet » Wed Jun 16, 2010 2:15 pm

Tackett wrote:What do you use for corner trim (where the top meets the side panel)? The pieces I have are L shaped, with the long leg going on the top, and the short leg on the side.


Not sure what MJ used but I used a insert molding that you can get at most RV stores. Comes in mill finish and white mostly. You can find inserts in many colors.

Image

Image

Image
ImageMark (& Cindi)
Visit our website: Little Swiss Teardrop

I was wondering why the water balloon was getting bigger... and then it hit me.

ImageImageImageImage
User avatar
planovet
The Cat Man
 
Posts: 5583
Images: 3
Joined: Tue Nov 27, 2007 4:48 pm
Location: Plano, Texas
Top

Postby ubear7 » Wed Jun 16, 2010 2:31 pm

planovet wrote:
Tackett wrote:What do you use for corner trim (where the top meets the side panel)? The pieces I have are L shaped, with the long leg going on the top, and the short leg on the side.


Not sure what MJ used but I used a insert molding that you can get at most RV stores. Comes in mill finish and white mostly. You can find inserts in many colors.

Image

Image

Image


Is the molding pictured easily worked around the curves with ease and without crimping, or is annealing needed? I like this option, it leaves a very clean look. :applause:
1998 Dodge Ram 3500 4x4, 2006 Dutchmen Denali 33rlbs
User avatar
ubear7
Teardrop Inspector
 
Posts: 19
Images: 5
Joined: Tue Feb 09, 2010 5:30 pm
Location: Miami, FL
Top

Postby planovet » Wed Jun 16, 2010 2:59 pm

ubear7 wrote:Is the molding pictured easily worked around the curves with ease and without crimping, or is annealing needed? I like this option, it leaves a very clean look.


It took my curves with no problems, no annealing needed. I just took my time and eased it over slowly.
The lip may bow out a bit on the sharper curves but it was easily tapped back into place with a rubber mallet and a gentle hand.
ImageMark (& Cindi)
Visit our website: Little Swiss Teardrop

I was wondering why the water balloon was getting bigger... and then it hit me.

ImageImageImageImage
User avatar
planovet
The Cat Man
 
Posts: 5583
Images: 3
Joined: Tue Nov 27, 2007 4:48 pm
Location: Plano, Texas
Top

Next

Return to Teardrop Construction Tips & Techniques

Who is online

Users browsing this forum: No registered users and 5 guests