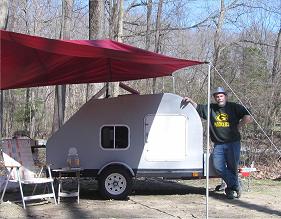
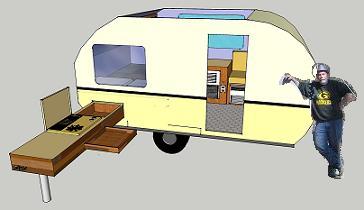
thanks for having me at your online party.... i'm a new builder here in maryland. having way too much fun designing this woody teardrop, and i'm gonna need to ask a ton of questions along the way. i'm starting out with the basic harbor freight platform,but working in some tricks and treats too. if there is anybody who wants to receive my dumb questions or just harass the new guy feel free to email-
thanks again,
steve
Teardrops n Tiny Travel Trailersor t n ttt for short (tnttt.com) |
newbie in belair md
12 posts
• Page 1 of 1
newbie in belair md
![]() by stevem50 » Wed Jun 30, 2010 3:05 pm
by stevem50 » Wed Jun 30, 2010 3:05 pm
-

stevem50 - Teardrop Master
- Posts: 150
- Images: 15
- Joined: Tue Jun 29, 2010 8:07 pm
- Location: Bel Air, MD
![]() by parnold » Wed Jun 30, 2010 3:24 pm
by parnold » Wed Jun 30, 2010 3:24 pm
Welcome to the madness!
Your best to post questions online so we can throw 10 different ways of answering the problem, and make you even more confused!
And don't forget the
Your best to post questions online so we can throw 10 different ways of answering the problem, and make you even more confused!
And don't forget the
-- Paul --
Build Thread
http://www.tnttt.com/viewtopic.php?t=35787
2nd Build Thread
http://www.tnttt.com/viewtopic.php?f=50&t=47901
 http://www.teartime.com
Build Thread
http://www.tnttt.com/viewtopic.php?t=35787
2nd Build Thread
http://www.tnttt.com/viewtopic.php?f=50&t=47901
-

parnold - Donating Member
- Posts: 2344
- Images: 302
- Joined: Mon Feb 08, 2010 4:49 pm
- Location: Northwest New Jersey


 Roly
Roly