Tick....Tock....Tick....Tock.... (Tuesday, July 27, and Wednesday, July 28)
Coming into the home stretch, the biggest challenge was paint. And not because of application, but because of timing; paint takes time to cure fully, and if you reapply (or topcoat your color over primer) too soon, bad things can happen. (varying from perpetually soft paint, to wrinkling or lifting from sub layer outgassing)
Tuesday
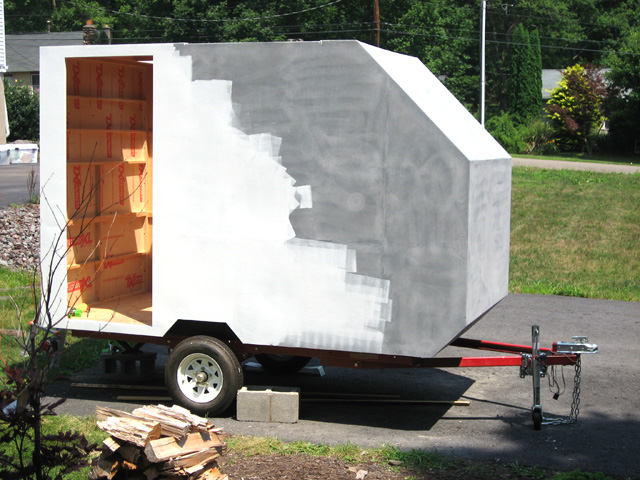
My wife tackled the primer coat while I was at work. Despite all the reports I had read, the primer I had chosen was very thin to our surprise. This made application actually a bit more difficult for my wife than it would seem; runs were very easy to form, and it was soaking into the grain a bit too easily. (which is sort of it's job, but still...)
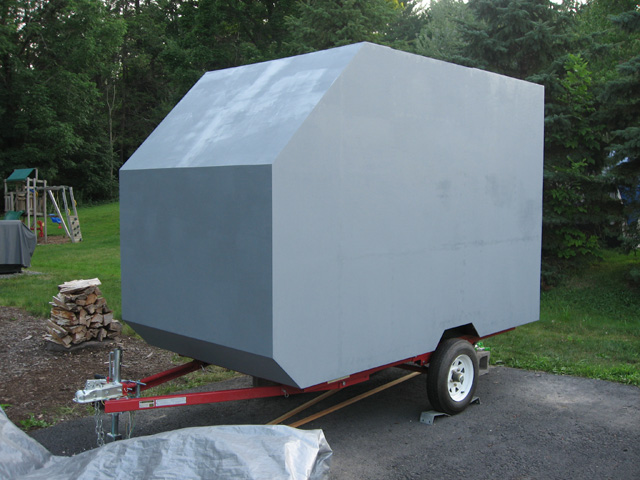
After a few hours of priming, she was happy to shoot me a text message reporting that we now had a large toaster in the driveway. I concurred.

The only thing I was really able to address when I got home, since the primer was drying, was to work on the trailer lighting. I needed to push the lights further out away from the frame, since my floor frame hangs out a few inches in all directions. I bought a piece of flat aluminum stock at the BORG earlier in the day in anticipation of the task, and starting cutting and bending to suit. About an hour later, I had my two matching bracket extensions, and went out to the trailer to install them.
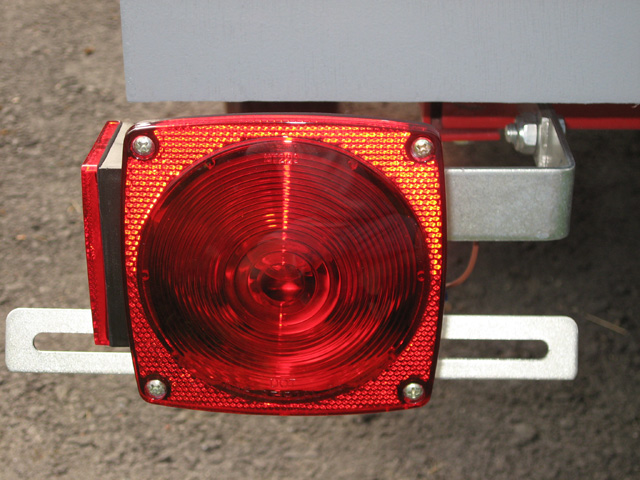
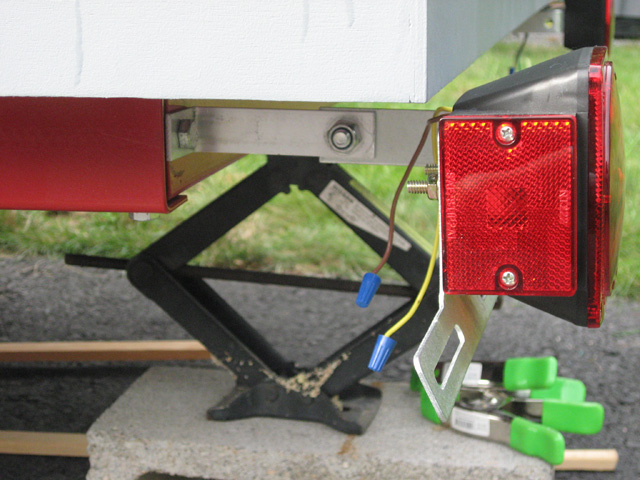
In this second pic, you can get a really good idea of what I did. My bracket extension basically bolts to the frame, and the original bracket bolts to the extension I made. It may not look factory, but it'll work. (some may ask why I didn't just make a whole new bracket... I wanted to conserve the flat aluminum in case I needed it for other projects in the future.

) With the extensions in place, the lights now are just about flush with the rear wall, and are flush on the sides with the side walls. 100% road legal.

While working around the trailer, I did notice that the cure time on the primer was taking longer than advertised, and was worried this would affect our timetable. (some thicker spots were dry to the touch, but could be imprinted slightly if pressed) I was especially worried that the top colorcoat might have the same issues. I decided to get and add the hardener to accelerate the cure time of the color coat, as I didn't want to be stuck waiting for paint to cure before I could install the necessary items. (door, vent, skylight)
Wednesday
With a deadline right around the corner, I decided to take another day off work to truck along on the build. Painting was the order of the day, and with a limited time window (didn't want to be laying paint in peak heat) I knew that two hands would make things go quicker and hopefully smoother.
The paint I chose to use is Valspar Industrial Tractor and Implement Enamel.

I've done much research on this, and not wanting to spend an insane $$$ on my exterior, I feel that this should provide me with a reasonable amount of protection
with regular maintenance. (I accept that I will have to scrutinize the paint every 6 months, and re-coat at least once every two years to retain water protection) I don't recommend that you all use it, without first ascertaining the risks vs benefits and how they'll affect you. Bang for the buck though, I personally think it'll be an excellent solution. Time will tell if I'm wrong I guess.
Being that I was concerned about cure time, I ran out to Tractor Supply Co. first thing in the morning to get the hardener. On the way back, I stopped at the local true value hardware store to pick up another 6" foam roller, two liners, and most important, a 4 pack of mixing buckets. (well, paint tidy liner, but same difference)

The mixing buckets were a sensible forethought, because I knew that the work time to roll the paint on would be longer than the initial setup time for the paint once I mixed in the hardener. In this way, I was able to mix a 32 oz batch at a time, and we could use that without fear of the balance of the paint kicking too fast before we got to it. (The clear nature of the liner/bucket made marking the outside easy for the amount of paint, then the amount of hardener to add; I premeasured using water to make my marks, then dumped the water out and dried it thoroughly before adding paint and hardener) Sure enough while we were painting, the paint we had mixed in that batch was starting to get viscous as we got to the bottom of the roller tray liner; had I mixed the whole gallon.... well... bad. Just bad.
While I was mixing the first batch of hardener + paint, my wife attacked the primer with my sander, so that the paint would have a good surface purchase to grab.
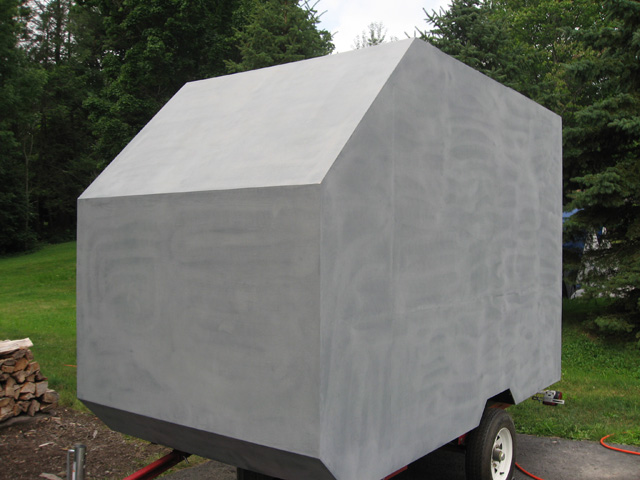
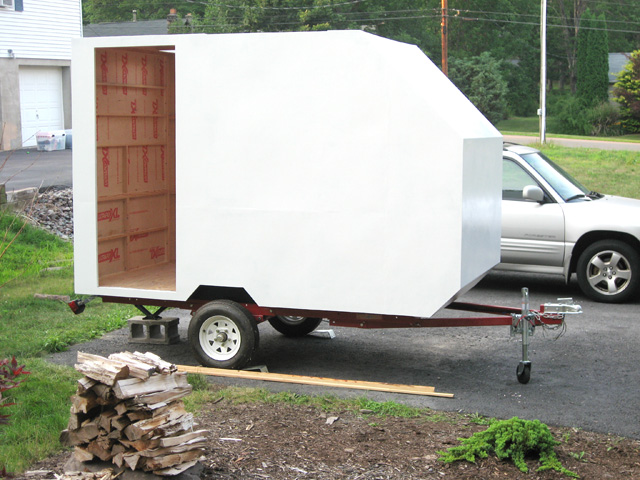
Minutes later, we began laying paint on the trailer. The Valspar goes on very nicely on a prepared surface. There were spots where the primer did not fill the wood grain pores, and we had to work the paint into them to ensure a waterproof barrier. Hopefully we got them all. Had we more time, I would have postponed the paint, and dropped another layer of primer to fill all the pores; but being in a time crunch, I made the call to forge ahead with the paint, knowing the paint would fill the pores too. (but slow us down during the paint application)
As we finished the first batch of paint, I went in to mix up batch #2. That was applied uneventfully, and I got the timing of when to start mixing batch #3 a bit better. As we finished off batch #3, we found we had exactly enough paint to get the drivers side wall done, completing all paint work for now. (it was a really
good thing I didn't just mix the whole gallon's worth in one shot; I'd have just wasted a quart of paint!)
After paint, I set about to run the trailer light wiring and install my ghetto duct tape wiring holders.
After reconnecting the wiring, checking my ground, and testing each lamp and function, I ran the wire along the trailer frame, and duct taped it periodically so that no wiring was hanging down anywhere. I rubber banded the excess up front in the A frame area, leaving about 20" of loose slack for the plug itself to hook into the vehicle harness port. (sorry, no picture, but you all know what duct tape looks like.

)
Lastly for the night, I decided to prep my skylight material. Originally, I was going to go with Lexan for the skylight. But it is exceptionally more costly compared to acrylic, (Plexiglass) and only comes in a thin .093" sheet in the 3' x 6' size I needed. (at the BORG; I'm sure I could special order it from someplace, but that'd be costly and insane most likely) I decided to use a .220 thick piece of acrylic sheet instead. I'd worked with acrylic before in the marine fish tank industry, so I'm familiar with it's properties and drawbacks. It came out to about the same price, is dramatically thicker, which will match my roof thickness better (no depression/step at the joint) and should provide a reasonable level of impact/vibration resistance. I know it's not in the same league as Lexan, but since it's on the roof, laying flat, fully supported, and should never see direct impact, I'm hoping, it'll do the job just the same. Hopefully, I'm not wrong.

(I figure any direct impact that would crack/shatter the acrylic, would probably ruin Lexan just the same anyhow; it'd have to be something awful like a tree branch falling on the trailer. Plus small weather abrasion and scratches can actually be polished out of acrylic easily, whereas it's more of a PITA with Lexan. Like my paint choice, I guess time will tell.
I digress; I cut the Plexi to the required trailer width, 59.25" in length. I had planned on using the sheet's width 'as is' for it's width; I had left my raw wood opening on the roof at 36 and 1/8", thinking the extra 1/8" would accommodate even a small amount of overage in whatever plastic sheet I bought, even after primer and paint application. Wouldn't you know, the Plexi is exactly 36 and 1/8" also. With the paint thickness added in, I knew it'd be tighter than I wanted. So, out came the router. I rigged up a plank with some clamps under the Plexi sheet so that I could use the flush cut bit, and dialed in the depth exactly so that it'd only bite into the Plexi. (we're talking sub 1/128ths of an inch adjustments here; did I mention I love my Bosch Router?) A few minutes later, I had shaved exactly 3/64" of an inch off the entire 59.25" length of the Plexi. (sorry, forgot to take pics of this process; it was approaching dark, and I wanted to make sure I got done and cleaned up before nightfall hit)
So, on to the final 24 hours! Tomorrow morning while I'm at work, my wife will be applying the MinWax Tung Oil finish to the skylight spars to protect them. (since doing it after the skylight is in place will be more troublesome) Then, once I get home from work, the paint should be fully cured long ago, and I can begin to install the door, the skylight, and with any luck, the fan vent also. I have buffered myself a small 'overtime' in case I can't get to the vent tomorrow though; we are not leaving for the trip until mid day on Friday, so if I have to, I can drop the vent fan in place, screw it in, and silicone seal it first thing in the morning and still have it dry before I pull out of the driveway.
E.