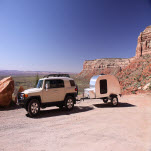
DD, on the road to LCG

...ask your questions in the appropriate forums BUT document your build here...preferably in a single thread...dates for updates, are appreciated....

Postby aggie79 » Fri Dec 10, 2010 11:50 am

Gary,

That is some galley you have there! I like the use of the laminate flooring. I can't wait to see you and the Diner at Beavers Bend.

Take care,
Tom
Tom (& Linda)
For build info on our former Silver Beatle teardrop:
Build Thread

93503
User avatar
aggie79
Super Duper Lifetime Member
 
Posts: 5405
Images: 686
Joined: Tue Aug 07, 2007 5:42 pm
Location: Watauga, Texas

Postby jkidd6339 » Fri Dec 10, 2010 9:07 pm

Gary
The galley looks great. I think the Vynil on the counter is a great idea. It will be much more functional than mine. I guess mine will be mostly for cargo. When do you figure you will try it out? How's that thing with Ronda working out?
User avatar
jkidd6339
Teardrop Master
 
Posts: 198
Images: 1
Joined: Sat Jan 24, 2009 1:16 am

Postby StPatron » Fri Dec 10, 2010 10:14 pm

jkidd6339 wrote:Gary
The galley looks great. I think the Vynil on the counter is a great idea. It will be much more functional than mine. I guess mine will be mostly for cargo. When do you figure you will try it out? How's that thing with Ronda working out?


Thanks jkidd. It resembles vinyl but is actually Shaw brand laminate flooring that I found at Habitat, heckuva bargain but only 6 panels. I sealed the edges with Titebond III, hope it holds up. It's sturdy, I laid down on it for testing. I'm shooting for a March completion but it's looking iffy.

Haven't heard from Rhon in months. I was the best man at her wedding at Stanton Creek in September. Pete officiated at the ceremony, supplying kazoo music. Missed seeing you at the rally.
User avatar
StPatron
Donating Member
 
Posts: 748
Images: 297
Joined: Tue Dec 15, 2009 8:38 pm
Location: OK
Top

Postby High Desert » Sat Dec 11, 2010 12:30 am

Gary, great call on the laminate for the counter. Looks sharp! I made a small table some time back and used some leftover laminate flooring for the top. Works great and tough as nails. And on that monster counter the tile look is awesome. :thumbsup:
Shaun

"it's not the years honey, it's the mileage"
High Desert
Platinum Donating Member
 
Posts: 8780
Images: 27
Joined: Wed Apr 08, 2009 1:46 pm
Location: SW Washington state
Top

Postby Lookfar » Sat Dec 11, 2010 12:43 am

Gary;
I've been enjoying your build for a while. The problem is, I keep bouncing back and forth between pages, and forget to comment on anything.
You've got an interesting trailer going. Hope to see it at Beavers Bend.
Butch
Image
User avatar
Lookfar
Donating Member
 
Posts: 225
Images: 22
Joined: Sun Jan 31, 2010 9:58 am
Location: Arkansas
Top

Postby StPatron » Tue Dec 14, 2010 10:17 pm

Thanks Shaun and Butch!

Today was absolutely gorgeous and I enjoyed a ride in the country on my 78 Harley Davidson Sportster. It's a 75th anniversary edition model that I restored,,, complete basket case. Got a lot of thumbs up from folks who enjoyed seeing an older HD on the road.

Image
Then, it was back to work on DD.

This is the burner I'm using. Originally intended for use as a side burner on a full-size grill.

Image
I used full extension slides for mounting. This allows the lid to flip up once the burner is fully extended. I mounted the slides directly to the unit, no worries of catching a support tray on fire. No wobble when extended, it's very sturdy with the 100 lb. rated slides. Allowance was made for the propane cannister to fit without contacting the a/c plenum. Part of the fiberglassed drip pan for the a/c can be seen.

Image
Lid open
Image
Simmer
Image
Full blast
Image

I think I'll really enjoy this, it's so simple to use. Pull out the unit, lift the lid, rotate the knob,, that's it. Auto-ignition. I believe it's rated at 10,500 btu's, should work great! Later, I may route black pipe from a tongue-mounted 20 lb. tank. For now, this will work.
User avatar
StPatron
Donating Member
 
Posts: 748
Images: 297
Joined: Tue Dec 15, 2009 8:38 pm
Location: OK
Top

Postby Cliffmeister2000 » Wed Dec 15, 2010 12:06 am

That's really nice, Gary! :thumbsup:

I'm guessing you chose slides with a 100 lb rating. I'm curious how stable it is with a big pot of boiling water on it?!? :thinking:
God Bless

Cliff

♥God. ♥People.
1 John 4:9-11

My Teardrop build pictures
User avatar
Cliffmeister2000
Titanium Donating Member
 
Posts: 3622
Images: 157
Joined: Thu Jul 26, 2007 10:18 pm
Location: Phoenix, AZ
Top

Postby StPatron » Wed Dec 15, 2010 1:58 am

Cliffmeister2000 wrote:That's really nice, Gary! :thumbsup:

I'm guessing you chose slides with a 100 lb rating. I'm curious how stable it is with a big pot of boiling water on it?!? :thinking:


Thanks, Cliff.

Yes, those are the 100 lb slides. I tested it in the full extension position and it's not going anywhere. No slop in the tracks and no downward tilt. I'm using the same slides for my cooler and am very pleased with both applications.

If a big pot of boiling water goes down,, the tongue will be pointed skywards. :lol:
User avatar
StPatron
Donating Member
 
Posts: 748
Images: 297
Joined: Tue Dec 15, 2009 8:38 pm
Location: OK
Top

Postby aggie79 » Wed Dec 15, 2010 10:00 am

Gary,

That burner is really cool! Could you say what the rough dimensions of it are?

Thanks, Tom
Tom (& Linda)
For build info on our former Silver Beatle teardrop:
Build Thread

93503
User avatar
aggie79
Super Duper Lifetime Member
 
Posts: 5405
Images: 686
Joined: Tue Aug 07, 2007 5:42 pm
Location: Watauga, Texas
Top

Postby StPatron » Wed Dec 15, 2010 9:32 pm

aggie79 wrote:Gary,

That burner is really cool! Could you say what the rough dimensions of it are?

Thanks, Tom


Here ya go, Tom.
Image
13-1/2" wide, 16-1/4" deep, 4-1/2" high. That height is the burner unit alone without the disp. propane cannister installed.

The top actually has a nice finish, I forgot to clean up the sawdust before snapping the pic. The corners on the left side are radiused, the corners on the right are squared,,,, it's designed to attach to the left side of a grill. I had concerns about insetting it into the countertop (clearance/fire and cannister access) and therefore decided to go with the slide mount.
User avatar
StPatron
Donating Member
 
Posts: 748
Images: 297
Joined: Tue Dec 15, 2009 8:38 pm
Location: OK
Top

Postby aggie79 » Thu Dec 16, 2010 9:14 am

Thanks Gary.

This info will help me try to figure out my galley layout. I'm kind of stumped right now in trying to fit everything I think I need. The compact size of this burner may allow me to store my cooler in the galley.

Take care, Tom
Tom (& Linda)
For build info on our former Silver Beatle teardrop:
Build Thread

93503
User avatar
aggie79
Super Duper Lifetime Member
 
Posts: 5405
Images: 686
Joined: Tue Aug 07, 2007 5:42 pm
Location: Watauga, Texas
Top

Postby StPatron » Sun Dec 19, 2010 2:49 am

Cold in the shop today, so the back-up plan was to work inside sewing the dinette cushion covers. I selected a medium-high density 4" foam and had the supplier cut the pieces to size. That worked great, no ragged edges. I did one last check of the fit and was pleased. I think the 4" thickness will provide me with the desired combination of both comfort and table clearance for my legs when seated.

Image
Dewey enjoyed helping with the paper pattern cutting.

Image
I've done a bit of sewing but never attempted major upholstery work, so I spent some time last week researching online. I like the challenge of learning something new. I decided on a box cushion style without piping and began cutting out the material, then sewing. Dew quickly lost interest, hopped up on his perch and snoozed while I worked.

Image
This is back cushion #1. I still need to add the zipper panel and detail the corners but I was anxious to see how it fit and looked. Almost one down, three more to go.

Image
User avatar
StPatron
Donating Member
 
Posts: 748
Images: 297
Joined: Tue Dec 15, 2009 8:38 pm
Location: OK
Top

Postby grizz » Sun Dec 19, 2010 9:06 am

Nice pics Gary, Dewey looks like the perfect helper.

Our 3 cats have become incredibly "homely" since we got married and moved into one house.
Harley sleeps on the foot end of our bed, between Nicola and I
Dukey (Marmaduke) sleeps in the Radiator hammock bed at the window. He sneaks into the garage when the door is open and crawls intot he teardrop for a sleep, have locked him in there before by accident.
Tabitha the old girl sleeps in my office in my box of tools..... on top of the drill and other stuff, and no I do not know why she does.
She also takes duty when you shower as "life saver cat"

Nicola just came in to show me a scratch from Dukey, he is high on American Catnip ..... it drives him mad.
Greetings from England.

Rian.


Hoping to get it all done in time.
User avatar
grizz
1000 Club
1000 Club
 
Posts: 1210
Images: 29
Joined: Mon Sep 21, 2009 2:37 pm
Location: Rochester, Kent, UK
Top

Postby S. Heisley » Sun Dec 19, 2010 11:31 am

It looks like you're doing a good job on those cushions, Gary. I hope mine turn out as good! :thumbsup:
User avatar
S. Heisley
Super Lifetime Member
 
Posts: 8866
Images: 495
Joined: Mon Sep 17, 2007 10:02 am
Location: No. California
Top

Postby StPatron » Mon Dec 20, 2010 12:42 am

Rian: Good to see you posting again, thanks for checking in. Sounds as if your cats have adjusted well to the move, they all have such different personalities. I planted a patch of catnip on my acreage and it's quite popular. Have you been doing any camping lately?

Sharon: I know your cushions will turn out fabulous, just like the rest of your camper! There are so many nice fabrics to chose from, I saw a tapestry on eBay that was to die for,,, but, it wasn't in the budget. The "plain Jane" remnant piece I used wasn't large enough to cover all the cushions so I pieced in a different material on the backs/bottoms. Keeping the two different materials aligned properly was tough but worked out ok. I finished the other back section today and started working on the seats, I'll post pics of all the cushions when they are completed.

I didn't realize there were so many foam options. 4" seems to be the standard thickness, then there are varieties of density and compression. The salesman had samples and he would put them on a chair for me to test. It became rather amusing. :lol:

You may find this tutorial on box cushion sewing helpful:

http://www.alternative-windows.com/box-cushion.htm
User avatar
StPatron
Donating Member
 
Posts: 748
Images: 297
Joined: Tue Dec 15, 2009 8:38 pm
Location: OK
Top

PreviousNext

Return to Build Journals

Who is online

Users browsing this forum: No registered users and 8 guests