Teardrops n Tiny Travel Trailersor t n ttt for short (tnttt.com) |
How many ribs in a hatch?
44 posts
• Page 3 of 3 • 1, 2, 3
![]() by Sparksalot » Sun Dec 05, 2010 9:06 pm
by Sparksalot » Sun Dec 05, 2010 9:06 pm
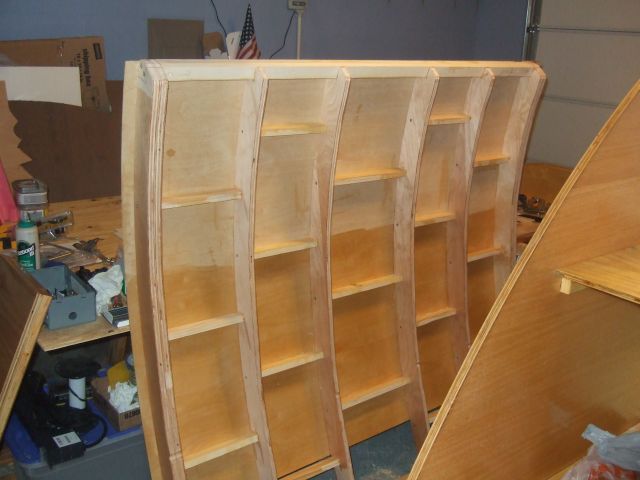
Rose is 5 wide, and uses 6 ribs. The outer two are doubled.
Holy cow, Rose is a teenager now! Done? Surely you jest. A teardrop is never "done".
The Compass Rose build thread: viewtopic.php?t=23213
Inspiration: http://tnttt.com/Design_Library/Trailer%20for%20Two.htm
It's got a cop motor, a 5.3 LS plant, it's got cop tires, cop suspensions, cop shocks. ~ Elwood Blues
The Compass Rose build thread: viewtopic.php?t=23213
Inspiration: http://tnttt.com/Design_Library/Trailer%20for%20Two.htm
It's got a cop motor, a 5.3 LS plant, it's got cop tires, cop suspensions, cop shocks. ~ Elwood Blues
-

Sparksalot - Silver Donating Member
- Posts: 1627
- Images: 687
- Joined: Fri Feb 15, 2008 9:36 pm
- Location: Texas by God
![]() by Sam I am » Sun Dec 05, 2010 9:42 pm
by Sam I am » Sun Dec 05, 2010 9:42 pm
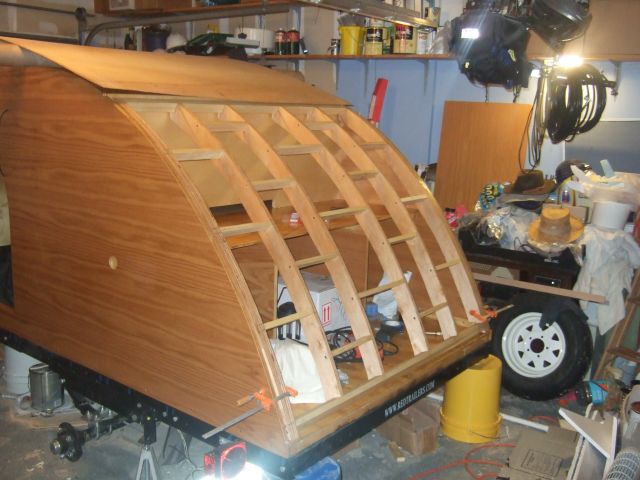
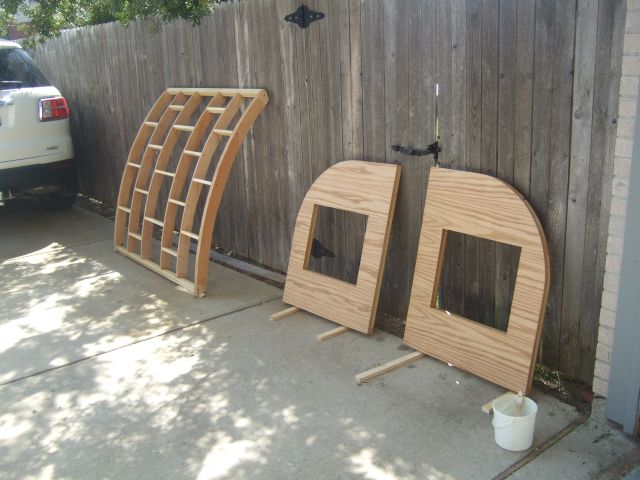
I went a simpler way on my hatch. I built the rear of the teardrop with spars and skin as if there wasn't going to be a hatch, then cut the hatch free after it was skinned. The advantages: no curved ribs to make, and only two curved jigsaw cuts to make. It's light, simple, and has zero spring back with 1/8" Baltic birch skin. The birch literally falls around the curve, and produces no forces trying to make it spring back. I added a second layer of 1/8" skin on the teardrop and the hatch for more strength. There are more photos in my Flickr album.
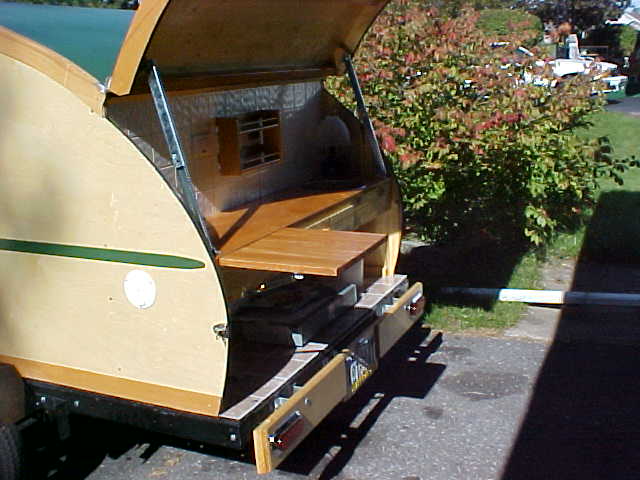
Teardrop build photos at http://www.flickr.com/photos/12482094@N07/
-
Sam I am - 500 Club
- Posts: 770
- Images: 106
- Joined: Sun Jul 02, 2006 9:19 pm
- Location: Central PA