DD, on the road to LCG

...ask your questions in the appropriate forums BUT document your build here...preferably in a single thread...dates for updates, are appreciated....

Postby High Desert » Sat Mar 26, 2011 12:49 pm

Gary, happy to see all the progress on the Diner. You're going to have one fine rig there when she's done! :thumbsup:
Shaun

"it's not the years honey, it's the mileage"
High Desert
Platinum Donating Member
 
Posts: 8780
Images: 27
Joined: Wed Apr 08, 2009 1:46 pm
Location: SW Washington state

Postby StPatron » Thu Mar 31, 2011 2:23 am

Thanks, Shaun.

I was thinking today, I may not live to see it finished :lol:
User avatar
StPatron
Donating Member
 
Posts: 748
Images: 297
Joined: Tue Dec 15, 2009 8:38 pm
Location: OK

Postby StPatron » Thu Mar 31, 2011 2:25 am

It seems the black cloud of tool problems remains. That's ok, though. Just another challenge. Thought I'd share the laugh with all. :lol:

Yesterday I made a cardboard template, then transferred that to masonite for a cutting template for my hatch ribs.  With a 73 inch wide galley, I decided I would want 7 full-width (3") ribs and 2 more for spacers which I will modify. No interior liner. My plan is a combination of the Steve Frederick and Roly design (as used on his 1/4 Nelson, with the outside "ribs" extending beyond the sidewall).

My plan today was to cut the ribs for the hatch using the router technique as described by Aggie79. Thanks Tom!

I secured the masonite template to the plywood and cut out the first rib. Tested it for fit, made adjustments and used that rib as my new template. I then secured the ply template to the plywood sheet with screws, flush with the surface. Using my top-bearing flush trim bit I began cutting with the bit set at half the finished depth. Two passes were planned.

First, a little background on my Craftsman router. It has a plastic "triangle" knob that's used to tighten the base to the motor once depth has been selected via rotation of the motor in the base. Standard set-up. But, it doesn't hold the position for long, depth increasing with travel. Usually not a problem with soft woods but hardwoods or plywood cause it to loosen no matter how hard I crank it down. Even when taking shallow passes, I have to stop about every foot and re-adjust. Frustrating but ok when using a trim bit as depth increase is tolerable.
 
After cutting 3 ribs, I notice that the bearing spacer is moving while I'm cutting.  That's not right.  Turns out that the set screw has vibrated out and is now missing. So, I stop the router and lower the bit, fully seated.  Normally, I don't fully seat the bit as it's not recommended and also makes it hard to get out of the collet.  But, I have no other choice.  I finish the rest of that rib and start on another.  As I'm readjusting the depth for the bazillionth time, I notice a piece of metal on the plywood.  Inspecting it, I see that part of the cutting edge has broken off from one flute.  It's a two-fluted bit, so I press on.  It's not cabinet work after all. It's cutting ok but the sound isn't smooth.  After about 8 more inches of cut, the bit breaks completely off from the shaft. Nice!
 
The options now are to completely stop, order another bit and wait for 3-4 days for it to arrive.  The big box stores don't sell this type of bit.  Or, come up with another plan.  I decide to use a straight bit and use the shaft of the bit as a substitute "bearing", aligning the shaft of the straight bit with the template.  That works ok for another rib and then as I'm tightening the depth knob,,, part of the knob breaks off. It becomes laughable at this point!

Using pliers, I'm able to tighten what's left of the knob and press on. But, that's short-lived. The bit becomes dull and starts smoking.  I have another straight bit, use that and create two more ribs before it also craps out.  Now,, the only option is to order another trim flush bit so I can finish the remaining two ribs.  I got 7 cut out, need 9 total. 

I've located a bit with a lifetime guarantee and will order that tonight. Wish I had started with that one. 7 ribs in 9 hours.  Fun, fun!

Here they are prior to dressing with the belt sander:
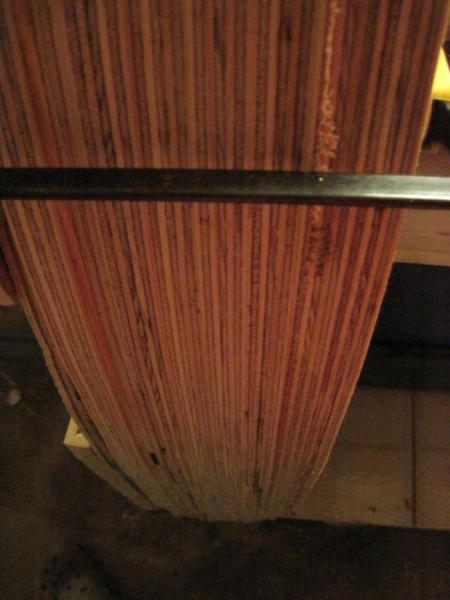
Image
User avatar
StPatron
Donating Member
 
Posts: 748
Images: 297
Joined: Tue Dec 15, 2009 8:38 pm
Location: OK
Top

power tools

Postby mvperini » Thu Mar 31, 2011 8:08 am

Is it just me or am i missing something, if i had issues like this with power tools i would be in the hospital .the wife just reminded me i have been in the hospital because of power tools. :lol: If you have issues with the power tools do not use them, borrow one , rent one , steal one oh even buy one but do not use power tools that are not safe.IMHO which is not worth much anyway

Mike
Image

1947 Kenskill teardrop kamper 4X10>
1951 Boles Areo 16ft Canned Ham>
1956 Roadmaster 20ft> Restored
1959 airstream 18ft restoration complete
1953 Pontiac house car
mvperini
500 Club
 
Posts: 821
Images: 0
Joined: Sun Aug 19, 2007 9:38 am
Location: LAFAYETTE, OREGON
Top

Postby StPatron » Thu Mar 31, 2011 12:51 pm

Huh?

I would agree with your safety warning but I don't believe it applies here, Mike. If I considered what I was doing unsafe, I would stop.

1. Commutator glazing on a drill does not create an unsafe condition. If the drill isn't turning chances for injury are significantly reduced.
2. Using a substitute bit in a router to accomplish the same end result is just that.
3. A router that won't hold a depth adjustment is only going to impact the wood.

Maybe I'm missing something? Where is the injury risk in these specific situations?
User avatar
StPatron
Donating Member
 
Posts: 748
Images: 297
Joined: Tue Dec 15, 2009 8:38 pm
Location: OK
Top

Postby ian.allen2 » Thu Mar 31, 2011 2:13 pm

I know the router feeling. I too have had to buy more flush trim bits as I was starting to make new ribs for my hatch out of real wood instead of plywood. I had cut them out with a jigsaw, close to the line, screwed the rib to the body in position ready for routing. One of my router knobs does not clamp as the plastic clamp bit broke off, but the other side knob clamps well and it has never loosened on me. Today, i set the depth of the router, turned it on and started routing away at about 1/8" of depth to be flush with the body shape. The router started spinning quicker, so I took the bit away and noticed the bearing has disappeared, never to be seen. The locking screw was still in place. This has happened before but the screw came undone and the bearing fell off and I routered 1/8" into the body. Luckily enough, it was on the bottom edge where it wont be seen. I have ordered 3 flush trim bits so I have spares. One of them has the bearing above the blades so the bearing cannot come off when using. This type might be better than a bottom fitting bearing.
ian.allen2
Teardrop Builder
 
Posts: 26
Joined: Tue Mar 01, 2011 8:59 am
Location: Leicester UK
Top

Postby aggie79 » Thu Mar 31, 2011 2:15 pm

Gary,

I must say you have patience that I don't have. I probably would have called it a day if my router bit crapped out on me.

The ribs look great. I think you'll like that you went 3" in depth. I only did 1-1/2". This worked and spring back wasn't an issue, but I had to be careful about not distorting the hatch when attaching the aluminum (around the radius.)

I'm itching to see the Diner. Keep up the good work!

Take care,
Tom
Tom (& Linda)
For build info on our former Silver Beatle teardrop:
Build Thread

93503
User avatar
aggie79
Super Duper Lifetime Member
 
Posts: 5405
Images: 686
Joined: Tue Aug 07, 2007 5:42 pm
Location: Watauga, Texas
Top

huh

Postby mvperini » Thu Mar 31, 2011 2:42 pm

sorry :oops: maybe i read more into the post than what was there, i think what threw me was the statement [After about 8 more inches of cut, the bit breaks completely off from the shaft. Nice! ] and i was serious about power tools not liking me very much :lol: :lol:

Mike
Image

1947 Kenskill teardrop kamper 4X10>
1951 Boles Areo 16ft Canned Ham>
1956 Roadmaster 20ft> Restored
1959 airstream 18ft restoration complete
1953 Pontiac house car
mvperini
500 Club
 
Posts: 821
Images: 0
Joined: Sun Aug 19, 2007 9:38 am
Location: LAFAYETTE, OREGON
Top

Postby StPatron » Thu Mar 31, 2011 4:16 pm

ian.allen2 wrote:One of them has the bearing above the blades so the bearing cannot come off when using. This type might be better than a bottom fitting bearing.


Hi Ian and welcome to my build journal.

I've come to the conclusion that you get what you pay for when buying router bits with bearings. And, routers. A run of the mill non-bearing bit (or, is that bearing-less?) suffices for amateur work but the addition of a bearing complicates matters. I've had the bearing on that bit freeze up and burn wood. Now, the total disintegration of the bit. Had I noticed the collar becoming loose and tightened it, maybe it would have lasted longer???? I got it from MLCS and have been happy with their products, this is the first bit failure. I'm replacing it with a bit from them, but selected the Katana brand w/lifetime guarantee. I'm also going with the 1/2" shank.

I agree. I think by virtue of design the top bearing bit has a strength advantage, a more secure bearing and less chance of operator error. When I template route, I'm most often free-handing on a worktable versus table routing. Therefore, the use of the top bearing bit.

I think the router is a super tool but it seems it can be one of the most frustrating as well.
User avatar
StPatron
Donating Member
 
Posts: 748
Images: 297
Joined: Tue Dec 15, 2009 8:38 pm
Location: OK
Top

Postby StPatron » Thu Mar 31, 2011 4:45 pm

aggie79 wrote:I must say you have patience that I don't have.


Hi Tom,

I saw your patience with that blue tape, you're not fooling me. :lol:

That's super to read your opinion on the 3" rib depth. I debated that. With the extra wide hatch I thought I'd need the support.

Clearance is not an issue. As a matter of fact, I've got CaseyDog already requesting to sneak into a campground by hiding in the "trunk". Like we used to do at drive-in movies. If I decide later that the ribs need trimming, I'll plan the job around a gathering. It's too bad no one but Cream kitty was around to enjoy yesterdays entertainment. I used to get upset but now just laugh at what life hands ya sometimes.
User avatar
StPatron
Donating Member
 
Posts: 748
Images: 297
Joined: Tue Dec 15, 2009 8:38 pm
Location: OK
Top

Postby GuyllFyre » Thu Mar 31, 2011 4:48 pm

I've heard a lot of stories about Craftsman routers and their "ARHA" feature.

ARHA = Automatic Random Height Adjustment

They're just not very good routers usually. Which is why I bought a Porter Cable set and am quite happy with it.
Things I have for sale on craigslist:
http://albany.craigslist.org/search/?ar ... catAbb=sss

Things I have for sale on eBay:
http://www.ebay.com/sch/merchant/seansmith
User avatar
GuyllFyre
Donating Member
 
Posts: 209
Joined: Fri May 21, 2010 9:35 pm
Location: Scotia, NY
Top

Postby StPatron » Thu Mar 31, 2011 5:38 pm

GuyllFyre wrote:ARHA = Automatic Random Height Adjustment

They're just not very good routers usually. Which is why I bought a Porter Cable set and am quite happy with it.


That's a good description.

There appears to be a design flaw. Something that won't allow full compression of that tightening "ring".

A Porter Cable is on my wish list.
User avatar
StPatron
Donating Member
 
Posts: 748
Images: 297
Joined: Tue Dec 15, 2009 8:38 pm
Location: OK
Top

Postby Dusty82 » Thu Mar 31, 2011 7:35 pm

I LOVE my Porter Cable routers. I've owned and used different brands in various shops and on different job sites, and I wouldn't own anything other than a Porter Cable. Just my 2 cents...
TV: 2004 Jeep Liberty Sport

Currently stuck in a tent.
User avatar
Dusty82
The 300 Club
 
Posts: 313
Joined: Thu Jan 28, 2010 8:15 pm
Location: Southern Oregon
Top

Postby LDK » Thu Mar 31, 2011 9:19 pm

I had the same problem as you did with the set screw coming out on my pattern bit. I noticed the bearing was traveling so I pushed the bit up to the collet. It didn't cut as good that way and it burned the wood alittle but I managed to get the job done. I never did fine that tiny screw. I have a new bit that is basically useless now.
LDK
Gold Donating Member
 
Posts: 1419
Images: 1
Joined: Fri Jan 22, 2010 8:29 pm
Top

Postby StPatron » Thu Mar 31, 2011 10:53 pm

LDK wrote: I have a new bit that is basically useless now.


If you're interested in salvaging your pattern bit, replacement collars with set screws are available. Here's one link:

http://www.mlcswoodworking.com/orderstatus/html/smarthtml/pages/bushing_ball_bearings.html
I've been enjoying your build thread, Larry.
User avatar
StPatron
Donating Member
 
Posts: 748
Images: 297
Joined: Tue Dec 15, 2009 8:38 pm
Location: OK
Top

PreviousNext

Return to Build Journals

Who is online

Users browsing this forum: No registered users and 14 guests