DD, on the road to LCG

...ask your questions in the appropriate forums BUT document your build here...preferably in a single thread...dates for updates, are appreciated....

Postby ARKPAT » Tue Apr 19, 2011 11:42 am

Gary ... looks like you are almost getting to the point to start camping. I must have missed you at BB. I think you where on the motorcycle when I was busy. Glad to see you are build a trailer and enjoy. We both where late night workers =)

:thumbsup:

Pat
Life is to short always eat dessert first.
User avatar
ARKPAT
1000 Club
1000 Club
 
Posts: 1549
Images: 77
Joined: Tue Dec 13, 2005 4:45 am
Location: Arkansas

Postby StPatron » Wed Apr 20, 2011 1:25 am

ARKPAT wrote:Gary ... looks like you are almost getting to the point to start camping. I must have missed you at BB. I think you where on the motorcycle when I was busy. Glad to see you are build a trailer and enjoy. We both where late night workers =)

:thumbsup:

Pat

I might finish it this year, too early to tell. :lol:

I didn't make it to BB this year, was there in 2010 and hope to be back in 2012.
User avatar
StPatron
Donating Member
 
Posts: 748
Images: 297
Joined: Tue Dec 15, 2009 8:38 pm
Location: OK

Postby ARKPAT » Sat Apr 23, 2011 1:16 pm

Ok; I must have missed you then. I still have a bunch to do on my trailer ( been working while I camping :-))) ..... I have been thinking of building a trailer like Scott's out of all steel construction / tubing and poly panels insulation .... about the same size as Scott's and Silvia's new trailer. I'm getting older and have more support equipment for more room. Got my old '85 F-150 ( Classic Tagged ) almost street ready to pull with a Newer highway geared rearend and cruse control =)

Looking at making things easier to setup and camp.

;)

:thumbsup:

Pat
Life is to short always eat dessert first.
User avatar
ARKPAT
1000 Club
1000 Club
 
Posts: 1549
Images: 77
Joined: Tue Dec 13, 2005 4:45 am
Location: Arkansas
Top

Postby StPatron » Sat Apr 23, 2011 1:54 pm

At least you're campable. Congrats on your '85 project, I love those old trucks. :thumbsup:
User avatar
StPatron
Donating Member
 
Posts: 748
Images: 297
Joined: Tue Dec 15, 2009 8:38 pm
Location: OK
Top

Postby ARKPAT » Sat Apr 23, 2011 2:41 pm

That why I said I was building as I go camping.

A picture of my first camp out at Grand Lakes of the Cherokee =)

Image

This is after I got back from Petit Jean Gathering a few years back.

Image

I cut the door out at the campsite.

:oops: :shock: :worship: :thinking:

It has been an experiment in salvage parts to build from. The only thing bought at that time was the HF frame ( on sale ) and twenty - five door panels for $25 of ( insulated french door blanks panels from Thurm-o-Tru ) ...... the three 8' x 2 x 4's where scrap ..... the hinges and door hardware was salvage yard pickings ~ $2.

:thumbsup:

Pat
Life is to short always eat dessert first.
User avatar
ARKPAT
1000 Club
1000 Club
 
Posts: 1549
Images: 77
Joined: Tue Dec 13, 2005 4:45 am
Location: Arkansas
Top

Postby StPatron » Wed May 04, 2011 12:42 am

I've had a few setbacks but am now back on track again,, I think. :lol:

Setback 1:
I built a cupboard face frame out of the oak galley sliders from the pop-up. Then, after applying the stain they were very, very different in color. They both appeared to be white oak, but one stained almost black. No go. Removed it and created a new face frame, ripping a cedar 2 x 4 for the sliding door tracks.

Setback 2:
I planned a compartment in the cupboard for storage of a water jug, gravity flow to the sink below, flip-style tap. I built the customized space divider and as I was inserting the jug I noticed a crack in the plastic jug. No go. Lesson learned: Don't customize a compartment for an item that may eventually have to be replaced,, unless it's a common item.

Here's a pic of the curbside cupboard w/slider doors. The finish on the sliders matches, the light angle makes it look off.
Image
Now, what to do with the center section? Line it with cedar strips, what else? :lol:
Image
User avatar
StPatron
Donating Member
 
Posts: 748
Images: 297
Joined: Tue Dec 15, 2009 8:38 pm
Location: OK
Top

Postby S. Heisley » Wed May 04, 2011 8:16 am

:o Oh, Nice! :D
User avatar
S. Heisley
Super Lifetime Member
 
Posts: 8866
Images: 495
Joined: Mon Sep 17, 2007 10:02 am
Location: No. California
Top

Postby rebapuck » Wed May 04, 2011 7:45 pm

Love reading these build journals.

I think the wrinkle in your cushions is simply slack. Upholstery and slipcovers need to be tight. Fabric stretches every time you sit on it.
Judy
1966 VW camper
1967 VW singlecab
Image
User avatar
rebapuck
.
 
Posts: 2243
Images: 1
Joined: Thu May 14, 2009 1:55 pm
Location: Chapel Hill NC
Top

Postby aggie79 » Wed May 04, 2011 9:10 pm

Gary,

The galley cabinets look great. The center section with the alternating wood species is really cool!

Your progress has me motivated to get off my back side and get moving on my cabinets.

Take care,
Tom
Tom (& Linda)
For build info on our former Silver Beatle teardrop:
Build Thread

93503
User avatar
aggie79
Super Duper Lifetime Member
 
Posts: 5405
Images: 686
Joined: Tue Aug 07, 2007 5:42 pm
Location: Watauga, Texas
Top

Postby StPatron » Thu May 05, 2011 11:48 am

Thank you Sharon, Judy and Tom. I've been enjoying some nice building weather and trying to take advantage of it.

Judy: Welcome and thanks for your comments. I often get the idea that not many ever click here. I love reading the build journals too and hope my journal has motivated someone or at least amused them.
User avatar
StPatron
Donating Member
 
Posts: 748
Images: 297
Joined: Tue Dec 15, 2009 8:38 pm
Location: OK
Top

Postby StPatron » Mon Jun 13, 2011 2:47 am

While awaiting the purchase of a replacement router, I busied myself with some various odds and ends.

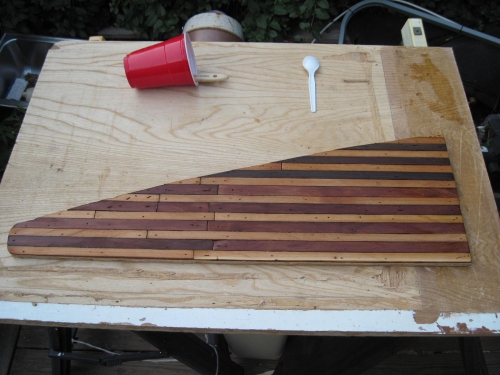
I wasn't happy with the appearance of the laminate covering on my bathroom upper cabinet door. So, it got my now standard... cedar strip
covering. :lol:
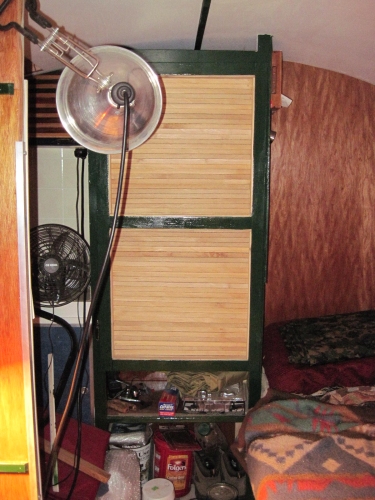
I made a matching cedar strip panel that I attached to the divider wall, near the ceiling. No pic now, sorry.
Image
I also made a door for the upper "hanging clothes" area of the closet. Not sure if I'll make this permanent or not. Might be a case of cedar strip overkill. A curtain might replace it, so I'm putting off finishing the cedar. A portion of the bathroom cabinet door can be seen above the fan.
Image
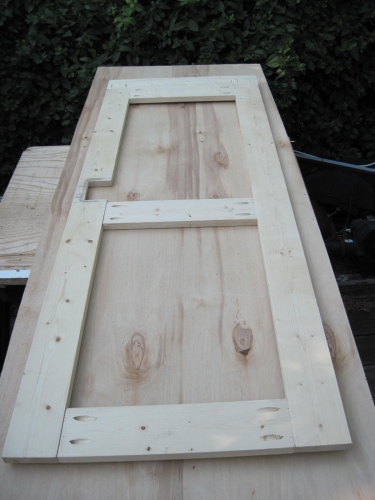
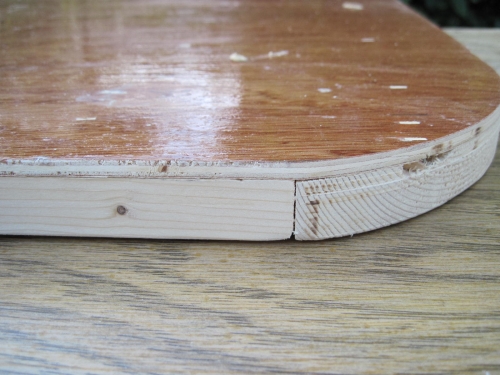
I also began work on the door.
Image
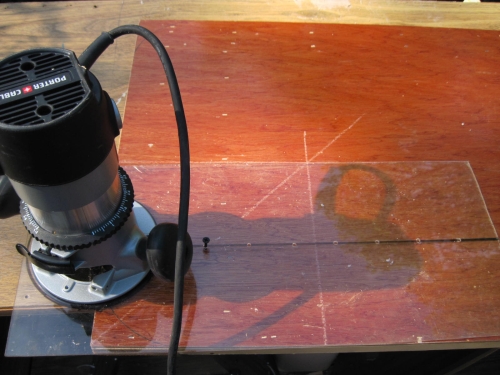
With the arrival of my new Porter Cable router (man, is it sweet!) I made a circle cutting jig from plexi and radiused the top corners using the same radius of my windows.
Image
Image
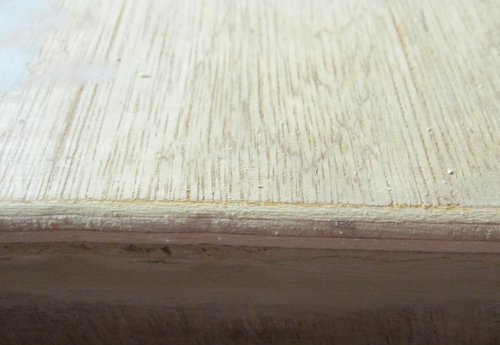
A roundover was done on the roof/wall joint. I'm awaiting a roll of fiberglass tape.
Image
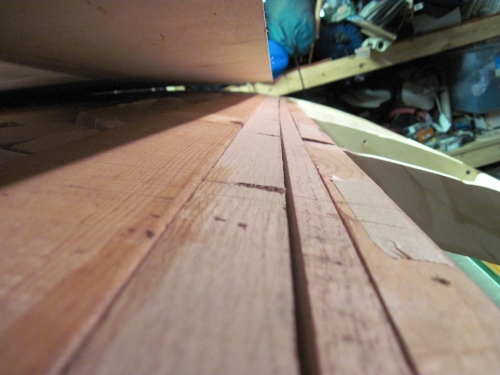
Sighting along the top of the hatch, I noticed a bow. 1/8" deflection on each end. This is somewhat worrisome but I was unable to think of a suitable remedy without disassembling the entire hatch. When it was first built, it was fine. I believe it developed a slight warp as it sat in place loosely secured.

I decided to reinforce the last roof spar (doubled 1 x 2 oak) with a 2 x 4 joined with Titebond and pocket screws. Hopefully this will provide a solid area for attachment of the "living hinge". If the warp doesn't straighten, hopefully the 1/8" deflection on each end won't be a problem. With that in place, the last section of roof skin was screwed down.
Image
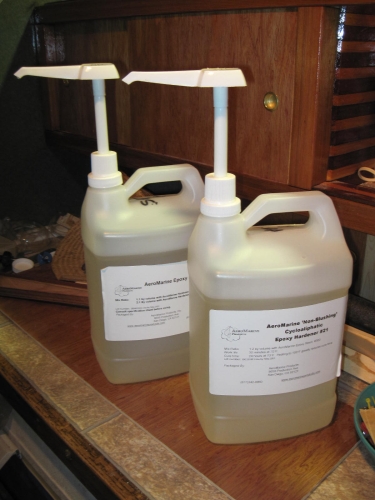
I plan to use digital camouflage print fabric for the sidewall treatment, epoxy laminate method. My 3 gallon order arrived from Aeromarine.
Image
I began applying a base sealing coat to the luan. Loosely brushed on with a chip brush and then spread with a Bondo spreader. I have to pick out an occasional chip brush hair, no problem. When I apply the cloth, I will use foam rollers.
Image
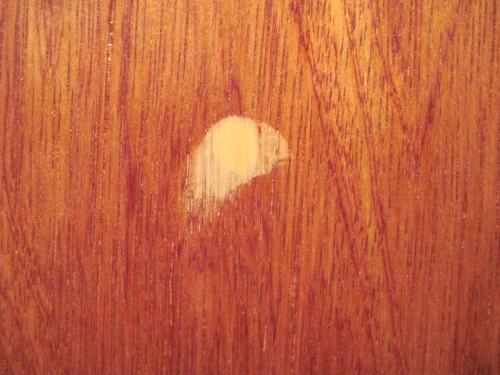
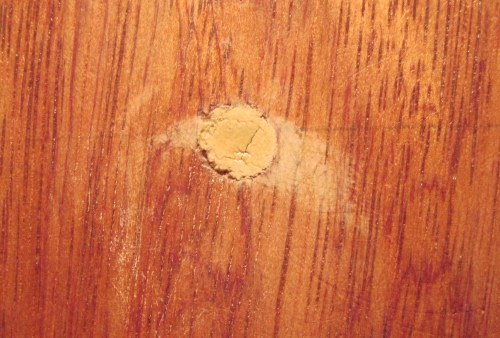
Elmer's wood filler is far superior to PL brand, IMO. Elmer's doesn't have a tendency to crack, PL does. Elmer's pic first, followed by PL.
Image
Image
I decided to perform an experiment before applying the cloth to DD. I first coated some luan with epoxy and let dry 24 hrs. Then, I covered a small area with epoxy and placed the cloth sample on it and brushed a coat on top. The initial appearance was unnerving. The design on the cloth was gone, it appeared to be solid black.
Image
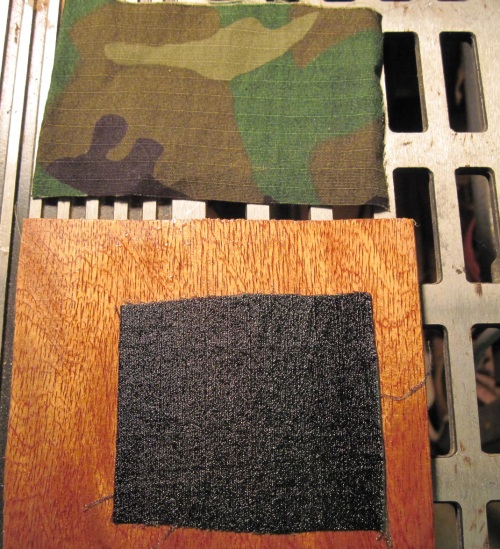
After another 24 hr. dry time, still dark. The surface was rough and I lightly sanded it with 150 and applied a second top coat. 24 hrs dry time later, the design of the cloth can be seen again. All better now! (I also tested a swatch of the cloth I intend to use.) No difference between the two. Here's the progression.
Image
Image
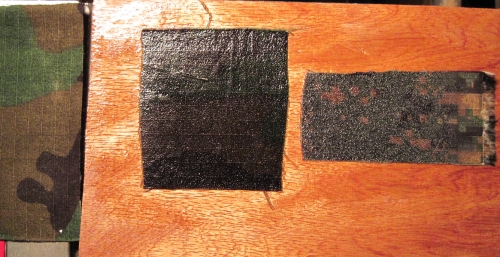
On this swatch, epoxy covers the left two thirds. The remainder is dry.
Image
My fiberglass tape is due to arrive on Tuesday. In the meantime I've been busy filling screw holes, sanding and applying the first layer of "sealing epoxy" to the luan. The first coat soaks in quickly, subsequent coats result in a nice, mirror finish.

For the roof, I'm leaning toward using Valspar Tractor and Implement enamel in a color that will compliment the digital camo fabric. Looking at IH white now, which is a light tan or cream color. I have a terrible eye for coordinating colors! Any and all suggestions always welcomed.
User avatar
StPatron
Donating Member
 
Posts: 748
Images: 297
Joined: Tue Dec 15, 2009 8:38 pm
Location: OK
Top

Postby StPatron » Mon Jun 13, 2011 1:41 pm

A better pic of the digital camo material:
Image

The Valspar color chart:
Image

Best match?
User avatar
StPatron
Donating Member
 
Posts: 748
Images: 297
Joined: Tue Dec 15, 2009 8:38 pm
Location: OK
Top

Postby High Desert » Mon Jun 13, 2011 2:38 pm

hey Gary, looking good! You better be careful or you're going to get to go camping this season! ;)


IMO I think you're on the righ track with the IH white. A little bit of neutral color but light enough to reflect instead of absorb the sun a bit. Can't wait to see your rig outside for a full finished pic.
Shaun

"it's not the years honey, it's the mileage"
High Desert
Platinum Donating Member
 
Posts: 8780
Images: 27
Joined: Wed Apr 08, 2009 1:46 pm
Location: SW Washington state
Top

Postby aggie79 » Mon Jun 13, 2011 3:09 pm

Gary,

I really like the cedar strip "theme". I think that will be the signature of the Dumpster Diner.

The camo looks cool too! Can't say which I like best - the digital or traditional. They both look good. I'm not much help on the colors either, but I would probably not go with a white just because I think you'll be fighting stains. (There are a lot of plants with wild berries in our area. Mix that with hungry birds and...well you know.) My guess is that tan or light green would look good.

Take care,
Tom
Tom (& Linda)
For build info on our former Silver Beatle teardrop:
Build Thread

93503
User avatar
aggie79
Super Duper Lifetime Member
 
Posts: 5405
Images: 686
Joined: Tue Aug 07, 2007 5:42 pm
Location: Watauga, Texas
Top

Postby jkidd6339 » Mon Jun 13, 2011 8:02 pm

Looking good Gary

I like the idea of the camo. What do you have to do to protect it from the sun? The epoxy that I used on the boat seems to turn yellow after a while. I haven't really worried about it because they were just temporary repairs till I could get them fixed right.
User avatar
jkidd6339
Teardrop Master
 
Posts: 198
Images: 1
Joined: Sat Jan 24, 2009 1:16 am
Top

PreviousNext

Return to Build Journals

Who is online

Users browsing this forum: No registered users and 10 guests

cron