Trolley top mk 2....., Wanda

...ask your questions in the appropriate forums BUT document your build here...preferably in a single thread...dates for updates, are appreciated....

Re: trolley top windows

Postby jackdaw » Fri May 06, 2011 4:07 pm

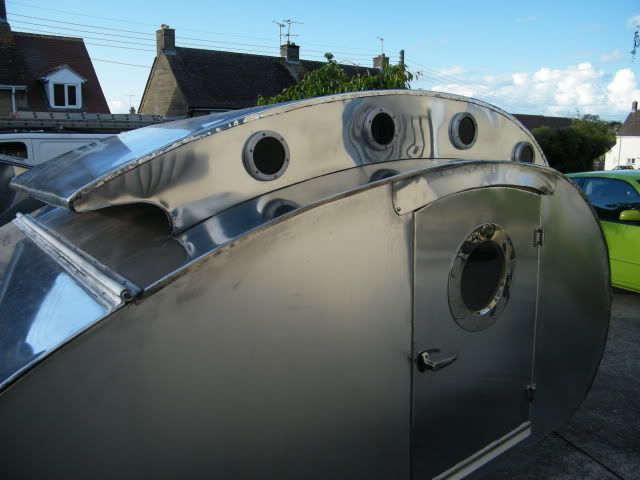
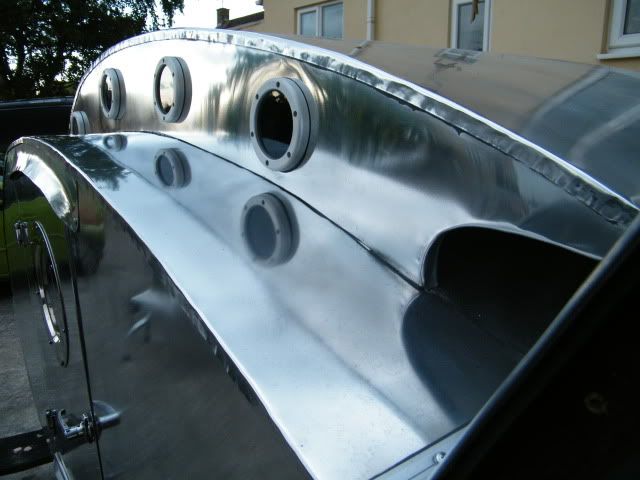
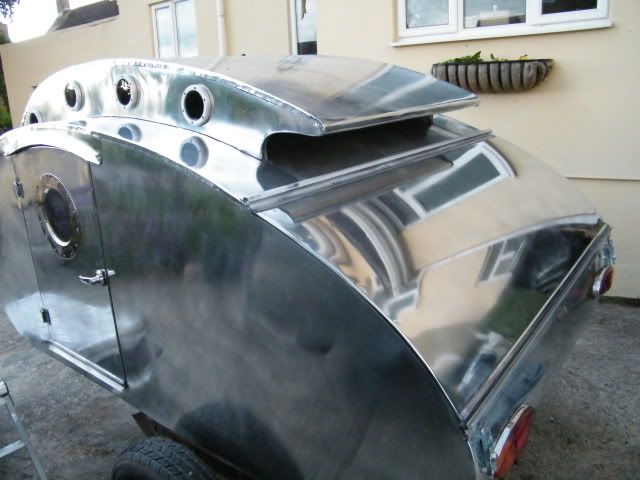
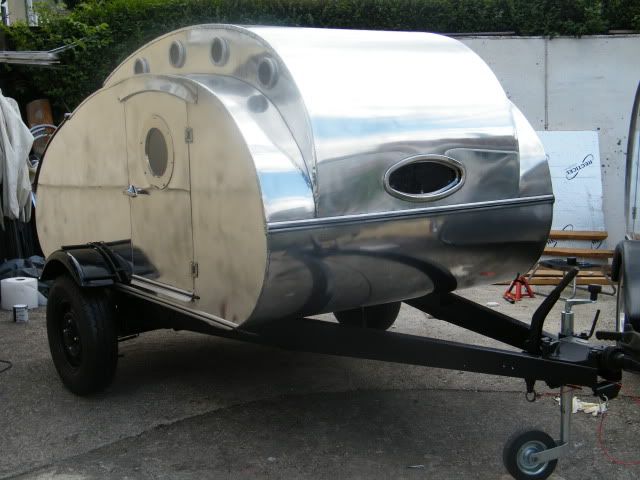
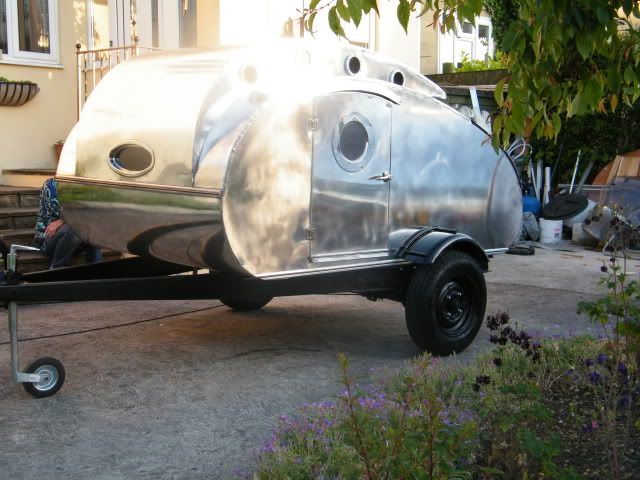
danlott wrote:I debated the number of windows on my trolley top. I think 4 on each side looks best. Three does not look like enough and five seems like to much.

Where did you find the windows? Are they the screw-in access plates? If so how do you plan on using them? Are you replacing the screw-in plates with something else?

I still have not decided how I will be doing my trolley top windows, so I am very interested in how you do yours.

Dan


Thanks for your input Dan :thumbsup:

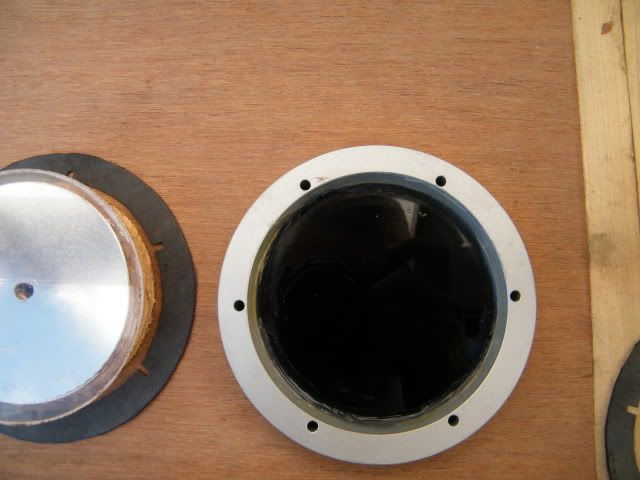
I found the windows on ebay..they were very reasonable (cheep :D) They're quite chunky , check out this link

The size is 4 7/8" outside diameter, 3 7/8" rebate, and 3 5/8" inside diameter.

They do a larger version too.

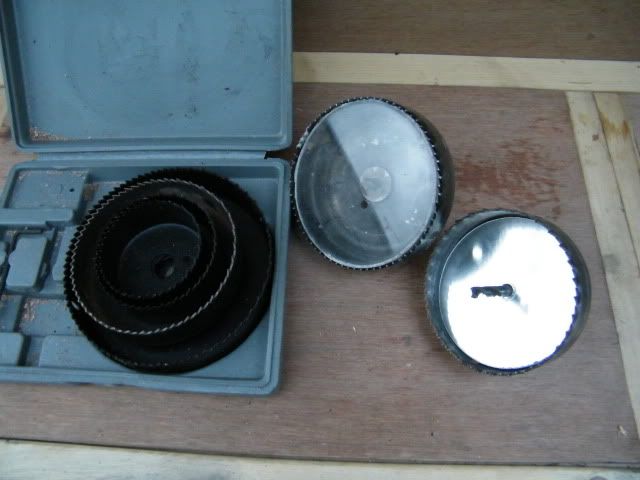
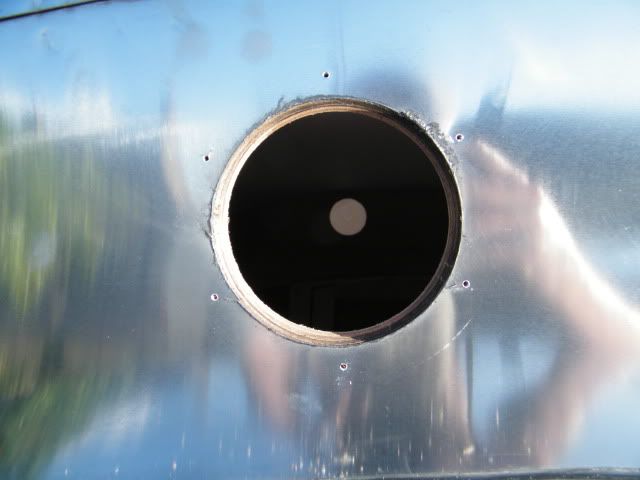
I've cut some perspex with a hole saw that sits nicely in the rebate. I think I'll silicone the perspex in place and make up a gaskit to fill the rebate. I'll fix the windows with polyurethane sealer and 6 screws in each. I've got a 3 1/2 hole saw, It's about the right size to cut the holes.... If I wiggle it a little.

Cheers Dave
User avatar
jackdaw
500 Club
 
Posts: 598
Images: 124
Joined: Fri Feb 22, 2008 2:31 pm
Location: Wltshire, UK

Postby GuyllFyre » Fri May 06, 2011 4:35 pm

The four per side look nice to me.
Things I have for sale on craigslist:
http://albany.craigslist.org/search/?ar ... catAbb=sss

Things I have for sale on eBay:
http://www.ebay.com/sch/merchant/seansmith
User avatar
GuyllFyre
Donating Member
 
Posts: 209
Joined: Fri May 21, 2010 9:35 pm
Location: Scotia, NY

Postby High Desert » Fri May 06, 2011 8:21 pm

I think the 4 have a nice balance too Dave.

With the port holestyle trim rings on all the windows it somehow reminds me of the Nautilus from 20,000 Leagues Under the Sea... :thinking:
Shaun

"it's not the years honey, it's the mileage"
High Desert
Platinum Donating Member
 
Posts: 8780
Images: 27
Joined: Wed Apr 08, 2009 1:46 pm
Location: SW Washington state
Top

Postby Woodstramp » Sat May 07, 2011 12:00 am

That looks amazing. My hat's off to you Dave. Show it off....it's special.
User avatar
Woodstramp
The 300 Club
 
Posts: 438
Joined: Fri Nov 20, 2009 9:28 pm
Location: Aladambama
Top

Postby warbird » Sat May 07, 2011 2:06 pm

Just got back from Daves, Four holes it is then!! :) 
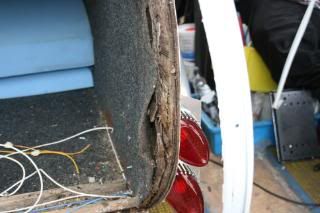
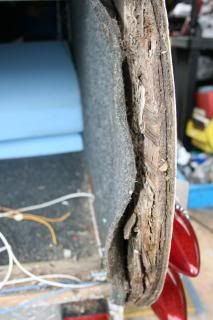
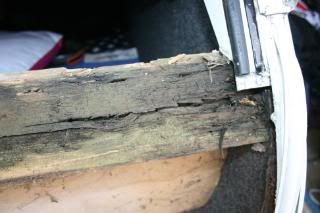
Its looking good too! Had a great day buddy, gonna get on with the repairs to my 'Little Guy' tomorrow, cutting some new wood! :o
Its not always true that size matters!
warbird
Teardrop Inspector
 
Posts: 20
Joined: Mon May 17, 2010 2:52 am
Location: Bristol, UK
Top

Postby jackdaw » Sat May 07, 2011 4:08 pm

Thanks for all the replies ....Initially I thought 5.... and Barry who's buying the trailer thought 4..... His wife Jeanette said it didn't matter on how many were used because it would look great anyway. :lol: :lol:

As warbird said..... four it is then. 8) 8)

We've had a most unusual spell of dry weather over here. I can't remember how many weeks ago it was when we last saw rain. Usually April is wet, but not this year :) We had a little rain this morning, but it soon dried out.....until we cut the last of the eight windows out......not long after the skys opened and it hasn't stopped yet......The cover's back over the trailer.... I'm sure we'll get the windows fitted tomorrow :D :D
Thanks again for helping us out :thumbsup: :thumbsup:

Geoff we had a great day... as usual.. Thanks for coming over, and lending a hand....We'll get your little guy ready for the end of the month, as long as the rot doesn't go to far forward :worship:
ATB Dave
User avatar
jackdaw
500 Club
 
Posts: 598
Images: 124
Joined: Fri Feb 22, 2008 2:31 pm
Location: Wltshire, UK
Top

Postby warbird » Sat May 07, 2011 4:32 pm

You mean this??

Image :shock:

or this??


Image :(

or maybe even this???

Image :cry:
Last edited by warbird on Sun May 08, 2011 9:19 am, edited 1 time in total.
Its not always true that size matters!
warbird
Teardrop Inspector
 
Posts: 20
Joined: Mon May 17, 2010 2:52 am
Location: Bristol, UK
Top

window link

Postby danlott » Sat May 07, 2011 7:42 pm

Dave,

Thank you for the link to the rings you are using for your porthole windows. Make sure to take some good pictures of the installation. I might be able to use them for my build.

Dan
Hoplite Traveler Build thread
Image Image
Life is what happens to you while you're busy making other plans.
User avatar
danlott
Donating Member
 
Posts: 874
Images: 264
Joined: Fri Mar 06, 2009 2:18 pm
Location: Winnemucca, Nevada
Top

Re: window link

Postby jackdaw » Sun May 08, 2011 5:09 pm

danlott wrote:Dave,

Thank you for the link to the rings you are using for your porthole windows. Make sure to take some good pictures of the installation. I might be able to use them for my build.

Dan


I fitted them today, after a lot of preparation.... but they're now in.

Just for Dan, I took a few extra shots, that may help to show how they're fitted.
I have a cheap hole saw set, that has large cutters.
I cut a hole the size I wanted the perspex in an off cut of ply. Then I could remove the pilot bit, and use the off cut as a guide to cut the windows out.

I spent the yesterday evening covering the perspex with limo black film so you can see out, but not in. and silicond the perspex into the frames, so they were all ready to go today.

Here's the holes saws I used to cut out the side of the trolley top and perspex

Image

I thought it might be a good idea to mount the rings on rubber gaskits instead of sealing them on with polyurethane sealer. At least they could be easily removed to re-polish the trolley top. I used pond liner to cut all eight gaskits

This next shot shows one of the rings on the left, and then the difference in sizes of the side cut out, on top of a piece of perspex, on top of a rubber gaskit. On the right is one of the rings with the tinted perspex set in place.
Image

This is what the inside looks like
Image

Each hole was marked, and pilot holes drilled before screwing the rings in place.

Image

I gave the area a little going over with some more polish, and screwed the windows in place.

Image

Image

Image

I polished the hatch up a bit more too :D :D

Image

Just the sliding window to fit in the rear of the trolley top to go. I've made it up, and going to fit the tint and varnish before it goes in.


Cheers , Dave
User avatar
jackdaw
500 Club
 
Posts: 598
Images: 124
Joined: Fri Feb 22, 2008 2:31 pm
Location: Wltshire, UK
Top

window install

Postby danlott » Sun May 08, 2011 7:26 pm

Thank you for the extra photo's Dave. I think I will contact the seller of the rings and see about getting some shipped over.

Dan
Hoplite Traveler Build thread
Image Image
Life is what happens to you while you're busy making other plans.
User avatar
danlott
Donating Member
 
Posts: 874
Images: 264
Joined: Fri Mar 06, 2009 2:18 pm
Location: Winnemucca, Nevada
Top

Postby droid_ca » Sun May 08, 2011 8:30 pm

I must say you do amazing work and your photos make it look easy thank you for such a good guide
There is a world, just beyond now,
where reality runs a razor thin seam between fact and possibility;

Anywhere I roam where I lay my head is home....
Image
“Fide Canem”
Please check out my build thread
viewtopic.php?f=5&t=52816
User avatar
droid_ca
Donating Member
 
Posts: 1981
Images: 176
Joined: Thu Sep 30, 2010 5:08 am
Location: Prince George BC Canada
Top

Postby jackdaw » Sat May 21, 2011 3:02 am

Thanks gents...I'm guessing its time for another update :D
Last weekend our good friends Barry and Jeanette came for a visit to see how the trailers's coming along , and to help paint the chassis.


After a few coffee's and cake, we got stuck into the trailer. the plan was to paint the chassis, after demounting the trailer, and stripping the old paint off.
Many hand make light work ... Luckily Warbird called in to lend a hand too.

Stripped down chassis

Image

Red oxide going on

Image

Almost done with a first coat

Image

Back to black

Image

remounted

Image

Great day of chin-wagging and getting it done :D :D

I wouldn't let them leave without checking out the trailer on the back of their Deli

Image

The new tyre came in the post, so our local tyre fitters swapped the tyres over to the right wheels....

Then after fitting some trim along the bottom of the trailer, and touching up the chassis with black paint. I fitted the first mudguard

Image

Then the same for the other side :D :D

Image

Then the handles were fitted to the back of the trailer. One for the hatch, and then one under each light...to give them a bit of protection ans for a bit of styling. The number plate has been put on, but I'm waiting for the led numberplate bolt before it's properly fitted. I only had time to make up one of the triangle reflector brackets....I hope to get the other one done tomorrow.

I'm ready to bolt the trailer down, and get the road lights wired up if the led's turn up tomorrow...maybe finish the rear window if all goes well.

Image

Heres a few more shot's because we like photos :D :D

Image

Image

Image

Image


Also started on the cupboard doors....the first one's done
Image
User avatar
jackdaw
500 Club
 
Posts: 598
Images: 124
Joined: Fri Feb 22, 2008 2:31 pm
Location: Wltshire, UK
Top

Postby Wolfgang92025 » Sat May 21, 2011 9:53 am

Dave,

Very nice :thumbsup: :thumbsup: :thumbsup:

Thanks for all the :pictures:
Wolfgang

Image
User avatar
Wolfgang92025
Lifetime member
 
Posts: 1098
Images: 660
Joined: Fri Apr 18, 2008 10:16 pm
Location: Salt Lake City area, Utah
Top

Postby jackdaw » Sat May 21, 2011 2:37 pm

Thank you Wolfgang..

We've been busy again :D :D
Today Rosie decorated the galley....I'm not sure what Barry and Jeanette will think of it as it isn't the neutral colour that we talked about last weekend :oops: :oops:
I like it ..and i hope they do to.
The number plate lights turned up in the post, so I can wire them up tomorrow. All the internal window frames have been removed and stained , the windows have been tinted with limo black tint. The rear window has been made up, stained, and the perspex tinted, ready for fitting tomorrow. The other triangle's been fitted :D :D

We've gone from this

Image

To this.....

Image

Should we keep the fish in the galley, or loose them .....What do you think ?
User avatar
jackdaw
500 Club
 
Posts: 598
Images: 124
Joined: Fri Feb 22, 2008 2:31 pm
Location: Wltshire, UK
Top

Postby droid_ca » Sat May 21, 2011 3:17 pm

I'm really liking your build :applause: :applause: :applause: :applause:
where did you get your tail lights I like them?
Awesome job on building this trailer
:thumbsup:
There is a world, just beyond now,
where reality runs a razor thin seam between fact and possibility;

Anywhere I roam where I lay my head is home....
Image
“Fide Canem”
Please check out my build thread
viewtopic.php?f=5&t=52816
User avatar
droid_ca
Donating Member
 
Posts: 1981
Images: 176
Joined: Thu Sep 30, 2010 5:08 am
Location: Prince George BC Canada
Top

PreviousNext

Return to Build Journals

Who is online

Users browsing this forum: No registered users and 17 guests