10' Standie Foamie ... on hold

Canvas covered foamies (Thrifty Alternatives...)

Moderator: eaglesdare

Postby GPW » Sun Jul 17, 2011 10:15 am

QUOTE: " I want you guys to know I had a hard time peeling off the canvas..." ...That only counts if you make funny noises while doing it .... :lol:

Glad you got it sorted !!! I still believe , despite these minor setbacks, that it will be SUPER when done ... 8) :thumbsup: :D
There’s no place like Foam !
User avatar
GPW
Gold Donating Member
 
Posts: 14920
Images: 546
Joined: Thu Feb 09, 2006 7:58 pm
Location: New Orleans

Postby bdosborn » Sun Jul 17, 2011 10:26 am

Mike,

I wonder if it wouldn't help to vacuum clamp the canvas on? My exterior skins have held up great using this technique. Maybe it would hold it tight and keep it from shrinking as well as getting rid of bubbles? I bet you could vacuum clamp 1/8" plywood to the inside of the walls for a nice surface.

Image

Bruce
2009 6.5'X11' TTT - Boxcar
All it takes is a speck of faith and a few kilowatts of sweat and grace.
Image
Boxcar Build
aVANger Build
User avatar
bdosborn
Donating Member
 
Posts: 5594
Images: 806
Joined: Wed May 05, 2004 11:10 pm
Location: CO, Littleton

Postby pat g » Sun Jul 17, 2011 10:40 am

Mike,

nice job on the repair. I like GPW's idea of assembling the walls in one piece then cutting the openings. My TD was done that way partly because of my need to see progress as I build and partly because I design on the fly. GOOD LUCK!

Pat G
pat g
Teardrop Master
 
Posts: 155
Images: 122
Joined: Thu Feb 17, 2011 8:28 pm
Location: Medina, Oh
Top

Postby Wobbly Wheels » Sun Jul 17, 2011 11:40 am

Hey all,

Mike, sorry to read about your misadventure !
Haven't been around much - RL gets in the way sometimes.

Sounds like its squared away and you're back on track, though. In looking at the door framing - is that a butt joint that failed ?
If it's screwed through the wood and into the end grain of the ply, might a better option be 1/4 dowels instead of screws ?
I'm figuring to have canted sides on mine instead of overhead cabinets so, with the door being full height, it needs to be in its own 'pod' separate from the rest of the trailer's profile. The door jamb will by necessity be a significant structural component, so rest assured that your mishap won't go to waste: I've been thinking about rounding the top of the door I've already made so I can laminate a U shaped bow for the jamb from strips. Seeing where yours has failed convinced me, so thanks !

A quick thought (a question, really) on foam repairs since it seems especially apropos here...
Were that a conventional foam and glass layup and were we at the recovering stage of the repair, we would sand down the foam to create enough of a recess for a layup right over the repair, then tie into that with the overall sheathing so the finished surface doesn't show a repair.

In working with the canvas, is the canvas/canvas bond as strong (stronger, I would think) as canvas/foam ?
Do you think there's a call for patches or strips of cloth as reinforcement under the primary skin for reinforcement ?
I'm thinking of seams between foam panels, under canvas seams to keep them flush and keep them from shrinking away from each other, basically anywhere you would tape and mud drywall in a house...

I have a question about the bed framing too but I'll shut up and watch and it'll probably be answered ;^)
Brock wrote:My wife taught me to sew. ( don't laugh too loud, you might hurt yourself )

Don't sweat it, I sew too....even if it's just gear and sails so it's still manly, lol.
:R
User avatar
Wobbly Wheels
Donating Member
 
Posts: 1080
Joined: Tue Mar 15, 2011 9:51 am
Top

Postby angib » Sun Jul 17, 2011 4:18 pm

I have to say that there is some strange effect at work here and the explanations given so far don't make much sense to me from a structural engineering point of view.

How can a crack want to open up if the canvas stuck to the foam is trying to shrink? The shrinkage will want to pull the crack closed, not open. Yes, even when picking the whole panel up.

I have to use very uneven shrinkage, with the most right at what will be the bottom edge of the wall, to try to explain why that crack would want to open. Mike, any chance you got the bottom edge much wetter than the rest, so it shrank more? Still, I'm clutching at straws.

Do you still have launderettes with their big washing machines? A hot wash is going to be better for getting shrinkage done.

I might also ask if you have stores that sell plywood, as I'm thinking that might turn out to be an easier material to build teardrops from..... :wink:
User avatar
angib
5000 Club
5000 Club
 
Posts: 5783
Images: 231
Joined: Fri Apr 30, 2004 2:04 pm
Location: (Olde) England
Top

Postby Wolffarmer » Sun Jul 17, 2011 4:43 pm

Mike

Sorry about your set back. Just remember all those pictures of the early rockets blowing up before they got it (somewhat right ) and they started putting people on the top of them.

In sizing your cloth I would first cut a piece of cloth and measure it. Put it in a tub if it won't go in your washing machine. Put in warmish water or as much as you can stand and then jump in with both feet for a few minutes of stomping about, dry, measure, repeat, measure, repeat. See if you can get a handle on the shrinkage.

Andrew, do you think it may be the shrinkage tried to twist the foam like a potato chip ( north american chip ) turning it into a bowl?

Randy
"these guys must be afraid of the dark"
User avatar
Wolffarmer
Donating Member
 
Posts: 4612
Images: 309
Joined: Wed May 02, 2007 1:32 pm
Location: Idaho Rupert
Top

Postby mikeschn » Sun Jul 17, 2011 5:38 pm

angib wrote:I have to say that there is some strange effect at work here and the explanations given so far don't make much sense to me from a structural engineering point of view.

How can a crack want to open up if the canvas stuck to the foam is trying to shrink? The shrinkage will want to pull the crack closed, not open. Yes, even when picking the whole panel up.

I have to use very uneven shrinkage, with the most right at what will be the bottom edge of the wall, to try to explain why that crack would want to open. Mike, any chance you got the bottom edge much wetter than the rest, so it shrank more? Still, I'm clutching at straws.

Do you still have launderettes with their big washing machines? A hot wash is going to be better for getting shrinkage done.

I might also ask if you have stores that sell plywood, as I'm thinking that might turn out to be an easier material to build teardrops from..... :wink:

Andrew,

I think the key to the puzzle is that the large surface areas had more tension, and the area where it cracked had less tension. So the foam was being pulled away from the crack, towards the large surface area.

Mike...
The quality is remembered long after the price is forgotten, so build your teardrop with the best materials...
User avatar
mikeschn
Site Admin
 
Posts: 19202
Images: 475
Joined: Tue Apr 13, 2004 11:01 am
Location: MI
Top

Postby mikeschn » Sun Jul 17, 2011 6:02 pm

Here's what I got done today...

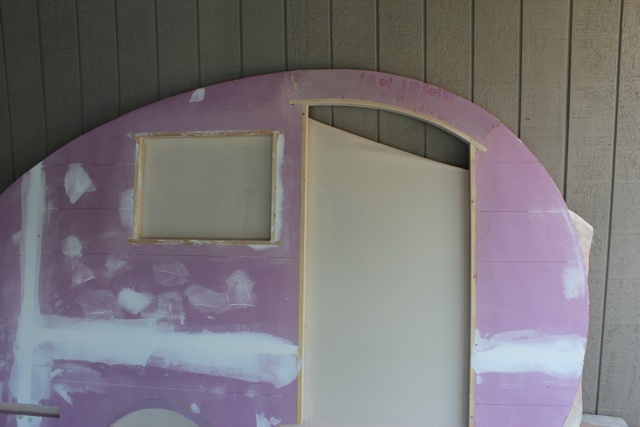
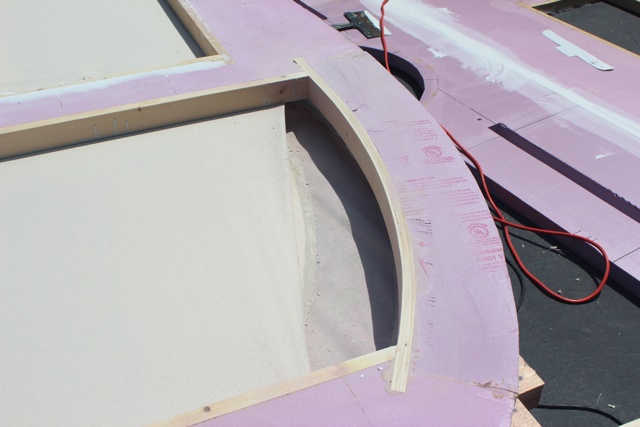
Here's the new framing inset into the foam!
Image

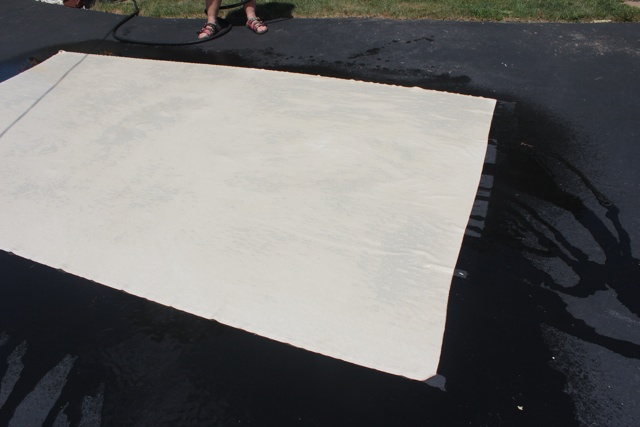
Here we are doing the shrink test. I started with a piece 11' long. Within seconds the piece had shrunk to 10' 2.25" When the canvas was finally dry it was 10' 2". You see that dry asphalt at the edge of the canvas. That's how much it shrunk, on each side...
Image

Here's another view of the repair I did this morning. I think it turned out well!
Image

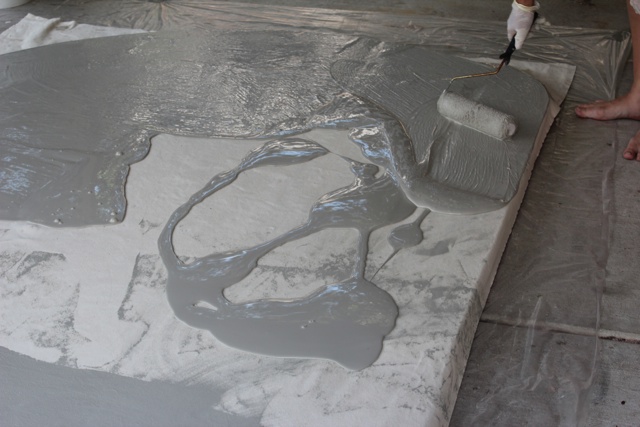
Okay, I got beat up for putting on too much paint on this wall. Chell said it was easier to work, but I noticed after sizing the canvas, it didn't pull nice and tight. And there is no middle of the road. Either it's sized, or it isn't.
Image

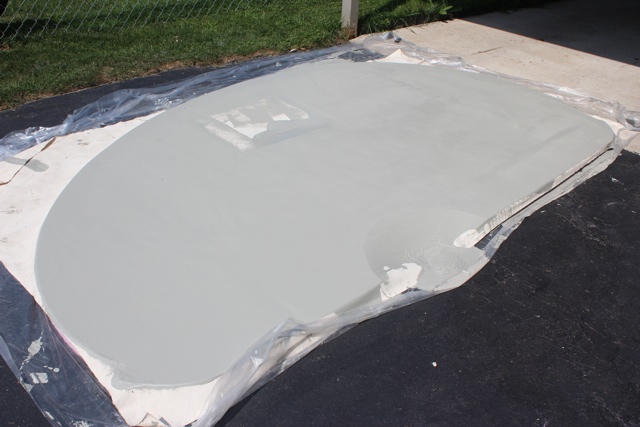
Here's the final result of the second wall. We are waiting for the large pools of paint to dry. Silly me, for pouring on too much paint!!!
Image

Mike...
The quality is remembered long after the price is forgotten, so build your teardrop with the best materials...
User avatar
mikeschn
Site Admin
 
Posts: 19202
Images: 475
Joined: Tue Apr 13, 2004 11:01 am
Location: MI
Top

Postby Wolffarmer » Sun Jul 17, 2011 6:14 pm

I think it made you make a better looking door.

It has it's own plans. You just need to follow

8)

Randy
"these guys must be afraid of the dark"
User avatar
Wolffarmer
Donating Member
 
Posts: 4612
Images: 309
Joined: Wed May 02, 2007 1:32 pm
Location: Idaho Rupert
Top

Postby RAYVILLIAN » Sun Jul 17, 2011 7:03 pm

Mike I'm traveling right now so not on much. I was making wild guesses as to the crack problem just thought it might be related to the shrinking problem since it cracked at the top edge of the door where the foam was the smallest.

The only thing that I would have done different is to cut the canvass at the doors and windows and wrapped it on into the frame while doing the side than done the same on the outside skin so that the inside would have wrapped into the outside and the frames would be double wrapped.

Your doing great can't wait to see next weekends progress. :applause:
Gary
Where ever we raise the hatch is home.
Darn blank states keep getting further away and we keep traveling slower ain't never gona get this map full.
111961Image
User avatar
RAYVILLIAN
Lifetime member
 
Posts: 1434
Images: 109
Joined: Thu Aug 05, 2004 9:33 pm
Location: Rayville MO
Top

Postby mikeschn » Sun Jul 17, 2011 7:06 pm

RAYVILLIAN wrote:Your doing great can't wait to see next weekends progress. :applause:
Gary


Thanks Gary,

I'm looking forward to next weekends progress too! :thumbsup:

Mike...
The quality is remembered long after the price is forgotten, so build your teardrop with the best materials...
User avatar
mikeschn
Site Admin
 
Posts: 19202
Images: 475
Joined: Tue Apr 13, 2004 11:01 am
Location: MI
Top

Postby GPW » Sun Jul 17, 2011 7:41 pm

Mike , The repair looks Very Nice ... even better now , Stronger !!! And it won't show at all under the covering ... I had to join the two side pieces with a smaller 6" piece right over the door ... Doesn't show ... :thumbsup:
The second side looks like it's coming along nicely .... You must own stock in a Paint company eh ??? :lol: :o

That's a Lot of shrinkage huh ? :o Maybe that's why our coverings are so tight and the doors are rubbing now ... still shrinking .. :roll:
There’s no place like Foam !
User avatar
GPW
Gold Donating Member
 
Posts: 14920
Images: 546
Joined: Thu Feb 09, 2006 7:58 pm
Location: New Orleans
Top

Postby eaglesdare » Sun Jul 17, 2011 8:11 pm

i :applause: the recovery!


on that shrinkage issue as far as our doors go, wouldn't that mean our doors were shrinking also? so there should be no tightness.
Louella
May the foam be with you.
User avatar
eaglesdare
Donating Member
 
Posts: 3168
Images: 13
Joined: Tue Aug 26, 2008 7:06 pm
Top

Postby atahoekid » Mon Jul 18, 2011 12:40 am

Bravo, Mike... Job well done. You've recovered nicely. I like your new door even better and I definitely will need to remember to set in my door frame too. Now this newbie builder can continue thinking about his "Road Foamie". I was very scared for a while... :o :frightened: :shock: Keep up the good work. I am impressed :applause: :thumbsup: :D
Mel

"Believe in your abilities... Remember amateurs built the ark, professionals built the Titanic"

"Indecision may or may not be my problem" Jimmy Buffet

Image

The Road Foamie Build Thread: viewtopic.php?t=45698
User avatar
atahoekid
Platinum Donating Member
 
Posts: 1773
Images: 158
Joined: Sat Jul 24, 2010 2:49 am
Location: Incline Village, NV
Top

Postby GPW » Mon Jul 18, 2011 8:18 am

QUOTE: " In working with the canvas, is the canvas/canvas bond as strong (stronger, I would think) as canvas/foam ?
Do you think there's a call for patches or strips of cloth as reinforcement under the primary skin for reinforcement ?
I'm thinking of seams between foam panels, under canvas seams to keep them flush and keep them from shrinking away from each other, basically anywhere you would tape and mud drywall in a house... "

W2.. the canvas to canvas bond is extremely Strong ... and we consider the reinforcing strips an integral and very important part of the whole Foamie procedure.. Seams, edges , doors ,hatches, window and AC framing, anywhere you need more strength ... Probably the floor to sidewall join being the most important place to reinforce... And for particularly troublesome areas , you can even use that Fiberglass tape that comes in rolls ... I used it on mine , secured with T2 and then painted ... works fine , blends with the canvas, Very Strong ...
There’s no place like Foam !
User avatar
GPW
Gold Donating Member
 
Posts: 14920
Images: 546
Joined: Thu Feb 09, 2006 7:58 pm
Location: New Orleans
Top

PreviousNext

Return to Foamies

Who is online

Users browsing this forum: No registered users and 9 guests