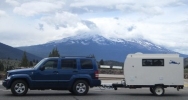
The Poet Creek Express - Foamie Hybrid

Canvas covered foamies (Thrifty Alternatives...)

Moderator: eaglesdare

Re: The Poet Creek Express - Laying Frame

Postby S. Heisley » Mon Mar 26, 2012 9:30 pm

Don't feel bad, KC. I think that a lot of builders get carried away on some part of their build. (When I was in the "dream-up" stage, I was going to build a "wooden tent".) Anyway, if you are going to splurge, the chassis is a great place to do it because, even if you decide to rebuild your tear at some point, the chassis will probably always be strong and very use-able. I was looking at your narrative and pictures, thinking: "Boy, I'd like to be able to do that but, being an old geezer, I doubt I ever will." Many of us will get to do it vicariously, through your build thread. HaHa! Thanks for sharing! :applause:
User avatar
S. Heisley
Super Lifetime Member
 
Posts: 8866
Images: 495
Joined: Mon Sep 17, 2007 10:02 am
Location: No. California

Re: The Poet Creek Express - Laying Frame

Postby KCStudly » Mon Mar 26, 2012 10:29 pm

Thanks for the encouraging words Sharon. I always look forward to your thoughtful comments and positive attitude.

I guess I'm just feeling the start of that juggling feeling where things are going to start depending on an overlapping contingency of prerequisites.

Will the suspension be too high, the tires too big, the counter too high. Can't weld the draw bar until the ride height is set. Can't set the ride height till the axle has been placed and the springs have been preloaded. Can't order the axle until I know if it needs to be spring over or under for the perch locations, yadda yadda yadda. Starting to chase my tail in a circle mentally. :?

I'll just have to take another bite of the elephant.

I guess I could just run with the suspension as planned and if the cooler won't fit under with the counter top at a reasonable height, I can just redesign and make the galley work out as I go. :thumbsup:

And GPW, I now realize that I may have been sounding all down on you; didn't mean it that way. Thanks for the positive comments. To me I'm just working a craft that I am familiar with, steel fab and tech writing (well, creative e-story telling with a tech writing influence), and you make it sound like I am breaking new ground or setting the world on it's ear. Thanks, that is nice for my ego. :thumbsup:
KC
My Build: The Poet Creek Express Hybrid Foamie

Poet Creek Or Bust
Engineering the TLAR way - "That Looks About Right"
TnTTT ORIGINAL 200A LANTERN CLUB = "The 200A Gang"
Green Lantern Corpsmen
User avatar
KCStudly
Donating Member
 
Posts: 9640
Images: 8169
Joined: Mon Feb 06, 2012 10:18 pm
Location: Southeastern CT, USA

Re: The Poet Creek Express - Laying Frame

Postby GPW » Tue Mar 27, 2012 5:24 am

KC , Your build will give us a “basis for comparison “ on all other trailers ... Now that we’ve seen one “built the Right way ” ... :thumbsup:
There’s no place like Foam !
User avatar
GPW
Gold Donating Member
 
Posts: 14920
Images: 546
Joined: Thu Feb 09, 2006 7:58 pm
Location: New Orleans
Top

Re: The Poet Creek Express - Laying Frame

Postby KCStudly » Wed Mar 28, 2012 11:11 pm

Today's progress was good!

Didn't make sense to move the trailer frame down and then back up again on a short week night session, which worked out good because Karl had a hot all-night job to make a rush part for a trash plant that was down on an outage, so he needed the shop to be clear anyway.

I need to figure out my suspension heights so I concentrated on getting dimensions of all of the suspension parts so I can add them to the model. The front hanger is 3-1/2 wide (outside) but the main frame rail is only 2 inches wide. In order to keep the spring and hangers from sticking out on the sides I intend to offset the brackets inboard some. I think I have all the info I need now to work out the final axle specifications. I just need to figure it all out and speak to the local Dexter distributor. Need to ask about available spring perch widths (2-1/2 inch wide are not std. trailer width), and with the hanger offsets my perch width is no longer an even number (centered on the rails is 62 inches). We got the wheel back spacing and required tire side wall clearance measured the other day when we had the wheel off of the jeep so I can also figure the hub-to-hub length.

After tracing/sketching the hanger parts, measuring and writing down all of the dimensions, I sanded the corners off of the swivel coupler pin lock block.
8985289853

Then I pressed one of the pintle yoke bushings in.
89854

Here's how I did it. This next sequence of pics shows how I set up to use the spindle of the milling machine as an arbor press, it was just easier and clearer to take the pictures in a mock-up on the bench. First position the bushing squarely at the hole opening.
89855

Then add a steel block to distribute the force evenly so as not to deform the thrust face of the soft bushing.
89856

Then a piece of round bar to chuck in the spindle that is smaller than the upper bushing ID.
89857

And here it is set up in the mill and pressed home.
89858
I actually have an arbor press at home, and there's one at work, too, but neither the parts nor I where at either one of those locations at the time.

Here is the pintle yoke with bushings mocked up with the bolt that will be used at the draw bar yoke (the fixed pin for this location won't fit in the bushings until they are reamed to size, but the bolt is slightly under nominal size, so it fits well as is).
89859
Note that the bolt length was selected so that the shank extends through all of the bushing but there is still enough thread for the nut to snug down. The excess thread has been cut short so that there won't be any more than necessary sticking down. I won't run the self locking nut down until final assembly. Also notice that I did not bother to plug weld the pilot spigot in the yoke hub. After completing the big weld on the outer shoulder, it just didn't seem to be necessary.

Because the sleeve bushings for the U-joint are much longer, they were going to be harder to press (more friction), and the milling machine really isn't the right tool. Here's how I installed the first sleeve bushing in the U-joint.
89860
Because the bushings I was able to buy in this ID/OD where only available in 3 inch long, I didn't have to worry about mushrooming over the end due to the impacts from the hammer, otherwise I would have used a press.

The little ball peen hammer only went so far before I decided to pull out the big gun.
89861

Here it is almost home.
89862

And all the way home.
89863
I crept up on this so as not to mushroom the driven end against the bench in the last few taps.

Trimmed the excess off from the smashed end roughly in the saw.
89864

First I milled the rest of the bushing down to flush, then I took 0.025 inch off of each side of the whole U-Joint to make a snug fit with the pintle yoke. Took a few passes.
898658986689867

The final fit is just perfect. I had to just push it together slightly by hand. The U-Joint is just snug enough to hold itself in place, but can be turned easily by hand. Notice in the first couple of pics that there is no pin holding the U-Joint in to the yoke, just the snug fit. (The bushings pin and bolt will be coated with a dry film lube prior to final assembly; less messy than grease and will not attract dirt.)
8986889869898708987189872

The fit of the U-Joint to front draw bar yoke will be made a little looser to make sure that it is easy to assemble and disassemble.

And I cleaned up after myself.
89873
Last edited by KCStudly on Thu Feb 04, 2021 10:49 pm, edited 2 times in total.
KC
My Build: The Poet Creek Express Hybrid Foamie

Poet Creek Or Bust
Engineering the TLAR way - "That Looks About Right"
TnTTT ORIGINAL 200A LANTERN CLUB = "The 200A Gang"
Green Lantern Corpsmen
User avatar
KCStudly
Donating Member
 
Posts: 9640
Images: 8169
Joined: Mon Feb 06, 2012 10:18 pm
Location: Southeastern CT, USA
Top

Re: The Poet Creek Express - Laying Frame

Postby KCStudly » Thu Mar 29, 2012 6:02 pm

Well, I think I have worked out my axle dimensions.

Dexter D35 straight round tube (w/camber…technically not straight, but I cheated and modeled it that way for now)
77-1/2 hub face-to-hub face (should give about 2-1/4 inches of tire side wall clearance per side)
61 c/c spring perches (spring hangers mounted 1/2 inch inboard from centered on the frame rails)
Spring perches under axle (axle on top of springs worked out better for my ride height goal)
Spring perches for 2-1/2 wide spring (if available, otherwise no perches and I will buy separately, or fab, and weld them on myself)
5 on 4-1/2 bolt circle w/ 1/2-20 wheel studs
Elec. brakes.

Surprisingly after modeling all of the spring mounting hardware and springs, and putting them in to the trailer frame model, everything worked out amazingly close to my highly detailed digital side profile, including ride height and my initial stab placement.

Here are a few screen shot images.
89925 89926 89927

I took a guess and set the weight of the axle assembly at 150 lbs. New total from Inventor is 1092 lbs. including the 200+ lb cooler allowance.

Tomorrow I will model the wheels and tires.
KC
My Build: The Poet Creek Express Hybrid Foamie

Poet Creek Or Bust
Engineering the TLAR way - "That Looks About Right"
TnTTT ORIGINAL 200A LANTERN CLUB = "The 200A Gang"
Green Lantern Corpsmen
User avatar
KCStudly
Donating Member
 
Posts: 9640
Images: 8169
Joined: Mon Feb 06, 2012 10:18 pm
Location: Southeastern CT, USA
Top

Re: The Poet Creek Express - Laying Frame

Postby KCStudly » Thu Mar 29, 2012 8:36 pm

When I got home there was a small package from Summit Racing for me.
89930

I ended up ordering the wheels ($143 ea) and some lug nuts from them. The wheels are on back order, but I figured if I didn't order them, then I would never get them. I will probably look for some temporary factory take off steelies on CList in the meantime.

Anyway, the lug nuts and some swag were in the box.
89931

I can use the new hat next winter and it fit perfectly right out of the box (I don't usually wear one in warm weather).
89932
Note the multicolored tiger stripe/savanna grass paint job that my wife and I did in our kitchen. Pulled the chair rail trim off of the wainscoting, used two different luan templates to layout the tape lines (from a scale layout I made in AutoCAD), mask two of the four colors, paint, remask the other two colors, paint, and put the chair rail back. The ceiling is half tone of the lighter 'Guacamole' color. Where the swath of color split one of the light switch plates I painted one side of the screw head one color, and the other side the other color, then clocked the screw accordingly at install. The devil is in the details.
KC
My Build: The Poet Creek Express Hybrid Foamie

Poet Creek Or Bust
Engineering the TLAR way - "That Looks About Right"
TnTTT ORIGINAL 200A LANTERN CLUB = "The 200A Gang"
Green Lantern Corpsmen
User avatar
KCStudly
Donating Member
 
Posts: 9640
Images: 8169
Joined: Mon Feb 06, 2012 10:18 pm
Location: Southeastern CT, USA
Top

Re: The Poet Creek Express - Laying Frame

Postby KCStudly » Sat Mar 31, 2012 12:20 am

During my morning break at work today I called a couple of Dexter dealers and found an outfit in Hartford (about an hour ride) that had everything I needed in stock (unassembled). The catch was that they were only open until 4 pm and had no weekend hours. I checked with Karl and he was willing to loan me his P/U truck (probably could have squeezed it into the Ford, but was glad that I didn't have to get greasy spindle juice all over my nice still clean carpet). Because I am the go to working leader for my dept. on Fridays, I was also glad that it was a relatively calm day and was able to take a couple of hours PTO to bug out early.

Road Trip!!! :twisted:
8995789958

Axle w/ spindle nuts, RH & LH 10 inch brake backing plate assemblies, 10 inch drum brake hubs with bearing races installed, bearings, dust caps, seals, lug nuts, backing plate nuts, spring perches and U-bolts w/ self locking nuts all loaded up.
89959

The bare axle was only $125 by itself . However, by the time you add up all the subassembly's and loose pieces, plus top up the gas tank in Karl's truck ($42) I'm into the axle for about $482 (ouch). But... it is exactly what I wanted and I have it right now. I will have absolutely no concern about bolting on the big 31 inch tires and full size 15x8 inch wheels, and the 10 inch brakes will provide a more enjoyable towing experience. Though the brake related parts cost more than the axle, by far.

Arrived back at Fab Mecca to an ordinary day in the shop where they were building these big expansion joints for a trash to energy plant.
89960
Special heat resistant stainless steel alloy, 147 inches inside dimension, rolled and built up T section. Shown at tack up stage, but will be fully welded when done. Just from tack welding they pulled about 5/8 inch out of round!!!

Anyway, that's a quick turnaround paying job for Karl, and it is bulky so I needed to stay out of the way. To that end I stashed the axle parts at the back of the bench and tinkered on a few small things.

One of the retainer clips on one of the leaf springs was tweaked open more than the rest, so I got out the calibrated adjuster mechanism (BFH) and made a few finely crafted adjustments.
89961

Started measuring on the axle and spring perches. Noted that the spindles appear to have a bit of toe built in (whether it is intentional or not, I do not know) so I have designated the toe in as the front. As measured at the front, middle and rear across the tops of the brake mounting plates it varies by about 3/32 inch, and I would say that only about 1/32 inch of this is due to the plates being curled a little from being stamped/punched. I'll take some more measurements of the actual spindles when I get a chance.

The spring perches (shipped loose) have an inside and an outside; they are shorter on the inside (measured from the tangent point of the arch where they rest on the axle tube to the flat where the spring rests) so that they match the slope of the axle camber. You'd probably be none the wiser if you put them on backward, and they are unmarked, but still, they are intended to be welded on in the correct orientation. They are only 1-7/8 wide and my springs are 2-1/2 wide, so I am a little up in the air as to whether I should scab on some pieces of flat bar to make them wider. Will probably pose the question in the trailer section and link that here.

Checked fit of the perch hole with the alignment pin on the spring and was not at all surprised to find about 3/16 inch clearance; much too sloppy for my taste. Kind of tough to see in these blurry pics, but the shadowy part in the second pic is all slop.
89962 89963

The upside being that you could be pretty sloppy welding the perches on and you could still pretty much just wave the axle in the general direction of the springs and have it drop in place. The down side would be that all of the effort put into making sure that the tongue was perfectly centered and that the spring hangers are precisely located (which I will get to soon) would pretty much be a waste of time. So some alignment bushings are in order. (I know what you are thinking...unnecessary overkill... but, I will know that they are there and it will make me happy. I'll build my trailer my way and you can build yours however you like.)

The holes in the perches were punched and these punched holes typically have a bit of a taper to them with little jagged edges where the metal was sheared by the punch. So I drilled them out just a tad to clean up the holes.
89965 89966
After drilling they measured 0.695 ID.

Chucked up a drop piece of 3/4 round bar and turned the outside to be a snug interference fit.
89967 89968

Faced the end and knocked the corner off with a flat file, followed by a little clean up with some emery cloth.
89969 89970
(Both of these are posed photos so that I could take the pic's with the lathe not running and not worry about getting tangled up.)

Hit the end with a center bit, then drilled out to 1/2 inch nominal for the 0.490 OD alignment pin size.
89971 89972

Then I cut them both off long in the band saw.
89973

Tapped one into the perch to check fit.
89974 89975
Ahhh, much better. I will put a tack weld or two on the back side (shown) and then cut and grind them flush to the perch face.

Checked the U-bolt plate fit with the leaf spring alignment pin nut and with the U-bolts.
89964
The fit with the alignment pin nut is fine, but the slots for the U-bolts will need to be lengthened about 1/8 inch each; the 2-3/8 OD dumb axle is smaller than the typical drive axles that these U-bolt plates were made for. I may even fill in the excess portion of the slots with some slugs (if I get the bug).

When I got home the wife had dragged these off of the front porch so that she could get in the door. (Sweet!!!)
89976 89977
(Guess it's safe to put the snow shovel away now? Sure fire way to make it snow.)

As I wheeled them past the Jeep and down to the garage I laid them against one of the tires on the Jeep and checked them out. Yup, they're the same. A little more tread on them, but they're the same. (Hmm, maybe I should buy a couple more, put all 4 on the Jeep, and put the used ones on the trailer and spare? We'll see.)
Last edited by KCStudly on Sat Mar 31, 2012 4:11 pm, edited 1 time in total.
KC
My Build: The Poet Creek Express Hybrid Foamie

Poet Creek Or Bust
Engineering the TLAR way - "That Looks About Right"
TnTTT ORIGINAL 200A LANTERN CLUB = "The 200A Gang"
Green Lantern Corpsmen
User avatar
KCStudly
Donating Member
 
Posts: 9640
Images: 8169
Joined: Mon Feb 06, 2012 10:18 pm
Location: Southeastern CT, USA
Top

Re: The Poet Creek Express - Have Axle

Postby GPW » Sat Mar 31, 2012 5:54 am

KC, you’ve taken the common trailer to “machine” status ... pretty Amazing !!! 8) Guess we’ll never look at another trailer the same from now on eh ... :thinking:
There’s no place like Foam !
User avatar
GPW
Gold Donating Member
 
Posts: 14920
Images: 546
Joined: Thu Feb 09, 2006 7:58 pm
Location: New Orleans
Top

Re: The Poet Creek Express - Have Axle

Postby SteveW » Sat Mar 31, 2012 8:41 am

Wish I had that kind of skill :thumbsup: (and TOOLS! :FNP )
Steve
The build is on.
User avatar
SteveW
Teardrop Master
 
Posts: 168
Joined: Thu Feb 02, 2012 7:11 pm
Location: Winter Garden, FL
Top

Re: The Poet Creek Express - Have Axle

Postby Wobbly Wheels » Sat Mar 31, 2012 9:13 am

Where the swath of color split one of the light switch plates I painted one side of the screw head one color, and the other side the other color, then clocked the screw accordingly at install.


Hehe...that sounds far too familiar...
User avatar
Wobbly Wheels
Donating Member
 
Posts: 1080
Joined: Tue Mar 15, 2011 9:51 am
Top

Re: The Poet Creek Express - Have Axle

Postby KCStudly » Sat Mar 31, 2012 12:18 pm

Thanks for the kind words, GPW and SteveW. They are appreciated greatly.

Wobbly, The devil is in the details! Hopefully it is the sum of those little details that make a job come out and not only function well, but also give it that special something. That 'je ne sais quoi' quality.

Thinking ahead to the cabin, we'll see how it goes. You have to be careful because when you get to a certain level of finish, then all of the little warts jump out and smack you in the face, as if worse than if you just maintain that nice even level of 'that looks pretty acceptable' quality (not exceptional... I'm talking final finish appearance). I know this through observation of other peoples 'show' projects, not my own. This is not a show project, by far, but I do hope to be able to display it with pride (so far so good). I have never built anything so refined to pass any level of true scrutiny, and don't intend to do so with this project. The detail design work and metal fabrication is just what I do.

:thumbsup: :D
KC
My Build: The Poet Creek Express Hybrid Foamie

Poet Creek Or Bust
Engineering the TLAR way - "That Looks About Right"
TnTTT ORIGINAL 200A LANTERN CLUB = "The 200A Gang"
Green Lantern Corpsmen
User avatar
KCStudly
Donating Member
 
Posts: 9640
Images: 8169
Joined: Mon Feb 06, 2012 10:18 pm
Location: Southeastern CT, USA
Top

Re: The Poet Creek Express - This post doesn't exist

Postby KCStudly » Sat Mar 31, 2012 6:57 pm

This update doesn't exist. If this had been a true update I would be posting pics and explanations of all the work that I had gotten done today.

As stated previously, Karl has a bulky job in the shop right now with lots of linear feet of high amperage welding; plenty of opportunity for second hand welding flash. He's still gotta pay the bills and most of the equipment I would be using would use the same power lead that he needs for the MIG welder, and he needs all of the bench. So the decision was made for me to log some teardrop time (er...down time). His job needs to be done by tomorrow and he thinks he will finish up by mid morning/noon, so I may be able to get in there for a few hours tomorrow.

I can tell you this, the benefits of using Karl's shop far, far, far outweigh any minor inconvenience associated with doing so. I'd still be sitting behind my computer screen planning if it weren't for the resources that Karl has made available to me. :applause: :thumbsup: :D
KC
My Build: The Poet Creek Express Hybrid Foamie

Poet Creek Or Bust
Engineering the TLAR way - "That Looks About Right"
TnTTT ORIGINAL 200A LANTERN CLUB = "The 200A Gang"
Green Lantern Corpsmen
User avatar
KCStudly
Donating Member
 
Posts: 9640
Images: 8169
Joined: Mon Feb 06, 2012 10:18 pm
Location: Southeastern CT, USA
Top

Re: The Poet Creek Express - Have Axle

Postby Wolffarmer » Sun Apr 01, 2012 12:13 am

Hey KC

I just started reading your build thread. Fan freakin tastic. When I start welding up my trailer, my camera is going to be broken.
You do nice work, very nice work. Me I am just an old farm hack stick welder. But one winter I did work in a local shop that builds rotary snow plows. The big ones, highway and airport mostly. I learned a lot and was amazed by a lot. Like when we mounted the engine in the frame of a rig we would hang it from a chain and move it about until it looked right. Then we made the motor mounts.

:lol:

I learned to use the wire feed, ( mig? ) there but that was many years ago. But i did learn about transfer punches and slightly over sized drills and nice belt sanders for metal work. That does put a lot of pretty into a job.

Any one want to start a pool as to how much my frame warps? and how much I can live with?

:lol:

Randy
"these guys must be afraid of the dark"
User avatar
Wolffarmer
Donating Member
 
Posts: 4612
Images: 309
Joined: Wed May 02, 2007 1:32 pm
Location: Idaho Rupert
Top

Re: The Poet Creek Express - Have Axle

Postby KCStudly » Sun Apr 01, 2012 1:03 am

Thanks for checking it out Randy (Wolffarmer), and for the compliments and encouraging comments.

Yup,
MIG = Metal Inert Gas (consumable wire fed electrode with gas shielding)
TIG = Tungsten Inert Gas (non-consumable tungsten electrode torch, hand fed wire rod and gas shielding)
Stick, as you know, is a consumable electrode rod coated with a flux material that forms a mechanical shield that must be chipped off after the fact,
and then there is good old oxy-acetylene welding where an open flame is the heat source and wire is fed by hand, similar to TIG. Here the fuel mixture is key to avoiding oxygen contamination of the weld.

I've done them all at one time or another. Never done submerged arc, though. IIRC that is a machine process where a powdered shield media is poured around the arc as the torch progresses, usually reserved for large industrial process.

A friend of mine on the catapult team follows the Miller welding forum and tells of a guy that does large equipment repairs where he uses 3/4 inch diameter x 3 ft long stick rod wearing one of those aluminized fire suits and a helper behind him to manipulate the torch cables. Digs a trench under his work to catch the molten metal from the carbon arc gouging he does for weld prep. Apparently he goes through helpers quite frequently.

As far as warping is concerned, you just need to think ahead a little to try and keep it under control; clamp everthing well, add temporary diagonal braces, check dimensions often so you know what it is doing and what you might have to do to correct it (if you can). Weld a little here, a little over there, work your way around evenly. Don't burn anything down solid until everything is tacked and triple checked. It's going to move, the worst thing is to be surprised by it when it is inconvenient. As long as you know it is there, can accept the tolerance...it's only metal. If we can make it in the first place, we can certainly change it to make it right, or at least close enough. The trick is to keep it under control during the process, instead of trying to fix it all at once in the end. Small tacks are easy to cut. Several inches or feet of solid welds, not so much...and even more difficult to restore fit after cutting.

Anyway, I, for one, am looking forward to your build. You just can't beat practical experience, and I am sure you have that in spades! :thumbsup: I love your sense of adventure, too. Build on.
KC
My Build: The Poet Creek Express Hybrid Foamie

Poet Creek Or Bust
Engineering the TLAR way - "That Looks About Right"
TnTTT ORIGINAL 200A LANTERN CLUB = "The 200A Gang"
Green Lantern Corpsmen
User avatar
KCStudly
Donating Member
 
Posts: 9640
Images: 8169
Joined: Mon Feb 06, 2012 10:18 pm
Location: Southeastern CT, USA
Top

Re: The Poet Creek Express - Have Axle

Postby Wolffarmer » Sun Apr 01, 2012 1:33 am

I have only touched on TIG welding a long time ago. I have oxy/acetylene aluminum. And have the brand marks on the top of my head. Pretty close to the dent made when a spud celler fell in on me. I have a good stick welder and a good sized oxy/acetylene outfit. And a good sized rose bud that works very well. When I have full tanks. I also have a hand cranked forge now.
:D
Hope I don't need that.

Yup. lots of temp cross bracing is planned and lots of tacking be done and checking before welding solid, in small bits. Lots of chipping and grinding. I also have a 4" and a 9" angle grinder. Just wished I had a helper to run that 9". Getting heavy for me.

I am still reading your thread. Just saw how you radius-ed your rail ends. Nice looking. Now to figure our how I can do it.

Last week on the farm I welded the roller harrow back together. Lots of welding in a not to comfortable position for this fatty. And wearing my winter cotton coat for spark protection on a nice spring day, yes i know but it was all I had. After that was over I had to have my helper pull a sleeve of the coat so I could get it off. I was soaked, wobbly legged and tired. I called the boss and informed him I was going home. Actually I just went home. He called as I was just leaving. Heck he was in Idaho Falls 2.5 hours away.
:lol:

I do wished I had a metal band saw, even one of those cheap china ones would do me. I have used them in the past on many things. And have used a nice large industrial saw when building snow plows. One time on that job they turned me lose on a gear case casting to drill holes to bolt it together. The raw casting was about 500 pounds and cost $10,000 in 1984. I figured out a way to use their big radial arm drill press. Drill much taller than me, I just crawled around on the table setting things up. I got to do a bunch of special jobs like that. Welding some wild things that took a lot of stress and in critical areas of the rotory system. And heck, all i am is an old farm hack welder. No certs ( for welding ) and I was there only 3 months. Does help this is a small farming area and I know the owner. Though he didn't know I was working there until he came in early one day. 8) I was working grave yard.

Randy
"these guys must be afraid of the dark"
User avatar
Wolffarmer
Donating Member
 
Posts: 4612
Images: 309
Joined: Wed May 02, 2007 1:32 pm
Location: Idaho Rupert
Top

PreviousNext

Return to Foamies

Who is online

Users browsing this forum: No registered users and 12 guests