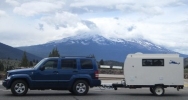
The Poet Creek Express - Foamie Hybrid
Moderator: eaglesdare
Re: The Poet Creek Express - Laying Frame
Don't feel bad, KC. I think that a lot of builders get carried away on some part of their build. (When I was in the "dream-up" stage, I was going to build a "wooden tent".) Anyway, if you are going to splurge, the chassis is a great place to do it because, even if you decide to rebuild your tear at some point, the chassis will probably always be strong and very use-able. I was looking at your narrative and pictures, thinking: "Boy, I'd like to be able to do that but, being an old geezer, I doubt I ever will." Many of us will get to do it vicariously, through your build thread. HaHa! Thanks for sharing! 

...Sharon....
I think I can...I THINK I can...I THINK; I CAN! (I think I did it!)
http://www.doityourselfrv.com/handcraft ... g-trailer/
viewtopic.php?f=50&t=27313&start=555
http://www.squidoo.com/painting-a-campi ... ramebuster

I think I can...I THINK I can...I THINK; I CAN! (I think I did it!)
http://www.doityourselfrv.com/handcraft ... g-trailer/
viewtopic.php?f=50&t=27313&start=555
http://www.squidoo.com/painting-a-campi ... ramebuster
-

S. Heisley - Super Lifetime Member
- Posts: 8866
- Images: 495
- Joined: Mon Sep 17, 2007 10:02 am
- Location: No. California
Re: The Poet Creek Express - Laying Frame
Thanks for the encouraging words Sharon. I always look forward to your thoughtful comments and positive attitude.
I guess I'm just feeling the start of that juggling feeling where things are going to start depending on an overlapping contingency of prerequisites.
Will the suspension be too high, the tires too big, the counter too high. Can't weld the draw bar until the ride height is set. Can't set the ride height till the axle has been placed and the springs have been preloaded. Can't order the axle until I know if it needs to be spring over or under for the perch locations, yadda yadda yadda. Starting to chase my tail in a circle mentally.
I'll just have to take another bite of the elephant.
I guess I could just run with the suspension as planned and if the cooler won't fit under with the counter top at a reasonable height, I can just redesign and make the galley work out as I go.
And GPW, I now realize that I may have been sounding all down on you; didn't mean it that way. Thanks for the positive comments. To me I'm just working a craft that I am familiar with, steel fab and tech writing (well, creative e-story telling with a tech writing influence), and you make it sound like I am breaking new ground or setting the world on it's ear. Thanks, that is nice for my ego.
I guess I'm just feeling the start of that juggling feeling where things are going to start depending on an overlapping contingency of prerequisites.
Will the suspension be too high, the tires too big, the counter too high. Can't weld the draw bar until the ride height is set. Can't set the ride height till the axle has been placed and the springs have been preloaded. Can't order the axle until I know if it needs to be spring over or under for the perch locations, yadda yadda yadda. Starting to chase my tail in a circle mentally.

I'll just have to take another bite of the elephant.
I guess I could just run with the suspension as planned and if the cooler won't fit under with the counter top at a reasonable height, I can just redesign and make the galley work out as I go.

And GPW, I now realize that I may have been sounding all down on you; didn't mean it that way. Thanks for the positive comments. To me I'm just working a craft that I am familiar with, steel fab and tech writing (well, creative e-story telling with a tech writing influence), and you make it sound like I am breaking new ground or setting the world on it's ear. Thanks, that is nice for my ego.

KC
My Build: The Poet Creek Express Hybrid Foamie
Poet Creek Or Bust
Engineering the TLAR way - "That Looks About Right"
TnTTT ORIGINAL 200A LANTERN CLUB = "The 200A Gang"
Green Lantern Corpsmen
My Build: The Poet Creek Express Hybrid Foamie
Poet Creek Or Bust
Engineering the TLAR way - "That Looks About Right"
TnTTT ORIGINAL 200A LANTERN CLUB = "The 200A Gang"
Green Lantern Corpsmen
-

KCStudly - Donating Member
- Posts: 9640
- Images: 8169
- Joined: Mon Feb 06, 2012 10:18 pm
- Location: Southeastern CT, USA

 Guess we’ll never look at another trailer the same from now on eh ...
 )
)
