BACKGROUND:
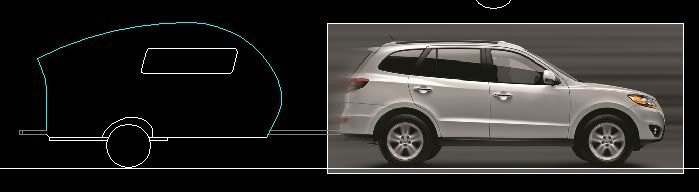
Our tow car is a 2007 Hyundai Santa Fe with tow package. About 3 years ago we bought an Aristocrat LoLiner for camping to replace our old tent trailer. I completely redid the interior in it and repaired the rotted out front corner. We really like the trailers vintage looks, but even though it weighs about 2000lbs, and the Santa Fe is rated to tow 3500 lbs, the Santa Fe has real difficulty towing the trailer over Snoqualmie Pass to some of our favorite spots. After two summers I finally decided we needed a lighter trailer, and I really needed a new project…….because I don’t already have enough……unfinished projects……..really, ask my wife…….or not.
DESIGN:
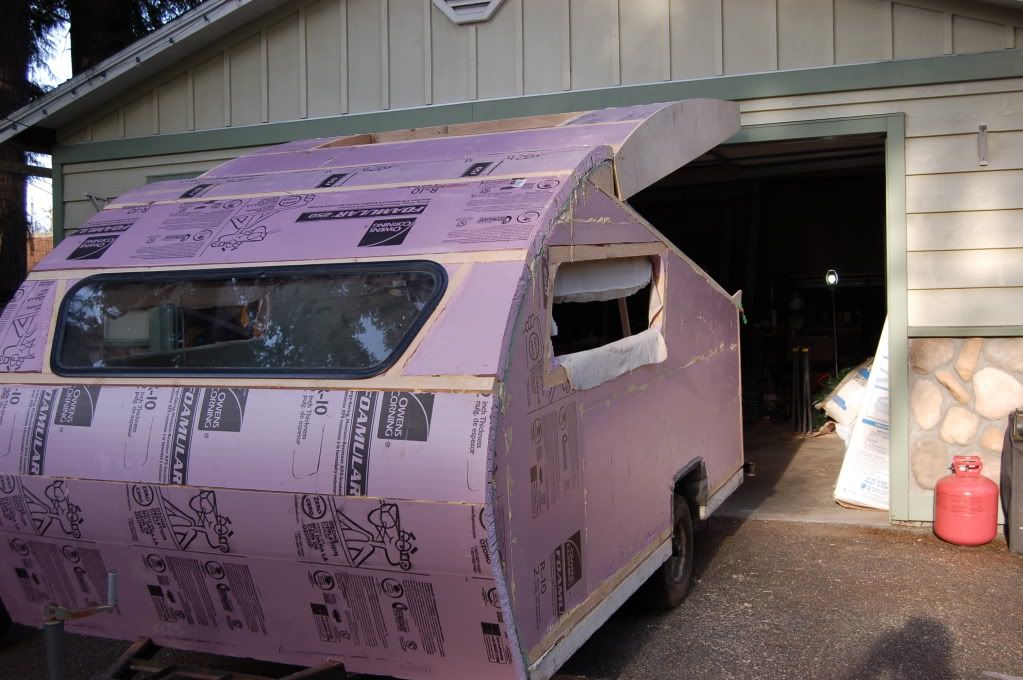
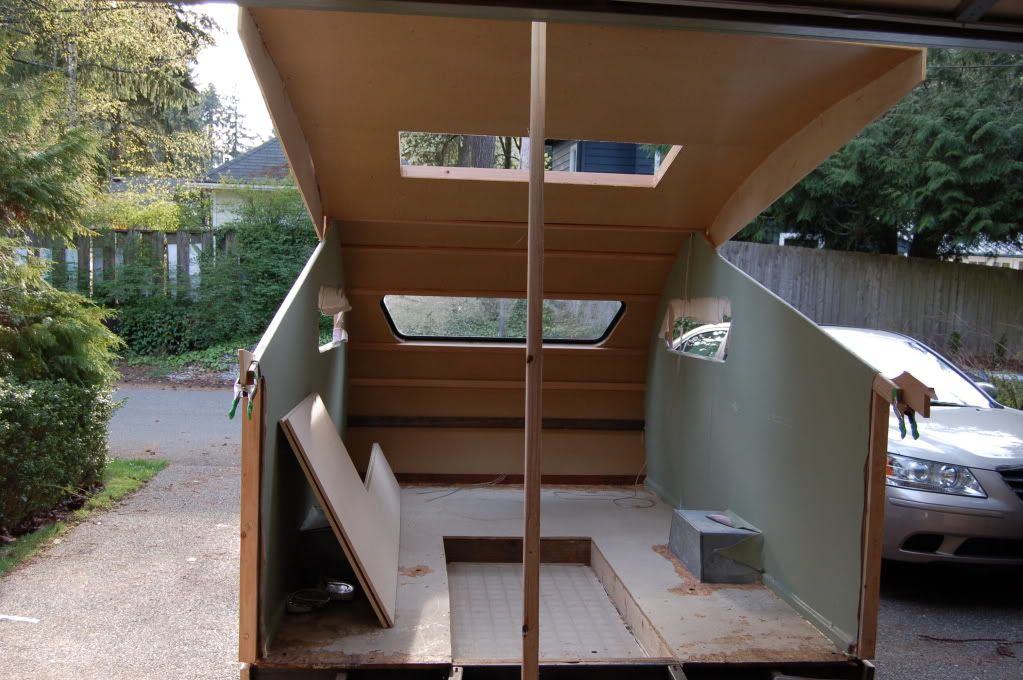
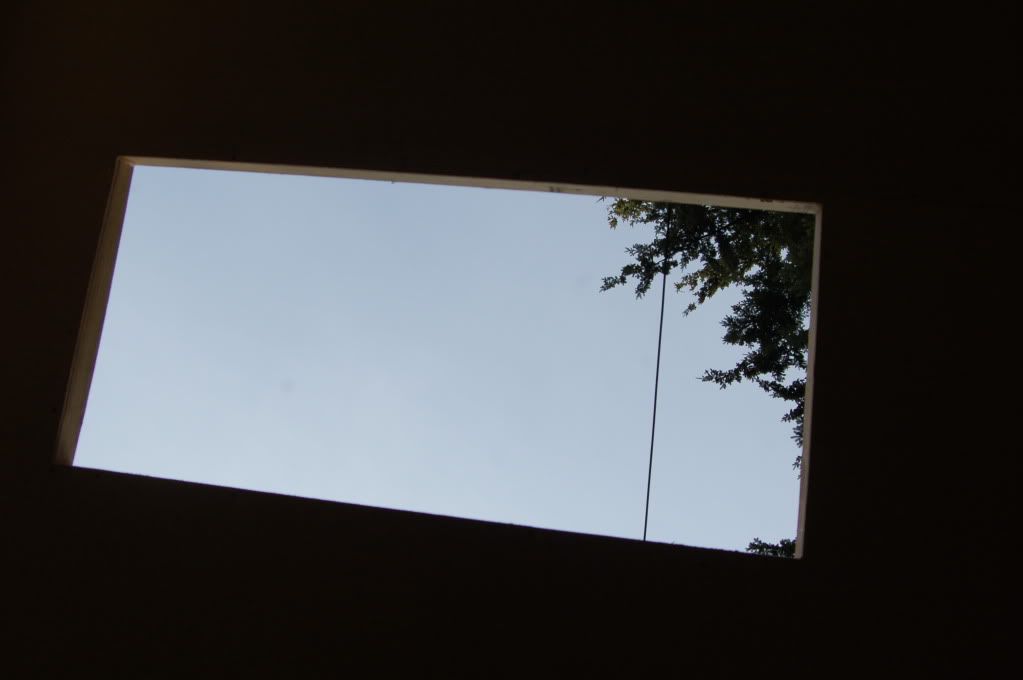
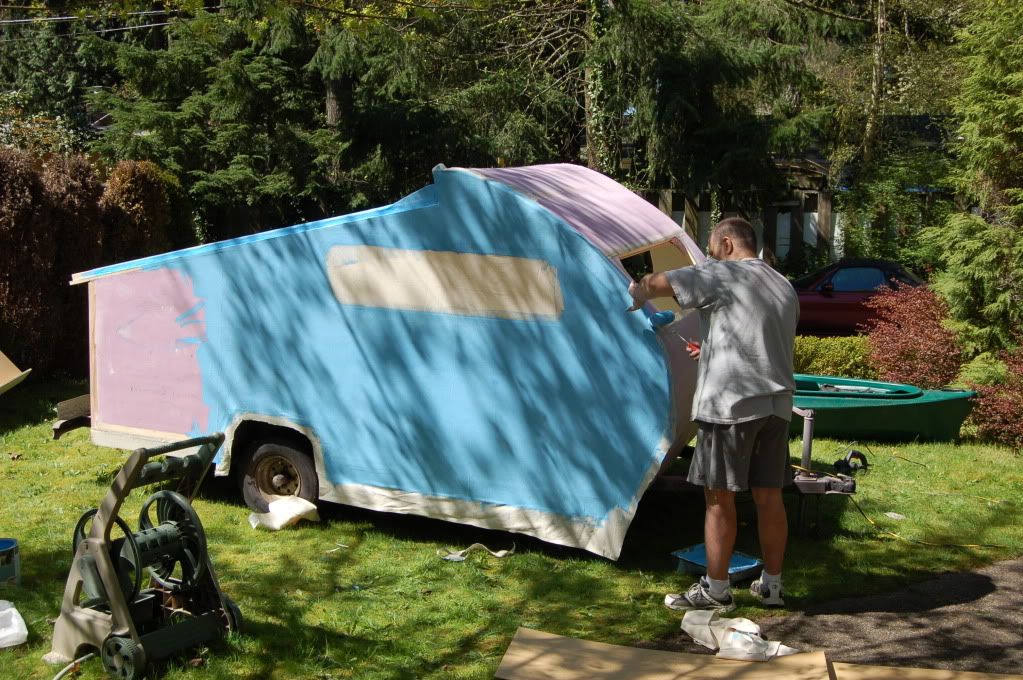
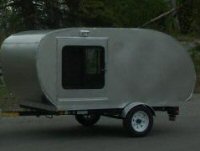
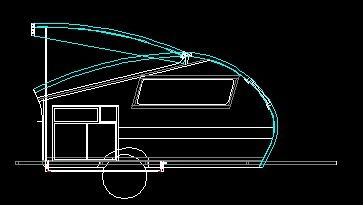
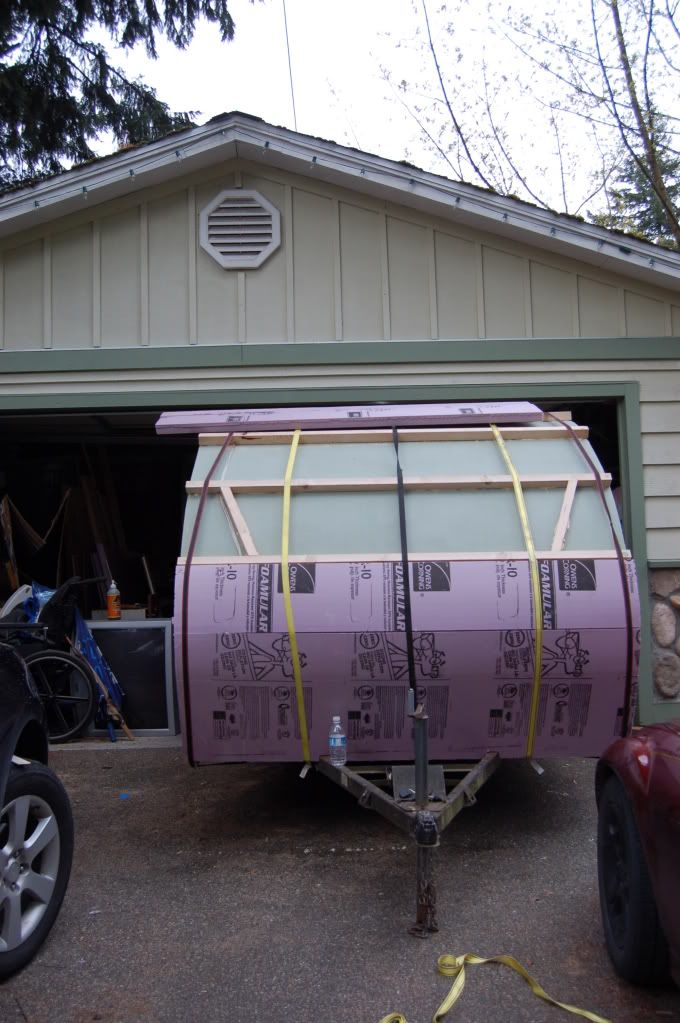
The trailer design was inspired by the Kampmaster/Campmaster/Wild Goose type design where a large portion of the roof opens up to create a standing height interior. The design was drawn up in Autocad and revised several times to say the least. The trailer dimensions are 6’-3” wide by about 11 feet long. The trailer will hold me, my wife and our two dogs, a 105lb golden retriever and miniature schnauzer. Our 11 year old son usually shares a tent with our other camping friends. For those times they are not with us he may just squeeze in with us until he feels comfortable staying in a tent alone. The trailer will contain a near king size bed/dinette in the front of the trailer and a pair of 3’ wide cabinets flanking the drop floor area. Additional storage will be provided under the bed/dinette area. The main hatch will use a living hinge and several piano hinges will be used for the door and upper portion of the rear wall-hatch connection. Canvas or heavy vinyl will be used for the hatch side walls connected to the lower walls and back with Velcro. The windows were removed from a truck canopy by someone else (I did not need to dispose of the canopy!) and were picked up for $20 from craigslist. Canvas is from Harbor Freight.
POWER:
12 volt power will be provided by batteries to be located in the center front, below the bed initially, and then moved to a battery box on the trailer tongue. I picked up two automotive cigarette lighter /USB sockets and two USB goose neck reading lights that will be installed in storage cubbies in the cabinets at the head of each side of the bed. I plan to get a small power inverter as well. The trailer light wiring will be replaced and new LED tail lights will be mounted.

THE BUILD:
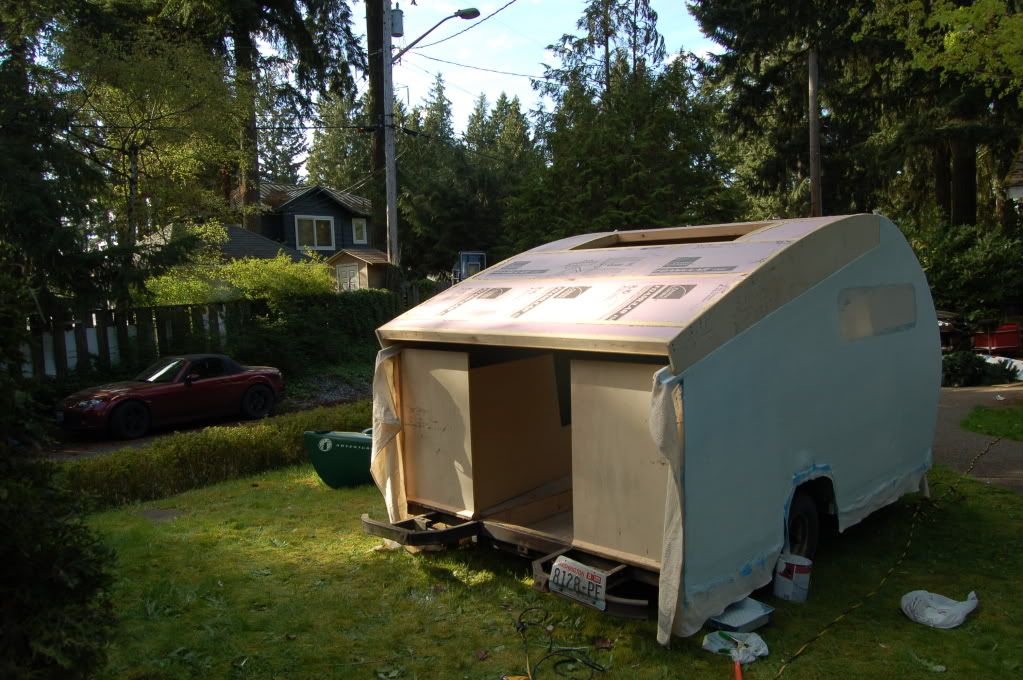
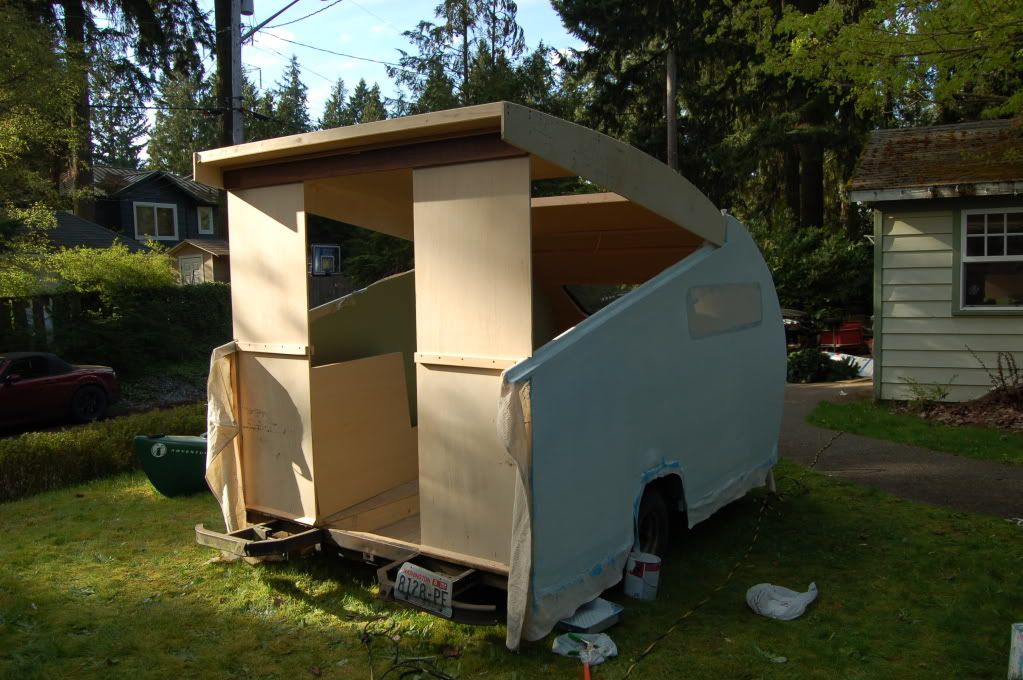
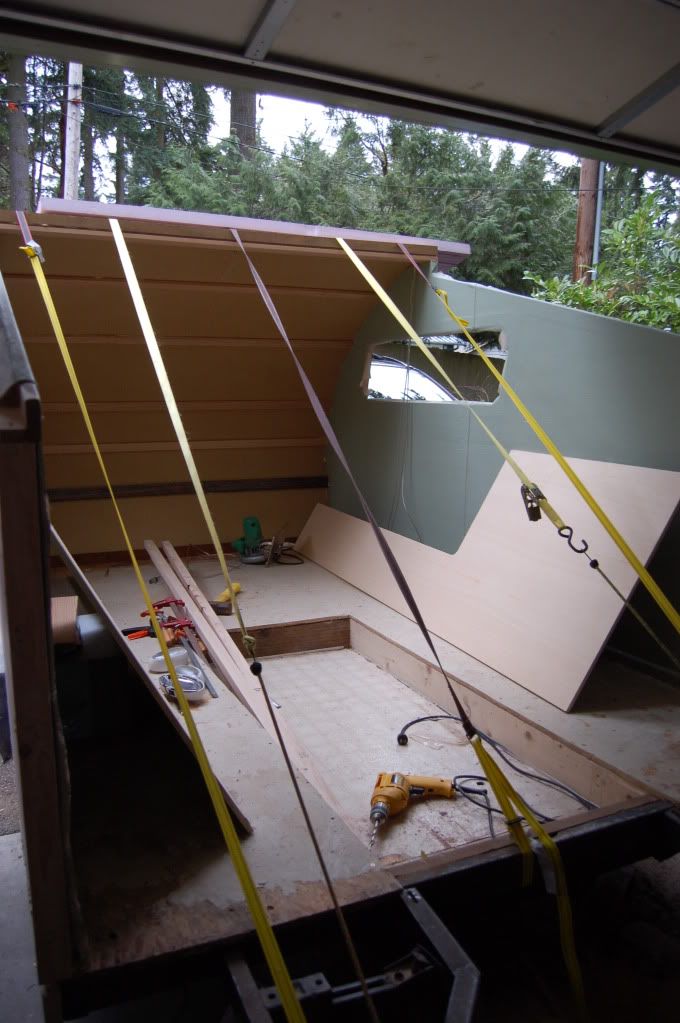
The trailer is based on our old tent trailer frame. It began last fall with the demo of the tent trailer down to the decking. Since the actual deck was in good condition, I decided to leave it in place. The galvanized steel wheel wells were also sound, so I left them in place. To give some more interior height I decided to install a drop floor. After looking at the frame I decided to cut out a portion of one steel cross member to install the dropped floor, bolting the pressure treated 2x6s to the frame at several places, including the remaining portion of the cut cross member. I was able to remove some additional steel support that was to distribute the forces of the tent trailer lifting mechanism, weight savings! Then it got cold and things sat in the garage until last month when I started again. Since the trailer is a rear entry design I also cut and reshaped the rear bumper to allow easier access. Eventually I will put some plywood on the remaining bumper areas and either build some storage boxes to site there or coolers and the like will be strapped there. The bottom was then sprayed with several cans of undercoating.
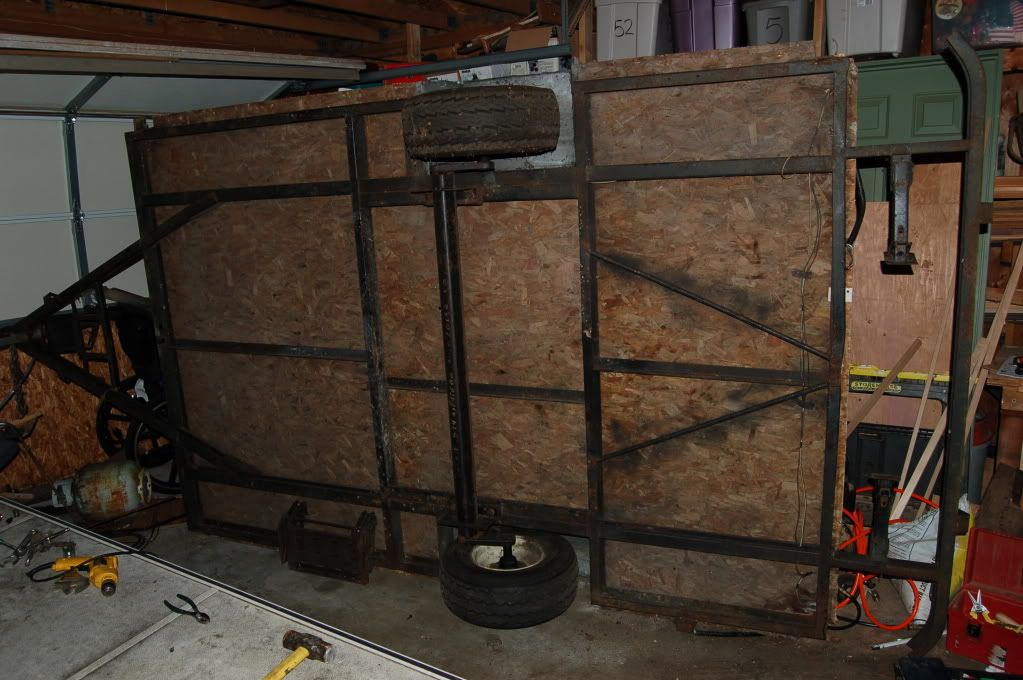
Frame pre-modifications picture
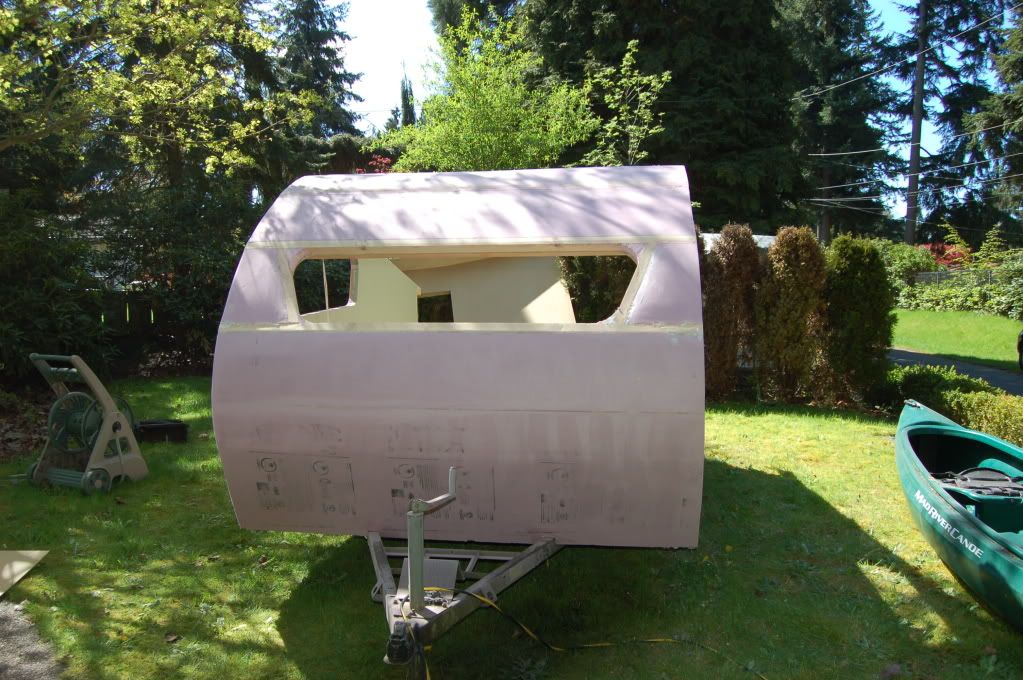
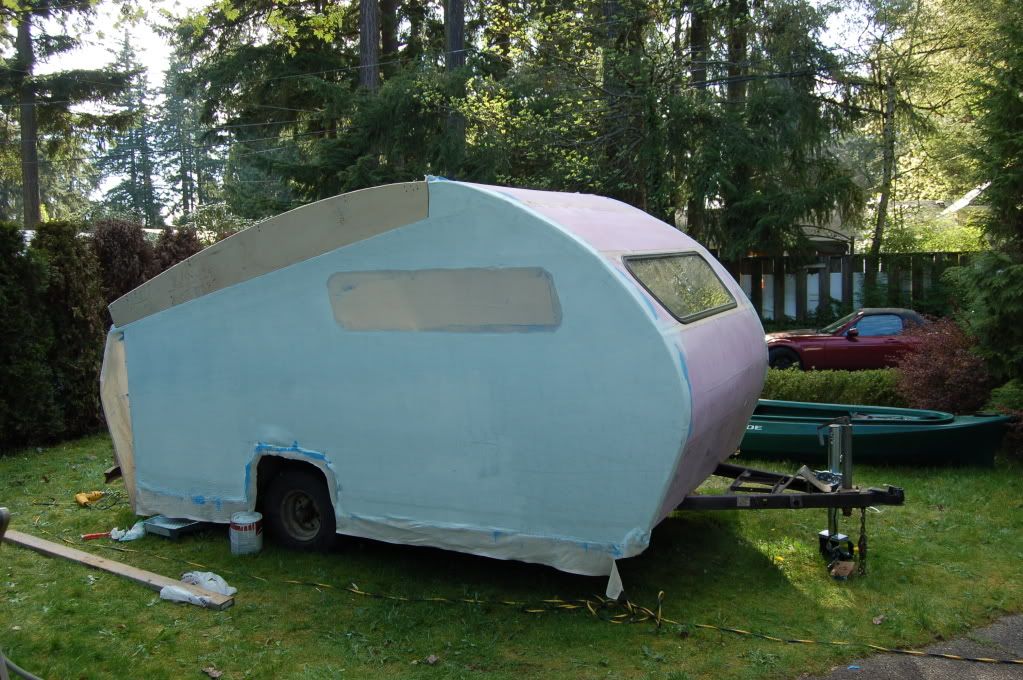
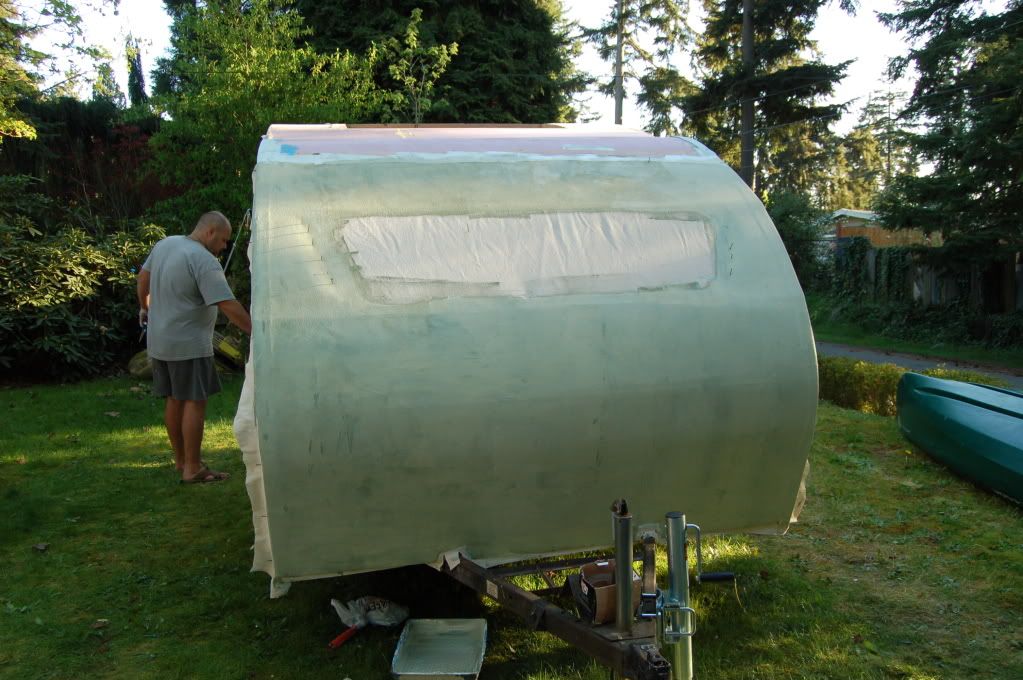
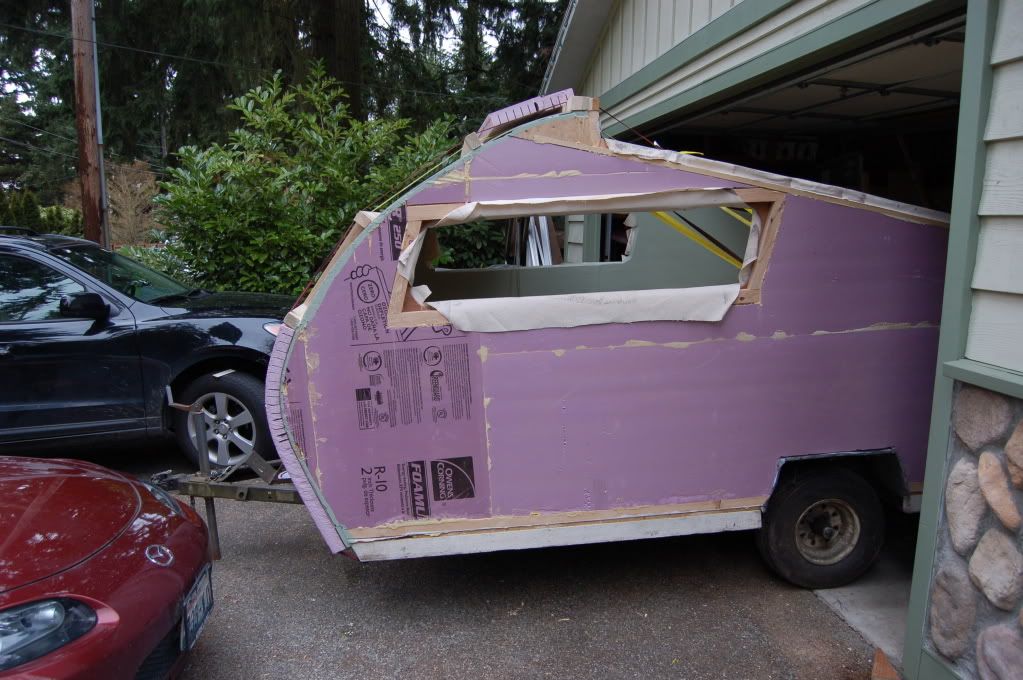
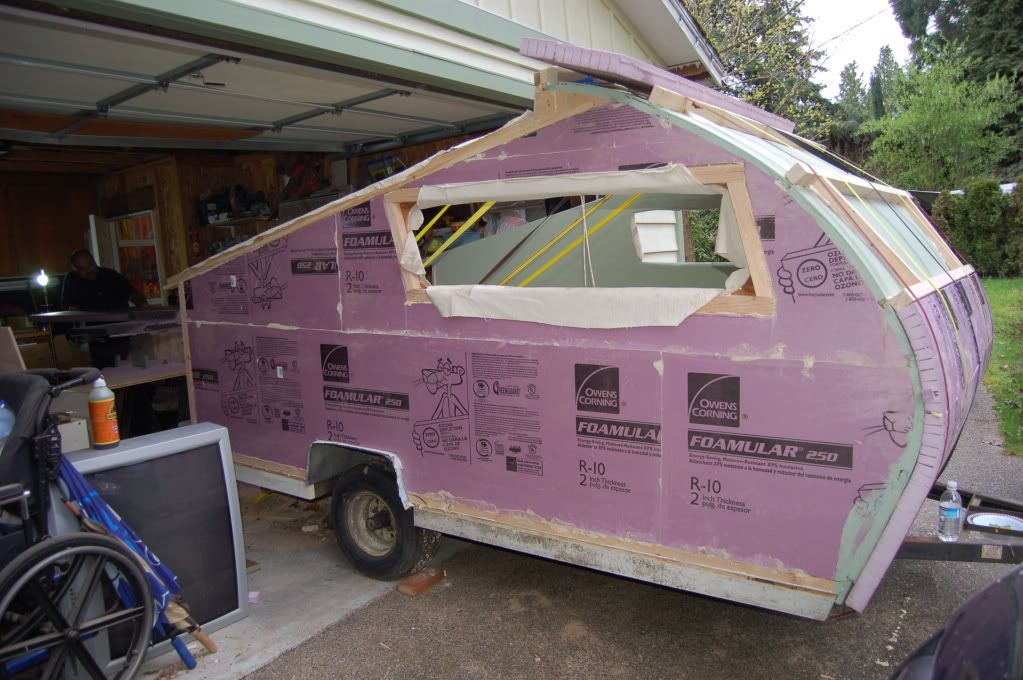
The walls are 2” foam built up from 2’x8’ sheets of the Home Depot pink foam. I then glued a 2x3 glued to the bottom to anchor the wall to the trailer frame and a 1x “L” shaped piece glued to the top, along where the top will sit when down. These were not only glued, but also “nailed” into the foam with 5-6” lengths of glued in ½” dowel nails. There is also some 1x and ½” plywood glued on the end of the trailer to receive the rear walls which will be ½” plywood covered in canvas. The hope is that the wood provides a stronger glue joint along much of the perimeter of the wall. The windows were framed with 2x material. The interior of the walls has been canvassed with exterior paint “glue”, a mix of old paint and the $5 a gallon custom mixed, but not picked up, discounted paint from Lowes and Home Depot. Besides the “glue” coat, there are two top coats. The decking overhung the frame by about 3”, so I decided to trim off 2” of it along the sides of the trailer. I then screwed a 5/4” trim board just below decking. This hides the steel frame and also gives me the better canvas/wood bonding surface along the bottom of the trailer. The walls were then Gorilla Glued to the deck. By cutting back the overhang I could also bolt through the 2x at the bottom of the walls and through the actual steel frame rather than just through the OSB decking. (Almost all the gluing has been done with Gorrilla glue, except for some wood to wood joints were I used Titebond II.)
On the curved nose several 1x’s were notched and wood nailed into the foam to provide support for the masonite interior sheeting. I chose the masonite for cost, bendability and because I like the nondescript patterning. I also wanted some different textures and warmer colors in the interior. There are other benefits to this construction method, like not needing to fill the kerfs in the foam or trying to glue canvas to an inverted surface. The masonite was glued to the edges of the foam and the 1x and held in place with straps until dry. I did get some unwanted Gorilla glue oozing that I will need to scraped off the masonite. Then I sealed the back side and edges of the masonite with a generous coat of exterior paint. The front window was framed with 2x’s and two 2x’s and a 5/4” oak strip were laminated together to form the beam for the hinge. These were Gorilla glued and wood nailed onto the masonite/foam. I added another 2x to the top curved portion for additional strength. I roughed in the wiring for the ceiling lights and then came foam kerfing day, and the majority of the front was covered with Gorilla glued 2” foam, while I was only covered in pink foam dust.
That brings the build current. I have about 2 months until our first trip of the year, so there is no time to waste. Any suggestions on names for the trailer or paint schemes are welcome.


 as the WildMaster progresses...