The Poet Creek Express - Foamie Hybrid

Canvas covered foamies (Thrifty Alternatives...)

Moderator: eaglesdare

Re: The Poet Creek Express - Foamie Hybrid

Postby KCStudly » Thu Jun 21, 2012 10:37 pm

Well Rover Mike double checked his shop and did not find the galley skins... :(

I'll see what I can do from the leftover pieces. I will probably have to have a seam, but may be able to hide it under the counter support rails. We'll see. Maybe kerf some pieces to look like bead board and help hide any seams. If neither of those plans work out I can either buy two more sheets of 5x5 locally or use some birch bead board. I would hate to resort to non-WBP in the galley, tho, so preferably one of the above solutions will work.

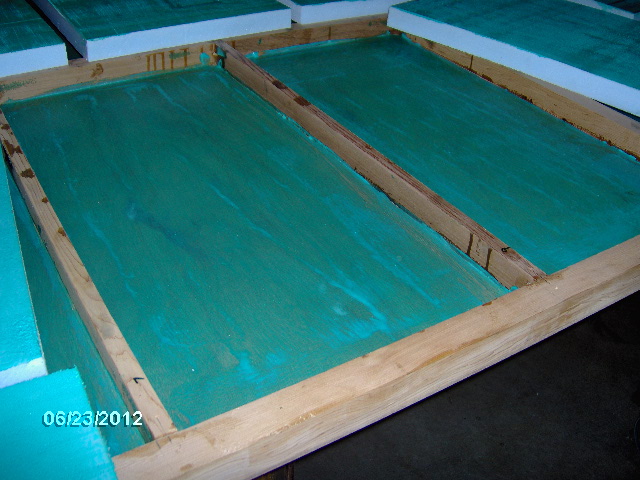
Also, the first of the foam was delivered today. In addition to the correct number and sizes of 1-1/2 thk foam, the invoice said 16 sheets of 2x8 x 1/2 thk, but they delivered 20 sheets. Trouble was I had ordered 3/4 thk. Discussed it at length with the sales guy, and he repeated it back to me, even said it would need to be 2 ft wide, not 4 ft wide in the 3/4 inch thk. Had to call them back. He says, "those idiots, I'll get the right stuff out to you for exchange as soon as possible". Well, it was printed right out there on the invoice as 1/2 inch thk with the sales guy's name right on the invoice, so I guess he was referring to himself. :? :lol:

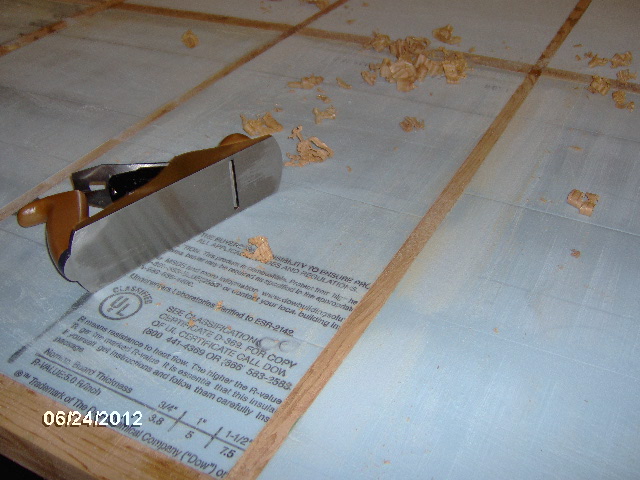
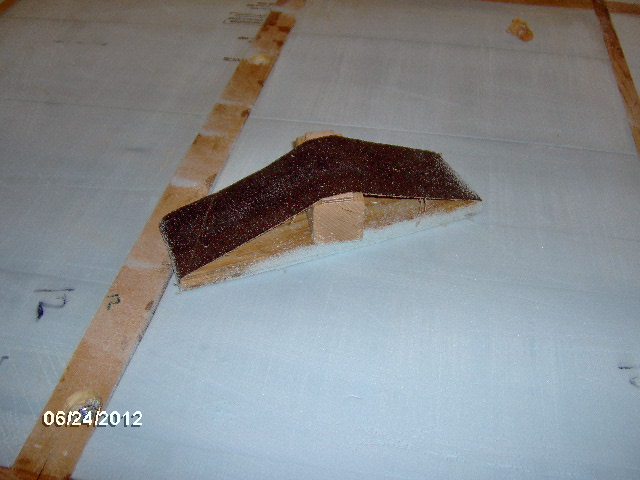
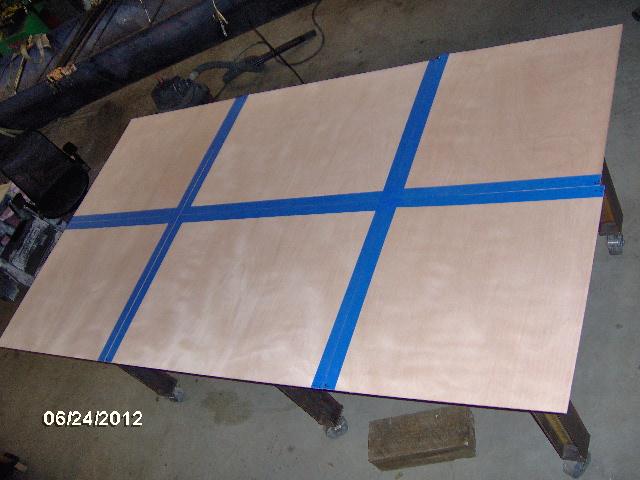
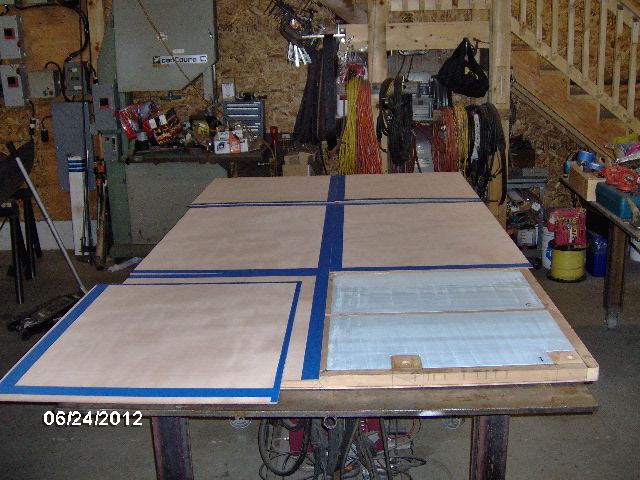
So tonight I trimmed the little bits of biscuits sticking out from the floor centerline blocking using a chisel. Then I used the bench plane and palm sander to fine tune the heights so that there were no "big steps" making everything on the centerline flush. Then I dry fit the floor bottom skins.
Image
Image

Since I have abandoned the idea of scarfing, there's plenty hanging over here and there to trim flush later (except as noted previously at the center panels).

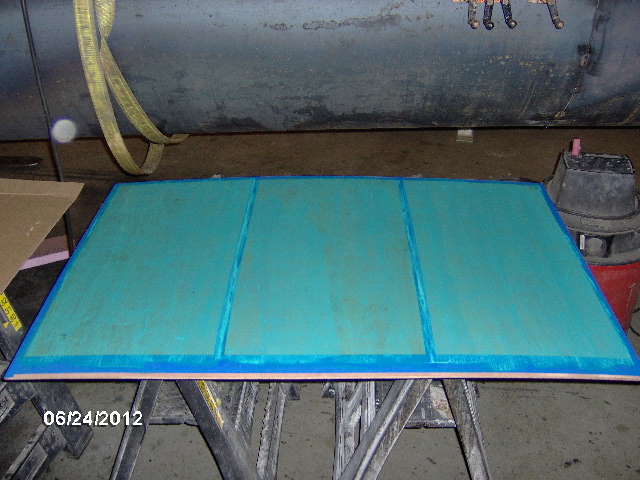
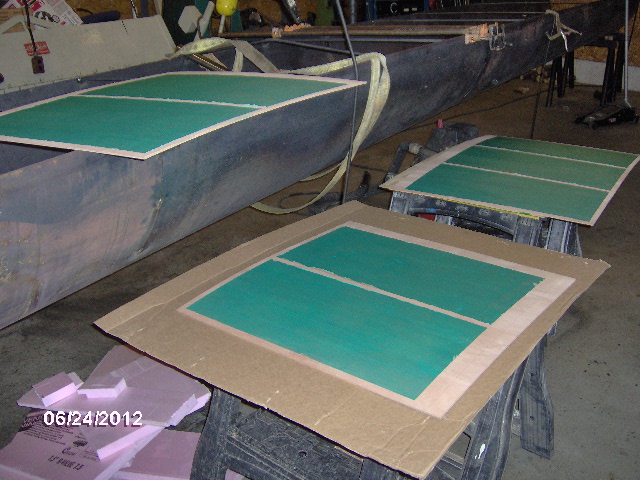
Here's the work bench after we laid down a thin plastic sheet painting mask to act as a peel ply for the glue. Didn't want to glue the frame to the table, will make cleanup easier, and provides a little protection for the skin from the stuff we would be piling on later.
Image

After setting the staple nailer up Karl and I worked together to do the glue up. I ran the glue over the frame work, Karl came behind me and spread out the glue with a chip brush, and I placed and nailed off the panels. Still 3H weather.
Image
Image
Image
Image

The long dark thing visible thru the big shop doors is the rolled steel trough for the wood chip drier that Karl is building.

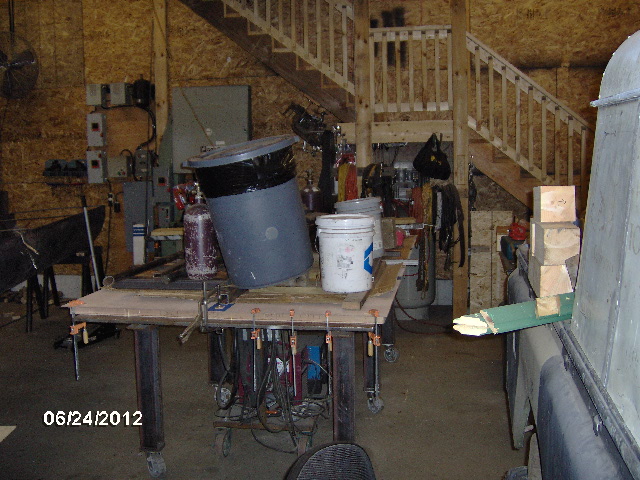
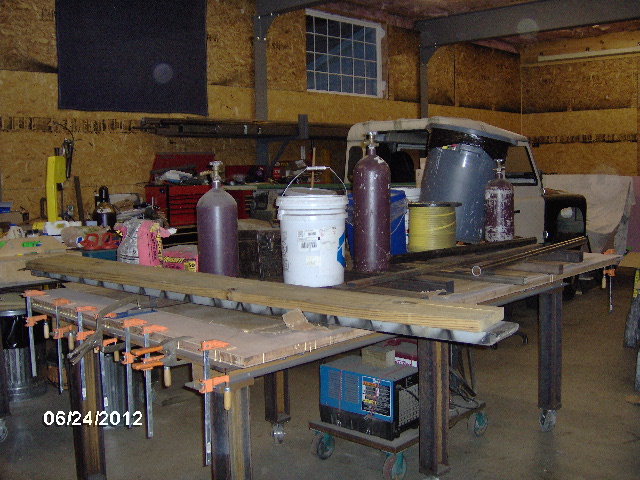
After wrapping the plastic up over the top of the bottom (huh...what...yup) here are the obligatory shots of the floor skins loaded down with all manner of heavy things; bucket of chain, bag of cement mix, misc. steel, wood, tool box, shield gas bottles, spool of Romex, big wooden carpenter's box full of drywall screws, etc.
Image
Image

A little sweep up of the chips from the plane work and we called it a night just before 8pm.
Last edited by KCStudly on Fri Sep 14, 2012 11:34 pm, edited 3 times in total.
KC
My Build: The Poet Creek Express Hybrid Foamie

Poet Creek Or Bust
Engineering the TLAR way - "That Looks About Right"
TnTTT ORIGINAL 200A LANTERN CLUB = "The 200A Gang"
Green Lantern Corpsmen
User avatar
KCStudly
Donating Member
 
Posts: 9640
Images: 8169
Joined: Mon Feb 06, 2012 10:18 pm
Location: Southeastern CT, USA

Re: The Poet Creek Express - Foamie Hybrid

Postby eaglesdare » Fri Jun 22, 2012 4:51 am

love those pics! you are doing a great job on this build. :thumbsup: :wine:
Louella
May the foam be with you.
User avatar
eaglesdare
Donating Member
 
Posts: 3168
Images: 13
Joined: Tue Aug 26, 2008 7:06 pm

Re: The Poet Creek Express - Foamie Hybrid

Postby KCStudly » Fri Jun 22, 2012 11:20 am

Thank you Louella. :D

Wished I had your new pool about the time those pic's were taken. :FNP
KC
My Build: The Poet Creek Express Hybrid Foamie

Poet Creek Or Bust
Engineering the TLAR way - "That Looks About Right"
TnTTT ORIGINAL 200A LANTERN CLUB = "The 200A Gang"
Green Lantern Corpsmen
User avatar
KCStudly
Donating Member
 
Posts: 9640
Images: 8169
Joined: Mon Feb 06, 2012 10:18 pm
Location: Southeastern CT, USA
Top

Re: The Poet Creek Express - Foamie Hybrid

Postby Wolffarmer » Fri Jun 22, 2012 10:32 pm

Wow, you are still working on this.

The forum had stopped sending me notices of updates and I have gotten behind a bit. The forum software does that to me a lot.

Randy
"these guys must be afraid of the dark"
User avatar
Wolffarmer
Donating Member
 
Posts: 4612
Images: 309
Joined: Wed May 02, 2007 1:32 pm
Location: Idaho Rupert
Top

Re: The Poet Creek Express - Foamie Hybrid

Postby KCStudly » Sun Jun 24, 2012 9:38 pm

Yeah Randy, I've been putting in something like 30-32 hrs a week. About 3 hrs each Mon, Wed-Fri and 10 hrs each Sat & Sun.

I just down loaded 62 more pic's from this weekend. The floor is all glued up and sitting under a pile of stuff.

Give me a bit and I'll up load the pic's and get you caught up.
KC
My Build: The Poet Creek Express Hybrid Foamie

Poet Creek Or Bust
Engineering the TLAR way - "That Looks About Right"
TnTTT ORIGINAL 200A LANTERN CLUB = "The 200A Gang"
Green Lantern Corpsmen
User avatar
KCStudly
Donating Member
 
Posts: 9640
Images: 8169
Joined: Mon Feb 06, 2012 10:18 pm
Location: Southeastern CT, USA
Top

Re: The Poet Creek Express - Foamie Hybrid

Postby KCStudly » Sun Jun 24, 2012 11:50 pm

Pic's are in the album but I need to get some sleep. :goodnight:

I'll write something up and get them in as soon as I get a chance. I'm just too busy building to come up for air. :? :FNP :? :FNP

The wheels finally arrived, the fenders are here, and the glue bottles came, too. I'll get pic's of those soon.

Night.
KC
My Build: The Poet Creek Express Hybrid Foamie

Poet Creek Or Bust
Engineering the TLAR way - "That Looks About Right"
TnTTT ORIGINAL 200A LANTERN CLUB = "The 200A Gang"
Green Lantern Corpsmen
User avatar
KCStudly
Donating Member
 
Posts: 9640
Images: 8169
Joined: Mon Feb 06, 2012 10:18 pm
Location: Southeastern CT, USA
Top

Re: The Poet Creek Express - Foamie Hybrid

Postby KCStudly » Tue Jun 26, 2012 1:38 am

Okay, where was I?

On Friday night when I arrived at Mecca Karl and his helper Kris (not to be confused with his wife Chris) had unloaded the weights and stood the floor assembly up out of their way.

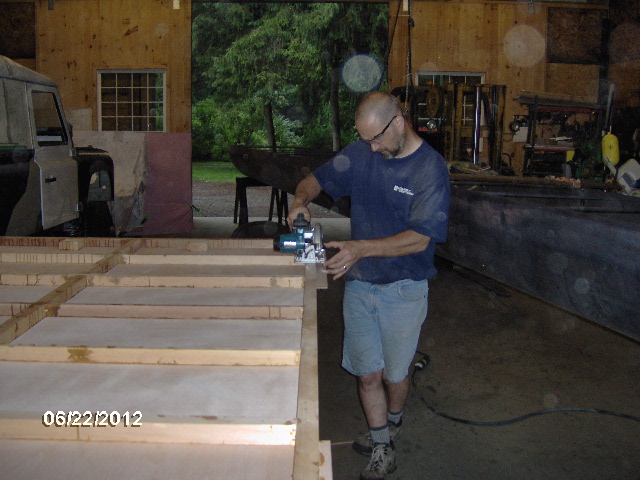
After clearing the bench and getting the floor down onto it, Karl and I were discussing the best tool to use for rough trimming the excess skin so that the router could make a clean pass.
Image

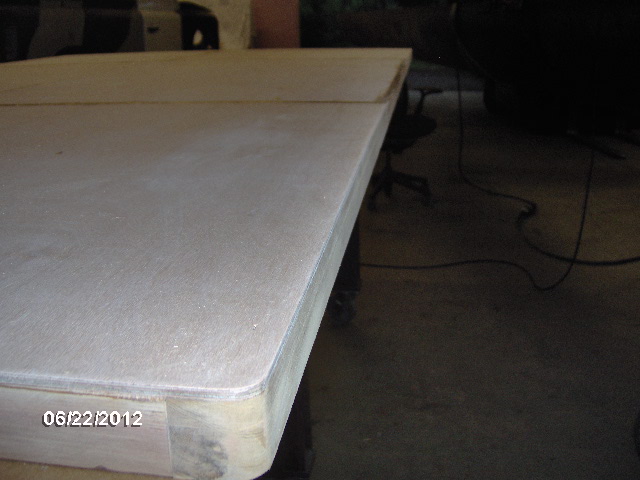
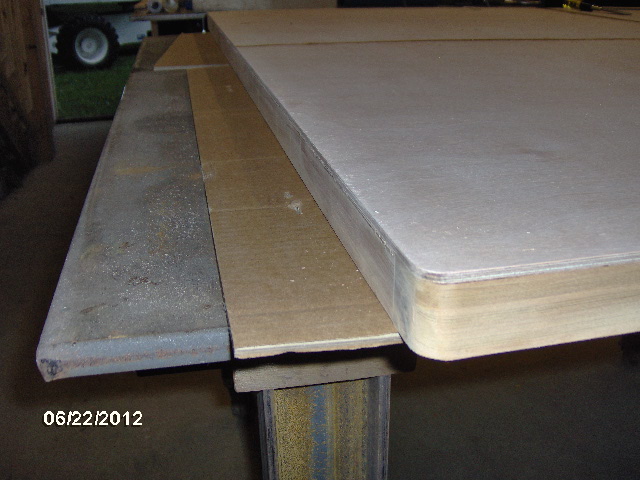
Karl jumped right in with his cordless panel saw and zipped them right off. Notice that it was easier to work from the top with the saw blade extended down. That way it was easy to see where and where not to cut, and the saw blade was pulling into the outer surface of the skin resulting in less fraying.
Image

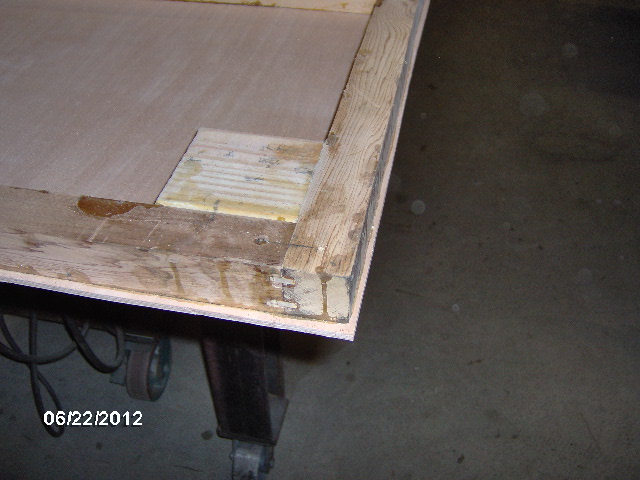
Here is how it looked after rough trimming.
Image

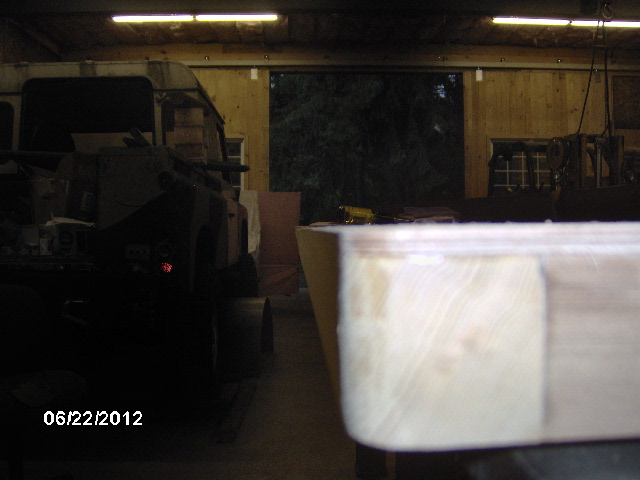
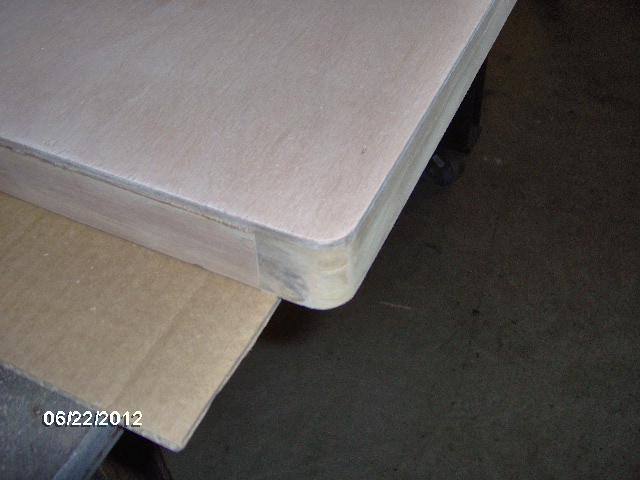
And here is how it looks after trimming with the router and a flush bearing bit.
Image
Image
Image
Image

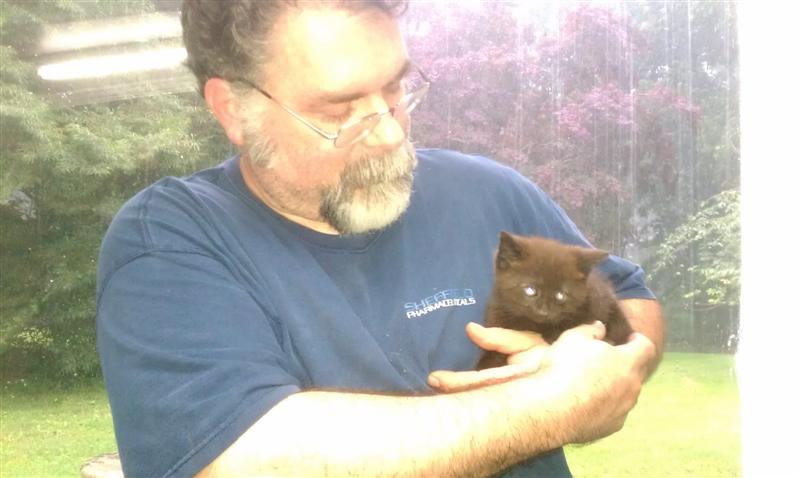
Karl's wife Chris came home with three rescue kittens. Very comical and entertaining to watch.
Image
Image
Image

Here I have fit a couple of small off cuts to fill my little scarfing detour oops.
Image

And the other side.
Image

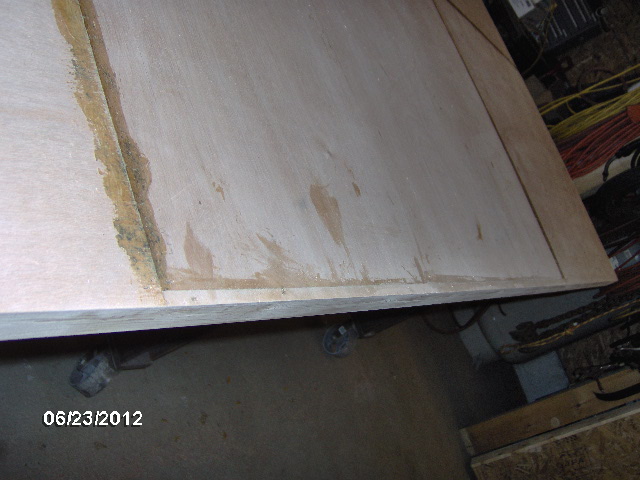
And here they are Saturday morning after trimming flush.
Image
Image

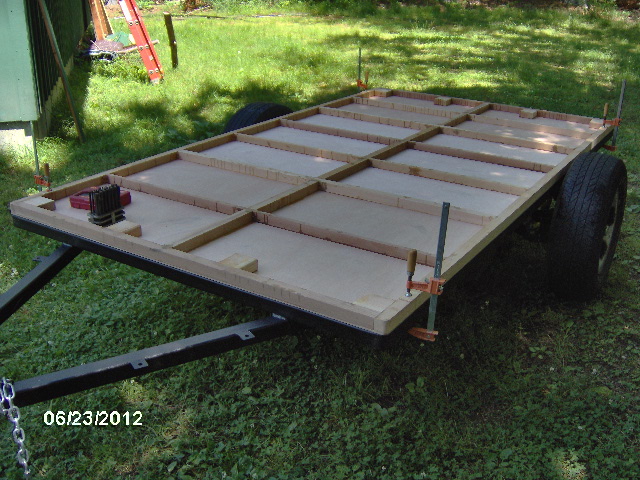
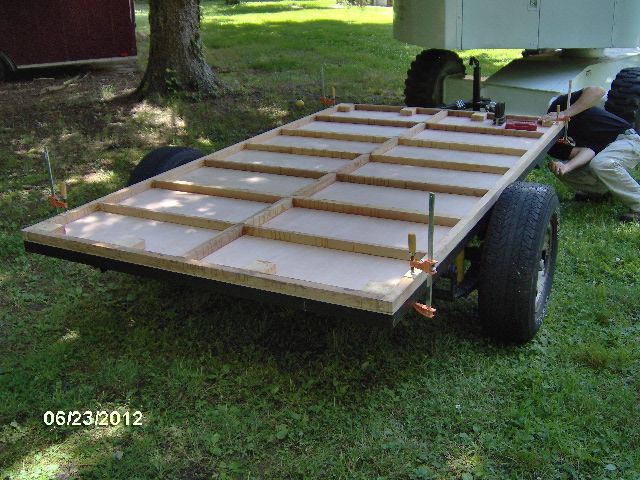
We carried the floor out to the trailer and aligned it flush to the front and sides. The grass was still wet from an evening shower, so while I was off looking for a piece of plastic to lay on, Karl reached under with a transfer punch and marked all of the mounting hole locations (doh, didn’t think we would be able to reach them all without crawling under).
Image

Looking like the plan.
Image

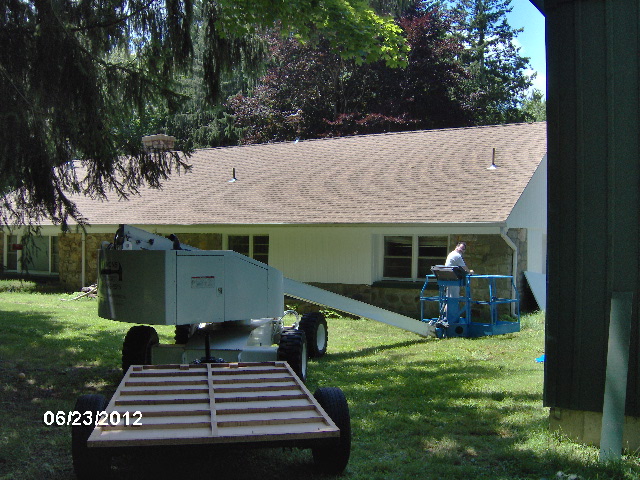
We couldn’t resist this photo op with the man lift posing as the tow vehicle.
Image
(Karl bartered the use of Rover Mike’s man lift so that he could repair some storm damage on the barn and install gutters, in trade for his time on the Rover project. It just coincidently happened to be outside of the back door where we had wheeled the trailer for easy access.)

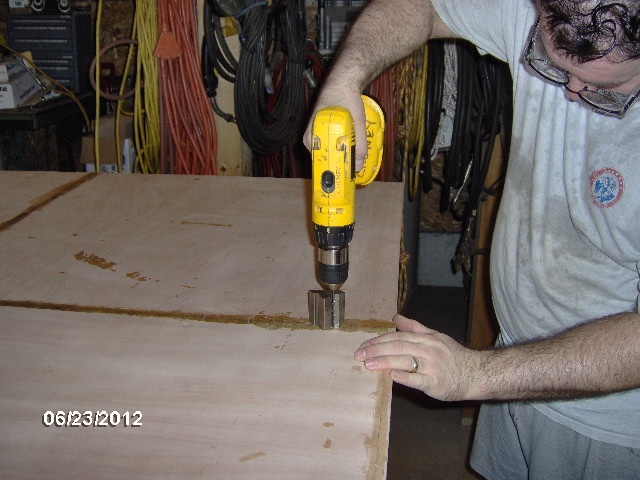
Here I am using a small machinist V-block to align the drill while piloting the mounting holes from the transfer punch marks.
Image

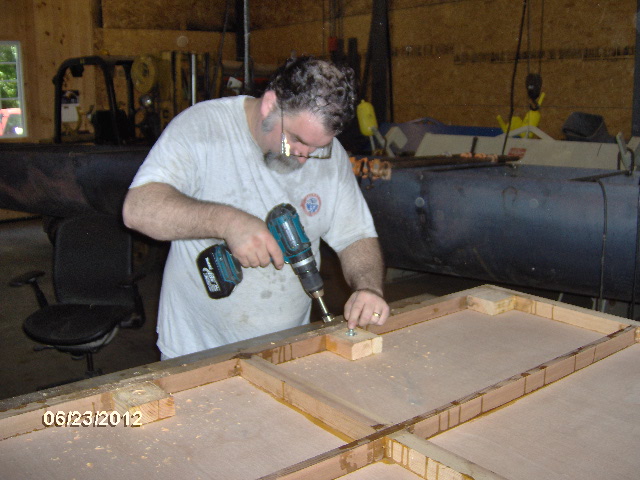
I had brought some spade bits with me, but Karl had a nice set of Forstner bits, so a used the 1 inch size to counter bore for the thread inserts.
Image

At first I just drilled (spot faced, actually) enough for the insert flange to sit below flush, but then I realized that they would be much more forgiving of bolt length if I buried them a bit deeper, so I went back around and bored the holes until they were all flush with the back of the Forstner bit.

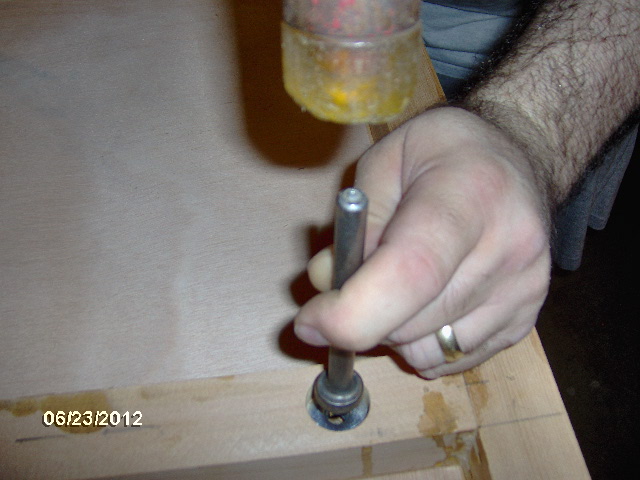
Here you can see me using the head of a weld stud (Karl’s idea) to drive the thread insert into place.
Image

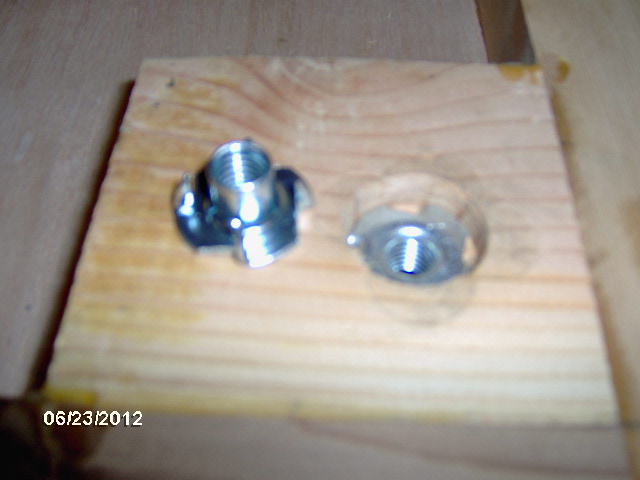
Here’s a fuzzy pic of two thread inserts, one installed and one upside down. You can just make out the the spiky tangs that bite into the wood and keep the insert from turning.
Image

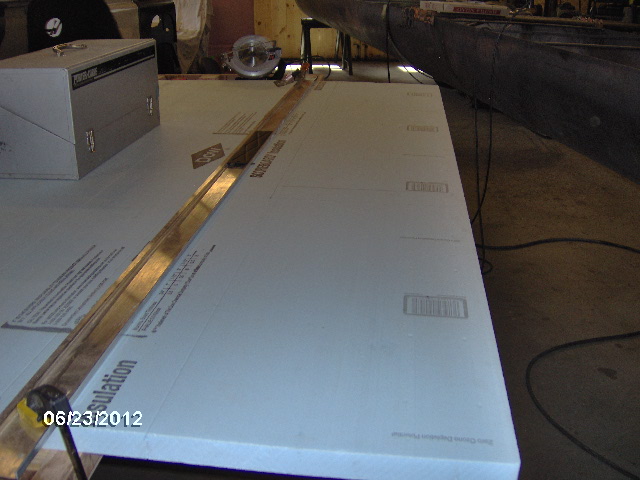
Time to start fitting the foam into the floor cavities. Started with 1-1/2 thk 4x8 sheet and used the circular saw with extruded aluminum guide fence to rip the first cut. Foam dust clings to everything.
Image

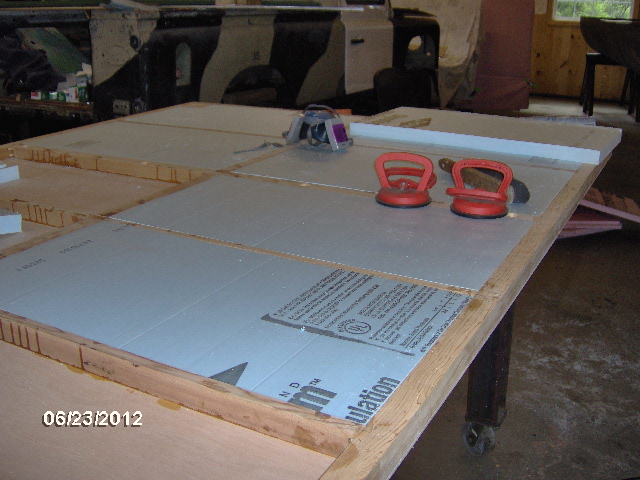
The foam they sent is square edge but is "Scoreboard", meaning that it has grooves, or slits, about 1/2 inch deep on both sides at 16 and 24 inch spacings. I was expecting solid tongue and groove (or ship lap, what I saw in the big box stores). No big deal. I think the square edges worked out better anyway.

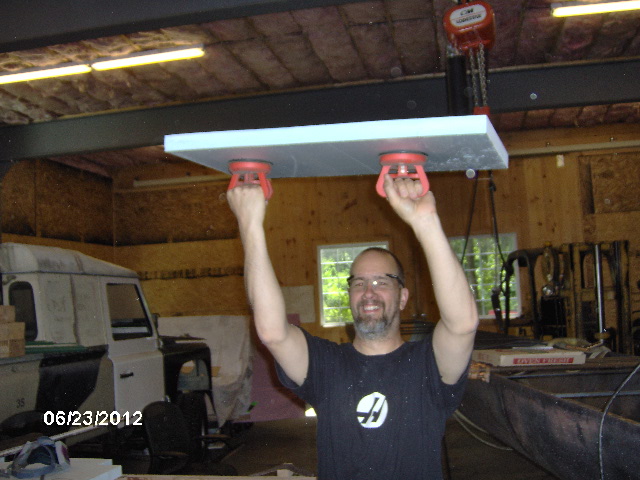
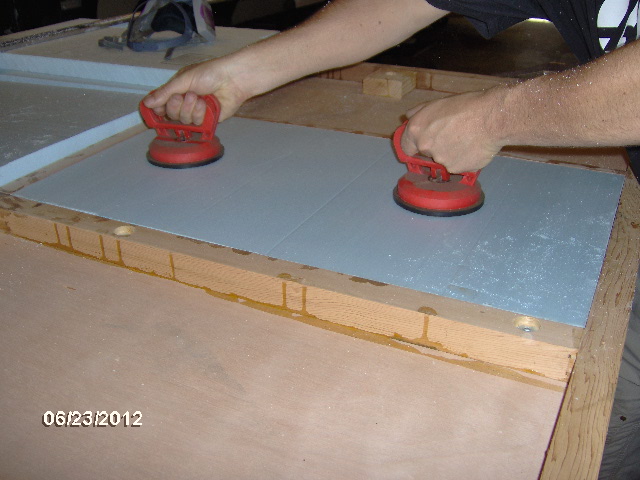
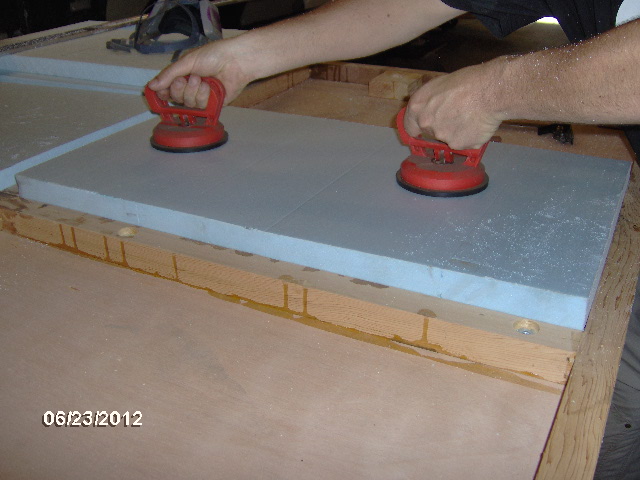
Once we started fitting some of the panels very closely we started to get concerned that if we stuffed the piece down in too hard during dry fit, we might not get them back out easily to apply the glue. You could feel the air squishing out when the foam was pushed down. Karl had a great idea and got out his panel suction cup handles.
Image


I wasn't sure they would work on the foam, but so long as they weren't placed on one of the factory score lines, they worked great!
Image
Image

That allowed us to fit the foam snuggly (for the most part) and not have to worry about lifting it back out.

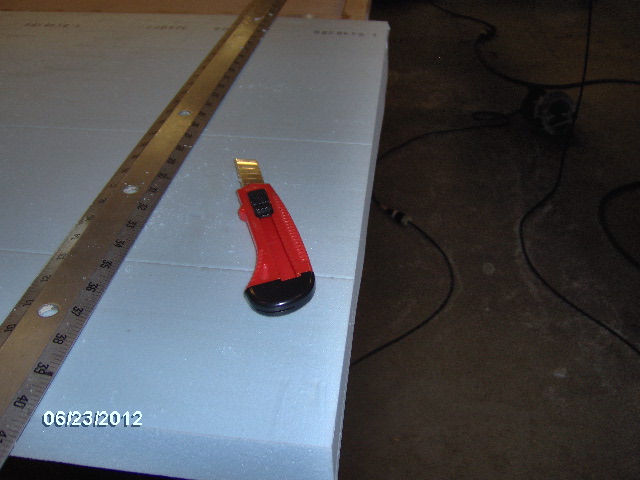
For the cross cuts we just used a straight edge and utility knives (the long snap off style that could be extended out a couple of inches) with fresh blades to score through.
Image

I found if I measured the space at both ends (some spaces had slight variations of 1/32 to 1/16 inch) and cut with the razor one for one I would usually have to knock the panel down a little with my make shift sanding block. The trick was to hold the knife low to the foam and drag the blade down into it in a single long motion. Couple of three passes and it zipped right through cleanly. Hold the knife up too straight, or try to pull it through the foam directly and it would plow and tear. Long flat strokes sliced right through. If I wasn't super careful the cut could wander out of plumb resulting in a tapered edge. Depending on which way I could either sand it back snug or it would fit the space with a slight gap. The worst were about 1/8 inch in a couple of spots, but for the most part everything fit nice and snuggly.

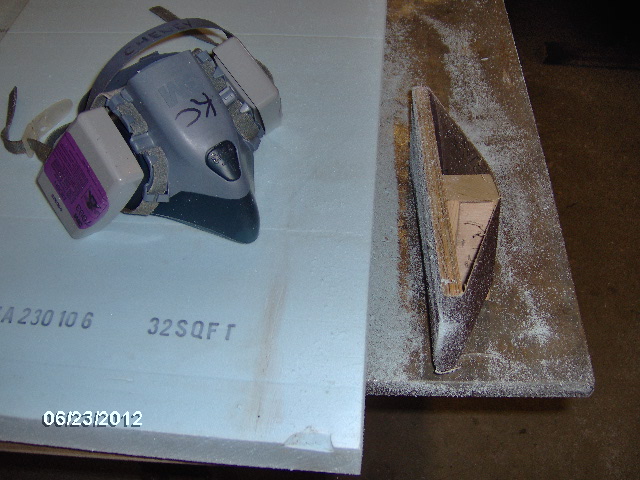
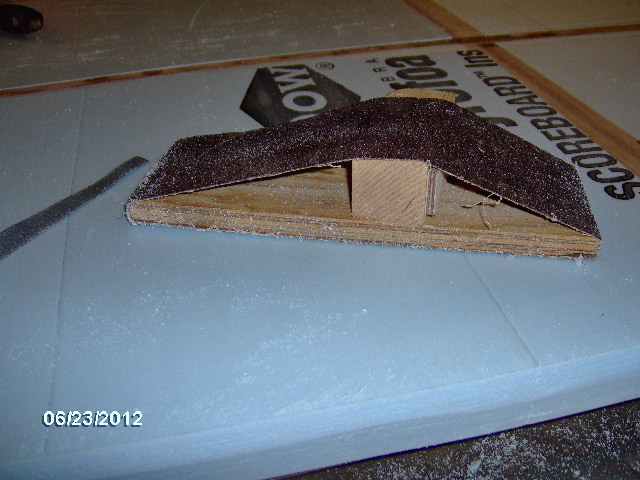
Block is a course belt sander belt over 1/2 inch ply with a chunk of 2x cedar wedged in to hold the belt taught.
Image

Making progress.
Image

The big sheet was pretty much spot on the 1-1/2 inch thickness and the yield was good with few drops.

Here's a closer look at the sanding block with coarse grit. Karl experimented with scoring part way through and snapping the foam the rest of the way, but that sometimes left an ogee shaped bump. If you look close you can see the edge of the foam where I have sanded it back closer to square.
Image


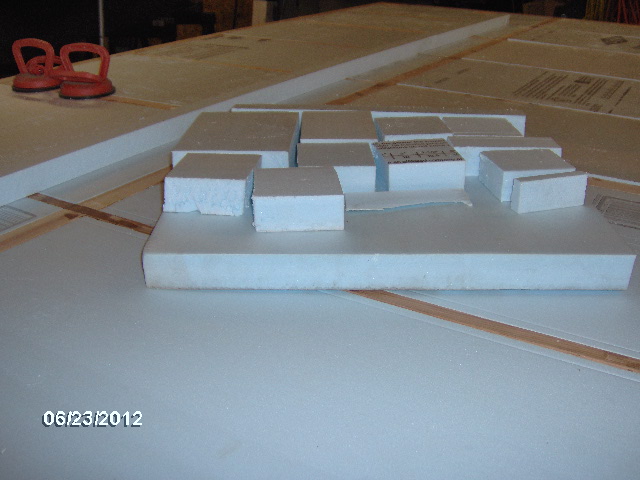
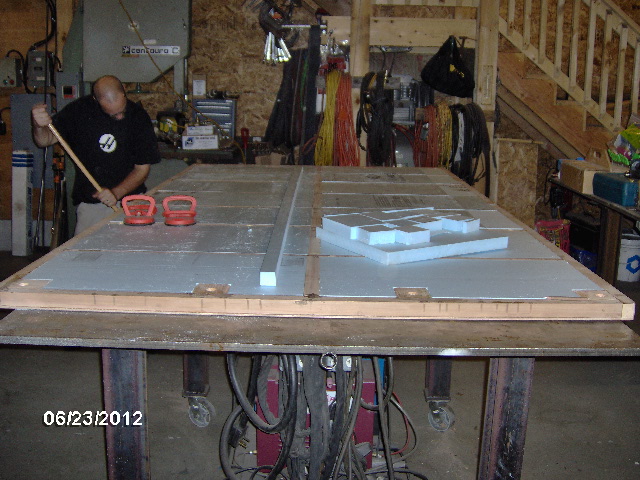
We worked across the front and down the curb side when we moved on to a 2x8 piece of foam. We found that we would get a better yield by using the 2 ft width supplemented by the drop strip from the 4x8 sheet. Didn't bother gluing the pieces together, nor did I bother to fill the very slight gaps here and there. Here you can see the finished dry fit with the leftover pieces; pretty good yield.
Image
Image
Although you see Karl sweeping, we quickly determined that the shop vac was the best way to clean up. Took a little while doing that.

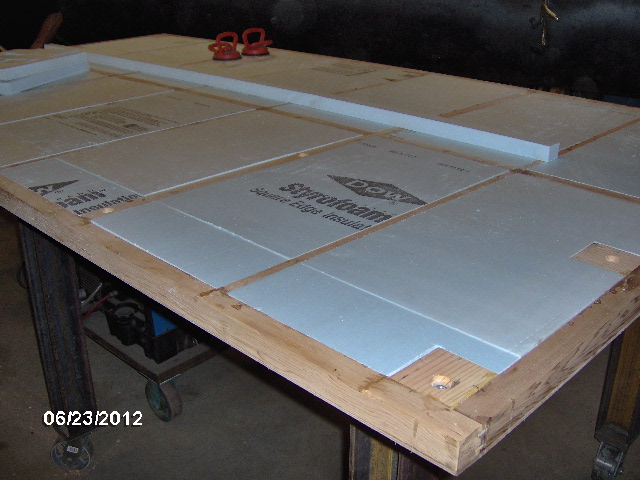
Here's a better look at the two piece panels.
Image


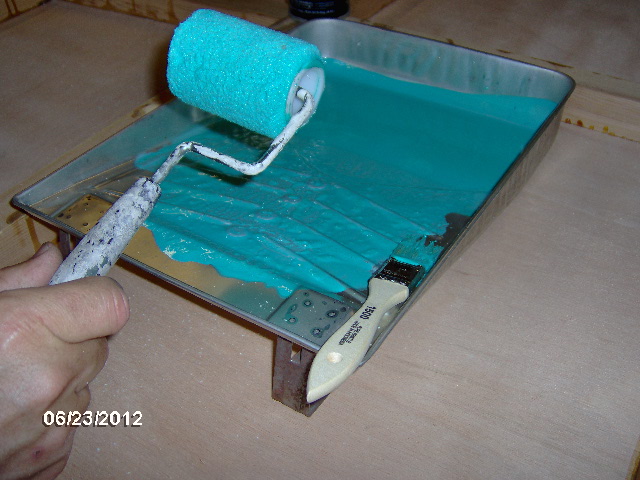
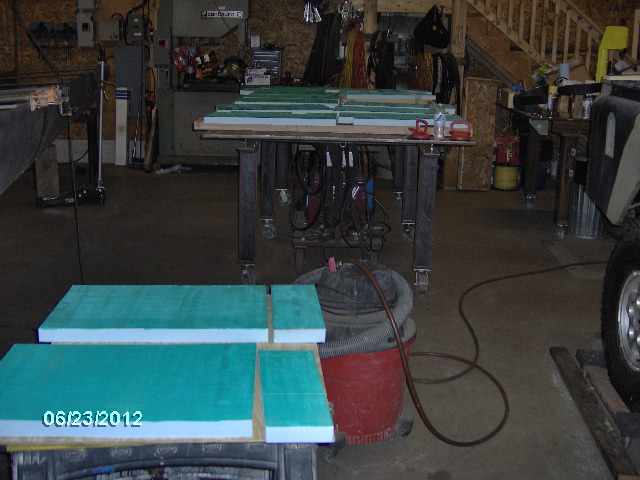
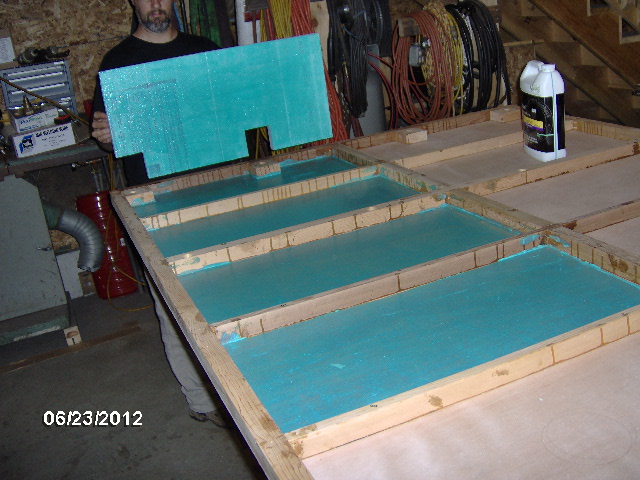
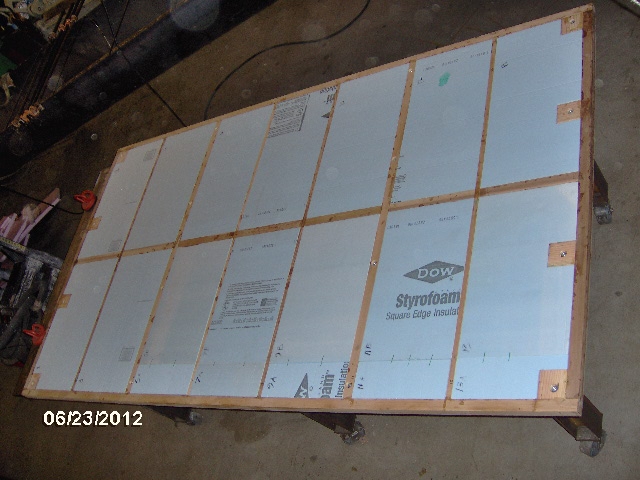
While I was fussing with details, Karl read the instructions on the 30NF adhesive and found that they recommended rolling it on for better coverage than spraying or brushing (in that order). This solved the problem of glue placement and having to resurrect my spray gun. It was very easy to apply with a 4 inch roller and a chip brush to get into the corners. We left the sides of the cedar uncoated because we didn't want the foam to stick accidentally on the way in.
Image
Image
Image
Image
Image

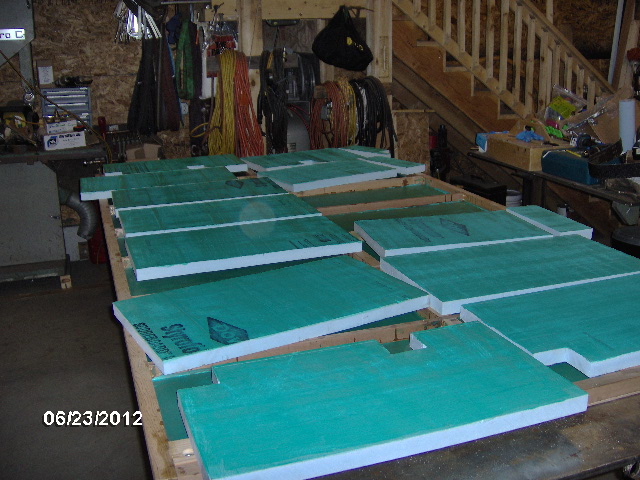
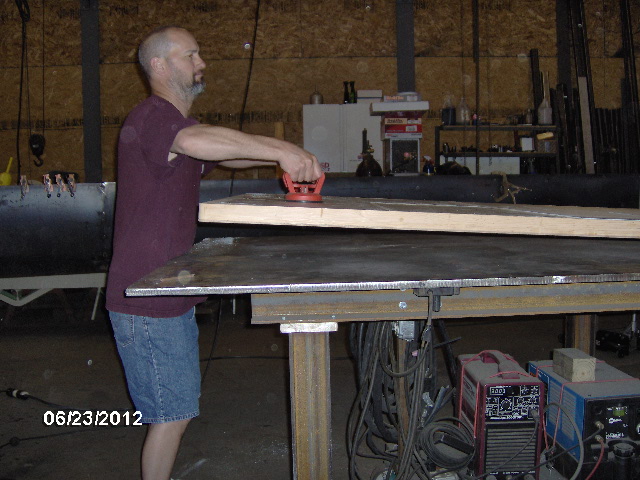
The instructions said that the adhesive would dry in 30 min, longer when humid, shorter when hot, then you have 4 hrs to join the parts. Well, it was both hot and humid. The wood parts dried in about 40 min, but the foam parts needed a lot longer (they don't absorb any moisture). We had planned to go out to dinner with the wives, so I went home, got cleaned up, and returned with Yvette in tow. Karl and I zipped out to the shop (while the girls played with kittens) and popped the foam in in about ten minutes.

I had one piece that I started to pat down a little prematurely and it popped on the factory score line. A couple of quick passes with the sanding block on the broken piece to smooth the edge from the score tab and it slipped right in place. Just to demonstrate how quickly and securely the adhesive had grabbed, I had Karl stick the suction cups one each on each of the front panels, then lift the whole end of the floor off of the work table.
Image

Clean up was a snap. The pan cleaned up easy with water and a paper towel, and the rollers slipped off easily the next day, with just a little rubbing to peel off the gummy bits from the roller ends.

A hard days work.
Image

Dinner at a local Mexican restaurant.

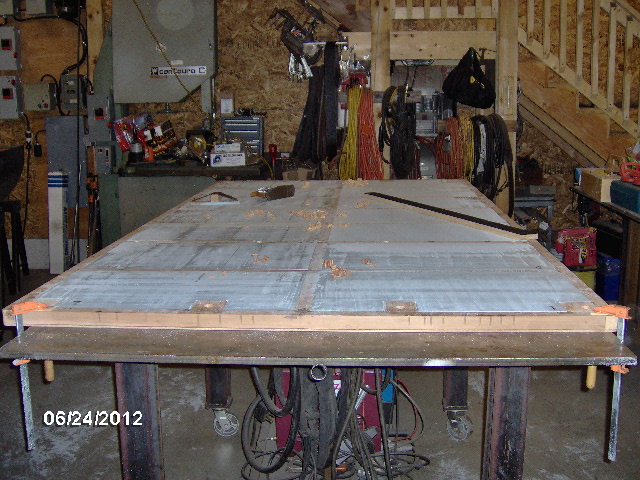
Sunday I made a long sanding board out of 1x4, a long sanding belt, spray adhesive and a few pneumatic staples. The 2x8 foam was just a little thicker than 1-1/2 inch and needed to be knocked down. There were also a couple areas where the xmbrs were just a touch higher than the foam, so I kissed those a couple of strokes with the bench plane. You can also see that I have gone over all of the even foam just dragging the short sanding block across one pass in each direction, long and short, to "break the glaze" on the foam.
Image
Image
Image

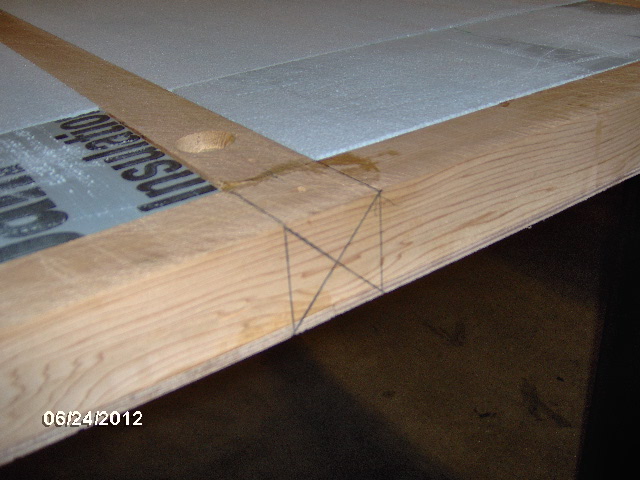
Vacuumed up all of the foam dust (seemed to take hours) then went around and marked the locations of all of the xmbrs and blocking on the perimeter of the frame.
Image

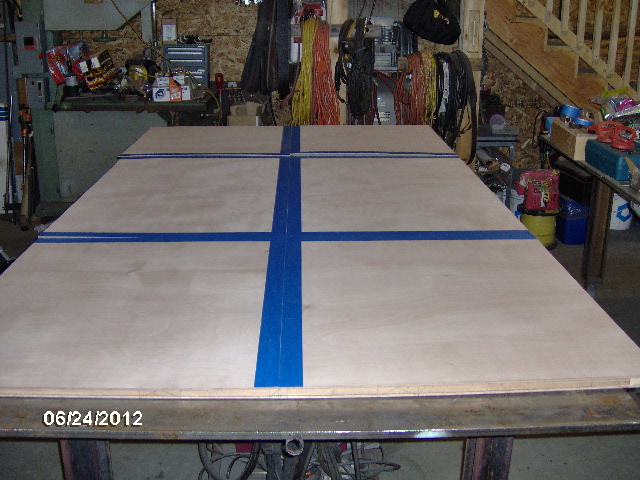
Then I did a dry fit of all of the floor top skins and masked the edges with 2 inch wide painters tape to protect against glue squeeze out.
Image
Image

The rear street side panel needed a little truing (probably the one I cut), which I did with the little Surform rasp and my small oak sanding block.

The two middle panels have adjoining grain patterns which should not have been given the Max Cut sheet optimizer layout. They should have each come off of the short end of a sheet. Hmm, might explain the missing galley wall skins? Oh well, I can't complain.

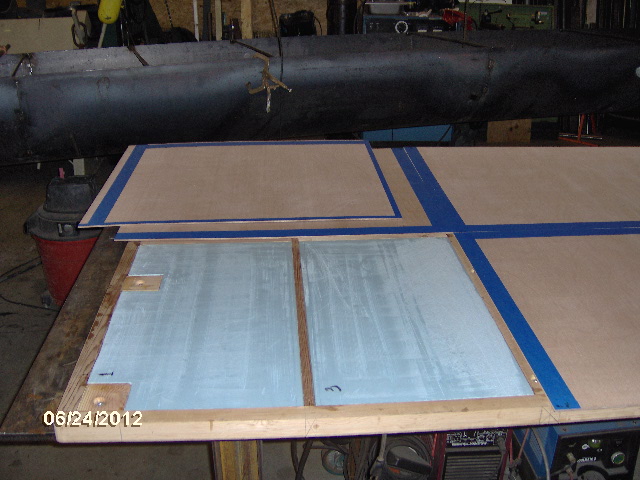
Then I started flipping the panels over and masking with both 3/4 and 2 inch wide tape to cover the wood glue areas from getting contact adhesive on them. I know I said I would do this more simply, but Karl's voice of experience, combined with my obsessive nature just couldn't risk it. Sorry Linux, guess I just like making things difficult.
Image
Image
Actually it was not that difficult because the glue reveal and the 3/4 tape were the same width, and I had traced the edge of the frame onto the underside, so all I had to do was overlap that by 1-1/2 inch. Then I just book leafed the panels and aligned the middle lengths of tape to the xmbrs and the marks on the perimeter I had made earlier. Time consuming, but easy.

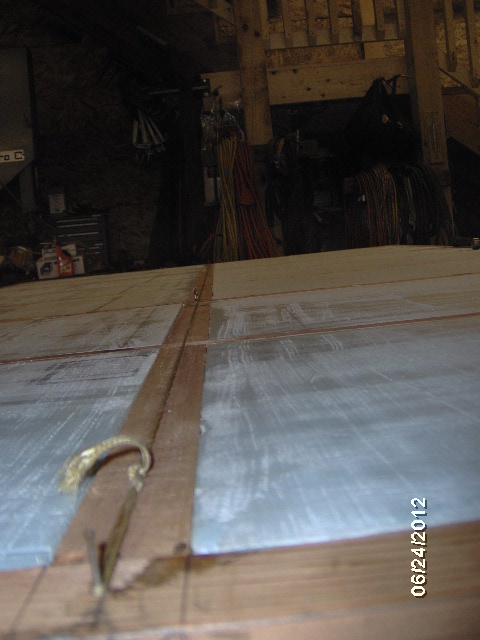
I set a finish nail just to the left of centerline at both front and rear and strung a string line.
Image

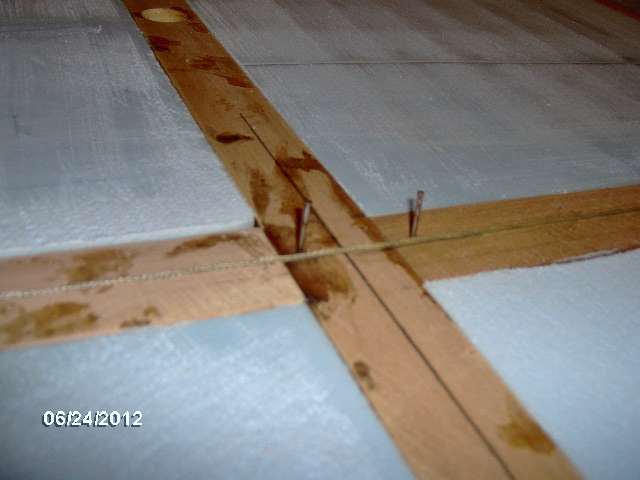
Then I added some more nails along the string, one at each corner of each panel, and one at the outside front corner of each middle piece.
Image

The nails will come into play later when we start setting the panels.

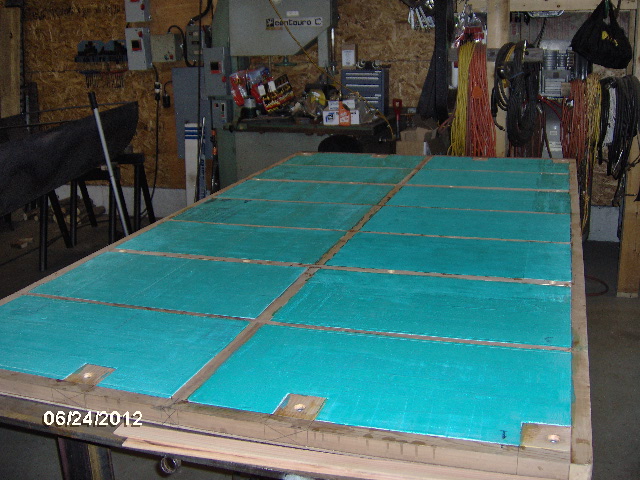
It was easy to roll the adhesive onto the foam without too much getting onto the wood.
Image

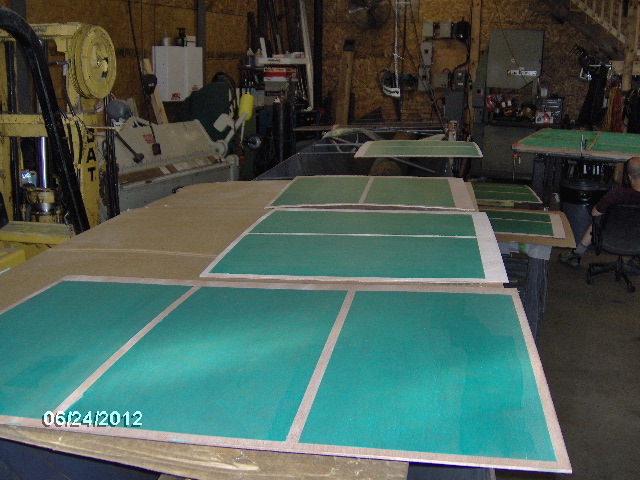
And the panels all coated.
Image
Image

Pulled the tape off of the panel backs.
Image
Image

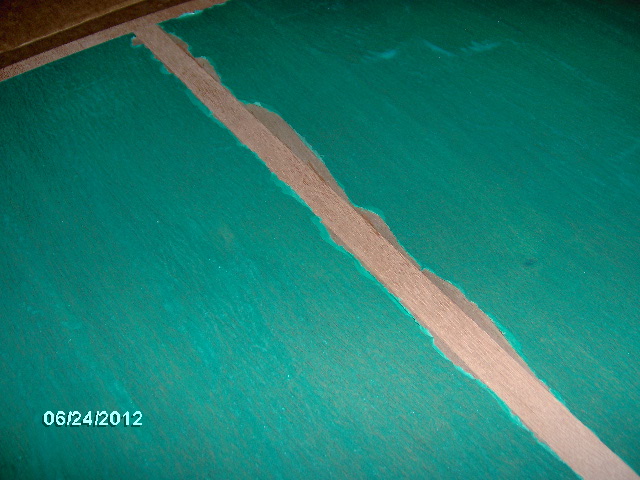
Had a little lifting in a couple of spots. this was the worst of it; no worries.
Image

Took forever (about 1 hr 40 min while we were entertained by kittens) for the adhesive to dry on the open pores of the foam that had been blocked down.

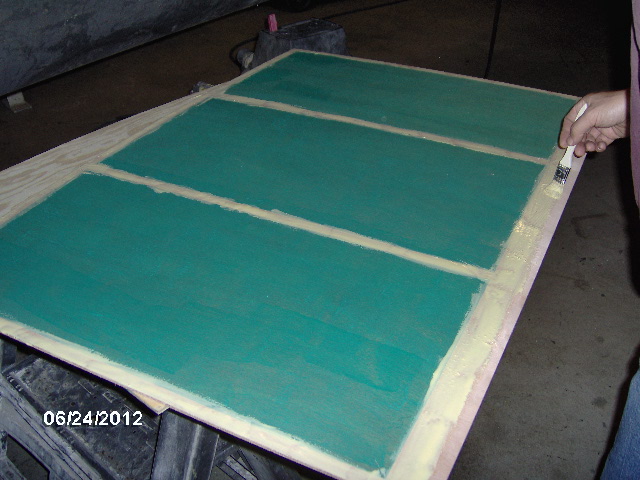
Once that was ready I went ahead and squirted the TB2 wood glue down on both the frame and the undersides of the panels while Karl followed behind spreading with the chip brush.
Image

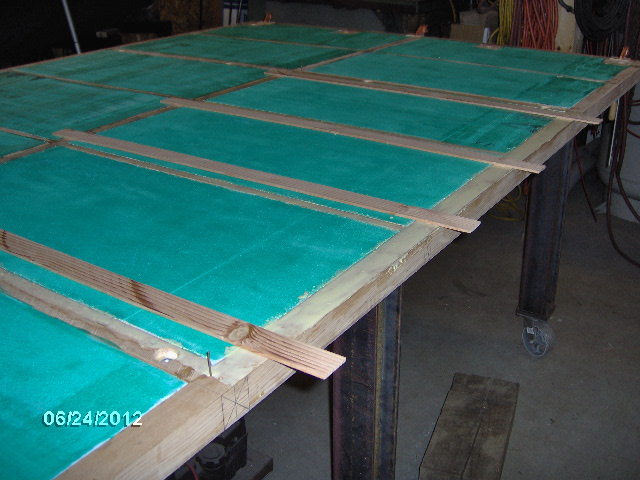
We positioned stickers made from the leftover slats starting in the middle street side.
Image

And then things got too busy for pics. I'll try to describe.

First we pushed the middle panel up against the nails on the centerline, then forward to the nail on the front 2x xmbr, before pulling the stickers out and setting the piece.

Then we set the rear street side panel up against the centerline nails and the middle panel.

Then we pulled that front nail and laid the front street side panel.

Pulled all of the centerline nails and set the curb side middle panel up against the street side panel and its front nail.

Then the rear curb side panel. Something was just a bit off, so we made sure that the centerline joint, that would show in the galley floor, was tight and had a slight gap where it could be filled later and hidden under the bulkhead wall.

Then pulled the last nail and set the front curb side panel.

Through all of this I was just stapling on the perimeter frame and at the bulkhead xmbr, leaving the center field of the cabin to be weighted and the rear edge of the galley floor to be clamped. Karl kept calling for more staples, "they'll be under the mattress anyway", and I kept saying, "we'll weigh it down".

We had not bothered putting anything between the table and the underside, but we did put a big piece of cardboard over the top to protect it before adding weight. Figured the masking tape would keep any squeeze out from getting on the panels and the cardboard might help soak up extra.
Image
Image

It was after 8pm by now and I quickly started to clean up and put tools away. Popped open the stapler magazine and realized that I had run out of staples some time back. Quickly reloaded and went back to where I had finished, started lifting cardboard and shooting more staples into the perimeter. Pretty obvious where I had run out, but I went around the whole thing and stuck them in every 4 inches or so.

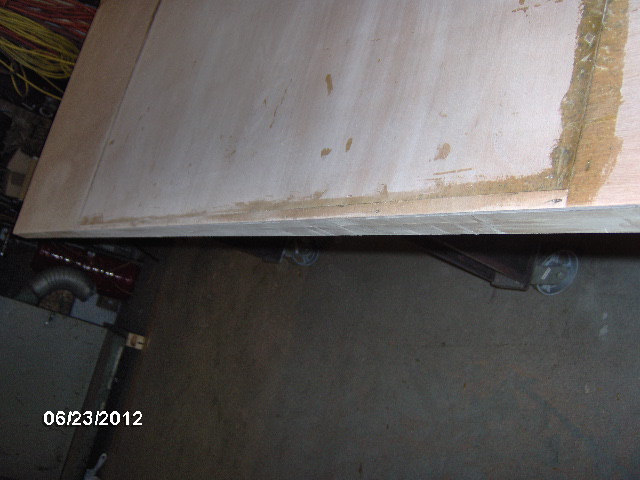
Tonight, Monday, Karl had unloaded the weights and pulled the cardboard (only had a few spots in the galley where it had stuck). the tape did pull little whispers of grain, but nothing that a quick hit with the palm sander wouldn't take care of. I went around the seams and a couple of trouble spots with a narrow scraper and knocked the glue down, then sanded the seams and tape areas smooth.

I'll save the rest of tonights efforts until I get the pic's loaded.

All for now.
KC
My Build: The Poet Creek Express Hybrid Foamie

Poet Creek Or Bust
Engineering the TLAR way - "That Looks About Right"
TnTTT ORIGINAL 200A LANTERN CLUB = "The 200A Gang"
Green Lantern Corpsmen
User avatar
KCStudly
Donating Member
 
Posts: 9640
Images: 8169
Joined: Mon Feb 06, 2012 10:18 pm
Location: Southeastern CT, USA
Top

Re: The Poet Creek Express - Foamie Hybrid

Postby linuxmanxxx » Tue Jun 26, 2012 2:12 am

Hey if it's taking the glue that long to flash, your pouring it on too heavy. Tonight mine was flashing in 10 minutes and only takes a long time when it's cold.
User avatar
linuxmanxxx
500 Club
 
Posts: 802
Images: 10
Joined: Fri Sep 10, 2010 1:50 am
Location: Abilene TX
Top

Re: The Poet Creek Express - Foamie Hybrid

Postby Ned B » Tue Jun 26, 2012 5:59 am

KC,
I've been following along and lurking, but I just gotta chime in here... Nice Job! Your level of craftsmanship is amazing! :applause: :applause:
User avatar
Ned B
1000 Club
1000 Club
 
Posts: 1036
Joined: Sat Apr 16, 2011 10:25 am
Location: Syracuse NY (ish)
Top

Re: The Poet Creek Express - Foamie Hybrid

Postby eaglesdare » Tue Jun 26, 2012 9:03 am

now these pics i can understand! all that metal work in the beginning was overload for me. :lol: your floor is great, mine is going to the fire pile out back. :cry:
Louella
May the foam be with you.
User avatar
eaglesdare
Donating Member
 
Posts: 3168
Images: 13
Joined: Tue Aug 26, 2008 7:06 pm
Top

Re: The Poet Creek Express - Foamie Hybrid

Postby KCStudly » Tue Jun 26, 2012 11:42 am

Linux, Many days here we have been having high humidity. The New England coast is amazing. Sometimes it can be in the 90's with 100% humidity and not be raining. I'm guessing it's a dry heat in TX.

Ned B, Thanks a ton. It's always nice to get positive feedback!

Eagle, Sorry I misspelled your name before, caught it and fixed it. Don't go throwing your floor out just yet. There must be something you can do to save it, maybe? I've got some imperfections here and there. I've tried to be honest by showing the bad with the good. My little error rounding the xmbrs, the scarfing fiasco and ongoing save, the "I wish I hads". I'll take the compliment, but just remember that we are our own worst critics, and the pictures make (almost) everything look 10-15% better.

I'm still a little behind on pictures and story, but hope to get caught up on that (and sleep) this evening; no building on Tuesdays.

Peace.
KC
My Build: The Poet Creek Express Hybrid Foamie

Poet Creek Or Bust
Engineering the TLAR way - "That Looks About Right"
TnTTT ORIGINAL 200A LANTERN CLUB = "The 200A Gang"
Green Lantern Corpsmen
User avatar
KCStudly
Donating Member
 
Posts: 9640
Images: 8169
Joined: Mon Feb 06, 2012 10:18 pm
Location: Southeastern CT, USA
Top

Re: The Poet Creek Express - Foamie Hybrid

Postby linuxmanxxx » Tue Jun 26, 2012 12:08 pm

It helps if you blow a fan on it in high humidity do you don't have such long wait times. I'd gladly trade this dry for some wet. After using this for about 8 months I've learned a coat with a simple brush is more than enough for a good bond. Go to wally world and get the biggest of the ones like the corner painters the red ones and that is absolutely the best applicator. Applies best coat with little waste or absorption and easy to clean and it was pretty cheap.
User avatar
linuxmanxxx
500 Club
 
Posts: 802
Images: 10
Joined: Fri Sep 10, 2010 1:50 am
Location: Abilene TX
Top

Re: The Poet Creek Express - Foamie Hybrid

Postby RandyG » Tue Jun 26, 2012 3:14 pm

Tell Karl to come by when I start my build, I could always use an extra set of hands and seems like he helps alot.
I was looking for a type of glue that would stick to foam for another project, most epoxy's will melt it :( The best thing I found was Gorilla glue but that gets expensive. N-E ways, looking forward to some more pics!
Randy
Aircraft fabricator, novice carpenter, electrical apprentice, audio engineer dropout.
Build thread - http://www.tnttt.com/viewtopic.php?f=50&t=54126
User avatar
RandyG
500 Club
 
Posts: 695
Images: 115
Joined: Thu May 10, 2012 6:52 pm
Top

Re: The Poet Creek Express - Foamie Hybrid

Postby crumbruiser » Tue Jun 26, 2012 5:18 pm

You have to be the most patient person on this forum. You work is really imaculate, extra fine quality! :thumbsup: I do admire your skills and craftsmanship.
Frank
I am not weird, I am a Limited Edition.
Facebook http://www.facebook.com/profile.php?id=100000303236631
User avatar
crumbruiser
Teardrop Master
 
Posts: 267
Images: 255
Joined: Sun Jul 10, 2011 6:11 pm
Location: Central Ohio
Top

Re: The Poet Creek Express - Foamie Hybrid

Postby KCStudly » Tue Jun 26, 2012 6:33 pm

Randy G, Karl is the best kind of friend. He has been invaluable on this project, from allowing the "use of the hall", to chipping in materials and supplies, to the encouragement and useful suggestions, and, yes, the helping hand. I just simply would not be doing this without him. :worship: I can't thank him enough for all that he is doing.

Thank you Crumb. Like I said, there are a few warts and the pictures make everything look better, but I do appreciate the complement and I am very happy with the results so far. It looks like the plan and I have not hit any snags or boo boos that I cannot live with or correct to my satisfaction...so far.

It's a double edged sword, tho. Karl is pushing hard to keep me moving toward my deadline and I want to spend time on details and making sure everything meets my standards. That's not to say that I'm going to do a bunch of stuff over just to get it perfect, but I'm not going to rush and let quality suffer just because I was in a hurry. I also want to be able to enjoy some of the finer points of craftsmanship while I'm in the moment, and not just steamroll past them in a furious panic. Mastering the wood plane (ha ha), or making the chisel do exactly what I want it to. These moments I hope to find along the way. Yeah, the DA may be quicker, but it is loud, and dusty, and you have to wear PPE. I will find the right blend of craftsmanship and practicality, and if I don't meet my schedule goals, well, nobody can say I didn't try hard. Can't justify crapping out the finish with this much jingle and sweat invested.

I think Karl may also have underestimated the scope of the project, and between the camper parts getting bigger and bigger, and taking over the back bench, and Rover Mike's Rover taking up a big chunk of space with no activity, he may be feeling a bit put out in his own shop. We thought about putting the floor assembly up front in the old porch shop to get it out of the way for now, but that is where the new kittens are in quarantine, so I was reluctant to offer it up as a scratching post/urinal (although they seem to be well litter trained already... you never know how they might react to the smell of the cedar and glue).

Karl is showing signs of being a bit of a foamie skeptic. He is struggling with the fact that I don't plan to have any hard lumber on the forward edges of the wall profile. I too haven't quite figured how I am going to wrap the ply skins around the radius with just the two foam wall edges to resist. My thought was to "train" the ply first and perhaps install temporary bracing, but Karl seems to think that I should make rails like the hatch ribs or galley side wall edging for the front radius.

I am thinking about that for just the tight section. Maybe just from the front cabinet top frame (that also acts as a spar) to the front cabinet shelf ledger (also acting as a front wall spar) I will consider adding 4 rib like elements, or a couple of intermediate spars there. Trouble is three fold: (1) good wood costs good money, (2) every piece added adds weight, contrary to the Foamie Method, and (3) they would take up valuable interior cabinet space (although not too much, I suppose).

Maybe once we see first hand how well GG works he will change his outlook(?).

He also is questioning the 'glue/paint as resin' technique (he has done a lot of custom glass work, including molded and vacuum bagged parts while working for Reeves Callaway, a well known custom Corvette boutique, but I'm trying to open his eyes to the foamie way.
Last edited by KCStudly on Sat Apr 13, 2013 3:39 pm, edited 1 time in total.
KC
My Build: The Poet Creek Express Hybrid Foamie

Poet Creek Or Bust
Engineering the TLAR way - "That Looks About Right"
TnTTT ORIGINAL 200A LANTERN CLUB = "The 200A Gang"
Green Lantern Corpsmen
User avatar
KCStudly
Donating Member
 
Posts: 9640
Images: 8169
Joined: Mon Feb 06, 2012 10:18 pm
Location: Southeastern CT, USA
Top

PreviousNext

Return to Foamies

Who is online

Users browsing this forum: Google [Bot], jgmahoney and 12 guests