Hello!

This is the place where you can introduce yourself, and include a photo if so desired.

Hello!

Postby bikeopelli » Mon Sep 24, 2012 10:39 am

Stumbled across "Mike" (online) the other day and he told me about this site. What a great effort this is! Delighted to have found it and becoming a member.
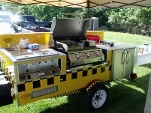
So here is the story of MY "tiny trailer...
Back in 2005 I finished a five year project as shown below. Its a 1936 Chevrolet Standard Coupe. Street Rod.
I'm running a '95 Pontiac 3.8L Supercharged V6 - 4L60-e Transmission - '95 S-10 rear end. During the build I knew I would want to eventually tow some kind of small camping trailer but I had no idea just what so all I did was cobble in a type II receiver at that time.
In making a decision about a trailer I considered several variables but I knew (after 5 years in the shop) I didn't want to take the time build anything from scratch so that was out. I also didn't want anything old with all the attendant problems there. So after considering that and several other variables I decided to purchase a new Haulmark 4X6 'transporter' in 2006. $1500. Over time I have modified it to meet our needs.
Image
A partial list of modifications includes:

1. Installed RV windows front, sides.
2 Cobbled in a 'shelf' that is where we sleep.
3. Larson retractable screen on back. (It's great to have the entire back open in the summer months).
4. Cobbled in (4) 6 volt deep cycle batteries (2 on the tongue; 1 on each side behind the wheels).
5. Installed 12 volt lighting, receptacles
6. Installed speakers (we watch DVD's on the laptop)
7. EdgeStar 12 volt compressor type refrigerator (lives in the coupe)
8. 8 amp solar panel/tracker with collapsible stand.
9. Awning. (Modified a cheap ($100) "Greatland" awning so that it fits up to the 'camper'.
Image
Image

The first coupla years we were "ice dependent" and realized we just had to change that so I researched what was available and landed on an "Edgestar" 12 volt (compressor type) refrigerator, 6 volt deep cycle batteries and and solar panel/tracker setup.
Two of the batteries live on tongue and two live behind the wheels. I cobbled up a solar tracker that is based on a 1.5" PVC collapsible stand that goes up/down in just a few minutes. At 8amp/hr it keeps the batteries topped off all day and with 4 of them they seldom get below 12.6 by the time the sun comes up the next morning.

Image
Image
User avatar
bikeopelli
Teardrop Inspector
 
Posts: 18
Joined: Mon Sep 24, 2012 9:28 am

Re: Hello!

Postby bc toys » Tue Sep 25, 2012 6:38 am

welcome to this great site hope to meet you on the camping trails some day nice setup you have
bc toys
2000 Club
2000 Club
 
Posts: 2217
Images: 42
Joined: Sun Jun 28, 2009 2:45 pm
Location: LAS VEGAS NV

Re: Hello!

Postby Oldragbaggers » Tue Sep 25, 2012 7:07 am

Very cool set up. I love seeing all the different creative ideas that come up on this site. Welcome!!
Life is sooooo good.........
Sail...camp....bike...repeat
Becky

Build Journal http://www.tnttt.com/viewtopic.php?f=50&t=45917
Visit our blog at http://www.oldragbaggers.com
Image Image
User avatar
Oldragbaggers
Gold Donating Member
 
Posts: 1842
Images: 331
Joined: Mon Aug 01, 2011 9:22 pm
Location: Essex, MD
Top

Re: Hello!

Postby mikeschn » Tue Sep 25, 2012 4:45 pm

I see you found us. :D Welcome to the forum!

Mike...
The quality is remembered long after the price is forgotten, so build your teardrop with the best materials...
User avatar
mikeschn
Site Admin
 
Posts: 19202
Images: 475
Joined: Tue Apr 13, 2004 11:01 am
Location: MI
Top

Re: Hello!

Postby Junkboy999 » Sun Sep 30, 2012 1:09 am

Sweet cargo trailer conversion.

Love the retractable bug screen and solar setup. Sure beats my 5 watt Harbor freight solar panel.

Welcome to the forum.

Terry
Junkboy999
User avatar
Junkboy999
1000 Club
1000 Club
 
Posts: 1259
Images: 52
Joined: Fri Jul 06, 2012 9:18 pm
Location: Wichita, KS
Top

Re: Hello!

Postby usopa65 » Sun Sep 30, 2012 6:07 am

What a neat solar setup! That's something I want to consider in my build. Mind if I ask what the timing mech. consist of, or maybe a place where I could start looking? Thanks
Lee
usopa65
My friends call me...Doughbelly...wif...tha ...funky-navel-lint an..ole"toe jam !
User avatar
usopa65
Teardrop Inspector
 
Posts: 5
Images: 9
Joined: Fri Sep 14, 2012 6:42 pm
Location: West Central Ohio
Top

Re: Hello!

Postby bikeopelli » Sun Sep 30, 2012 4:24 pm

usopa65 wrote:What a neat solar setup! That's something I want to consider in my build. Mind if I ask what the timing mech. consist of, or maybe a place where I could start looking? Thanks
Lee
usopa65

Lee,
If you can build Hot Dog carts and do R/C stuff then this project should be easy peasy!
Before I started this Solar project I knew almost nothing about solar. While I am sure there are a lot of great places to shop I landed on Wind&Sun in Arizona for my panel and controller and MTM Scientific for my solar tracker circuit board and gearhead motor. I have a small home machine shop which, without, would have made the project just a whole lot more difficult/expensive as all the any welding/machining would, of course, need to be farmed out.
Re: The tracker, there is no actual 'timing mech.'. The tracker 'looks' at the sun all day and actually follows it across the sky. Here is how the tracker works... the 'eyes' are (2) photo resistors with a 'shadow block' in-between them. (I built the tracking unit out of some scrap nylon). When pointed at the sun the 'east' photo-resistor will eventually be shaded. When the circuit detects a big difference in light between the two, it fires up the motor which moves the board a little until both photo resistors have the same amount of light. Then does it again... and again...etc. Of course its a little more complex than that but you get the picture.
I get kick out of the fact that the entire 30lb board is moved by the very small DC motor (7 rpm out of the gearbox) from MTM. In order to do that I had to precisely balance the board in both the X and Y plane. Of course, that was all part of the fun.
Image
For the mechanical part of the operation I built an aluminum box and used the small sprocket from a scrap rear bicycle cassette for the drive part and the front middle sprocket for the driven part. The two arms contact the 'morning' and 'evening' limit switches. I used a scrap RJ45 cable and connectors between the the box and the photo resistors.
Image

Because of my very 'tiny' camper. room is of course, at a premium. Also, I tend not to use things that take very much time to setup/breakdown. Enter the 1.5" PVC stand you see below. Goes up/down in 3-4 minutes. And it was cheap to build.

Image

You can see an entire Picasa album regarding this project by right clicking here.
If you view that album you will also see my 12VDC to 12VDC charger. Huh? Talk about a backyard shadetree effort! But it works!
I use it to charge the trailer batteries runn'n down the road (or in the event we run out of sun and amps at the same time. (I WILL NOT use a gas generator in a campground)). We all know that deep cycle batteries don't like to be charged with a 130amp engine alternator. This was a cheap (and fun) effort to charge those batteries at a rate they like. More information upon request.
User avatar
bikeopelli
Teardrop Inspector
 
Posts: 18
Joined: Mon Sep 24, 2012 9:28 am
Top


Return to Newbies, Introduce yourselves

Who is online

Users browsing this forum: No registered users and 3 guests