The Poet Creek Express - Foamie Hybrid

Canvas covered foamies (Thrifty Alternatives...)

Moderator: eaglesdare

Re: The Poet Creek Express - Foamie Hybrid

Postby Junkboy999 » Wed Nov 21, 2012 5:50 am

sweeeet build. Keep up that nice work.
User avatar
Junkboy999
1000 Club
1000 Club
 
Posts: 1259
Images: 52
Joined: Fri Jul 06, 2012 9:18 pm
Location: Wichita, KS

Re: The Poet Creek Express - Foamie Hybrid

Postby GPW » Wed Nov 21, 2012 11:22 am

It’s like a Foamie Mini-series .... with cliffhangers ... 8) 8) 8)
There’s no place like Foam !
User avatar
GPW
Gold Donating Member
 
Posts: 14920
Images: 546
Joined: Thu Feb 09, 2006 7:58 pm
Location: New Orleans

Re: The Poet Creek Express - Foamie Hybrid

Postby KCStudly » Wed Nov 21, 2012 4:00 pm

Thanks for the encouragement Terry (Junkboy999). That is well appreciated.

GPW, we need to push each other to log some serious build time. I'm headed to Mecca as soon as I finish up here and have a nice long holiday weekend to make some serious progress on locating, excavating foam, and gluing in my wall blocking. Before you know it I might just be able to start erecting some walls. You best head out to the studio and start putting up some of those rib assemblies. Hop to...the race is on! :R ;) :D

Put in an order for most all of my LED lighting, including dome and all trailer related (recessed tail/brake/turn w/connectors, front and rear running, license plate...still pondering b/u lights). All from superbrightleds.com. Still need to select reading lights. The galley hatch light I picked is out of stock until the end of the month, so is not included, but it is a rotating bar style so should be easy to aim regardless of the angle of the hatch underside where ever I decide to put it. For the porch lights I'm going to try something a little different. I'm going to use the little chrome hooded license plate lights in amber color up by the tops of the doors, then I'm going to use additional amber clearance lights (on the same switch) located under the trailer frame below the doors to act like foot lights. Should fit the understated retro/sleek vibe I'm going for by being unobtrusive. Add another $175 to the tally.

Okay, off to Mecca to get 'er done!
KC
My Build: The Poet Creek Express Hybrid Foamie

Poet Creek Or Bust
Engineering the TLAR way - "That Looks About Right"
TnTTT ORIGINAL 200A LANTERN CLUB = "The 200A Gang"
Green Lantern Corpsmen
User avatar
KCStudly
Donating Member
 
Posts: 9640
Images: 8169
Joined: Mon Feb 06, 2012 10:18 pm
Location: Southeastern CT, USA
Top

Re: The Poet Creek Express - Foamie Hybrid

Postby bonnie » Wed Nov 21, 2012 6:58 pm

I'm off to the garage. Go KC go. Glenn, are you going to get some time?
Remember, the turtle won. :)
User avatar
bonnie
Donating Member
 
Posts: 1390
Images: 107
Joined: Sun Jul 24, 2011 4:14 pm
Location: Roxana, IL
Top

Re: The Poet Creek Express - Foamie Hybrid

Postby RandyG » Wed Nov 21, 2012 9:19 pm

Wow, I didn't even think about putting the rubber under the hinge. The only problem I see with that is, there will be play between the hinge and the hatch and body. I don't think you can connect it tight enough with the rubber between it; unless you drill the rubber where the fasteners are going and shim it with washers... maybe. If that doesn't make sense, sorry, I do have another idea but I think it would get lost in translation.
Randy
Aircraft fabricator, novice carpenter, electrical apprentice, audio engineer dropout.
Build thread - http://www.tnttt.com/viewtopic.php?f=50&t=54126
User avatar
RandyG
500 Club
 
Posts: 695
Images: 115
Joined: Thu May 10, 2012 6:52 pm
Top

Re: The Poet Creek Express - Foamie Hybrid

Postby Wolffarmer » Wed Nov 21, 2012 9:30 pm

There is also the plastic hinge. Can get some at McMaster Carr

Randy
"these guys must be afraid of the dark"
User avatar
Wolffarmer
Donating Member
 
Posts: 4612
Images: 309
Joined: Wed May 02, 2007 1:32 pm
Location: Idaho Rupert
Top

Re: The Poet Creek Express - Foamie Hybrid

Postby KCStudly » Wed Nov 21, 2012 9:58 pm

Chugga-chugga, chugga-chugga, Woo-Woo. Thanks Bonnie. I just took another bite of that big 'ol elephant.

Started by figuring out what I had done wrong on the under counter face frame. Besides building it backward, I had built it out assuming that I had already cut all of the pieces to final length back when I did all (most) of the saw work. Well, turns out that I had not cut the top piece to final length (DOH), and that caused me to miss understand part of the problem. The other part was that the galley cabinets actually have the stiles placed at a different spacing than the inside cabinets (which I miss stated earlier, and is clearly shown on my paper hard copy of the plans). After measuring a few things and figuring out where I went wrong (...again this time), I reminded myself that the reason that the inside cabinet spacing and the galley cabinet spacing are different is because: (1) on the inside I wanted the middle bay to be a little narrower to accommodate a laptop or small net pad (in the event that I decide to add movie capabilities) leaving larger bays to the outside for clothing and personal items, whereas (2) in the galley the cooler width dictates that the outer (now left hand) bay be a little narrower (the cooler loads end wise), and for the sake of symmetry, also the right hand bay, leaving the middle bay wider. Clear as mud, right?

Anyway, the bottom line is that I reworked the under counter face frame again. Pulled the two Kregg screwed legs off, put the one back where it had been "before the correction", shortened the top rail, masked and re-glued and screwed the two legs (or stiles) back on.

Next I pulled out the router jig that I had made previously for all of the standardized 1x4x4 nominal wall blocking; got out my router and bits, got out the plan, and realized that I don't have what I need to do the job. Drat. There's that planning and prepping and sourcing and fiddling around routine that always seems to get in the way of getting things done! But, of course, you have to go through all of this to get to the actual work, so it is still progress. All along I have been making notes on the plans of the things that I have not planned the blocking for yet. In the 3D model when I moved the axle and fender blocking forward, it appears that I didn't revise the drawing (or at least did not print a revised copy). My top bearing flush cutting bit threw the bearing collar set screw and I have not replaced it yet (...but that doesn't really matter because it is 1-1/4 inch long and is too deep for the thin little template that I made). They still don't make a router collar set for my oddball Ryobi router/table combo that was a Ho-de-po package special, so I sat and took some measurements so that I can make my own. The other option would be to try and freehand all of the recesses just using my jig as a visual guide, then rely on the GG to take care of any irregularities (but there are A LOT of recesses, and getting that GG to lay down flat to the wall foam is a PITA...always seems to squeeze out "un-flat" and doesn't sand smooth easily. I might be better off just buying a new router that I know I can get collars for.

Anyway, I jotted down all of my notes and brought my box of glues and whatnot in out of the cold.

Randy (Wolffarmer), I am aware of the "living" hinge, and that might be a big help to RandyG, but it still doesn't solve my hang up on the issue of the radius wall to roof corner and how to run the water past the side wall. I really want to solve that, but if I have to I can fall back to a hurricane hinge and just interrupt the radius at the hinge (sigh).

Hope everyone has a nice holiday tomorrow, and hope that we all get something done this weekend.
KC
My Build: The Poet Creek Express Hybrid Foamie

Poet Creek Or Bust
Engineering the TLAR way - "That Looks About Right"
TnTTT ORIGINAL 200A LANTERN CLUB = "The 200A Gang"
Green Lantern Corpsmen
User avatar
KCStudly
Donating Member
 
Posts: 9640
Images: 8169
Joined: Mon Feb 06, 2012 10:18 pm
Location: Southeastern CT, USA
Top

Re: The Poet Creek Express - Foamie Hybrid

Postby bonnie » Wed Nov 21, 2012 10:22 pm

Why not fabricate a water spout of some sort. It could be added to your hinge idea and then run as one piece. With the foam, you could even integrate it into the radius. Think a really big weep hole, like what you find on RV/Boat windows. That would allow the water a place to run to, while keeping the overall radius shape you want. Just a thought.
Remember, the turtle won. :)
User avatar
bonnie
Donating Member
 
Posts: 1390
Images: 107
Joined: Sun Jul 24, 2011 4:14 pm
Location: Roxana, IL
Top

Re: The Poet Creek Express - Foamie Hybrid

Postby KCStudly » Sat Nov 24, 2012 1:00 am

Not sure I can picture your water spout idea, Bonnie, though I do appreciate the suggestion. I'm going to let this one stew on the back burner some more, until I get closer to that point in the build.

Progress.
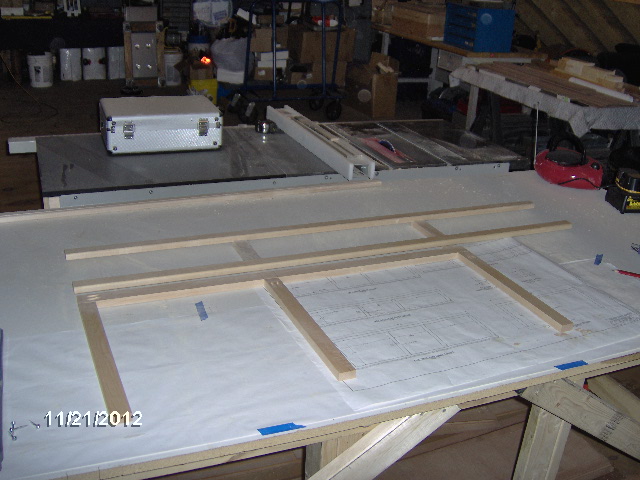
Here's a pic of that counter face frame fix I mentioned. The upper galley shelf face frame is shown above, with the under counter face frame corrected and dry fit below, in reverse (i.e. looking at the back side..when flipped face out it will be on the curb side).
Image

That was Wednesday eve. After dry fitting, I masked, glued and screwed, again.

Yesterday was two different turkey dinners with Vette's family first, then my family afterward. First dinner was at about 1:30. Turkey, stuffing, gravy, mashed spud, sweet potato with little marshmallows, butternut squash, mushed turnips, roasted acorn squash w/ a little cinnamon, potato soup, fresh baked bread, fresh cranberry relish, Rene's pork pie, choc/choc chip fudge, ginger cheese cake w/ pumpkin mousse and chocolate ganache on a choc graham crust, chocolate bomb, strawberry Napoleon cake, homemade pumpkin cream filled cream puffs/éclair's, etc. Caught in the moment and didn't take any pic's, sorry.

Second dinner was about 6pm. I will wait and describe when I get the pic's taken with mom's camera (I left my camera behind at the 1st dinner).

Today I slept in, then got up and went in to my desk and worked on the 3D model adding the wall blocking for the dome lights (... actually located up high on the side walls), coat hooks, and reading lights. Also detailed and placed the arched ribs that will form the front roof radius spanning between the back of the front cabinet floor and the top of the front cabinet face frame. Updated the drawings and printed out fresh prints.

Still to be determined, hatch strut blocking, and galley wing table blocking. For now, I have decided that the light switches will not need any additional blocking, other than the interior wall skin, or I can make some simple stainless steel switch plates. I had also thought that I would include a dedicated hanger for the hog leg holster (.357 mag bear repellent), but have decided that the coat hook will be adequate for the leather part, and the catch all shelf will handle the rest.

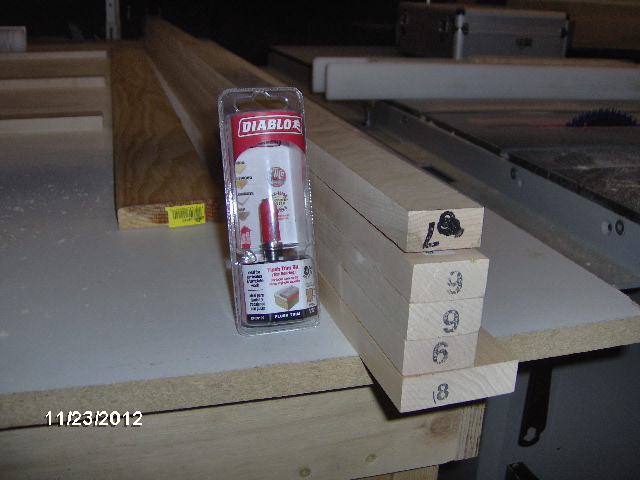
So after getting that sorted out it was off to the big orange to buy more wood. One 1x3 x 8 ft maple for the arches and ...you will see; some more 1x2 maple for the ledgers at the backs of the cabinets and shelves (probably not enough to complete the job, but picked out the acceptable wood and will cull more as it comes available); a 1x3 x 8 ft select pine for the additional wall blocking (may already have some drops for this, but couldn't remember); and another top bearing flush cutting router bit, 1 inch long.
Image

I looked up a source for a replacement collar and Allen wrench for my lost set screw on my 1-1/4 long flush cut bit, and it was about $6 plus shpg. For $10 I got the same/shorter bit and will just swap the collar around as needed.

Then I striped the masking and sanded the under counter face frame flush... again.

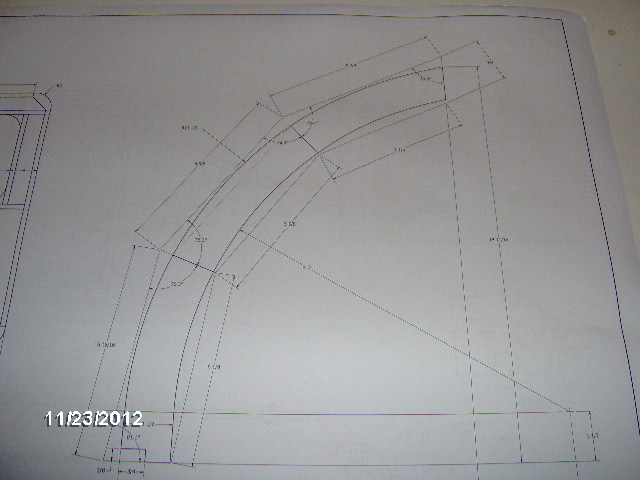
Finally moving on. Here's a pic of the full scale plan for the front radius arches.
Image

The final arched rib detail is shown superimposed on the mitered stick assembly. The mitered joints are all the same angle, but the top and bottom cuts are each different. And, of course, the angles are irregular, 76.3 deg for the miters, 63.5 deg at the top, and 81.1 deg at the bottom. The power and curse of 3D modeling.

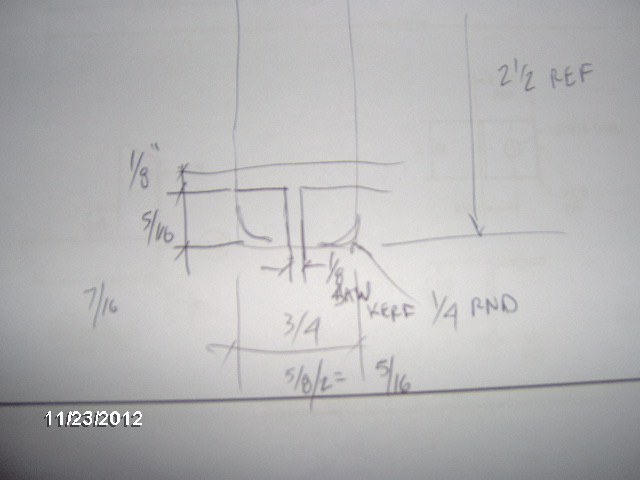
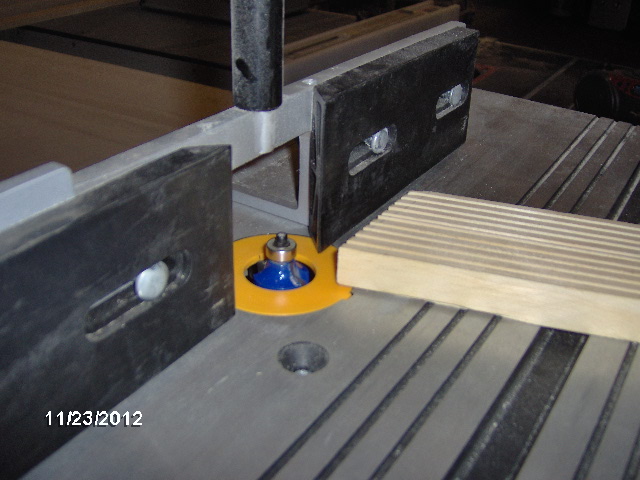
Well, the arch segment blanks only need to be 2 inches wide, and I need some small 1/4 round trim to use as the ledgers for the shelf and cabinet floor supports, so I started by making the 1/4 round out of the edge of the 1x3. First I set the router table back up with the round over bit and the feather board.
Image

Here's a sketch of the idea.
Image

Then I ran both edges of the 1x3 through the router. Actually, I ran each edge through a few times because the board wanted to tip a bit due to it being so long and me working alone w/o out feed rollers. Not a big deal, just had to run it through until it was all uniform.

Then I ran the board through the table saw on edge with the blade depth set shallow, flipping it around and running it through again to make sure that the slot was centered.
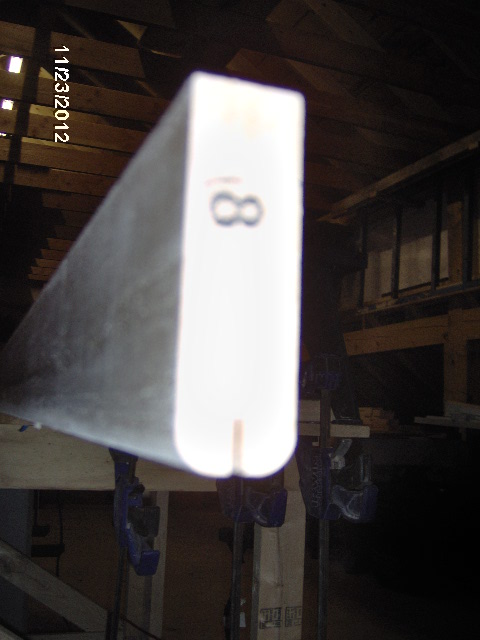
Image

Then, without changing the fence, I set the blade higher and ran the board though on its side getting this.
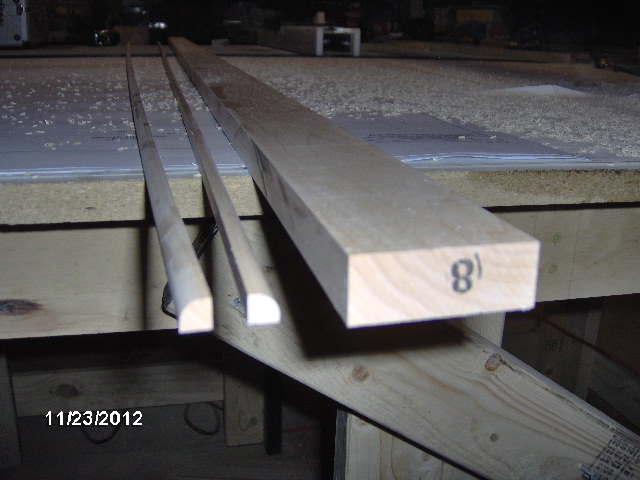
Image

The board was still just a shade over 2 inches, so I reset the fence and ran it through again.

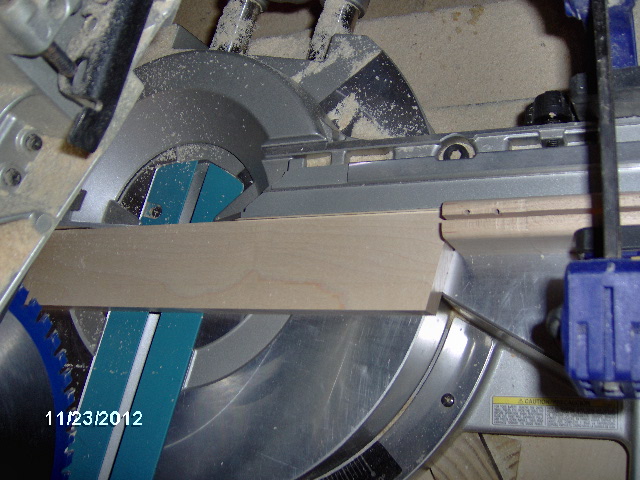
Then to the miter saw. So first I set the saw for the 76.3 cuts, did a test cut and laid the part right on the drawing to check. Once I was happy with the angle, I set a stop block for the length. After the initial cut all I had to do was flip the board, place it against the stop, make the next cut and repeat. That gave me the middle pieces for all four arch ribs.

Then, in order to maintain the exact complementary angle, I left the saw the same and cut the top and bottom pieces a little long using the same angle at each end.
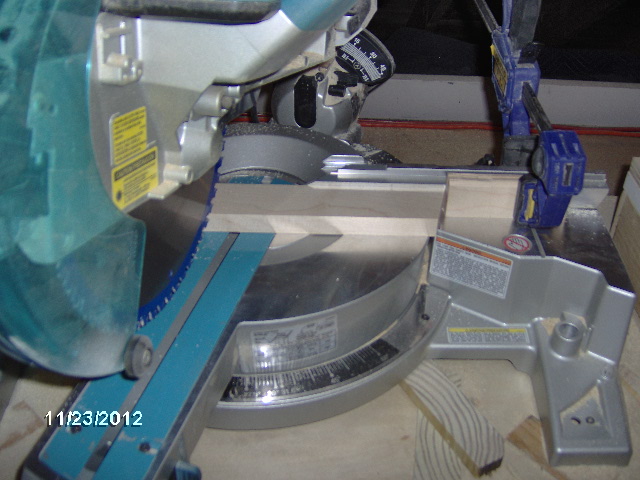
Image
Image
Image

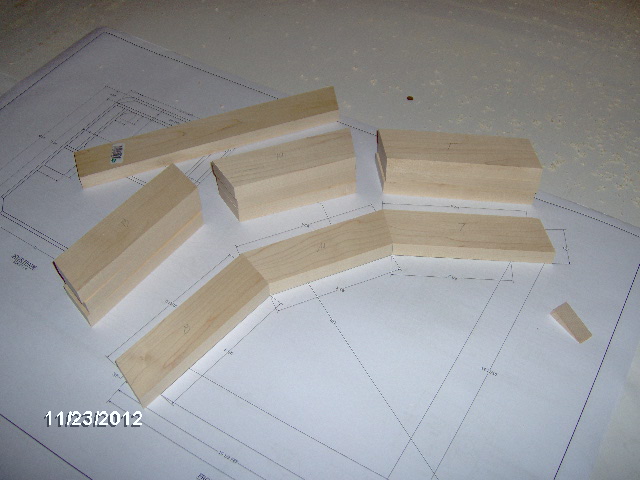
Then I reset the saw and stop for the top angle, running the top pieces for their second finish cuts. Then reset for the bottom angle and made the second cuts on those
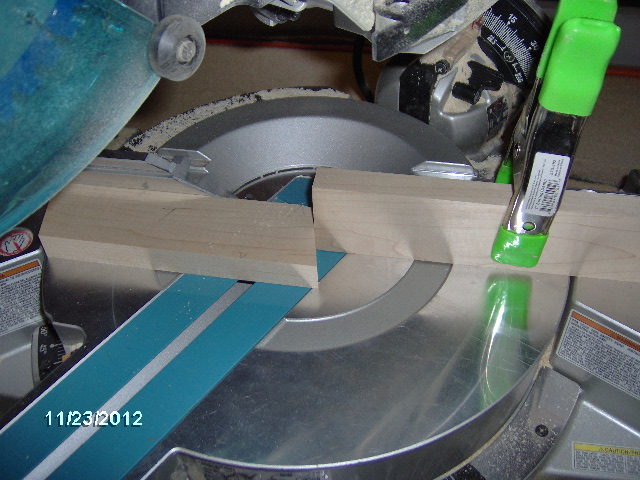
Image

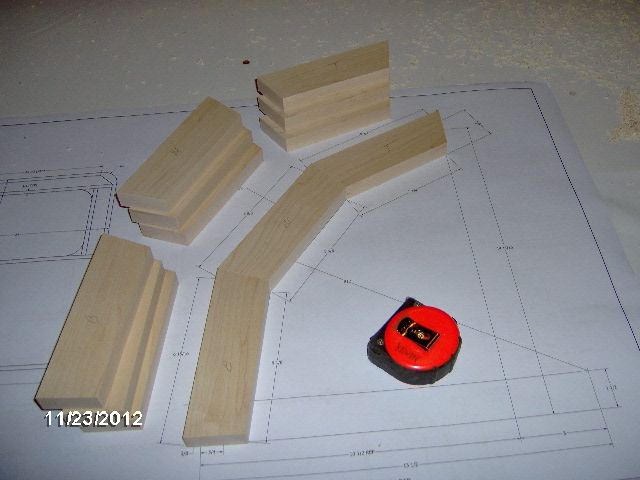
Ending up with this.
Image

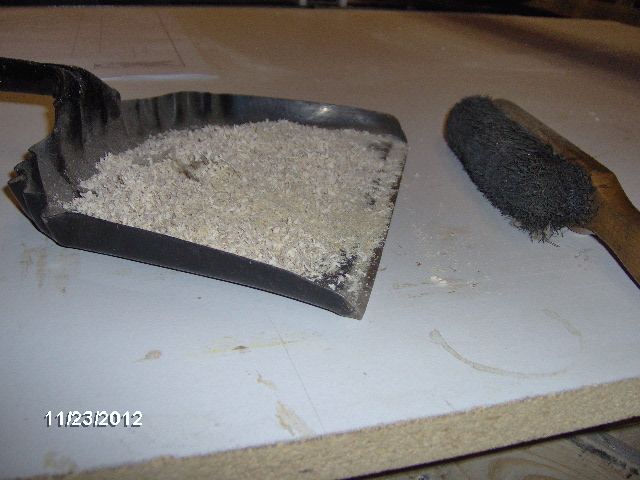
This evening we are serving a fine helping of maple saw dust and chips.
Image

And with that I called it a night. Hope to make a bunch more progress tomorrow.
Last edited by KCStudly on Sun Apr 14, 2013 10:17 am, edited 2 times in total.
KC
My Build: The Poet Creek Express Hybrid Foamie

Poet Creek Or Bust
Engineering the TLAR way - "That Looks About Right"
TnTTT ORIGINAL 200A LANTERN CLUB = "The 200A Gang"
Green Lantern Corpsmen
User avatar
KCStudly
Donating Member
 
Posts: 9640
Images: 8169
Joined: Mon Feb 06, 2012 10:18 pm
Location: Southeastern CT, USA
Top

Re: The Poet Creek Express - Foamie Hybrid

Postby bonnie » Sat Nov 24, 2012 6:50 am

Very nice work. :)
Remember, the turtle won. :)
User avatar
bonnie
Donating Member
 
Posts: 1390
Images: 107
Joined: Sun Jul 24, 2011 4:14 pm
Location: Roxana, IL
Top

Re: The Poet Creek Express - Foamie Hybrid

Postby KCStudly » Sat Nov 24, 2012 11:22 am

Okay foodies and foamies, get your feed bag on!

Thanksgiving at mom's.
Image

The turkey.
Image

Roasted root vegetables, including sweet potato, parsnips, carrots, and onions.
Image

Rainbow Chopped Salad with apples, blue cheese, pomegranate seeds, toasted hazel nuts, and red cabbage.
Image

Mom's cornbread stuffing.
Image

More stuffing that didn't fit in the bird.
Image

Green beans with sautéed onions, roasted chestnuts, and crispy pancetta wafers (note the Graber olives in the foreground, and the freshly stewed cranberry sauce in the background...my aunt Sandra's specialty).
Image

Glazed Pearl Onions with golden raisins, and almond slivers in a honey, sherry, vinegar glaze in a pot that Yvette spun.
Image

Pass the gravy, please (made from the pan drippings).
Image

Pecan and pumpkin pies with freshly whipped cream for dessert while sitting in front of the boob-tube watching the Science channel coverage of the Punkin Chunk. The ballista made it in for several snippets and a good slo-mo of one of our shots!

My sufficiency was sophonsified and any further indulgence would have been a copious redundancy.
KC
My Build: The Poet Creek Express Hybrid Foamie

Poet Creek Or Bust
Engineering the TLAR way - "That Looks About Right"
TnTTT ORIGINAL 200A LANTERN CLUB = "The 200A Gang"
Green Lantern Corpsmen
User avatar
KCStudly
Donating Member
 
Posts: 9640
Images: 8169
Joined: Mon Feb 06, 2012 10:18 pm
Location: Southeastern CT, USA
Top

Re: The Poet Creek Express - Foamie Hybrid

Postby GPW » Sat Nov 24, 2012 12:06 pm

Now might that be a local term ... sophonsified ?

Looks YUMMY !!! :D
There’s no place like Foam !
User avatar
GPW
Gold Donating Member
 
Posts: 14920
Images: 546
Joined: Thu Feb 09, 2006 7:58 pm
Location: New Orleans
Top

Re: The Poet Creek Express - Foamie Hybrid

Postby KCStudly » Sat Nov 24, 2012 2:35 pm

http://forum.wordreference.com/showthread.php?t=980742

It is... how you say? ...a colloquialism. It is the start of a much longer saw, that goes on and on, which my grandfather used to say when he was plum satisfied after a great meal, but I can never remember the rest. My aunt looked it up one time, not really a poem, somewhat obscure citation. Wish I had it at hand now.
KC
My Build: The Poet Creek Express Hybrid Foamie

Poet Creek Or Bust
Engineering the TLAR way - "That Looks About Right"
TnTTT ORIGINAL 200A LANTERN CLUB = "The 200A Gang"
Green Lantern Corpsmen
User avatar
KCStudly
Donating Member
 
Posts: 9640
Images: 8169
Joined: Mon Feb 06, 2012 10:18 pm
Location: Southeastern CT, USA
Top

Re: The Poet Creek Express - Foamie Hybrid

Postby KCStudly » Sun Nov 25, 2012 10:11 pm

Back when my sister and I were settling up dad's home, we packed up a bunch of his smaller hand tools in his bear box, threw a lock on it and had it shipped home with a few other things that we couldn't fit into the Ford (including a full size canvas tepee with 14 foot long poles that my sister wanted to keep). The stuff had been sitting in her garage, which is fairly well packed with, er... stuff, and we had not taken the time to divvy it all up.

Well, I knew that there were a couple of routers in there and was hopeful that one of them would be able to accept a guide collar adapter (since my Ryobi does not seem to be supported by the OEM or aftermarket). I was finally able to get together with her and get a hold of some of those tools.
Image
Image
Image

There's a 1/2 inch collet Ryobi R180 router with the same shoe pattern as mine (drat, no collar support, but a good powerful router even though we didn't find any 1/2 inch bits). Also, a 1/4 inch Skil 1835 plunge router that will take all of my existing bits and has guide collar kits available for reasonable cost (yippee, guide bushing kit merry Xmas present on its way to me). A power plane, newer belt sander, a small panel saw, two small Stanley planes, a whet stone (though worn and no longer flat), and a small Stanley measuring tape (the type and quality I prefer for bench work).

Spent some time sharpening the blades for the hand planes, but forgot to take a pic of the bald spot on my wrist where I scraped some hairs away. Ran a few of the motors, and those worked fine so far.

Then I went back to working on the front arch ribs. Laid them out in sets and figured out where to put the biscuits so that they would not poke through on the inside/exposed edge. Ran the biscuit slots, except that I had one piece kick out and the slot ran away through the piece... had to make another from the left over drop.
Image

Here are the mitered pieces with slots.
Image

And dry fit with the edge screw clamp technique.
Image
Some (or all) of the screw holes might show in the finished part, but I will fill them with putty and they are going in the cabinet anyway, so I'm okay with that.

It was a bit cold in the loft, about 10 deg colder than the TB2 says is okay...hope it still works.
Image

All laid out and ready to glue.
Image

Guess I forgot to take a pic of the assemblies after glue and clamps.

Then I switched to making a router template. At first I made another, longer circle template, and was going to make a fixture to hold the parts for routing, but after some layout I decided to do it the same way I did the hatch ribs. Used dad's panel saw to cut a piece of 3/16 underlay, cut out the full scale plan cleanly with a razor knife, spay adhesive to stick the plan onto the blank...
Image

... and fogged it with some black paint for a more durable transfer.
Image
Note the glued up riblet in the background.

Here is the template after peeling the paper off; running it through Karl's (or maybe it's Ben's?) antique, though highly functional wood band saw close to the line, then sanding with the small blocks, and finally laying it on one of the blanks to check fit.
Image

It had been an hour or so after gluing the blanks, more than the 1/2 hour noted on the TB2 bottle, but not the 24 hrs. required for "loading". When I pulled the clamps and screws from the above rib blank, I dropped it on the floor and one of the joints popped clean off. So I had to scruff it with a little 100 grit, put the screws back in and re-glue it.

Here are all of the riblets after removing the clamps and screws.
Image

And here I have fit the template to each piece and traced it with pencil to use as a guide for roughing out the blanks on the band saw before routing.
Image
Image

And that seemed to be a good stopping point, since I did not want to risk breaking the uncured glue joints by subjecting them to the vibrations of the band saw.

Hope that I can continue with this tomorrow.

Hope you are enjoying following along!
KC
My Build: The Poet Creek Express Hybrid Foamie

Poet Creek Or Bust
Engineering the TLAR way - "That Looks About Right"
TnTTT ORIGINAL 200A LANTERN CLUB = "The 200A Gang"
Green Lantern Corpsmen
User avatar
KCStudly
Donating Member
 
Posts: 9640
Images: 8169
Joined: Mon Feb 06, 2012 10:18 pm
Location: Southeastern CT, USA
Top

Re: The Poet Creek Express - Foamie Hybrid

Postby Ned B » Mon Nov 26, 2012 8:49 am

Over on one of my woodworking forums, I recently asked about the set up time on titebond III, and the collective wisdom said at Least 2 hours, preferably 4 to five before they would feel comfortable putting it to another tool. Overnight would be better. As for the low temperature glue up... man, that's right on the hairy edge. I was gluing up a cutting board the other day and had one glue line fail miserably after leaving it out in the shop (mostly unheated) to cure. If it gets any closer, you may want to start bringing the assemblies where it is at least a Little warmer, and/or apply heat up there in the loft (space heater set just enough to get the workpiece to 50° or so.) My solution is to simply bring my wood strips in the house and set up a table to glue things up in there.
Image

Image
User avatar
Ned B
1000 Club
1000 Club
 
Posts: 1036
Joined: Sat Apr 16, 2011 10:25 am
Location: Syracuse NY (ish)
Top

PreviousNext

Return to Foamies

Who is online

Users browsing this forum: DrAlvarez and 14 guests