The LED lights came in as scheduled. I was a bit reluctant to take them out of their plastic pouches to take pic's, lest I lose any screws or other small bits contained therein, but I could not resist getting a closer look.
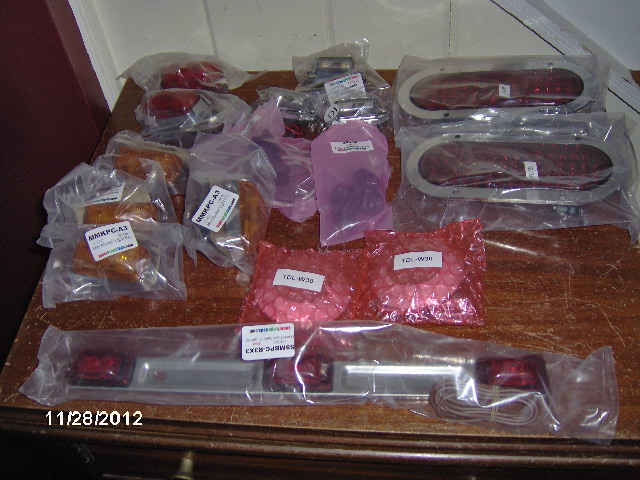
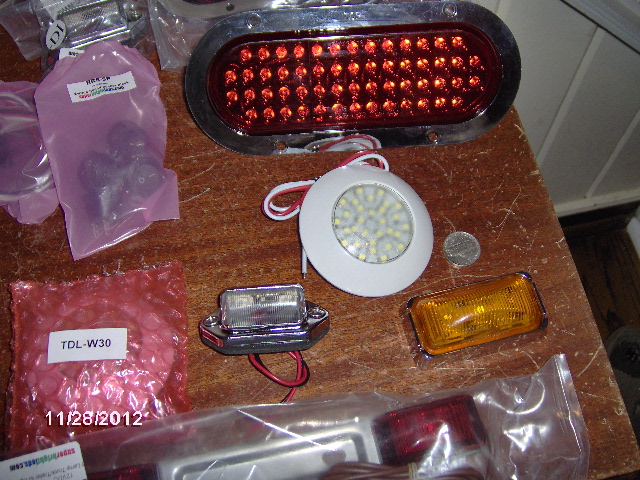
I didn't want to go over the top budget wise on super high zoot fixtures, but did want to stick with all LED's and simple low profile choices. The coin in the 2nd pic is a nickel for size perspective. The
dome lights (2 of round white disk shown) are only 3 inches in diameter. Testing on an 18v cordless tool battery suggests that one of these would probably be enough for most tasks inside the cabin, but I got two and plan to have one each up high on each side wall with a
wall switch for each light on either side.
[Edit: I have since learned that it is a very bad idea to apply higher than rated voltage to an LED because it can result in drastically reduced life span and premature failure. I won't be using the 18v battery anymore.]
The
small chrome hooded light comes in various colors (listed elsewhere as compartment lights); I bought one white for the license plate, and two amber for the porch lights (they look the same with a clear lens when not lit). I'm also considering getting one of these in red for under the cabinet at the foot of the bed, facing the rear, to act as a night vision light for the cabin; and two more white to use for reading/pillow lights (plus switches). Compared to other options they seem to be very reasonably priced.
The
amber lens rectangular light with chrome bezel is the front marker light. There are two of these and two red for the rear corners of the trailer, plus two more amber that I will mount under the floor behind the frame rails near the doors. The later will be connected to the porch light switches (one for each side) and will act as foot lights when the porch lights are on.
I ordered the
bar style galley hatch light today, now that they are back in stock. I think this will work well because it can be aimed 180 deg, which I hope means it will be easy to set up for optimal effect and forgiving of placement given the hatch angle when lifted.
The
tail lights with separate 90 deg plug/pigtail fit in less than 1-1/2 inch depth recess, which will work fine in the galley hatch with a slight raised area to establish a flat mounting ring on the curved hatch surface. The people at superbrightleds.com were very helpful, pulling the items out of inventory to check the stack up of heights for me before ordering.
The 3-bar light (still in package) is the std. type found everywhere and is required for trailers over 80 inches in overall width. My cabin is only 64 wide, but with 10 inch wide fenders, that I may have to space out a tad, I will be at least 84 inches wide overall.
Okay. So the plan for Wednesday got interrupted by our washer machine going ka-put and me having to troubleshoot. No bueno. Going to lose another day and dinero to a service call.
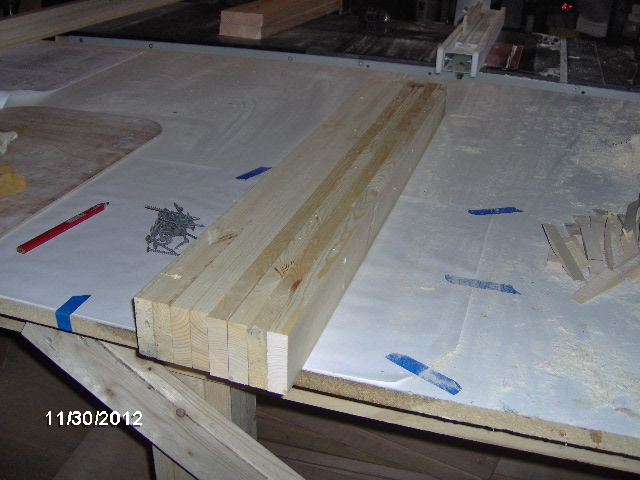
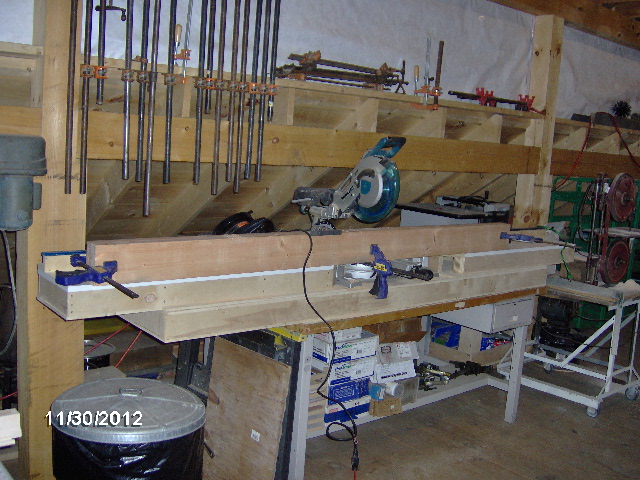
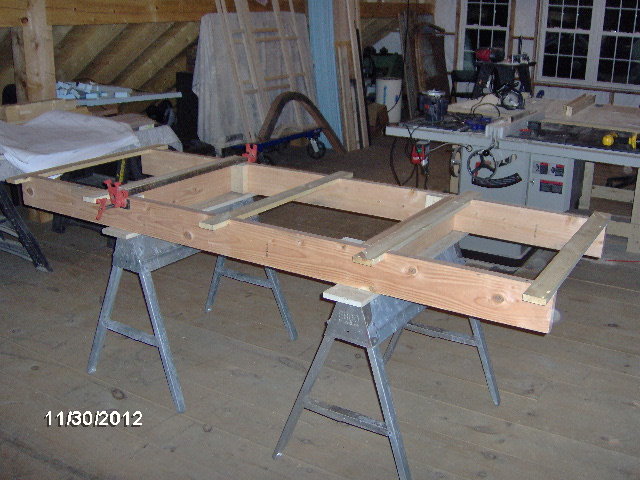
This evening I swung by the ho-de-po and got a couple of 2x6 x 10's (and a few bundles of firing strips for Karl). The plan is to build a cradle to support the floor assembly on either saw horses, up off of the loft floor, or on casters during the cabin construction. I hadn't modeled this, so was "winging" it a bit. Imagine a ladder frame with two main stringers, a couple of xmbrs for blocking and several slats spanning across to spread out the support.
Once at Mecca and unloaded, I visited with Karl for a bit. He wanted to keep the stairway hatch closed to keep the wood stove heat downstairs, both for Simon overnight, and so that it holds some heat into tomorrow. The loft, being vented, would just shed this heat as waste. Anyway, after a very short time Karl was complaining how cold it was (about 35) and suggested that I hang a plastic sheet booth and place a heater inside (ding, ding, ding...light bulb going off). Said that he would never notice the difference in the electric bill, as it is so varied with all of the fab and equipment use, even though I offered to chip in if he notices a big change in power bill. Not sure if plastic sheet would be enough to make a difference.
Anyway, after showing him the lights, he beat feet back downstairs to stoke the stove while I started in pulling the kerfing jig apart to salvage the 1x6 pine boards. Ran them through the table saw to rip off the beveled edge.

Then ripped them in half and cross cut them in the miter saw to make a stack of slats.
Some of these will pick up the middle xmbrs embedded in the floor so that I can screw the cradle to the floor as if it were the trailer frame. Thus the cabin won't get shoved off accidentally, and the cradle can be used later as a rigging device to tip and lower the cabin down through the hatch in the loft floor.
Then I turned my attention to the 2x6's. In hindsight I should have left them a bit longer, and maybe gone a bit wider, but I was trying to get by with the material at hand. Another key issue is to hold the cradle back from the edges so that it will not interfere with wrapping the canvas under the floor by a good 6 inches or so. Karl came and went a few times giving me a hand here and there, before succumbing to the cold and excusing himself back to the warmth of his couch.
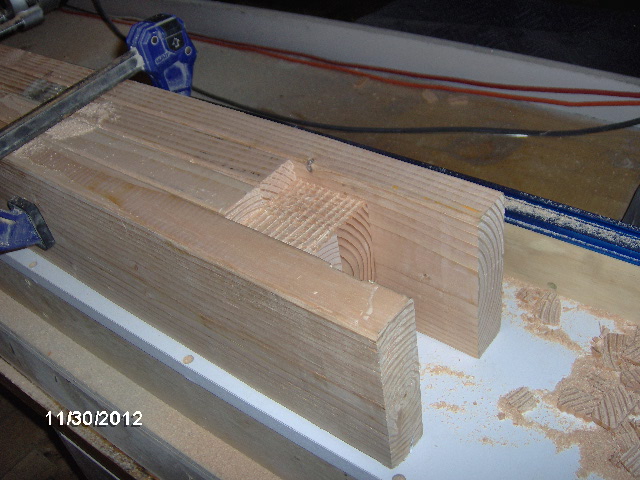
Cut 28 inches off of each 10 footer to act as blocking between the two stringers.
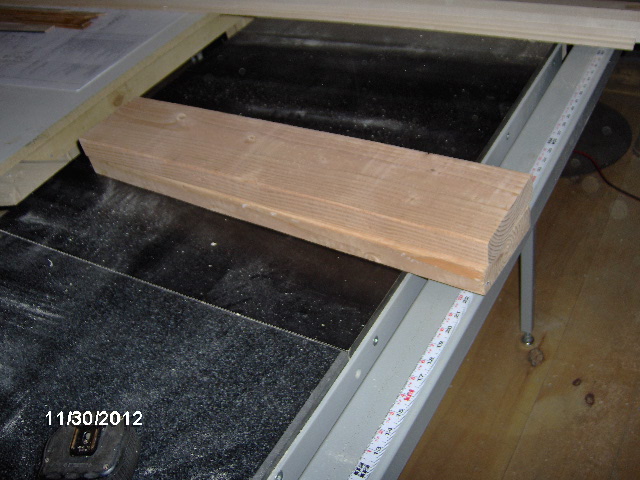
Then I cut the remaining sticks to the same length (one was 120-3/4 inches to start, and the other was 120-1/4...great QC work by the mill).
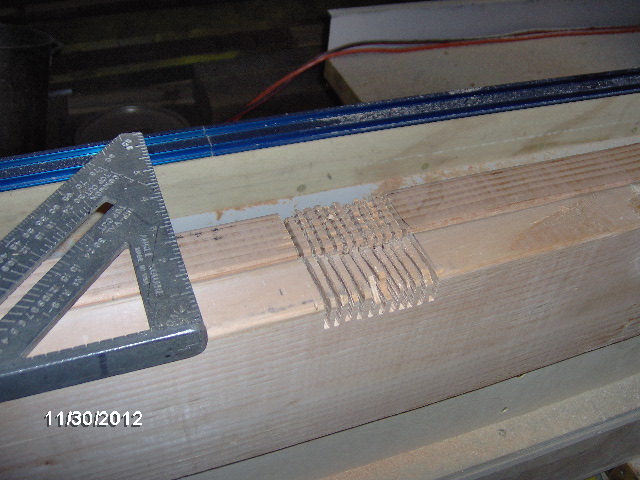
Next I sandwiched the two stringers together and laid out the notches for the slats, using the miter saw table as a work bench, only.
Used a quick square to guide the small panel saw (set to the thickness of the 1x slats) to kerf cut the notches.
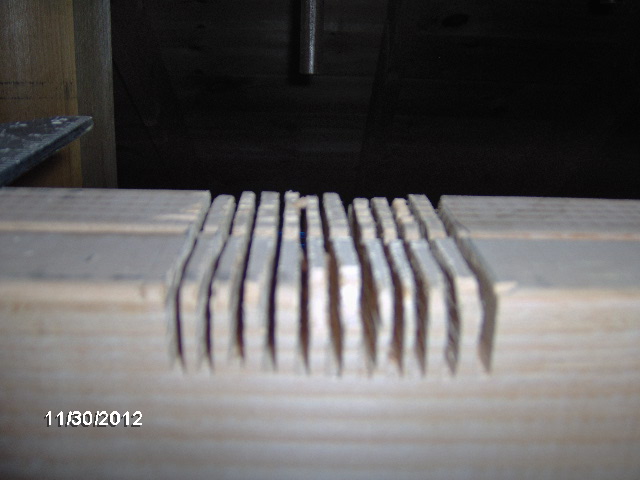
Then I used the metal button on the butt end of my chisel to knock out the kerfs, and then the chisel to just roughly knock down any gross high stuff.
Next I set up the router and just sort of freehanded the notches to clean off the bottom to a uniform depth, knocking off the high spots that the rough chisel work did not get.
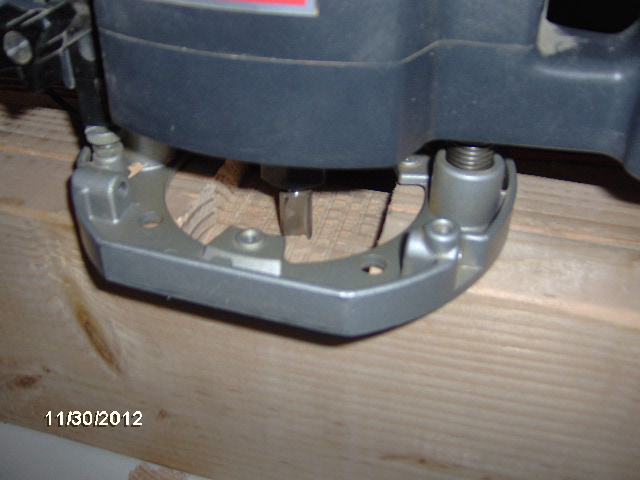
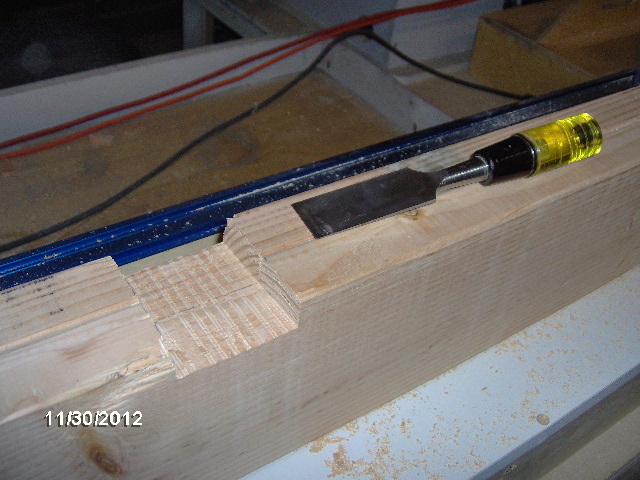
On the end notches I had to get creative so that the router would have something to ride on, so I just clamped the two blocking pieces along side to act as supports.
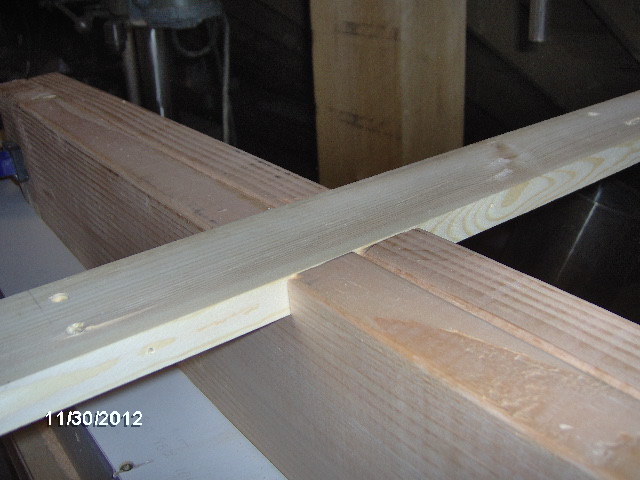
Checking the fit of the slats.
Next I cut and screwed some corner blocking on to the stringers where the xmbr blocking will go, rather than only relying on screws into the end grain.
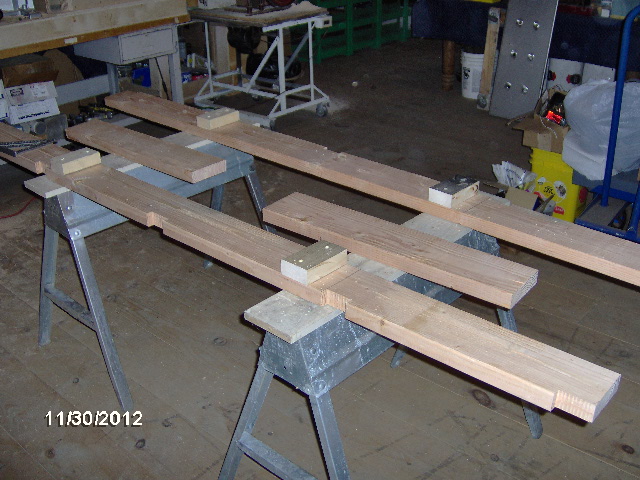
And here is the whole cradle frame mocked up in a dry fit before running out of deck screws and calling it a night.
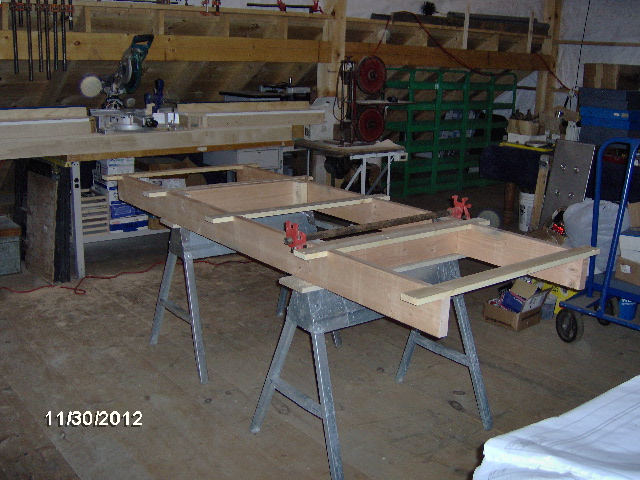
Tomorrow I have some morning errands to do in prep for Yvette's birthday, have to drop laundry off (no time to sit and do it myself), hardware store for more screws, then back at it to complete the cradle and haul the walls and floor up into the loft.
Keeping on keeping on.

 )
) I did suggest putting my little CI wood stove in up there to supplement the big stove downstairs, but until we seal things up it's just wasted energy. That's why he built the hatch over the stairway, so he doesn't have to heat the upstairs (downstairs isn't the Sahara desert either!).