The main points are that you are still doing things and you remain optimistic.


.
PS. Loved your BBQ/DO tip (see below) for Droid. It looks like that one out does the DO Satellite-walker table!
viewtopic.php?f=54&t=53091
![]() by S. Heisley » Mon Nov 05, 2012 5:58 pm
by S. Heisley » Mon Nov 05, 2012 5:58 pm

![]() by bobhenry » Tue Nov 06, 2012 8:53 am
by bobhenry » Tue Nov 06, 2012 8:53 am
S. Heisley wrote:.
The main points are that you are still doing things and you remain optimistic.
.
PS. Loved your BBQ/DO tip (see below) for Droid. It looks like that one out does the DO Satellite-walker table!
viewtopic.php?f=54&t=53091


![]() by bobhenry » Tue Nov 06, 2012 12:30 pm
by bobhenry » Tue Nov 06, 2012 12:30 pm


![]() by bobhenry » Mon Nov 19, 2012 7:40 am
by bobhenry » Mon Nov 19, 2012 7:40 am

![]() by S. Heisley » Mon Nov 19, 2012 7:31 pm
by S. Heisley » Mon Nov 19, 2012 7:31 pm

![]() by michiganflipper » Sun Nov 25, 2012 7:35 pm
by michiganflipper » Sun Nov 25, 2012 7:35 pm
 So where are they miss checking these out on here since I can not see it in person so are the next best thing
![]() by bobhenry » Mon Nov 26, 2012 8:55 am
by bobhenry » Mon Nov 26, 2012 8:55 am
![]() by Wobbly Wheels » Mon Nov 26, 2012 9:16 am
by Wobbly Wheels » Mon Nov 26, 2012 9:16 am
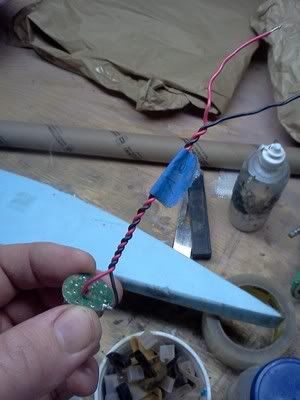
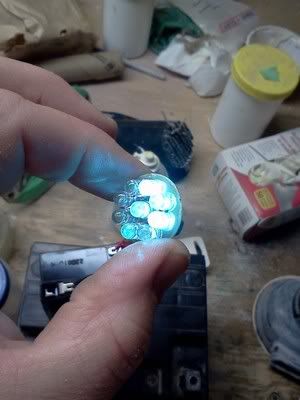
bobhenry wrote:I took 3 of my 4.5 volt 99 cent led flashlights and hooked them in parallel to see if they would work with the 12 volt power circuit and yes they did !

![]() by bobhenry » Mon Nov 26, 2012 11:02 am
by bobhenry » Mon Nov 26, 2012 11:02 am
Wobbly Wheels wrote:bobhenry wrote:I took 3 of my 4.5 volt 99 cent led flashlights and hooked them in parallel to see if they would work with the 12 volt power circuit and yes they did !
I want to use them for under-cabinet and maybe courtesy lighting but was going to solder in a 1/4W resistor when I figure out a housing (prob a piece of pvc conduit).
I'll have to check it out and see if mine will take 12V too. Thx Bob !
![]() by Wobbly Wheels » Mon Nov 26, 2012 2:30 pm
by Wobbly Wheels » Mon Nov 26, 2012 2:30 pm

I am not sure at this time if they will remain 120V AC or if I will opt up for a ,currently rather expensive, 12 volt standard base LED bulb.
![]() by bobhenry » Tue Nov 27, 2012 9:04 am
by bobhenry » Tue Nov 27, 2012 9:04 am
![]() by Wobbly Wheels » Tue Nov 27, 2012 2:20 pm
by Wobbly Wheels » Tue Nov 27, 2012 2:20 pm
It didn't like being left in the cold and was fogging up a bit
wired with 2 hot feeds and 2 grounds one of each was input the other was pass thru to the next light

![]() by bobhenry » Tue Nov 27, 2012 2:28 pm
by bobhenry » Tue Nov 27, 2012 2:28 pm
Wobbly Wheels wrote:
I like the extension cord for wire: waste not, want not !
![]() by Wobbly Wheels » Tue Nov 27, 2012 3:03 pm
by Wobbly Wheels » Tue Nov 27, 2012 3:03 pm

![]() by night*sky » Thu Nov 29, 2012 10:29 pm
by night*sky » Thu Nov 29, 2012 10:29 pm

Return to Tiny Houses on wheels
Users browsing this forum: No registered users and 2 guests