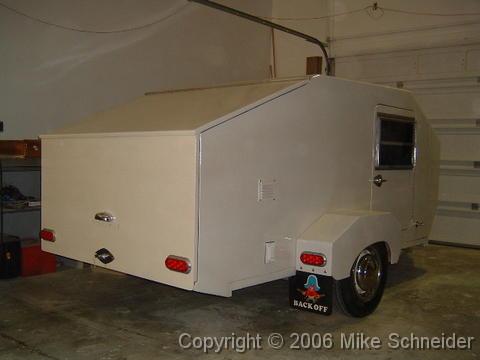
Insulating and Lining a Modernaire/Modernistic camper

Anything to do with mechanical, construction etc

Insulating and Lining a Modernaire/Modernistic camper

Postby fronius » Wed Dec 12, 2012 10:58 am

Does anyone have any experience retrofitting 1" insulation and birch ply to an existing trailer? Is there someone out there who could make a paper template for cutting the sidewalls correctly, or maybe I could trace the outside and take some thickness off? Any ideas are appreciated!
fronius
Teardrop Inspector
 
Posts: 5
Joined: Fri Nov 09, 2012 10:52 pm

Re: Insulating and Lining a Modernaire/Modernistic camper

Postby Thawley » Wed Dec 12, 2012 11:47 am

Gets a lot easier if you give up on the birch... I've seen a coulpe of TDs with thin, upholstered cushions velcoed in place between the roof spars.
User avatar
Thawley
Teardrop Advisor
 
Posts: 98
Images: 10
Joined: Sun Aug 21, 2011 1:24 pm
Location: Santa Ana, CA

Re: Insulating and Lining a Modernaire/Modernistic camper

Postby Lgboro » Wed Dec 12, 2012 2:58 pm

I cedar stripped my interior - a lot of worth but the outcome was well worth the extra time in terms of looks and weight.

[img]99809[/img]

[img]99810[/img]

[img]99802[/img]

Would be easy to cut to fit without a large template. I used cedar to lower weight but any other wood could be used. Gorilla Glue worked well with the blue foam insulation.
User avatar
Lgboro
500 Club
 
Posts: 708
Images: 53
Joined: Sun Apr 06, 2008 7:57 am
Location: Dudley, NC
Top

Re: Insulating and Lining a Modernaire/Modernistic camper

Postby Thawley » Wed Dec 12, 2012 3:23 pm

Cool! I can actually smell that thru my monitor!
User avatar
Thawley
Teardrop Advisor
 
Posts: 98
Images: 10
Joined: Sun Aug 21, 2011 1:24 pm
Location: Santa Ana, CA
Top

Re: Insulating and Lining a Modernaire/Modernistic camper

Postby S. Heisley » Wed Dec 12, 2012 3:50 pm

I think that I would purchase a couple rolls Kraft paper, tape it to the outside and then draw the shape based on the outside. Once that is done, trim it down to fit your interior. (If you want a full wall height, you'll have to tape a couple pieces Kraft paper together; but, that's no big deal.) After that, you can verify that you did it right by taking the cutout inside and placing it against the wall. Then, if it is correct, tape or tack it there and draw in where the supporting skeletal boards are. You'll be able to feel where the skeletal boards are. Both sides should be the same; but, just in case, tape the pattern to the inside of the other wall and check it. To do that, you will be using the other side of the pattern and you can mark in the skeletal boards for that wall, too, as the skeleton boards may differ some. Be sure to mark which side of the paper represents the driver side and which, the passenger side, so you won't need to question it later on. Then, you can use that as your pattern for both sides and know where to put your plywood seams, etc. Because it was easier to erase mistakes, I used pencil when I was doing the original marking and then went over it later,on a flat surface, with a Sharpie marker and a ruler.

After you're done, roll it up and save it because it can come in handy later on, when you are looking to make updates, such as where you can add shelves or clothing hooks or whatever. I've pulled mine out and referred to my Kraft paper "wall maps" several times already. Also, take lots of pictures before you close up the walls. There may be times when something that you want to know, such as wiring, may not be on the Kraft paper drawings; but, you'll be able to see by looking at the pictures.

For the insulation, I would measure at the top and bottom between the area of each set of ribs and then transfer those measurements to the Styrofoam, using a straight edge ruler to draw between the marks on the foam. If you have to make adjustments to the foam after you fit it, you can use a hot knife to cut off excess or to cut a small piece to stick in where it might be lacking; but, that's just my way of doing things. Here are some pictures:

You can use an iron to heat the knife for those trimmings and it will keep the Styrofoam debris down.
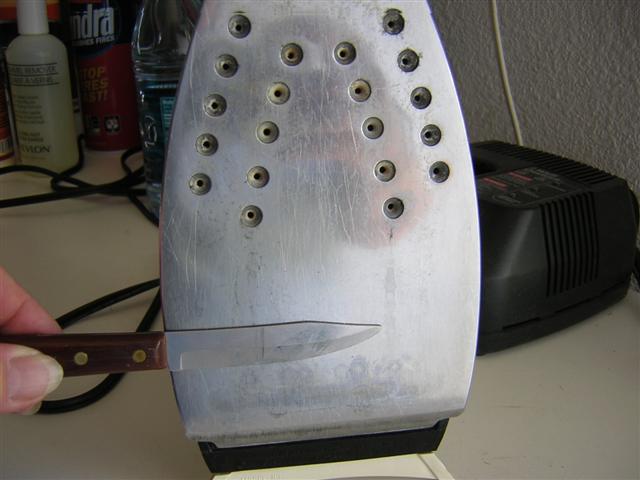
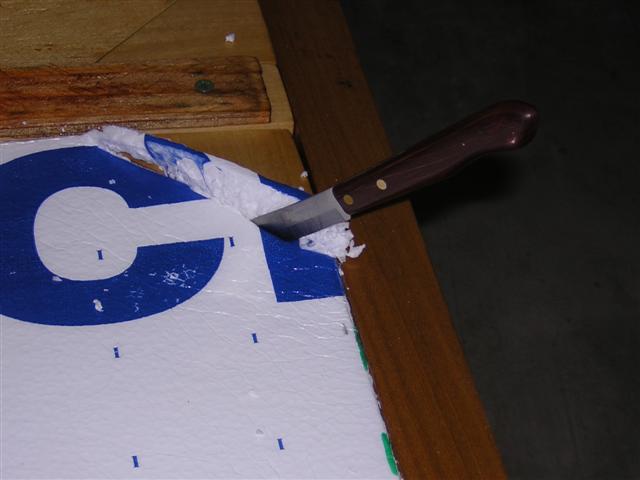
Image Image

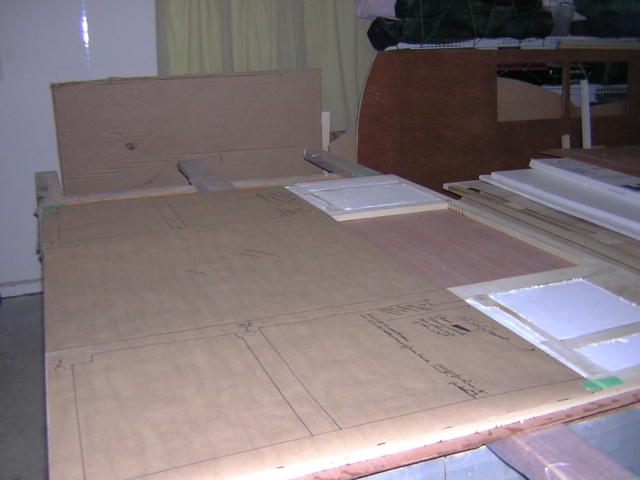
In this picture, I was mapping the straight back wall; so, I didn’t bother to take the Kraft paper the entire way up. I simply wrote the information on the paper:
Image

Please notice that I also marked where the screws are and whether they were Kreg or standard screws.

User avatar
S. Heisley
Super Lifetime Member
 
Posts: 8869
Images: 495
Joined: Mon Sep 17, 2007 10:02 am
Location: No. California
Top

Re: Insulating and Lining a Modernaire/Modernistic camper

Postby fronius » Fri Dec 14, 2012 4:25 pm

Thanks for the ideas everyone
!
fronius
Teardrop Inspector
 
Posts: 5
Joined: Fri Nov 09, 2012 10:52 pm
Top

Re: Insulating and Lining a Modernaire/Modernistic camper

Postby fronius » Sat Dec 15, 2012 8:26 am

There are only metal ribs and they are few and far between. In a plywood framed camper, how often are the ribs typically placed - every 16" or so?

Thanks!
fronius
Teardrop Inspector
 
Posts: 5
Joined: Fri Nov 09, 2012 10:52 pm
Top

Re: Insulating and Lining a Modernaire/Modernistic camper

Postby S. Heisley » Sat Dec 15, 2012 12:15 pm

fronius wrote:There are only metal ribs and they are few and far between. In a plywood framed camper, how often are the ribs typically placed - every 16" or so?

Thanks!


Every situation is different. To keep down the weight, we use as few ribs as possible. (Because I over-built my frame, I later went back and removed some of the unnecessary wood.) The plywood keeps everything stable and together. 16" is okay; but, if you have a cross rib for some reason, you can get away with more space between, as much as 20". 18" on center would be okay, too. It kind of depends on the layout. Also, it would help if people knew what thickness of plywood you plan to use as that can make a difference, too. Some people use thicker plywood and less ribs, using ribs only as a way to attach the plywood together. (Some people even successfully make their ribs out of plywood.)

Tip: As long as you have it apart, you might want to add a few small, thin blocks of wood wherever you think you might want to hang or screw something in later. Or, if you prefer, you could glue small, strategic pieces of plywood to the back side of your interior plywood before you install it. That might work better for you. But, again, it depends on your plywood thickness. If you are using 1/8" thickness walls, you would definitely want to do that. The good thing about metal ribs is that I would think it would be easier to use any stud finder after the wall is enclosed.

Good luck...can hardly wait to see your build!
User avatar
S. Heisley
Super Lifetime Member
 
Posts: 8869
Images: 495
Joined: Mon Sep 17, 2007 10:02 am
Location: No. California
Top

Re: Insulating and Lining a Modernaire/Modernistic camper

Postby S. Heisley » Sun Dec 16, 2012 1:15 pm

Fronius, knowing now that your framework is made of metal ribs, I've been thinking....
Most teardrops are made with wood ribs but cargo trailers use metal ribs and you are basically dealing with covering a metal cage on wheels. Because of that, I would go to the cargo trailer conversion section and run a few searches in that section. I suspect you will find your best answers there.

Best Wishes,
User avatar
S. Heisley
Super Lifetime Member
 
Posts: 8869
Images: 495
Joined: Mon Sep 17, 2007 10:02 am
Location: No. California
Top


Return to Teardrop Construction Tips & Techniques

Who is online

Users browsing this forum: No registered users and 0 guests