The Poet Creek Express - Foamie Hybrid

Canvas covered foamies (Thrifty Alternatives...)

Moderator: eaglesdare

Re: The Poet Creek Express - Foamie Hybrid

Postby GPW » Sat Mar 15, 2014 7:34 am

KC , you planning on masking off everything when putting the roof on ??? :thinking:
There’s no place like Foam !
User avatar
GPW
Gold Donating Member
 
Posts: 14920
Images: 546
Joined: Thu Feb 09, 2006 7:58 pm
Location: New Orleans

Re: The Poet Creek Express - Foamie Hybrid

Postby KCStudly » Sat Mar 15, 2014 8:10 am

GPW wrote:KC , you planning on masking off everything when putting the roof on ??? :thinking:

Yup, pretty much. :lol:

Here is a link to a thread sharing my thoughts on applying the outer canvas skin.
KC
My Build: The Poet Creek Express Hybrid Foamie

Poet Creek Or Bust
Engineering the TLAR way - "That Looks About Right"
TnTTT ORIGINAL 200A LANTERN CLUB = "The 200A Gang"
Green Lantern Corpsmen
User avatar
KCStudly
Donating Member
 
Posts: 9640
Images: 8169
Joined: Mon Feb 06, 2012 10:18 pm
Location: Southeastern CT, USA

Re: The Poet Creek Express - Foamie Hybrid

Postby atahoekid » Sat Mar 15, 2014 7:30 pm

I wish I owned stock in 3M. Based on how much blue painters tape you use, I could be a rich man!!! :lol: :D 8) But I actually greatly admire your eye to detail! :applause: :thumbsup:
Mel

"Believe in your abilities... Remember amateurs built the ark, professionals built the Titanic"

"Indecision may or may not be my problem" Jimmy Buffet

Image

The Road Foamie Build Thread: viewtopic.php?t=45698
User avatar
atahoekid
Platinum Donating Member
 
Posts: 1773
Images: 158
Joined: Sat Jul 24, 2010 2:49 am
Location: Incline Village, NV
Top

Re: The Poet Creek Express - Foamie Hybrid

Postby KCStudly » Sun Mar 16, 2014 12:18 am

Mel, I do use a bit more tape than some, but it really does help keep the glue from going where I don’t want it to. I hate it when the stain won’t take because of glue sealing the wood. Also, with the contrasting stains it makes more sense to apply the finishes before final assembly. I also don’t like it when the clear coat gets cloudy due to glue haze after wiping squeeze out. I’m pretty sure I am not the king of tape use. Maybe Aggie Tom’s Silver Beatle build is a contender for that title?

I was out to Mecca by 10am, but seemed to get a slow start. The front cabinet and shelf panels need another coat of poly on one side, but I like to leave that until the end of a work session so that I don’t have to worry about kicking up dust while I work on other things.

So I thought I could start working on dry fitting the galley shelves and counter first, leaving time to do the poly later in the day. Makes sense to start with the shelves so that the counter isn’t in the way while I work (same as in home kitchen). I hadn’t bought any maple to make ledgers for the upper shelves, and I had no confidence in the new table saw to accurately cut the grooves.

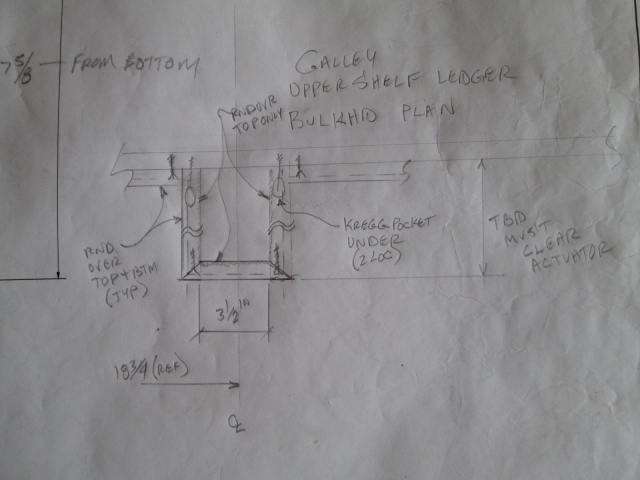
It made the most sense to work from the bulkhead mounted shelf ledgers out to the face frame. The ledgers against the bulkhead that will support the shelf panels will be interrupted by the chases for the hatch actuators, so I did some math and a little sketch to figure out the cut lengths and how much stock I would need. This is looking down on one of the chases.
Image

I did have a couple of pieces of pine drops that were close to the right dimension, so just ripped a skim cut on the saw to get them ready. The blade misalignment to the table is just bad enough that the rip fence cannot quite be forced to align to the blade. What a waste of my time and money. Might be good for building a garden shed or playhouse for the kids, but absolute junk for finish carpentry. I wasted two of the shorter pieces of pine trying to get it to run the slots (not sure I wanted to use pine anyway). Both pieces were about 2 ft long. I “set the fence” (a long tedious process of measuring many times between both edges of the blade and the fence, horsing the fence skewed to match the blade, clamping it, and then seeing how far off it was before repeating) and then ran the piece thru twice flipping it in between to make sure the groove was centered. The grooves were not bad at one end, much too wide in the middle of each piece, and again oversize at the other end. I gave up on the saw… again.

Next I tried a 1/4 inch straight cutter in the router, which gave much more consistent results, but was still an oversize slot for the 5mm (3/16 inch) ply. Karl has a short 3/16 dia x 1/4 shank end mill cutter, but it has a rounded end; might not matter but it could cause the panels to either float too much in the groove, or pinch. It might have worked, but I no longer had enough of the pine to finish the job. I thought about running out for maple and taking it to work to use the saw there, but that would take time and more money. Looked at the excess cedar, but was reluctant to change themes in midstream, and it would have to be ripped. Reluctant to waste anymore wood on this saw.

Other options: I had the rough edges that were ripped off of the Red Grandis used to make the hatch ribs. And I have tons of the small 1/4 round maple trim that I made earlier and have not used. So if I switch to cleats underneath (like the under counter cleats I showed earlier) instead of the grooved ledgers, and use the 1/4 round maple trim on top, the different species won’t be too obvious, and I can avoid using a table saw.

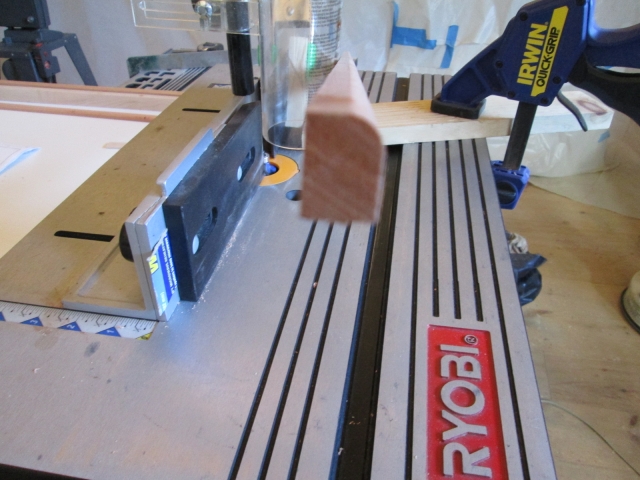
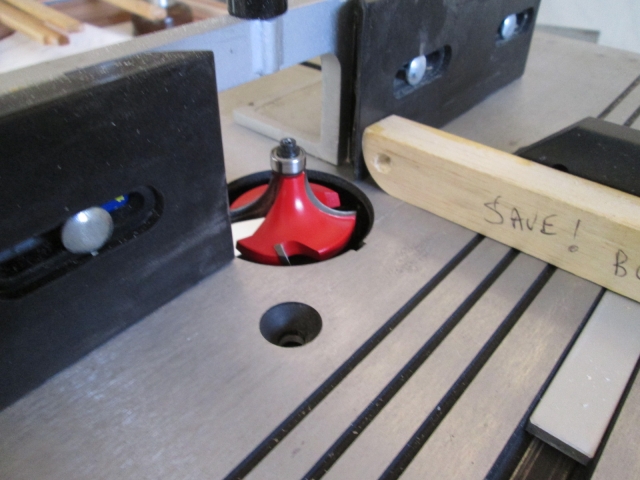
So first I used a straight cutter in the router to skim the rough edges down true, making 2 pieces 1/2 x 3/4 actual size. Then switched to the 1/4 inch radius bit to round over one corner (shown upside down here).
Image

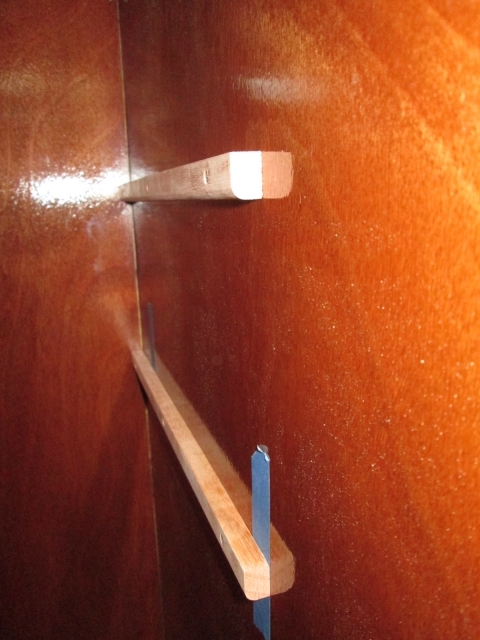
Here is a mockup giving a better idea of what I am on about. The first pic is looking at a cross section of the shelf face frame railing as if looking toward the side wall of the galley. To the right is the maple piece representing the shelf front rail. Underneath the thin ply is the cleat stock 3/4 inch tall. On top is the small maple 1/4 round (white).
Image
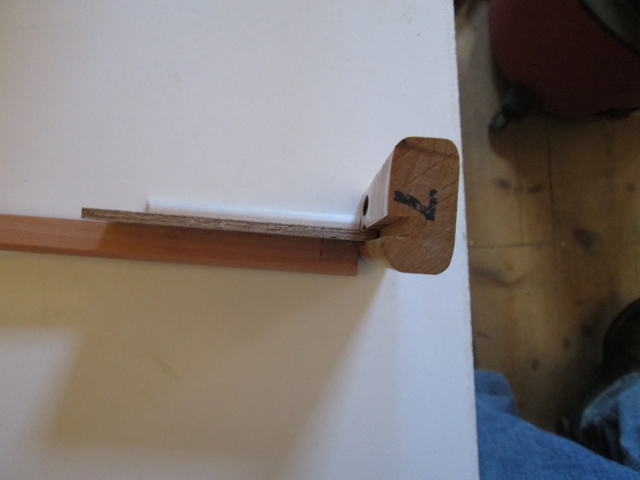
You can see that the cleat hangs below the lower edge of the rail, but I will deal with that in a minute.

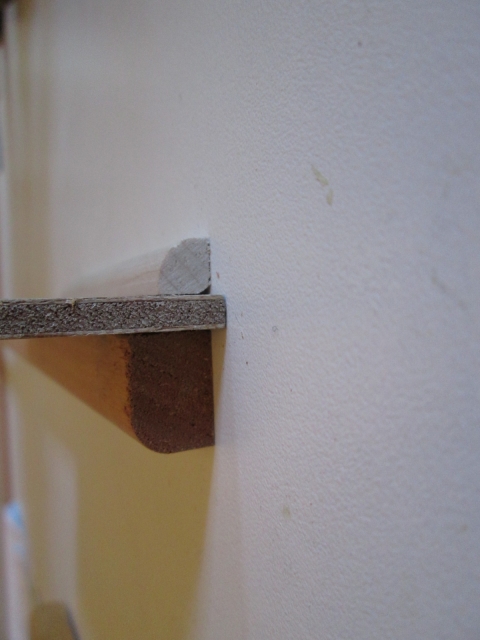
Here is the same thing without the rail.
Image

Back to the mismatch between the cleat and rail. Plan ‘A’ was to radius the end of the cleat where it meets the back of the rail so that it turns up and dives into the back of the rail. So I set up the 3/4 radius cutter (bought to put the roof edge radius on the roof spars) and ran some scraps.
Image

Even though they are not the same height, referencing the bottom to the pencil mark I tried to get the radius to end at the mark.
Image

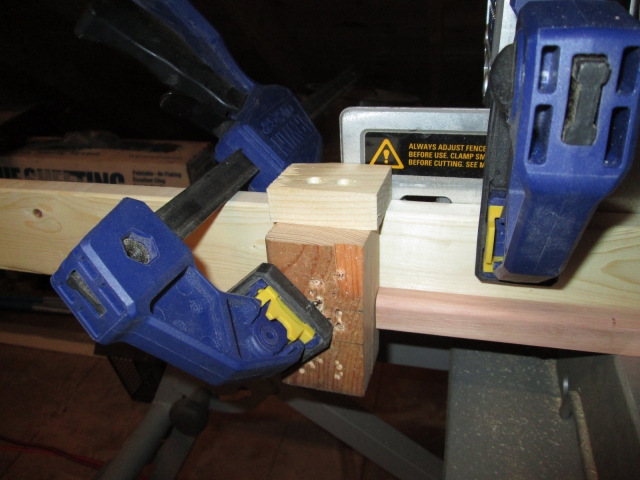
Not 100/ct happy, I kept going. Made a simple stop fixture for the miter saw. By clamping the 1x3 to the fence with its end under the saw, I could trim the end of the fence off cleanly making the perfect zero reference, while also supporting the back of the work piece from blowout (which the grandis tends to do). (Speaking of cheap box store lumber, this 1x3 was only 11/16 thk!)
Image

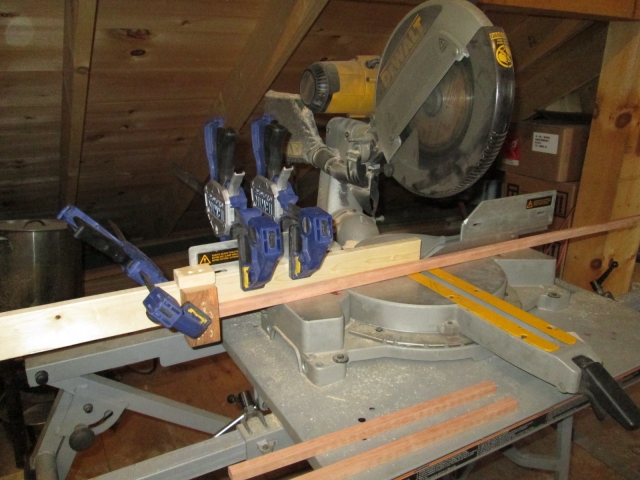
The little block screwed to the top of the stop block makes it easier to hang on the wood fence extension resulting in less juggling while applying the clamp.
Image

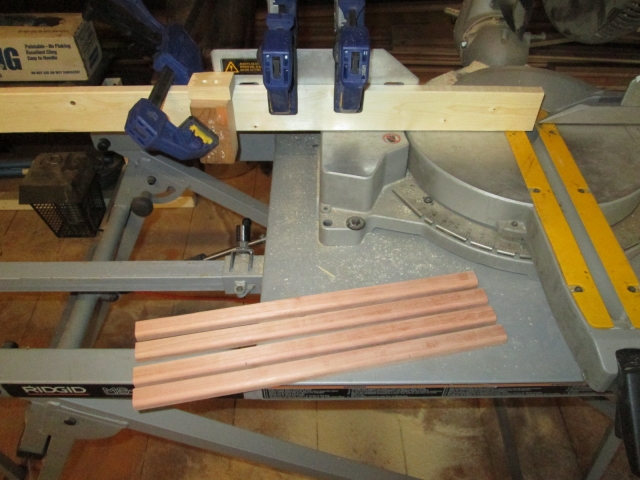
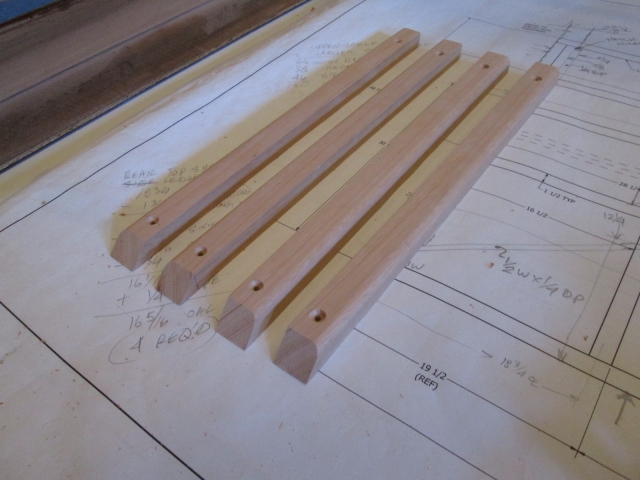
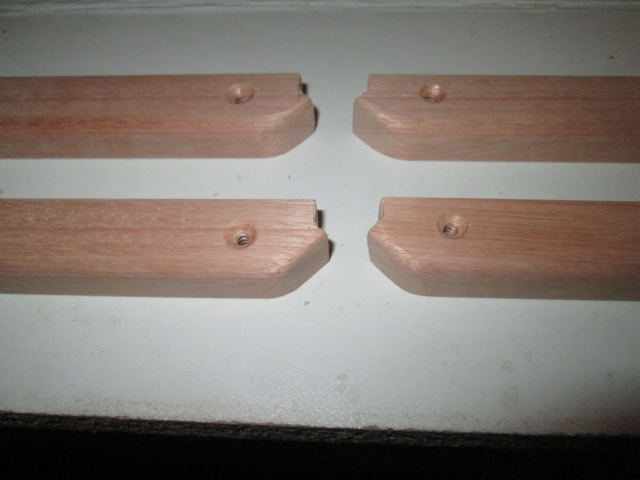
Quick and accurate repeat cuts. These are the four cleats for the ends of the upper and lower shelf panels that will be attached to the bulkhead to the outsides of the actuator chases (the actuators will be located inboard centered under the two middle hatch ribs, four ribs total).
Image

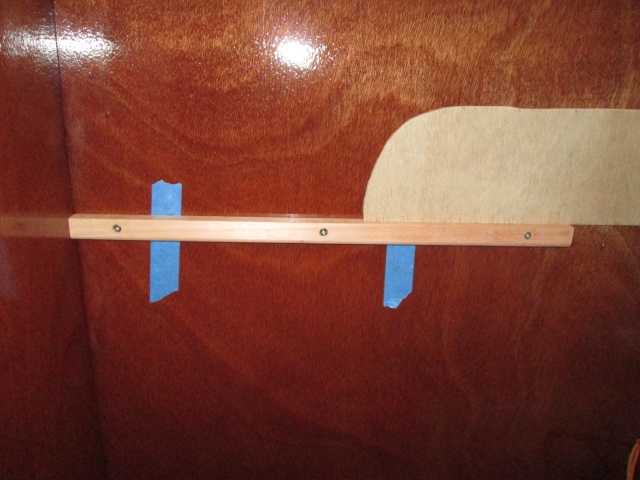
I put little strips of blue tape on the bulkhead at each end of the cleats so that I could measure up from the floor and mark the locations of the tops of the cleats on the tape. The piece in the middle with rounded corners is just a piece of ply that I used as a straight edge to confirm alignment between the cleats.
Image

Here’s a close up of one of the cleats with predrilled screw placement. Just dry fit for now, still needs stain and finish.
Image

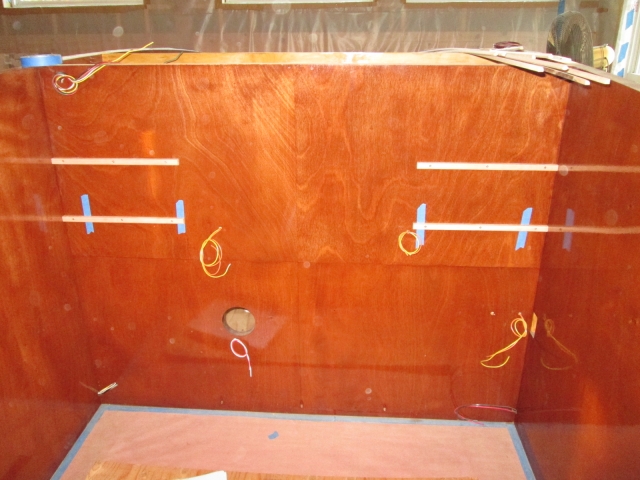
All four outer cleats placed on bulkhead. Eventually I will add two more cleats in the middle in between the actuator chases.
Image

Detail looking at the end of the street side cleats.
Image

These are the similar cleats that will support the sides of the shelf panels between the bulkhead cleats and the grooves in the backs of the face frame rails.
Image

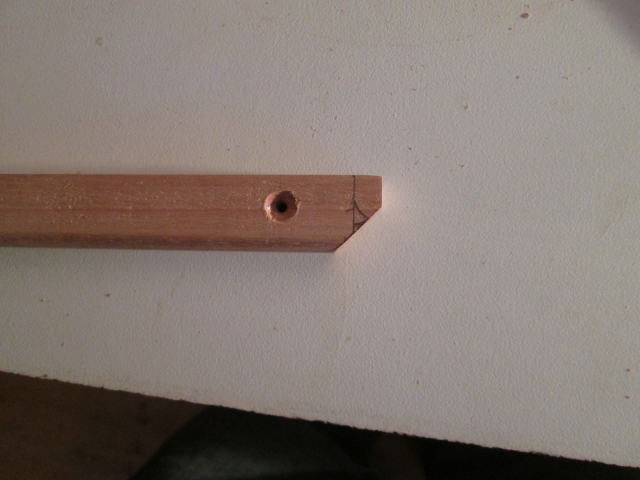
I thought it might be easier to miter the ends where they will be coped. Here I have rubbed a pencil on the edge of the miter cut to act as a visual aid while coping.
Image

Here you can see how I nibbled away up to the line on the bandsaw. This is the end where it meets in the corner by the bulkhead.
Image

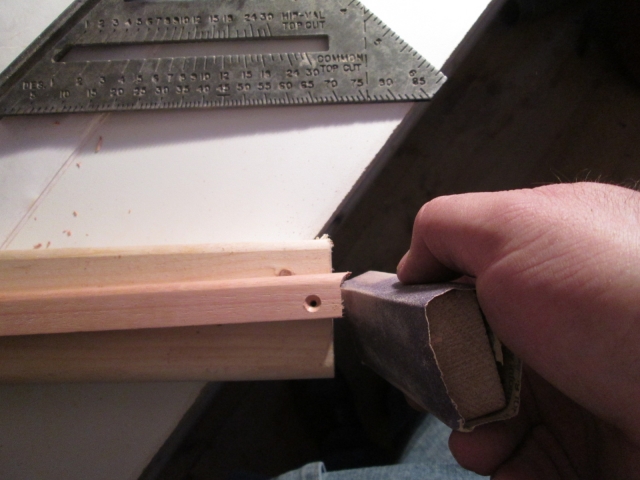
A little cleanup work using the hard block and some 100 grit.
Image

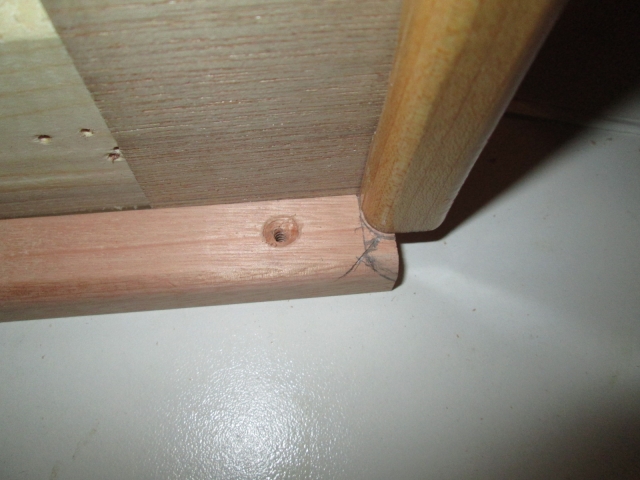
Next was dealing with the fit at the back of the face frame rail. Here I have stacked a piece of the rail stock on top of the cleat using a scrap of ply as a key to aid in alignment, and traced the detail onto the cleat.
Image

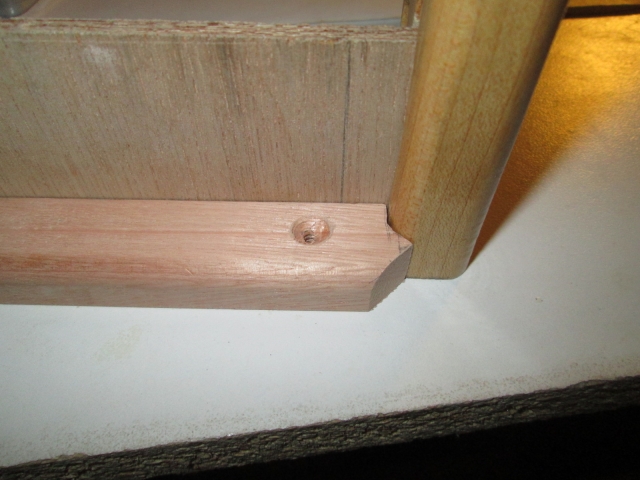
Mitered the lower part so that it tapers up to the back of the rail.
Image

Then I nibbled the rest on the bandsaw.
Image

Transferred the first piece to the others and repeated 3 more times, then I sanded the upturn corners to round them over a bit.
Image

Well, like I said, it was a bit of a slow start, but I ended up getting on a roll by the end and completely lost track of the time. Ended up being 8pm, for a 10hr session and I never got the poly on the front panels.

...and now that I am writing this I realize that I didn't even consider adapting the side ledgers that I have already made and finished. :NC :?

Oh well, I have to get to bed so I can go to work in the morning. :roll:
KC
My Build: The Poet Creek Express Hybrid Foamie

Poet Creek Or Bust
Engineering the TLAR way - "That Looks About Right"
TnTTT ORIGINAL 200A LANTERN CLUB = "The 200A Gang"
Green Lantern Corpsmen
User avatar
KCStudly
Donating Member
 
Posts: 9640
Images: 8169
Joined: Mon Feb 06, 2012 10:18 pm
Location: Southeastern CT, USA
Top

Re: The Poet Creek Express - Foamie Hybrid

Postby aggie79 » Sun Mar 16, 2014 9:11 pm

:thumbsup: :applause: :thumbsup: Looking great KC.

BTW, while you are coming close, I don't think you'll take my crown for "most blue tape used in a build." :lol:
Tom (& Linda)
For build info on our former Silver Beatle teardrop:
Build Thread

93503
User avatar
aggie79
Super Duper Lifetime Member
 
Posts: 5405
Images: 686
Joined: Tue Aug 07, 2007 5:42 pm
Location: Watauga, Texas
Top

Re: The Poet Creek Express - Foamie Hybrid

Postby KCStudly » Sun Mar 16, 2014 10:18 pm

Thanks Tom. The blue tape is a critical build tool, and a real time saver when you are taking your time with the details, so to speak. :lol:

I ended up working the day job 5 hrs this morning, including a last minute run to Ho-De-Po to resupply a paint crew. While the 5 gal bucket of Glidden was on the shaker I grabbed a lighter colored putty stick and ducked into the hardware aisle to get some longer SS FH screws.

I figured I would be beat from the hours that we have been putting in, but it was nice and sunny out, I still had some energy, and I had left my cell phone on the work bench at Mecca last night, so after dropping the paint back at the plant the pilgrimage was on.

Like I said, yesterday was a slow start and I ended up being a ditz, making new side cleats for the galley shelves when I could have used the side ledgers that I already had made and finished. :? I could have used that piece of cleat stock for one of the cleats that will go between the hatch actuators, too. Now I am short and will have to rip another piece (Dave, please keep looking for more saw auctions!!!).

Anyway, the first thing I did today was to look and see which way makes sense to go from here. Here is a comparison of the side ledger style and the side cleat style for the galley shelves. On the top is one of the street side ledgers. It has a ‘J’ shaped cope on the left that tucks under the lower radius on the face frame rail, and was left 1/4 inch long at the bulkhead end (on the right) to allow it to be coped to the same ledger profile (originally planned) at the right. On the bottom is the “new” style cleat shown coped to a chunk of its own profile on the right, with the undercut ‘J’ cope on the left that I showed in detail in my previous entry. (Disregard the wart over the top piece; that’s one of the screws holding the table top down.)
Image

Here’s a detail shot of the face frame end.
Image

And one of the bulkhead end.
Image

I thought about coping the side ledgers to fit the bulkhead cleats, but the screw holes in the side ledgers would be very close to the edge of the cope. If I butt the side ledger up to the bulkhead the face frame will be about 1/2 inch closer to the bulkhead than originally planned. I will lose a little shelf space, but I don’t have firm plans on what will be stowed there other than dry goods, herbs and spices, coffee, spare towels, TP, maybe canned goods; but no containers selected yet, so no big deal!?!

Pushing the face frame 1/2 inch toward the bulkhead shouldn’t be a problem with regard to hitting the wall blocking because the blocks are 3-1/2 x 3-1/2. Also, the screws in the side ledgers are angled toward the blocks and relatively close to the ends.

So I decided to only use the cleat style along the bulkhead, and to use the slotted ledgers on the side walls. To do this I pulled the cleats back off of the bulkhead, carefully labelled them so that they would each go back to their respective location (in case the screw holes weren’t all exactly the same). I used an ink sharpie on the back so that the ink would sink in, be visible after stain, not sand off easily, and, of course, not show.
Image

I went back to the router and the round nose bit to cope the outboard ends of the cleats. Used the feather board (because it was a handy piece of wood of the correct size) to back up the cut with the ‘T’-miter. I figured it would be easier to match the straight part of the cut to the tangent rather than the other way around, so I made the round cuts first.
Image
Image

Next I switched to the straight cutter bumped up against a waste fence to clean the rest.
Image

BTW, the Red Grandis makes very fine dust so for all of this work (including yesterday) I went to the trouble of hooking up the vacuum chute.

After screwing the bulkhead cleats back up (I used shorter 3/4 inch long screws for dry fit and will use longer 1-1/4 long screws for final to make sure I don’t bugger up the holes due to multiple fittings) I was able to push the side ledgers in tightly to where they held themselves up in position w/o their screws. Here is a close up of the curb side corner with the bulkhead cleat on the left and the curb side ledger on the right.
Image

Same thing with a scrap of ply and a piece of the maple 1/4 round mocked into place.
Image

All four corners with side ledgers just stuffed in tight not screwed yet. On the upper left I had to do a little hand work with the sanding block to open up the cope in the cleat so that the ledger would fit.
Image

A closer shot of the street side.
Image

A closer shot at that upper street side that needed adjusting, looking up slightly.
Image

Same thing with a scrap of ply in the slot.
Image

Same thing from the top with the 1/4 round scrap coped to fit the side ledger.
Image

After screwing the upper side ledger into the bulkhead wall blocking; measuring the face frame end of the slot up from the floor and screwing that end in (on the left); I made a spacer block that matched the separation exactly.
Image

Next I screwed the bulkhead end of the lower side ledger and used the spacer block to make sure the free end was at the correct height. This allowed me to push up hard on the lower piece taking measuring errors out of the equation, and keeping it from shifting while trying to hold fast for the screw.
Image

I suppose at this point I should have gone back to the front and finished up those panels, but I was on a roll, so I pulled the galley shelf panels out of stock and started trimming them to final size. One of them had some delamination on the edge. Pretty significant, but I still say that I have found very few cases like this. Some of it will get trimmed off when I set the final width of the panel and if there is any remaining I will glue it.
Image

I had to trim about an inch off the end of the precut panel to allow for the side ledgers. Here is the delaminated drop.
Image

Lower shelf dry fit into side ledger slots. Still need to rip the long edge to final size.
Image

Upper shelf fit to slots.
Image

I am leery about ripping the panels on the crappy table saw, so I pulled them back out for now to test fit the shelf face frame. It practically dropped into place and fit to a “T”. Still needs a second coat of poly.
Image
Image

Here’s the back of the face frame rail where it is screwed to the street side wall, shown with a scrap of ply in the groove.
Image

And another overall shot because I was happy with the way it fit!
Image

Not bad, I managed to get 3 hrs in and it was still light out, but I had some chores to do and needed some down time, so I called it a day.

Train kept a ‘rollin.
KC
My Build: The Poet Creek Express Hybrid Foamie

Poet Creek Or Bust
Engineering the TLAR way - "That Looks About Right"
TnTTT ORIGINAL 200A LANTERN CLUB = "The 200A Gang"
Green Lantern Corpsmen
User avatar
KCStudly
Donating Member
 
Posts: 9640
Images: 8169
Joined: Mon Feb 06, 2012 10:18 pm
Location: Southeastern CT, USA
Top

Re: The Poet Creek Express - Foamie Hybrid

Postby S. Heisley » Sun Mar 16, 2014 10:40 pm

This trailer is going to be jaw-dropping awesome! :D
User avatar
S. Heisley
Super Lifetime Member
 
Posts: 8866
Images: 495
Joined: Mon Sep 17, 2007 10:02 am
Location: No. California
Top

Re: The Poet Creek Express - Foamie Hybrid

Postby KCStudly » Sun Mar 16, 2014 10:51 pm

Wow, thank you Sharon. You made me feel really good with that comment! :D
KC
My Build: The Poet Creek Express Hybrid Foamie

Poet Creek Or Bust
Engineering the TLAR way - "That Looks About Right"
TnTTT ORIGINAL 200A LANTERN CLUB = "The 200A Gang"
Green Lantern Corpsmen
User avatar
KCStudly
Donating Member
 
Posts: 9640
Images: 8169
Joined: Mon Feb 06, 2012 10:18 pm
Location: Southeastern CT, USA
Top

Re: The Poet Creek Express - Foamie Hybrid

Postby atahoekid » Mon Mar 17, 2014 12:15 am

When Dave MCCann was building his Atmatear, I told him I never wanted to camp next to him because his build would make mine look absolutely juvenile. So guess what happened the first time we ever went to the same gathering?? UH HUH. You guessed it. Now do understand that I am proud of how mine turned out, but I know when I am outclassed. KC, guess who I never want to camp next to? YUP! Same reason... You're building at a level that is way above me. I really want to see the PCE out on the road and you enjoying all the time and effort you're putting into it. I'm sure you're enjoying the process of the build but you gotta go camping in it soon... :D :D
Mel

"Believe in your abilities... Remember amateurs built the ark, professionals built the Titanic"

"Indecision may or may not be my problem" Jimmy Buffet

Image

The Road Foamie Build Thread: viewtopic.php?t=45698
User avatar
atahoekid
Platinum Donating Member
 
Posts: 1773
Images: 158
Joined: Sat Jul 24, 2010 2:49 am
Location: Incline Village, NV
Top

Re: The Poet Creek Express - Foamie Hybrid

Postby kudzu » Mon Mar 17, 2014 10:18 am

So pretty!! :applause:
kudzu
Donating Member
 
Posts: 439
Images: 16
Joined: Wed Mar 27, 2013 3:20 pm
Top

Re: The Poet Creek Express - Foamie Hybrid

Postby KCStudly » Mon Mar 17, 2014 11:08 am

Mel,
Truthfully, I never thought TPCE would ever be favorably compared to the Atma. Dave is a truly artistic designer and the theme that he was able to maintain throughout his build is truly awe inspiring. Tho the design elements of TPCE are simple in comparison, I am honored that you think so highly of my work... :D

... so far. :R

Thank you, too, Kudzu! 8)
KC
My Build: The Poet Creek Express Hybrid Foamie

Poet Creek Or Bust
Engineering the TLAR way - "That Looks About Right"
TnTTT ORIGINAL 200A LANTERN CLUB = "The 200A Gang"
Green Lantern Corpsmen
User avatar
KCStudly
Donating Member
 
Posts: 9640
Images: 8169
Joined: Mon Feb 06, 2012 10:18 pm
Location: Southeastern CT, USA
Top

Re: The Poet Creek Express - Foamie Hybrid

Postby be_a_jayhawk » Mon Mar 17, 2014 1:11 pm

And here I thought I would just tack a 2x2 under the shelf.....
User avatar
be_a_jayhawk
Teardrop Master
 
Posts: 214
Images: 2
Joined: Wed Jun 19, 2013 6:32 pm
Top

Re: The Poet Creek Express - Foamie Hybrid

Postby KCStudly » Mon Mar 17, 2014 1:50 pm

be_a_jayhawk wrote:And here I thought I would just tack a 2x2 under the shelf.....

...and you would be camping far sooner than I. ;)
KC
My Build: The Poet Creek Express Hybrid Foamie

Poet Creek Or Bust
Engineering the TLAR way - "That Looks About Right"
TnTTT ORIGINAL 200A LANTERN CLUB = "The 200A Gang"
Green Lantern Corpsmen
User avatar
KCStudly
Donating Member
 
Posts: 9640
Images: 8169
Joined: Mon Feb 06, 2012 10:18 pm
Location: Southeastern CT, USA
Top

Re: The Poet Creek Express - Foamie Hybrid

Postby be_a_jayhawk » Mon Mar 17, 2014 1:53 pm

Lol you must not be following my build thread. ;)
User avatar
be_a_jayhawk
Teardrop Master
 
Posts: 214
Images: 2
Joined: Wed Jun 19, 2013 6:32 pm
Top

Re: The Poet Creek Express - Foamie Hybrid

Postby KCStudly » Mon Mar 17, 2014 1:56 pm

Actually, I probably am. It's just impossible to keep the jumble of builds all separated in my head. Sometimes I have a very hard time, what with all of the spring activity going on right now, and everybody posting. But that is a good thing. :thumbsup:
KC
My Build: The Poet Creek Express Hybrid Foamie

Poet Creek Or Bust
Engineering the TLAR way - "That Looks About Right"
TnTTT ORIGINAL 200A LANTERN CLUB = "The 200A Gang"
Green Lantern Corpsmen
User avatar
KCStudly
Donating Member
 
Posts: 9640
Images: 8169
Joined: Mon Feb 06, 2012 10:18 pm
Location: Southeastern CT, USA
Top

PreviousNext

Return to Foamies

Who is online

Users browsing this forum: No registered users and 13 guests