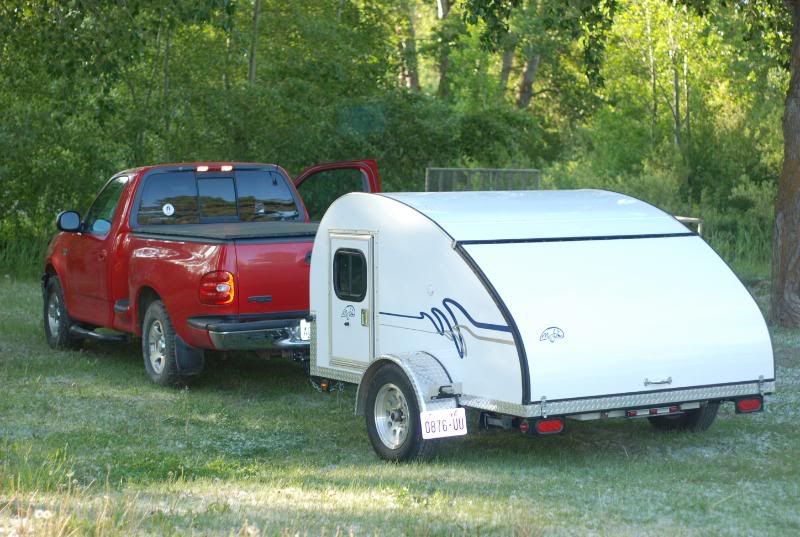
The Poet Creek Express - Foamie Hybrid

Canvas covered foamies (Thrifty Alternatives...)

Moderator: eaglesdare

Re: The Poet Creek Express - Foamie Hybrid

Postby KCStudly » Thu Jun 26, 2014 10:28 pm

Gave a tour of the build this evening. A business collaborator of Karl’s was dropping off and had a look. We all had a nice chat, but I didn’t get much work done as a result… despite it being hot and very humid. :?

I did break down the clamp setup from the rear ceiling panel glue up; scraped the excess glue a little bit; sanded the good side some; and threw it up on the roof to have a look see.

I was a little concerned that the longitudinal backer might make the panel stiffer in the direction of the bend, and I suppose it did a little, but I could still flex it plenty by hand with no creeks or cracks so I figured it would be okay. Something that I had noticed with the bigger front panel, and mentioned previously, is that the panels are tending to lie flat or sag in the middle. My assumption is that this will improve once I get the spars glued on top, but it is looking like there may still be too few to hold the shape, at least until the foam and outer skin are on (and maybe regardless).

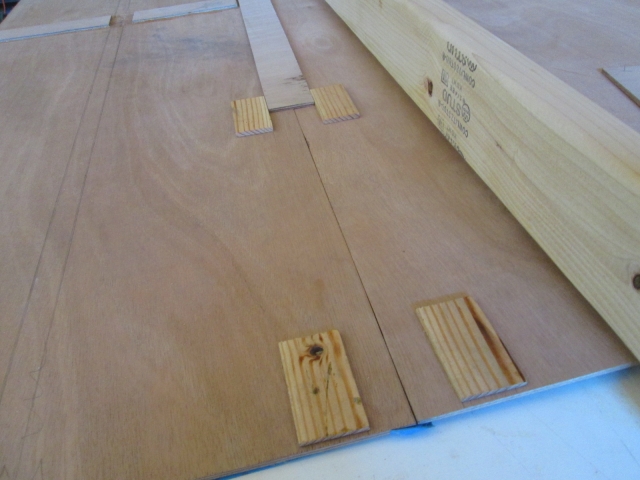
Here is the rear panel taped and weighted at the four corners. It’s difficult to see well in the pictures, but the short edges match the side profile well, while the middle remains flat.
Image
Image

Long discussion and numerous options were considered. At the time we narrowed it down as follows: 1) build a temporary support rib (or two) for inside the cabin to hold the panels up to the profile while completing the roof and hope that it doesn’t sag later when the supports are removed; 2) make two full length permanent ribs that run on top of the ceiling on either side of the roof vent bridging from the front cabinet face frame to the bulkhead, half lapping the spars (a flat spot, or parapet could be incorporated into the area at the vent)… 2a) option 1, above could be used and these permanent ribs could be added as a secondary step, or 2b) these ribs could be added during the ceiling bench build out and installed as a unit with the spars, skin and all; 3) add more spars spanning across the top of the ceiling.

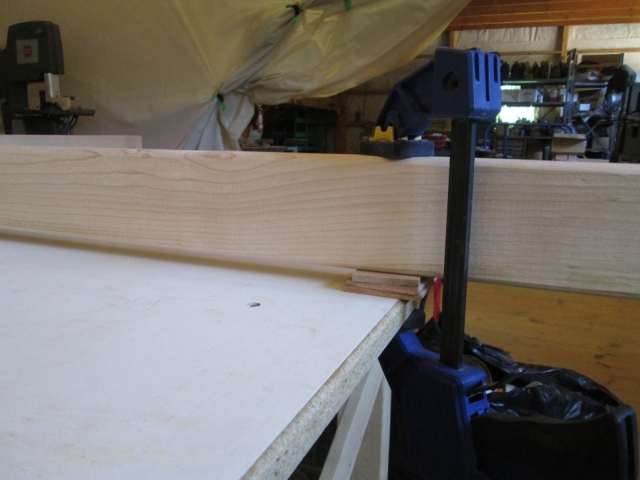
Then I had another thought; maybe I could train the panel prior to putting it on the roof; so I am conducting a test. I clamped the rear edge of the panel to the edge of the bench, propped up on a 1x2 in the middle, and weighted with a straight edge on the sprung side.
Image
Image
Image

Just 15 lbs, but I am curious to see the effect upon my return. Perhaps the humidity will help, too.
KC
My Build: The Poet Creek Express Hybrid Foamie

Poet Creek Or Bust
Engineering the TLAR way - "That Looks About Right"
TnTTT ORIGINAL 200A LANTERN CLUB = "The 200A Gang"
Green Lantern Corpsmen
User avatar
KCStudly
Donating Member
 
Posts: 9633
Images: 8169
Joined: Mon Feb 06, 2012 10:18 pm
Location: Southeastern CT, USA

Re: The Poet Creek Express - Foamie Hybrid

Postby KCStudly » Fri Jun 27, 2014 9:08 pm

I was going to swing by the lumber store today, thinking that I would make those long cabin roof ribs; but Karl said he had some 1/2 inch ply up in the attic of his shed that I could use (probably double up two wide per rib), so I headed up to Mecca to look at that first. On the way up there, after going by the exit for the orange store, I had a change of heart (thinking that the ply was probably not clean… mice, and not wanting to run the screws for the roof vent in between the plys). Thinking that I’d get some maple 1x4’s instead. Then I realized that the orange store up there doesn’t have the maple (that’s the store closer to my work), so I turned around again. (Can you tell that I was indecisive?)

When I got to Mecca I checked the shed, and sure enough there was a sheet of 1/2 inch… CDX… with mice sign. Um, not for me. There was also a pine 1x6 x 12 ft that was already primer white, but it was soiled, too (though, since it had been primed, it might clean up ok). I dragged that down for future reference, but Karl wasn’t around for me to check on that, so still undecided; and it had a few small knots here and there that I would need to avoid.

Okay, up to the loft to check on the rear ceiling panel test bend. Hmm, it looked pretty much the same. Not enough time or weight to effect much change. A test with no result is still a result. So I added a few more lbs in small MIG wire spools and a partial can of stain.
Image

That put about the right curl in it, but I was impatient and really can’t see myself waiting an indeterminate amount of time on the chance that the technique would “set” the panel enough not to sag or spring back. So I took the weights off, and of course, it sprang back right to where it had been.

So to me this proved that side to side spars are a good idea. After all, it was the spacer under this experiment that was what allowed the ply to take the correct shape.

I know this all seems merely obvious to all of you traditional builders out there, but here in foamie land spars aren’t generally needed. Apparently kerfed foam doesn’t have the same springy characteristic as wood (duh!) and is so light that it doesn’t really sag under its own weight (at least not in the 1-1/2 inch and larger thicknesses, nor in the relatively short spans that are typical of small TD’s).

So my hybrid design has always been based on the premise that the composite roof, combined with an arch, has inherent strength and would not need as many spars. I suspect that I could build a temporary spine to support the ceiling center during construction, but is the extra work really worth it? I’ve decided not.

And my thought to make long roof ribs on either side of the vent fan is complicated as well. I clamped the long aluminum straight edge to the wall so that I could measure the sagitta (height of the profile chord) to see what width board would be needed.
Image

Cutting the ribs and the spars for lap joints would weaken both and add complication (it occurs to me just now that I could eliminate the spars and just go with the long ribs… the rear bulkhead could support this, but the front cabinet face frame maybe not so much. I even toyed with the idea of converting to a trolley top, albeit very briefly.

No to all of that, the decision has been made. TPCE is taking one step closer to a traditional build. I will add three more spars on top of the ceiling panel. It’s the easiest solution to help the ply conform to the profile, requires the least added wood with little waste, and has the least downstream impact on fitting the roof foam.

Also, with the added spars I will reduce the “existing” forward spar from a 2x2 to a 1x2. So there will be 1x2 poplar spars on edge over the middle of the rear cabinet; 2x2 cedar spars behind and ahead of the roof vent; and 1x2 poplar at the planned panel butt joint (in addition to the wider 5mm splice slat), at the planned front spar location, and another about halfway between this and the front cabinet face frame.

I feel a little disappointed that I will not be breaking as much “new ground” as I had originally designed, but the greater good shall prevail and the build will move forward.

One more little thing; I snagged a 1/4 inch hex key to keep in the locker for configuring the rifle rest bolts.
Image

I have to go into the plant for a full day tomorrow, so I probably won’t get anything done, but I have some 1x2 poplar already from another project, so am looking forward to moving on.
KC
My Build: The Poet Creek Express Hybrid Foamie

Poet Creek Or Bust
Engineering the TLAR way - "That Looks About Right"
TnTTT ORIGINAL 200A LANTERN CLUB = "The 200A Gang"
Green Lantern Corpsmen
User avatar
KCStudly
Donating Member
 
Posts: 9633
Images: 8169
Joined: Mon Feb 06, 2012 10:18 pm
Location: Southeastern CT, USA

Re: The Poet Creek Express - Foamie Hybrid

Postby KCStudly » Sat Jun 28, 2014 7:58 pm

As mentioned, I had to work today, but it was uneventful so I had plenty of oomph left in me to get a little something more done on the build. Stopped by the house and brought the hatch hinge and a couple of 1x2 x 11-12 ft poplar sticks out to Mecca.

So I cut 3 spars out of the poplar, already had the 2x2 cedar spars for the vent and found that I already had a 1x2 cedar spar that would have been the front toe kick before I changed the locker configuration.

Here they are just placed into their relative positions across the walls to help visualize spacing and layout of a few more wall blocks (to be let into the tops of the walls like I did previously).
Image
Image

Although the spars are all cut to the full cabin width of 64 inches, some of them stick off the edge of the street side wall just a bit; two at 1/16 inch and the worst about 1/8 inch. There are a few things contributing. When the street side wall blank fell over and cracked just in front of the galley wall edging, it didn’t go back perfectly flat with the repair, and the upper rear cabinet face frame seems to have pulled the wall in just a tad on that side. I’ll probably just trim the spars flush to the wall as required and let the line of the roof follow the wall. I hope it doesn’t stand out too much when I round the edge of the roof over. I think you would have to be looking straight down the wall with a critical eye to see it.

Another thing that I want to take a closer look at fixing is where the street side roof arc meets the small front radius. There is a slight depression in the profile cut there where the roof arc came in a little low resulting in a slight depression on that side. I may slap a sliver on the top of the wall and re-contour it slightly; though it may be hard to match the inner skin finish without creating a shadow line or mismatch.

Finished up the evening by cutting the new wall blocks and marking their locations out.
KC
My Build: The Poet Creek Express Hybrid Foamie

Poet Creek Or Bust
Engineering the TLAR way - "That Looks About Right"
TnTTT ORIGINAL 200A LANTERN CLUB = "The 200A Gang"
Green Lantern Corpsmen
User avatar
KCStudly
Donating Member
 
Posts: 9633
Images: 8169
Joined: Mon Feb 06, 2012 10:18 pm
Location: Southeastern CT, USA
Top

Re: The Poet Creek Express - Foamie Hybrid

Postby RandyG » Sat Jun 28, 2014 9:24 pm

:thumbsup: Getting excited! All the planning is coming together.
Randy
Aircraft fabricator, novice carpenter, electrical apprentice, audio engineer dropout.
Build thread - http://www.tnttt.com/viewtopic.php?f=50&t=54126
User avatar
RandyG
500 Club
 
Posts: 695
Images: 115
Joined: Thu May 10, 2012 6:52 pm
Top

Re: The Poet Creek Express - Foamie Hybrid

Postby atahoekid » Sun Jun 29, 2014 12:39 am

Hey KC! Please forgive this very bizarre thought, but what if once you've completed The Poet Creek Express, you decide to build another? I know you have a ton of hours into this and am sure it will be great but I know that for myself that I thought of build #2 before I even got done with Road Foamie. GPW's built a couple and has ideas for building others and I know other TD builders have built multiples. I've toyed with the idea of restoring a vintage trailer but keep coming back to the idea of building my own again. Sorry, just a random thought as I was reading your last few posts...
Mel

"Believe in your abilities... Remember amateurs built the ark, professionals built the Titanic"

"Indecision may or may not be my problem" Jimmy Buffet

Image

The Road Foamie Build Thread: viewtopic.php?t=45698
User avatar
atahoekid
Platinum Donating Member
 
Posts: 1773
Images: 158
Joined: Sat Jul 24, 2010 2:49 am
Location: Incline Village, NV
Top

Re: The Poet Creek Express - Foamie Hybrid

Postby bonnie » Sun Jun 29, 2014 7:31 am

Mel, i think everyone thinks about build #2. Whether or not it ever gets built. :lol:

KC, that's going to be so much better. Move forward!
Remember, the turtle won. :)
User avatar
bonnie
Donating Member
 
Posts: 1390
Images: 107
Joined: Sun Jul 24, 2011 4:14 pm
Location: Roxana, IL
Top

Re: The Poet Creek Express - Foamie Hybrid

Postby KCStudly » Sun Jun 29, 2014 9:14 pm

No problem Mel. In fact I’m sure I have mentioned a few times how I might have done things differently, and how I would build #2 as a standy/slouchie, slide-in, over-the-fender, rear entry bunk house to go on The Charcoal Briquette (my resurrected UT). Traditional type construction using painted cheap underlay ply and foam filled 1x stick framing. Something very similar to the sketch GPW made for Louella when she started her 2nd; except with two bunks, one on either side of a narrow center aisle. The bunks could be used individually, make up into sofas, or be converted to a single bed. Here’s GPW’s sketch again.
Image

And thank you Bonnie for the kind words and support.

Today it was spar prep work.

Rather than trying to force the wall/walls to conform, I started by marking and trimming the three long spars flush to the sides.

Then I shimmed the vent spars up on some 5 mm (representing the ceiling skin) and clamped them stationary using long pipe clamps hooked under the floor. That way I could trace the roof arc and radial splay of the spars onto a scrap of 1x pine to make the side pieces for the vent framework; the “vent ribs”.
Image

From there I laid a straight line across the top of the tangent point, about 1/8 inch high at each corner, so that the vent flange will have something flat to lay on. I will build up the spars between the vent ribs using thin strips to match, then fair in the foam as required. Also note how I tried to avoid the big knot in this piece as much as possible. This meant that I had to shim one end of the board to cut the straight edge out on the table saw.
Image

After cutting the ends out on the miter saw, matching the angles by eye, I made the curved cut on the vertical band saw, trimming to the line with the little plane and the football shaped sanding block. A little back and forth and we get this.
Image

Here you can see the difference between the flat part and the spar. Of course the vent rib will eventually be mounted out near the middle of the roof, but it was more accurate to dry fit it here at the top of the wall.
Image

So this is basically the template. The inner and outer flanges on the vent are sized for 2x but I didn’t have any handy scraps that weren’t cupped or knotty, so I decided to sandwich some milled 1x pine. I have gotten a lot of mileage out of this piece. First it was a long sanding board (hence the tacky spray glue residue), then it was a router template for the fender and wing table blocking (hence the screw holes), and then it got ripped and used for the locker sill. Thrifty. :lol: So I traced three more ribs by lining the template up along the straight edge and running the pencil around it. The tackiness of the spray glue actually helped seat the template and made tracing easier. It’s hard to see the tracings but you can see where I marked the tops and fronts with the sharpie.
Image

After cutting those out similarly, I stuck one to the template with double sided tape and made it match with the flush cutting bearing bit on the router table. By using the post to start and the far end of the retracted fence to end, I was able to run the narrow piece thru without getting my hands too close to the cutter. (Thank you to whoever it was that pointed out the proper use of the starter post to me!)
Image
Image

Here are the first two fit between the spars as a look see check.
Image

Rather than trimming the other two rib blanks now, I glued one of the blanks to each of the trimmed parts, aligning the ends and straight edges and pinning the pairs with a few pin nails so they wouldn’t slide out of alignment under the clamp pressure. Note how I stacked the pairs under the same set of clamps. Later, after these had a chance to set up, I ran them around on the router table again to get two identical 1-1/2 inch wide ribs.
Image

Next I ganged the vent spars together, found the center, and laid out the locations where the ribs will get glued and screwed between. The fan is a hair over 14 inches square, but the flange is about 2 inches wide with the screw locations about centered on the width of the flange. That and leaving some room for the wiring meant that the rough opening was comfortable at 14-1/2 inches.
Image
Image

Side note: Since these two spars were no longer exactly the same length, I had to decide where the center was, or in other words, where the offset needed to be. So I laid the big aluminum straight edge along the top of each wall and found that it is actually the curb side wall that has the slight bow in at the top. The street side wall is actually very straight on the outside. Anyway, knowing that allowed me to know which ends of the spars to match, and which to let run.

Next I ganged up all of the spars, squared and evened them up, planed the ends of the tops flush (the cedar was a tad shorter than the pine), and clamped some waster blocks on each end to prevent breakout. Then hit them with the 3/4 inch round over bit in the 1/2 inch collet router, making progressive passes.
Image
Image
Image
Just a few hits with the small sanding block.

And the other end.
Image

And a little look see with the spars resting on top of the cabin. Street side looking back.
Image

Curb side looking back.
Image
Image

And a couple looking up from the curb side.
Image
Image

I finished up (about 4 hrs work) by drilling the pocket holes for the screws in the vent ribs.
Image
KC
My Build: The Poet Creek Express Hybrid Foamie

Poet Creek Or Bust
Engineering the TLAR way - "That Looks About Right"
TnTTT ORIGINAL 200A LANTERN CLUB = "The 200A Gang"
Green Lantern Corpsmen
User avatar
KCStudly
Donating Member
 
Posts: 9633
Images: 8169
Joined: Mon Feb 06, 2012 10:18 pm
Location: Southeastern CT, USA
Top

Re: The Poet Creek Express - Foamie Hybrid

Postby KCStudly » Sat Jul 05, 2014 9:56 pm

This past week has been hot and humid, so while I have been out to Mecca as usual, I haven’t made much progress, nor taken many pic’s until today. With the cold front that drove Arthur out came rain on the 4th, then a gorgeous cool, dry day today. Perfect weather for building!

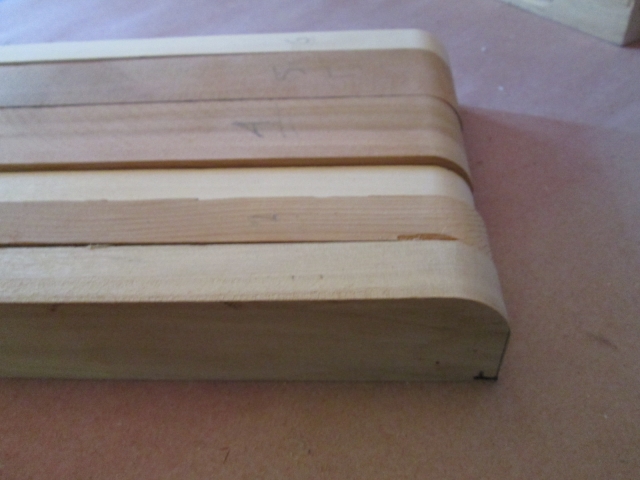
Let’s get caught up. On Monday I futzed around measuring and test fitting ceiling related stuff. The third spar will sit on top of the butt splice backer for the front and middle panels so it needed to be ripped down by 5mm (3/16 inch). Here it is in order with the others after being ripped. You can see that it is no longer as tall.
Image

The 6th spar goes over the rear cabinet, so I had to remove a portion of the butt splice backer on the pieced together rear ceiling section. Here it is dry fit.
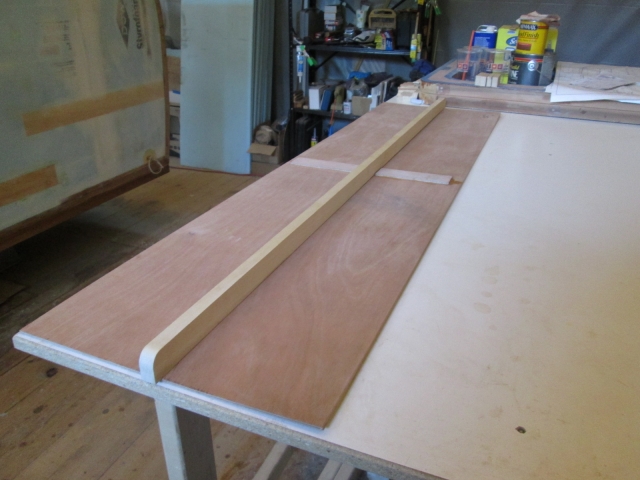
Image

On Wednesday I started cutting/chiseling out the pockets for the extra blocking in the tops of the walls where the extra spars will be screwed down into.
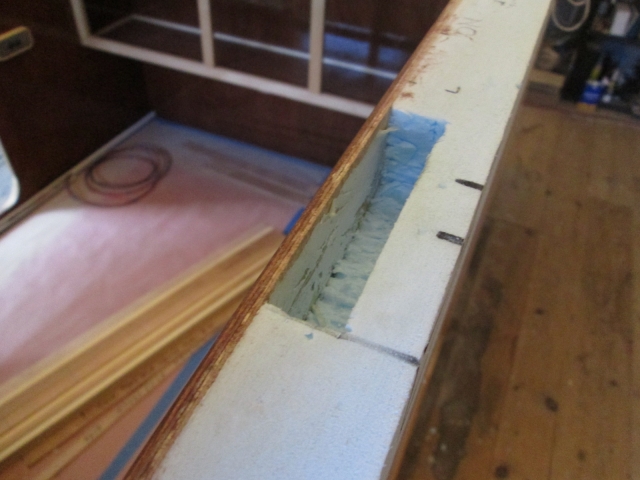
Image

These were purposely fit a tad shallow; I would rather shave the blocks down to the profile after gluing than have them be low.
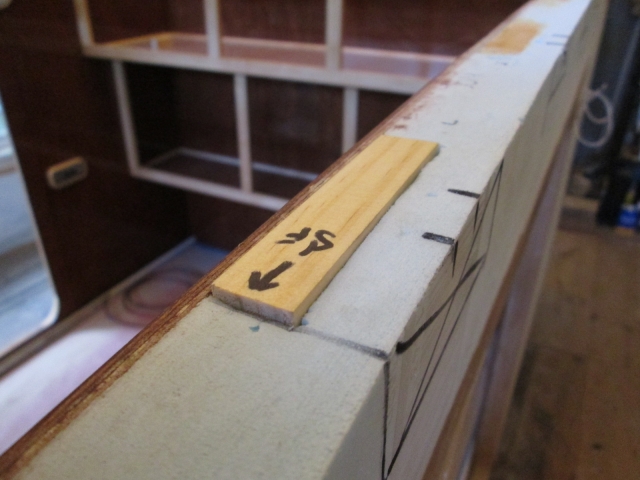
Image

I took the 4th off. Today I finished up fitting the four new blocks and glued them in using the same technique as the others done previously. I masked across the top edge of the inner wall skin to keep GG ooze from dripping down the nice finish, and glued them in. Here the glue is just starting to kick.
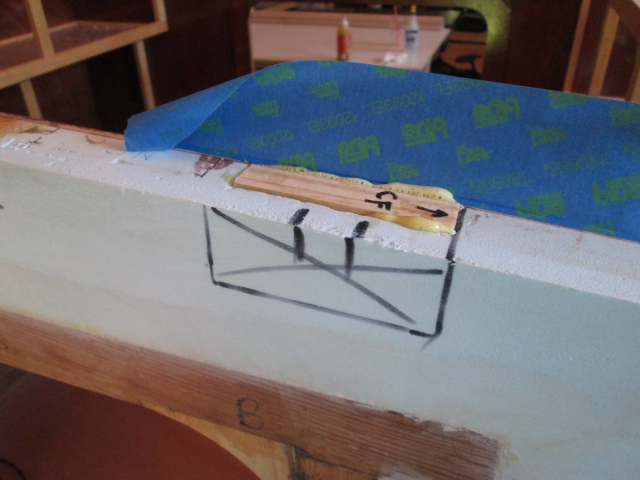
Image

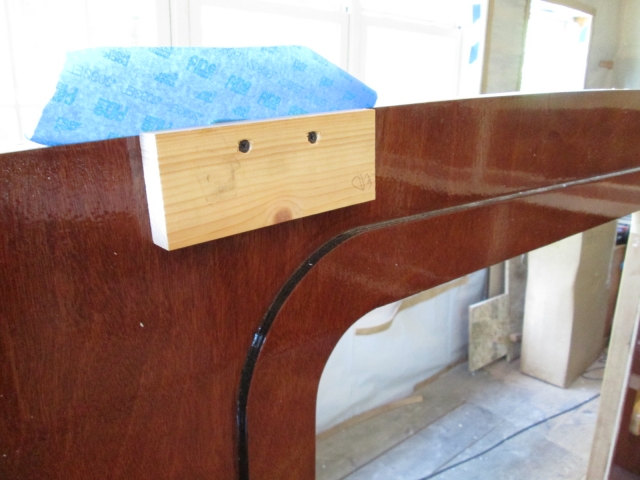
On the inside of each location I screwed a good size temporary block. This pinned the glued blocks into location, helped spread the load so as not to damage the finished wall, and kept the screw heads from digging in. When these are removed there will only be small screw holes that will be filled with the colored putty, and will hopefully virtually disappear.
Image

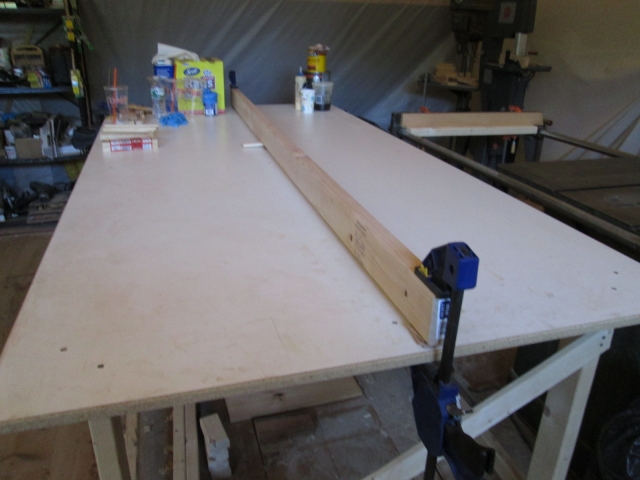
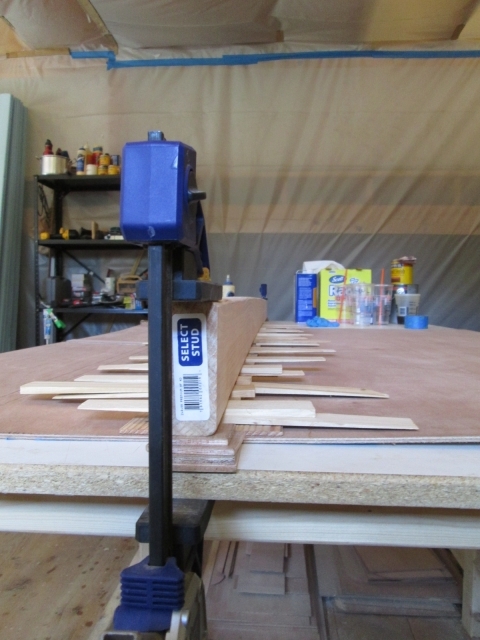
While that was curing I set up this clamp bar bridge. It’s a 2x4 x 8ft clamped to the edges of the work bench on top of 3 scraps of 5mm at each end.
Image
Image

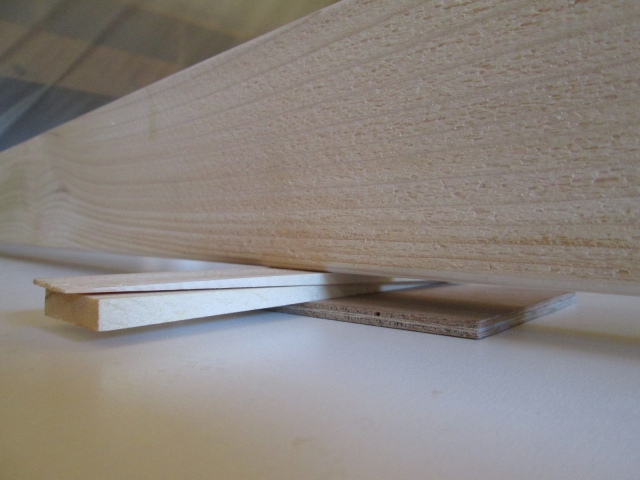
This left a gap between the 2x and table where I could slide the ceiling panel under and use wedge shims to clamp all along the field of the seams.
Image

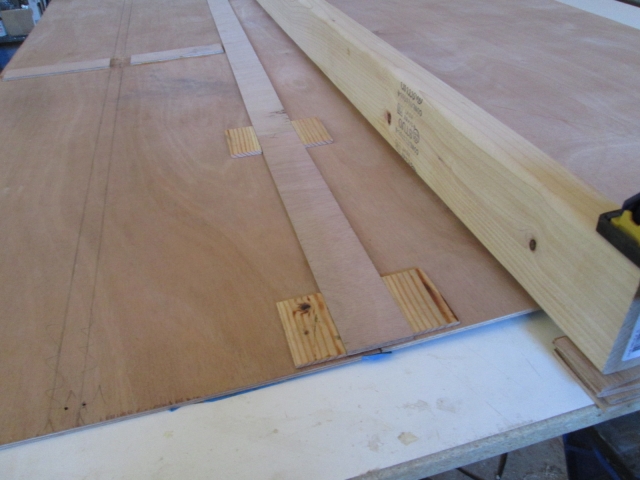
This is the rear ceiling panel on the left, the two piece butt splice backer strip, and the middle ceiling panel under the clamp bar on the right, all ready to be slid under the bar after applying the glue. The small shims of fir on either side of the backer are temporarily double sided taped on to help position the backer and keep it from sliding around in the glue.
Image
Image

Since this seam will be glued onto the top of the rear cabinet face frame, I hadn’t bothered to make the butt fit perfect, and with the slight gaps here and there it seemed like more glue would ooze thru it than would fasten it, so I let the backer do the work and didn’t bother to try to glue the edges of the panels. Here it is under the “clamp”.
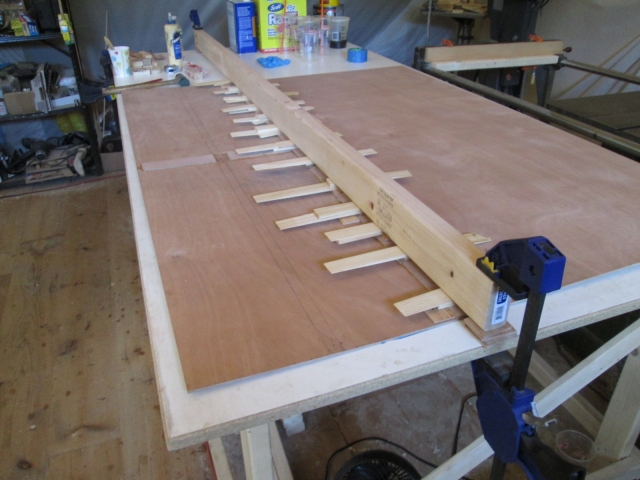
Image

Even with the 2x4 on edge, the wedges are a powerful tool and put a goodly arch in it; and then it would relax and the shims would loosen up. So the process was put the wedges in, go back and re-shim all of the loose wedges until they were all about the same snugness, wait a little bit, then go back and snug all of the wedges back up again.
Image

As the GG was oozing out of the wall blocking, I went around and scooped some of the excess off to keep it from dripping down the outside of the walls. Apparently I had used plenty to make up for the slight roughness of having gouged out the pockets.
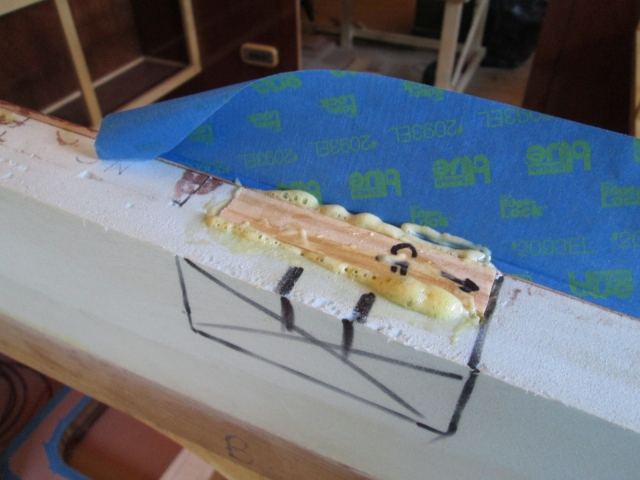
Image

Here is an example after removing the masking, cutting the excess glue, shaving the blocks down close with the block plane, and finally sanding flush with the little hard block.
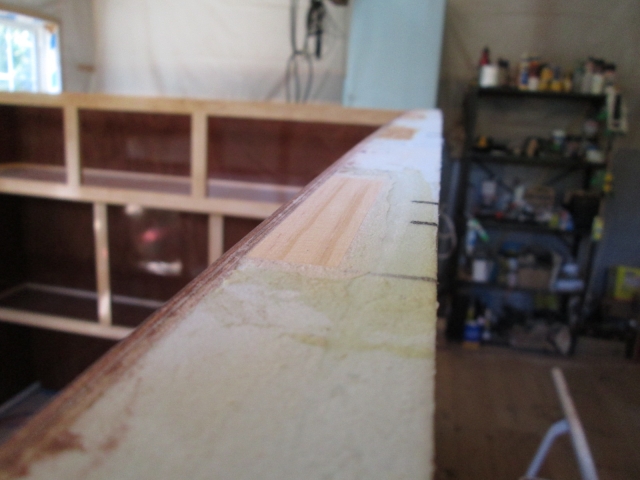
Image

Next, I took care to match the two edges of the rear ceiling panel assembly and the front panel. For this seam, the main ceiling seam in the cabin that will be visible, I improved on the technique that I used to join the two halves of the rear ceiling panel together. Before taping along the seam on the good/bottom side, I taped along both sides of the seam first. That way if the tape holding the seam together should happen to separate when I folded the joint open to apply the glue, at least the wood would still be protected and hopefully not get glue on the face. It actually worked out better with the longer sheet because when I dragged it off the front of the bench it touched the floor without opening fully to 90 deg’s. The angle tended to match the chamfer on the edge of the bench, backing up the tape and keeping it from pealing open further than intended.
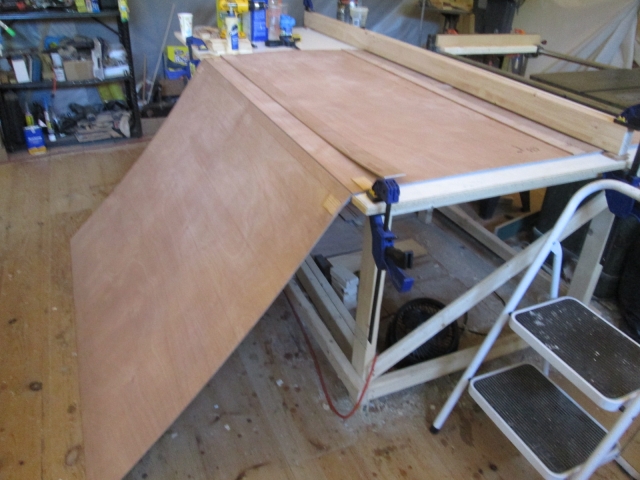
Image

So with it in this position, with the backer piece traced out and near at hand (the curled up piece), I applied glue to all surfaces; inside the butt joint, adjacent to the seam, and on the underside of the backer.
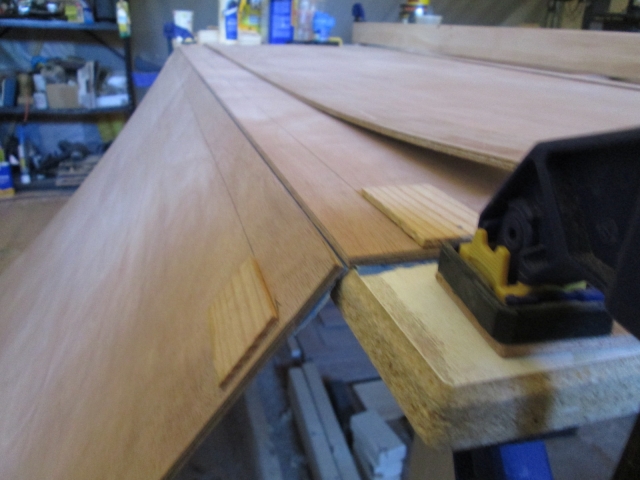
Image

Then I slid it back up on the table, flipped the backer into position, slid it under the 2x4 bar, and wedged it up.
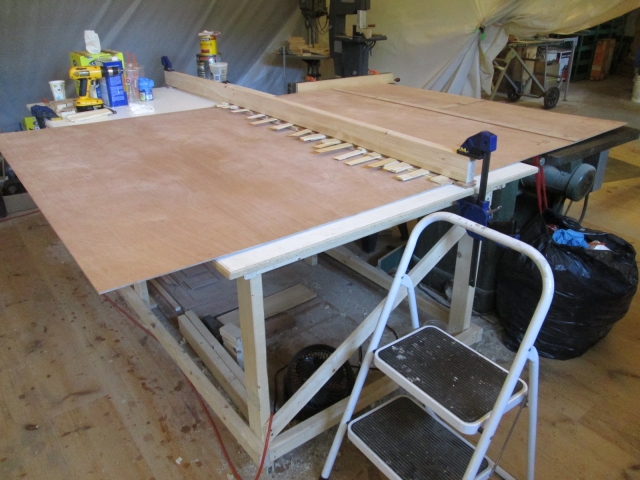
Image

Since I couldn’t really reach the middle of the table, the step stool was handy by so I could climb up and sit or kneel on top to work.

I still haven’t decided if I will attach the spars, using the same clamp and glue technique, before or after applying the finish to the underside of the panel. As it is now the panel is mostly flat and I can work the finish fairly easily, but the finish could be marred when I add the spars. If I add the spars now I might have a harder time sanding with the panel only partially supported, but I suppose I can use temporary blocking to prop it up securely (the way I am leaning at the moment). I’ll also have to factor in the roof vent riblets, as well.

All for now.
KC
My Build: The Poet Creek Express Hybrid Foamie

Poet Creek Or Bust
Engineering the TLAR way - "That Looks About Right"
TnTTT ORIGINAL 200A LANTERN CLUB = "The 200A Gang"
Green Lantern Corpsmen
User avatar
KCStudly
Donating Member
 
Posts: 9633
Images: 8169
Joined: Mon Feb 06, 2012 10:18 pm
Location: Southeastern CT, USA
Top

Re: The Poet Creek Express - Foamie Hybrid

Postby GPW » Sun Jul 06, 2014 5:23 am

KC, are you going to put foam between the roof spars ? Did I miss something ? :o
There’s no place like Foam !
User avatar
GPW
Gold Donating Member
 
Posts: 14915
Images: 546
Joined: Thu Feb 09, 2006 7:58 pm
Location: New Orleans
Top

Re: The Poet Creek Express - Foamie Hybrid

Postby KCStudly » Sun Jul 06, 2014 9:20 am

Yes, foam between the spars; spars and foam on top of the ceiling skin, then canvas.
KC
My Build: The Poet Creek Express Hybrid Foamie

Poet Creek Or Bust
Engineering the TLAR way - "That Looks About Right"
TnTTT ORIGINAL 200A LANTERN CLUB = "The 200A Gang"
Green Lantern Corpsmen
User avatar
KCStudly
Donating Member
 
Posts: 9633
Images: 8169
Joined: Mon Feb 06, 2012 10:18 pm
Location: Southeastern CT, USA
Top

Re: The Poet Creek Express - Foamie Hybrid

Postby GPW » Sun Jul 06, 2014 10:10 am

NICE!!! 8) 8) 8)
There’s no place like Foam !
User avatar
GPW
Gold Donating Member
 
Posts: 14915
Images: 546
Joined: Thu Feb 09, 2006 7:58 pm
Location: New Orleans
Top

Re: The Poet Creek Express - Foamie Hybrid

Postby KCStudly » Sun Jul 06, 2014 5:49 pm

More work on the ceiling panel sub-assembly.

The visible skin joint came out really nicely; I’m very happy with it. Here Karl and I set the skin up on top. It’s flush to the street side in the pic because I haven’t notched out for where the vent fan wires come up thru the curb side wall.
Image
Still sags in the middle without the spars.

Gave a real sense for how the inside will be; seemed a lot smaller all of a sudden, but not in a bad way. You can see the panel butt seam here.
Image
Image

With the front still sprung out over the riblets it gave a nice transit lighting effect.
Image

Moved the clamp bar location on the bench and added appropriate spacers to glue the 6th, rearmost spar.
Image
Image

The wedges were powerful enough to compress the pads on the nearside quick clamp enough to lift the bar off the spacers.
Image

I forgot to show this on the 6th spar, so I will show it here on the 3rd spar. The temporary locating pucks with double sided tape did a great job locating the spar from front to rear, but I used a single screw up thru the good face (where the hole will later be hidden on top of the street side wall) to pin the spar and keep it from moving across the panel. Also note the pencil line to help me align the spar overhanging the skin by 1/2 inch (shown here upside down just before applying glue).
Image

Here it is all glued up and under the clamp. Note that I switched to a steel threaded clamp at this end of the bar.
Image

While that was curing I clamped the rear vent spar, the 5th, on its back face (working on spacers right on top of the ceiling skin), and glued and screwed the vent riblets into place.
Image

After that all had some time to set up I broke down the clamp set up, cleaned up the glue joints and set the vent framework in place (just dry for now) to layout some square reference lines and take a pic of progress so far.
Image

So that was about 5 hrs yesterday and another 4 today. Not a blistering pace, but progress is progress.
KC
My Build: The Poet Creek Express Hybrid Foamie

Poet Creek Or Bust
Engineering the TLAR way - "That Looks About Right"
TnTTT ORIGINAL 200A LANTERN CLUB = "The 200A Gang"
Green Lantern Corpsmen
User avatar
KCStudly
Donating Member
 
Posts: 9633
Images: 8169
Joined: Mon Feb 06, 2012 10:18 pm
Location: Southeastern CT, USA
Top

Re: The Poet Creek Express - Foamie Hybrid

Postby bonnie » Sun Jul 06, 2014 7:33 pm

Progress is progress! Good looking work there, sir. I like how the roof line is working out. :thumbsup:
Remember, the turtle won. :)
User avatar
bonnie
Donating Member
 
Posts: 1390
Images: 107
Joined: Sun Jul 24, 2011 4:14 pm
Location: Roxana, IL
Top

Re: The Poet Creek Express - Foamie Hybrid

Postby KCStudly » Sun Jul 06, 2014 7:44 pm

Thank you, Bonnie. Thank you very much! :D
KC
My Build: The Poet Creek Express Hybrid Foamie

Poet Creek Or Bust
Engineering the TLAR way - "That Looks About Right"
TnTTT ORIGINAL 200A LANTERN CLUB = "The 200A Gang"
Green Lantern Corpsmen
User avatar
KCStudly
Donating Member
 
Posts: 9633
Images: 8169
Joined: Mon Feb 06, 2012 10:18 pm
Location: Southeastern CT, USA
Top

Re: The Poet Creek Express - Foamie Hybrid

Postby atahoekid » Mon Jul 07, 2014 12:56 am

You're detailed butt joining of the ceiling panels shows the difference between the two of us as builders. I would never try to butt seam those panels because in my mind there would never be any way to make a perfect seam. You, on the other hand, think there has to be a way to do it and figure out how. Well done!!! Oh so, what I did was join them with a seam bar behind and a trim bar in front. Doesn't look nearly as nice as yours! :(
Mel

"Believe in your abilities... Remember amateurs built the ark, professionals built the Titanic"

"Indecision may or may not be my problem" Jimmy Buffet

Image

The Road Foamie Build Thread: viewtopic.php?t=45698
User avatar
atahoekid
Platinum Donating Member
 
Posts: 1773
Images: 158
Joined: Sat Jul 24, 2010 2:49 am
Location: Incline Village, NV
Top

PreviousNext

Return to Foamies

Who is online

Users browsing this forum: Bing [Bot], Google [Bot] and 8 guests