West Coast 6x10 V-Nose Conversion

Converting Cargo Trailers into TTTs

Re: West Coast 6x10 V-Nose Conversion

Postby 8ball_99 » Sat May 05, 2012 7:21 pm

Your going to want to do it like the first picture that way the entire seam is attached to the studs. The down side is you end up with a little more scrap. With your trailer though it will work out about the same either way since you will need 3 sheets either way. With mine it cost me a couple extra sheets of board, But all the edges are secured so it makes all the joints nice and flush
8ball_99
500 Club
 
Posts: 623
Joined: Sun Mar 07, 2010 12:34 am

Re: West Coast 6x10 V-Nose Conversion

Postby BC_Explorer » Sun May 06, 2012 9:24 am

Thanks guys. Just as I thought also, the first option is the better of the 2. Hopefully I can get around to this tomorrow as time is running out before the first camping trip on the 16th...
BC_Explorer
Teardrop Master
 
Posts: 162
Images: 19
Joined: Tue Aug 16, 2011 10:11 pm

Re: West Coast 6x10 V-Nose Conversion

Postby Shadow Catcher » Sun May 06, 2012 5:11 pm

Challenger door does windows and doors and have been in the factory I can attest to the quality and they do stand behind their products. This is a company with Amish and Mennonite workers and management. Their working day is 5AM to 1PM so call early :)
User avatar
Shadow Catcher
Donating Member
 
Posts: 6008
Images: 234
Joined: Sat Apr 11, 2009 8:26 pm
Location: Metamora, OH
Top

Re: West Coast 6x10 V-Nose Conversion

Postby pete42 » Tue May 08, 2012 9:53 am

On your install if you go with first choice depending on how wide the cross beams are you may not have much room to screw the panel to the roof.
others have installed a board about 3 inchs wide to the beams then mounted the panel to the boards after insulating the roof.

pete
User avatar
pete42
Super Lifetime Member
 
Posts: 2203
Images: 13
Joined: Sat Nov 07, 2009 11:52 am
Location: SouthWest Ohio
Top

Re: West Coast 6x10 V-Nose Conversion

Postby BC_Explorer » Tue May 08, 2012 11:19 pm

pete42 wrote:On your install if you go with first choice depending on how wide the cross beams are you may not have much room to screw the panel to the roof.
others have installed a board about 3 inchs wide to the beams then mounted the panel to the boards after insulating the roof.
pete


Belatedly, I see what you mean. I got most of the ceiling panels in place tonight. I started the front panel at the first front cross beam just above and to the right of the side door. I then put up the second panel which starts at the cross beam roughly 1/2 way to the back of the trailer. At the 4' back edge of this panel, there is very little room to screw in the next and last panel at the back of the trailer. I am not about to drop the ceiling panels and start adding boards to the cross beams so I will have to figure something out tomorrow.

I also need to find a way to secure the leading edges of the ceiling panels at the very front in the V-Nose as there is no exposed roof support beams. Just something I overlooked earlier when I put the wall panel right up to the CT roof, but it should not be too difficult to find a way to work around this.
BC_Explorer
Teardrop Master
 
Posts: 162
Images: 19
Joined: Tue Aug 16, 2011 10:11 pm
Top

Re: West Coast 6x10 V-Nose Conversion

Postby pete42 » Wed May 09, 2012 9:02 am

sorry for not posting my first post earlier.
there are so many things to think of some are bound to be missed
until it is either to late or to much trouble to start over and correct.
I'm sure you will come up with a solution and move on the next step.

pete
User avatar
pete42
Super Lifetime Member
 
Posts: 2203
Images: 13
Joined: Sat Nov 07, 2009 11:52 am
Location: SouthWest Ohio
Top

Re: West Coast 6x10 V-Nose Conversion

Postby BC_Explorer » Mon May 14, 2012 12:49 am

Another update. It has been a busy couple of weeks and I have been scrambling to get as much done before I leave on Wednesday for 5 days for the first camping trip with the CT conversion...which still needs a lot of work.

Last week, I put the floor tiles in. I went with an EVA foam, interlocking tile for a couple of reasons. Cost: were on sale for $7.99 per package (each package covers 16 square feet.) Also the foam which is about 1/2" thick, should help prevent some cold air from seeping up through the floor.
Image


Originally, I wanted to go with an aluminum framed bed, however time and money is not in my favor right now, so I built the bed with 2"x3" wood stock and 1/2 plywood. The bed is designed to be folded up, but I am out of time to fully finish that part for now and it will have to wait until a later date. I also have a foot wide, removable extension to build that will allow the bed to be queen sized wide but with the bed up high (see details below), it would then not be foldable, hence the removable section. That new foam mattress will expand to it's full size (4" high and 72 " long) in a couple of days then can be trimmed to fit. I have used this product before and for the price, it makes for a good sleep.
Image


View in from the side door. Tomorrow, I still have to cover the one section of bed rail with the same material as the walls.
In order for the bed to fit over the top of the cabinet, I had to build the bed this high and also leave room for the drawer to pull open. The cabinet makes for a nice bench seat and sits about 19" high. In behind the white wall on the lower left is the CT's spare tire.
Image

Looking in from the back of the trailer. There is quite a bit of room for storage of lawn chairs, solar panels and other camp gear.
Image

The white cabinets you see in background will eventually be mounted. I have not decided exactly where yet but they will stay home this trip and until I do decide. Also the front roof section in the V-Nose still needs the ceiling added...
Image

In through the side door. Although the cabinets are white, the doors are the same gray which the drawers on the bench cabinet which still have the protective film on them. There is wiring to do but with nighfall not occuring until about 9:30 pm right now, there is no pressing need on this trip. In the meantime, I have some self contained battery operated LED lights to use.
Image

Thats about it for now. Tomorrow is a another busy day as I need to wrap up a few other projects before I feel confident enough that there is enough work done for the shakedown trip..and plenty of more work on the return home.
BC_Explorer
Teardrop Master
 
Posts: 162
Images: 19
Joined: Tue Aug 16, 2011 10:11 pm
Top

Re: West Coast 6x10 V-Nose Conversion

Postby BC_Explorer » Wed May 16, 2012 12:12 am

Well the last couple of days have been a scramble to get trailer ready for its first trip. The 2 white cabinets seen in my previous post, I decided to mount them stacked on the floor just to the inside left of the side door for now. This leaves the front v-nose area open until I decide if I want to add a counter top there.

Once the trailer was more or less packed up earlier this evening, I hitched up for a test drive only to find the trailer had no back running lights, turn signal nor brake lights. Now one of the very best aspects of doing my own CT conversion which also included checking and cleaning up the wiring when I first started the conversion, I now knew exactly where to look for the problem tonight and found that one wire had been pulled when I had put the bed frame in a few days ago. A quick 30 second fix ensuded then the CT had full working lights again.

The test drive went fine and I noticed that the trailer is considerably heavier and I am glad that I now have the Dodge Ram TV.

Leaving early tomorrow afternoon for a 5-6 day trip and will post an update with some photos next week.
BC_Explorer
Teardrop Master
 
Posts: 162
Images: 19
Joined: Tue Aug 16, 2011 10:11 pm
Top

Re: West Coast 6x10 V-Nose Conversion

Postby 8ball_99 » Wed May 16, 2012 8:52 am

Yeah it always surprises me to see some of these small crossover SUVs pulling some of these cargo trailers. Some don't even have brake controls. It doesn't take much camping gear to add some real weight to the trailer. Climb a few mountains, drive in some bad weather or have a deer run out infront of you on a curve you will be glad you have a good tow vehicle for the size trailer you have!
8ball_99
500 Club
 
Posts: 623
Joined: Sun Mar 07, 2010 12:34 am
Top

Re: West Coast 6x10 V-Nose Conversion

Postby David_L6 » Wed May 16, 2012 9:04 am

8ball_99 wrote:Yeah it always surprises me to see some of these small crossover SUVs pulling some of these cargo trailers. Some don't even have brake controls. It doesn't take much camping gear to add some real weight to the trailer. Climb a few mountains, drive in some bad weather or have a deer run out infront of you on a curve you will be glad you have a good tow vehicle for the size trailer you have!


No kidding! In addition to not being safe, some of those smaller vehicles are straining just to tow on flat roads.
I had a 2008 1/2 ton Silverado with 5.3 liter and tow package but really just didn't feel like it had enough for my 7' X 16' when loaded so I recently bought a 2012 1/2 ton Silverado with the Max Trailering Pack (6.2 liter, 3.73 gear ratio, 4 wheel disk brakes, etc.). I feel that anything it isn't capable of towing well shouldn't be towed with a 1/2 ton pickup.
User avatar
David_L6
Donating Member
 
Posts: 150
Images: 16
Joined: Wed Jun 01, 2011 10:09 pm
Location: Northwest Louisiana
Top

Re: West Coast 6x10 V-Nose Conversion

Postby Partsman » Wed May 16, 2012 11:26 am

My wife's Liberty is rated for a 5,000# pound trailer and it is tiny.
Partsman
Teardrop Advisor
 
Posts: 53
Images: 0
Joined: Thu Apr 05, 2012 4:17 pm
Top

Re: West Coast 6x10 V-Nose Conversion

Postby David_L6 » Wed May 16, 2012 6:41 pm

Bkcreation34 wrote:I just bought a new ford escape with the v6 and 4x4 with towing package I plan to use that for my 6x10 haulmark trailer. I should be fine if I don't load the inside to heavy.
What do you all think? I was going to put camping gear in the truck and inside the trailer will it be much inside so weight won't increase to much.


I have a 6' X 10' that my son pulled from Louisiana to Missouri with a 1/2 ton Silverado with a 4.8 liter V8 fighting head winds all the way up. Only got 9 mpg because of the head winds. Had no more than 600 pounds in the trailer and no more than 800 pounds of cargo / passengers in the truck. Your V6 will pull the trailer in ideal conditions but what about when the conditions aren't so great? :thinking:
User avatar
David_L6
Donating Member
 
Posts: 150
Images: 16
Joined: Wed Jun 01, 2011 10:09 pm
Location: Northwest Louisiana
Top

Re: West Coast 6x10 V-Nose Conversion

Postby BC_Explorer » Tue May 22, 2012 12:25 pm

Trip Report

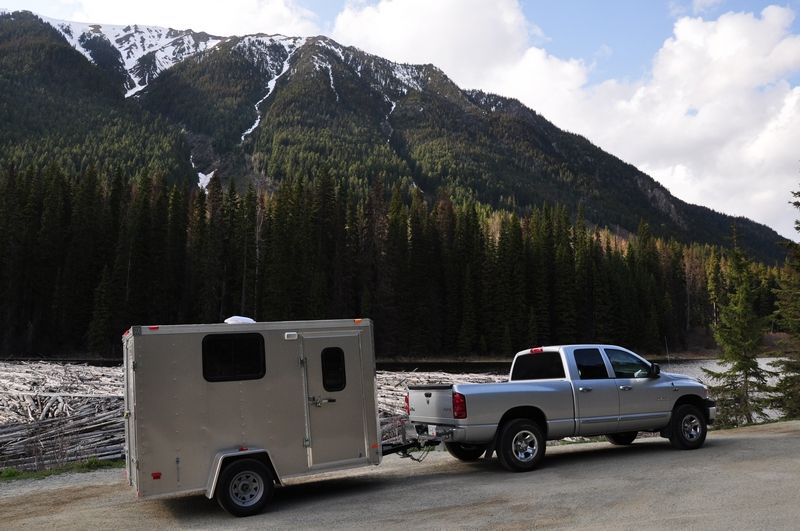
Back from a 6 day trip with the CT conversion. Overall the trip was a success and had no problems with either the truck or CT. In total, the mileage was just over 800 KM (480 miles) of which all was mountain driving over some of the recorded, steepest (but not hightest) roads in western Canada.

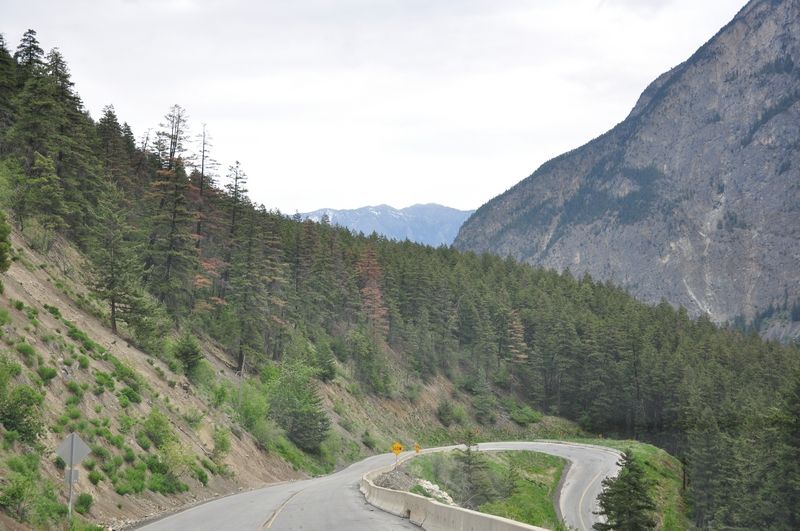
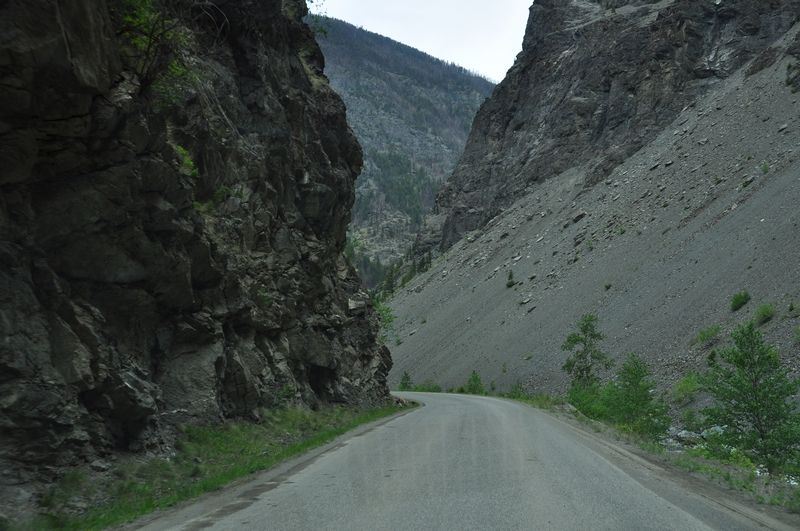
Headed out on Wednesday early afternoon and the first part of the trip was uneventful and the weather was good. After leaving the town of Pemberton and following the meandering road through the scenic Pemberton Valley, Cayoosh Pass looms ahead.

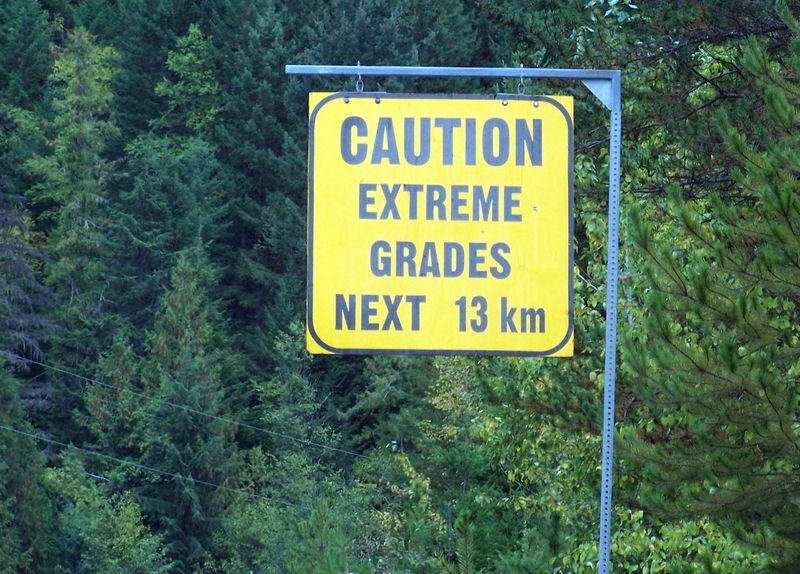
This very scenic pass is considered the steepest (not longest or highest) paved highway in British Columbia Canada. From the Pemberton Valley at 670 feet, the narrow and winding Duffey Lake road at it's worst, climbs steeply up grades that reach 15% to 3359 feet over a short 7.5 miles which is puntucated by several hairpin corners. The top of the summit further ahead tops out at around 4400 feet. This is where having the Dodge Hemi 5.7L engine and 3.92 gears in the TV pays off. It pulled up this section of road with relative ease and the rpms never went over 3000.
Image


Here the weather was sunny with clouds but cool however as always, the scenery is great.
Image


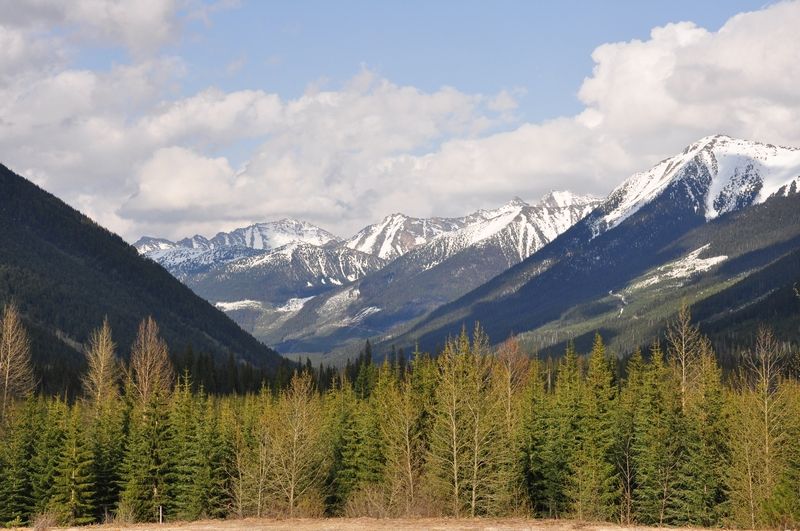
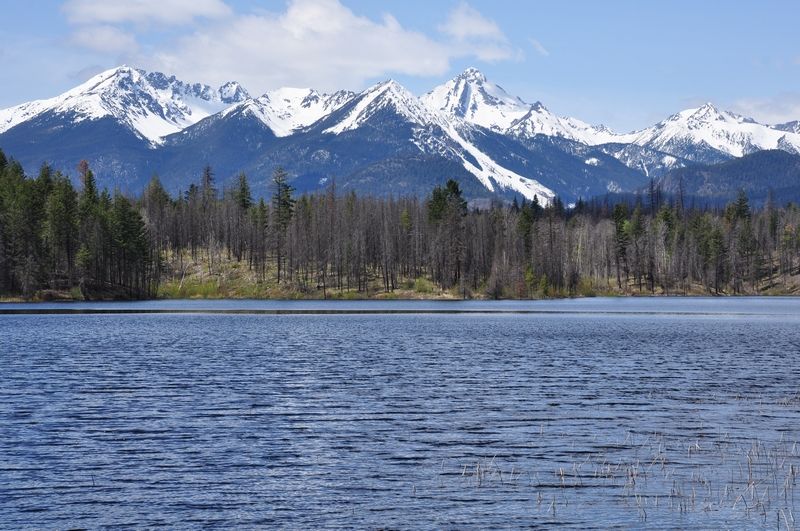
Mount Rohr at Duffey Lake.
Mount Rhor peak is at 7980 feet and has snow year round. The mountain is a very popular climbing destination due to it's gentle slopes.
Image


At Duffey Lake on the boat ramp.
Image


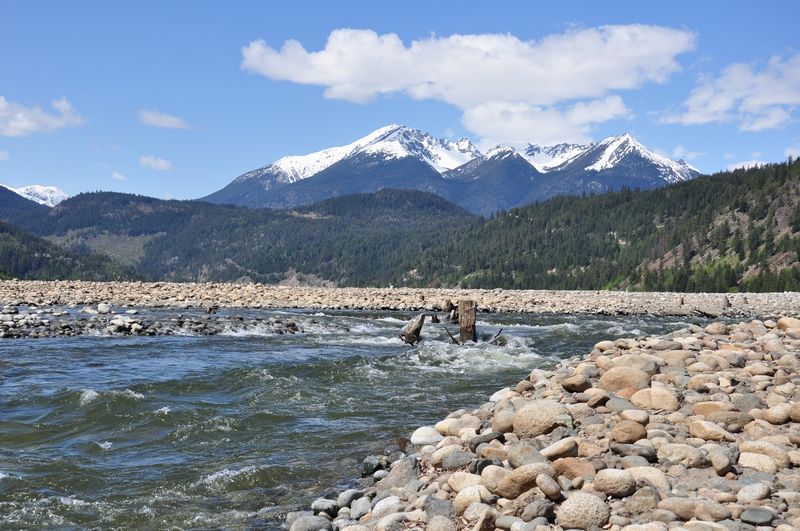
The Duffey Lake road traverses 60 miles over Cayhoosh Pass then descends into the town of Lillooet. Here the grades are reported not as quite as steep, however in one section, the descent is 1560 feet in 3.75 miles. On the return trip (as always), it seems that driving up this side of the pass is more work on the vehicle as once the the worst of the hairpins and grades are behind you, the road decends and ascends quite a bit more and is in rougher shape with uneven pavement, potholes etc.
Image

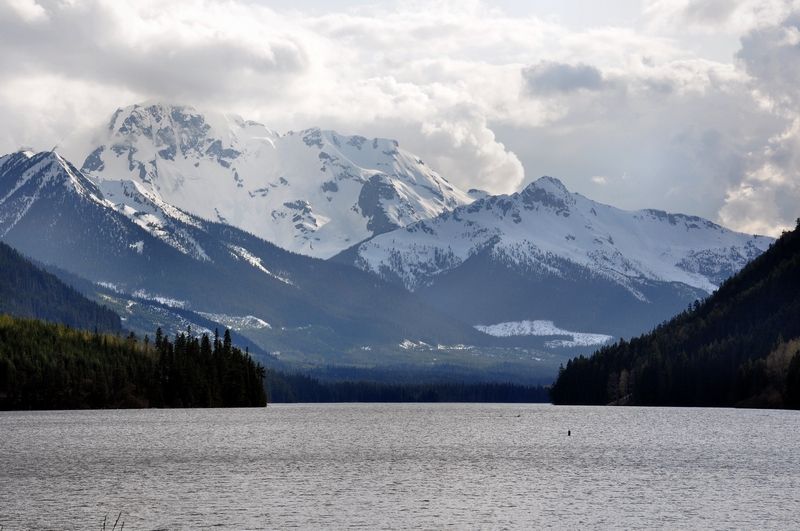
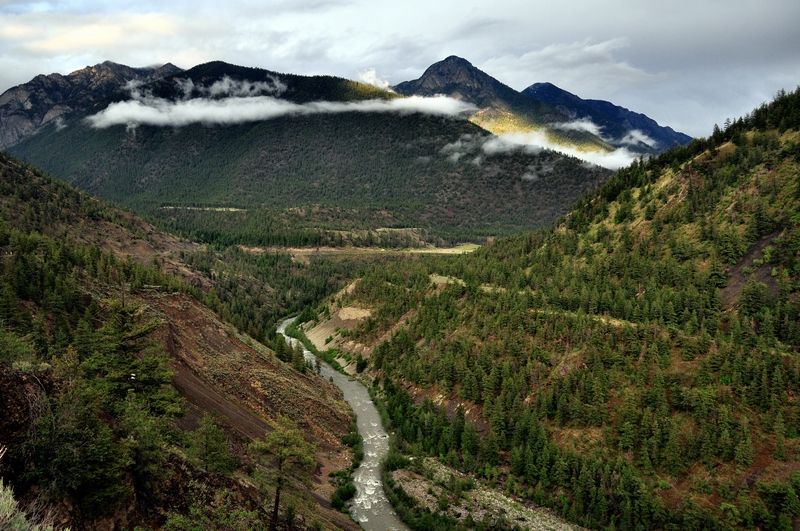
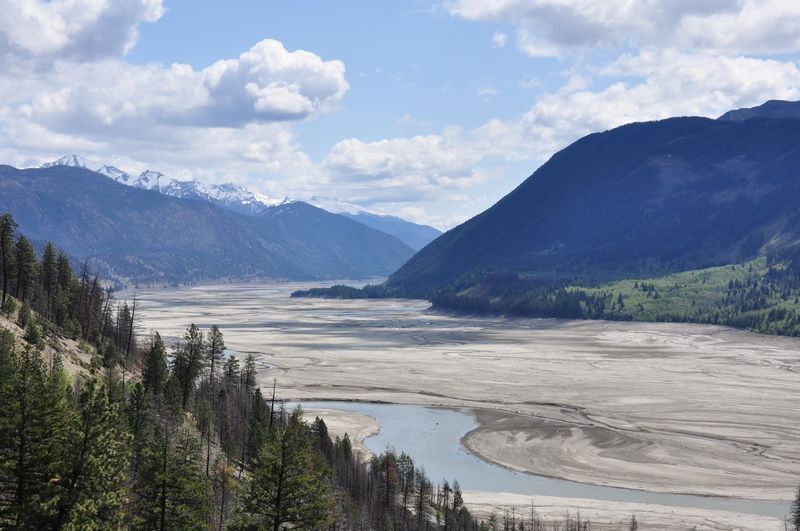
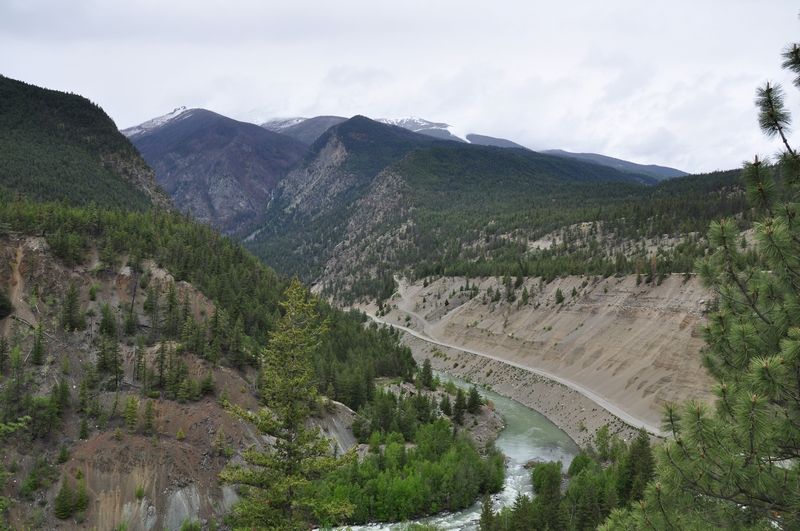
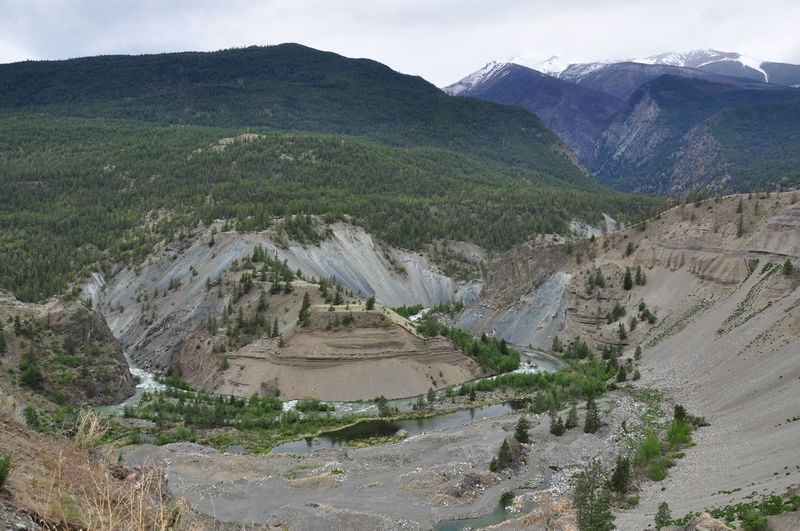
After leaving the town of Lilloeet and heading slightly northwest, the destination 60 miles away is a hydro electric reservoir/lake where the provincial hydro (power) company maintains a free campsite.


Along the way, the road slowly climbs up through the Bridge Valley and the views can be very good!
Image


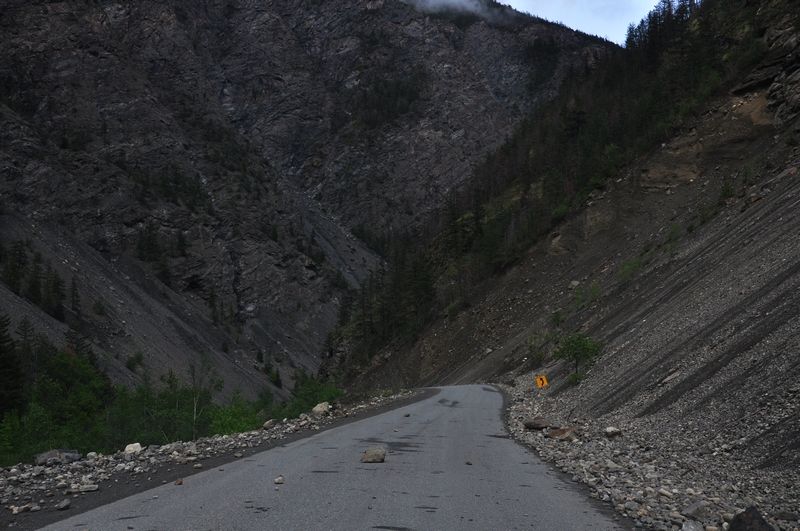
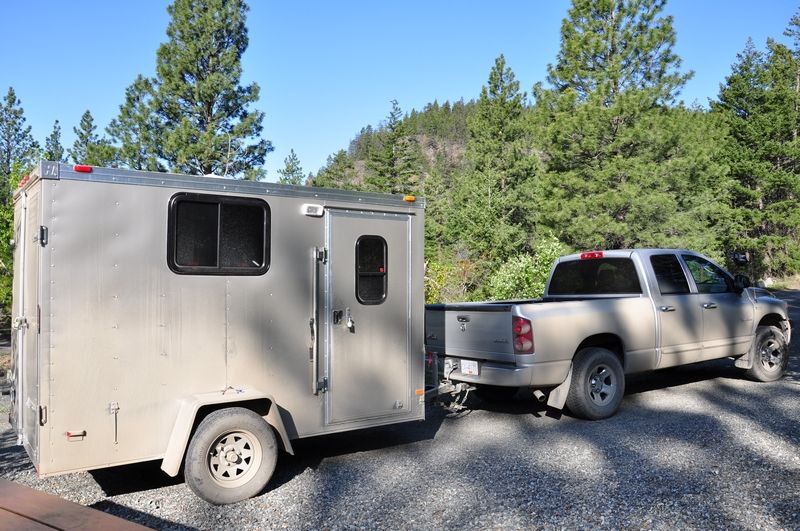
Here the weather was unsettled and there had been rain earlier which helped keep the dust on the intermittently at times, gravel road down to a minimum but only served to make a mess of the TV and CT (see pic below). This all weather road is quite narrow and very rough in spots and would only take a second or so of inattention to be in a bad spot...
Image


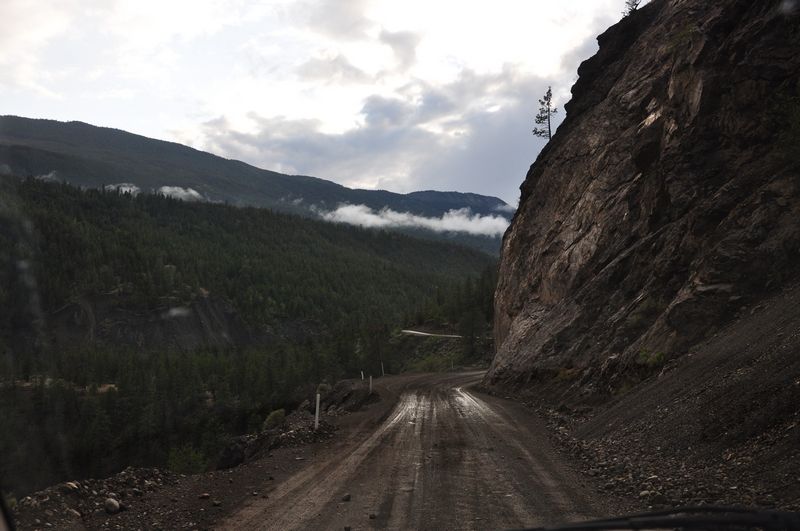
Also the road is carved out of sides of hills and mountains that are subject to continous rockfall. An unnoticed rock such as this can really play havoc with your oil or transmission pan.
Image


Arrived at the campsite just as darkness fell. Getting setup the first night was quick and after a couple of snacks and a cup of tea, it was sleep time. Overnight the temperature dropped to 41 degrees and with no heat in the trailer, it was a bit cool but an extra sleeping bag fixed that. By sunrise (5:10 am) the temperatures warmed up quickly and soon the inside temperature of the trailer was comfortable.
As you can see, the CT and TV took a good mud bath from the wet gravel roads on the way in. With it now daylight, I crawled under both the TV and Ct to check for any damage or concerns but both were fine.
Image
Image


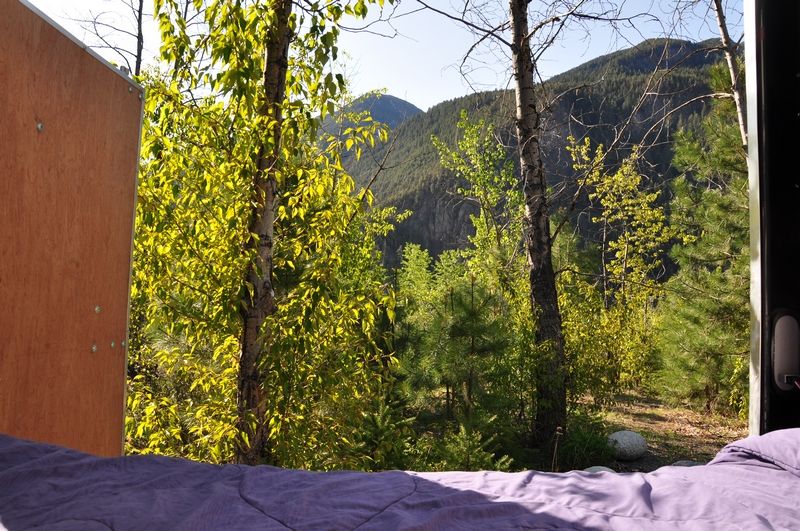
Backdoor view. No there is nothing wrong with the door on the left, it is just the curvature of the camera lens.
Image


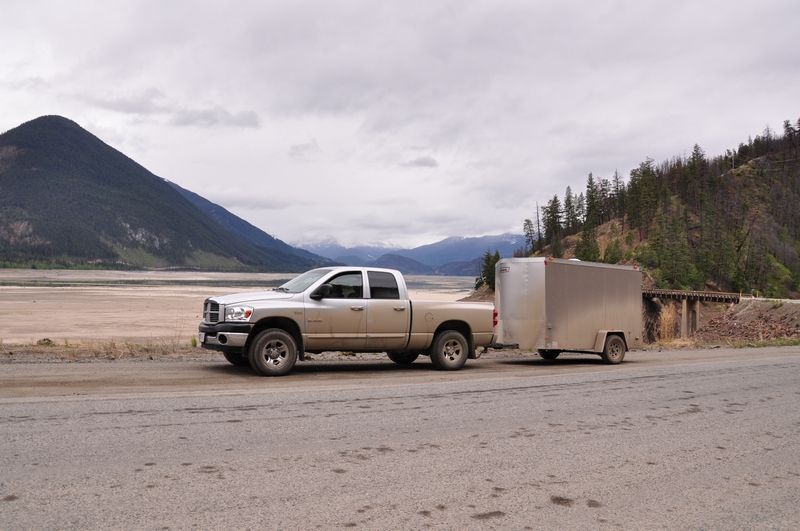
Although this particlar campspot gets continuous sun, it was also too exposed to the daily afternoon wind gusts which can reach 30 miles per hour or more. The next day, another more sheltered campspot was choosen...
Image


Some photos of the local area.
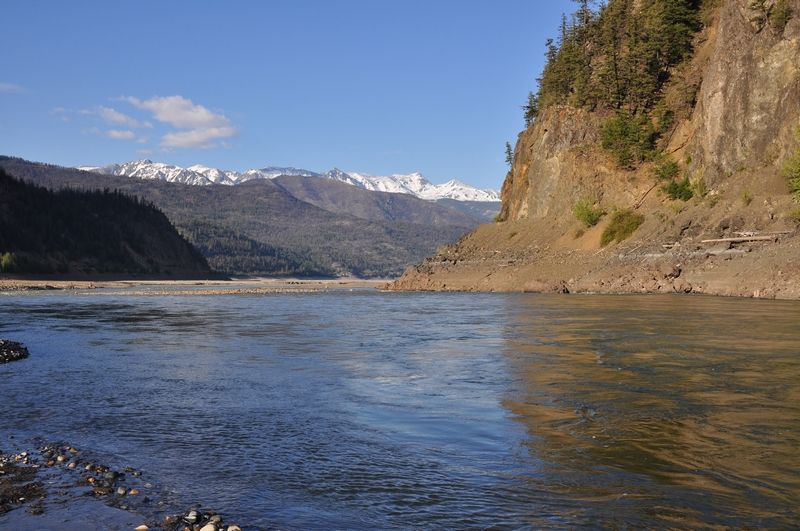
As mentioned, this is a hydro electric reservoir/lake which is about 50 miles in total length. This time of year, the water is drawn down but by mid July, the water level will be much higher at which time, fishing, boating and canoeing can be done. In the meantime, there is a lot other activity in the area such as mountain biking, hiking etc that can still be done.
Image


Small pond with a gorgeous view and has a great little camp spot right where this photo was taken. Also across the water and to the left is a small area which has room for about 6 camping spots. I don't usually camp here though as those camping spots are fairly tight to each other and can be noisy...
Image


Creek running into the reservoir. The campsite is to the immediate right of here.
Image


Just before sunset looking roughly NE.
Image


After spending 5 days here, it was time to head home. Over the course of these days, I found that the CT served it's purpose very well. With a few minor changes such as the addition of one more smaller cabinet and re-aranging some of the camp gear for easier accessibility, there is not much more I would want to add to the CT. Of course there are a few other projects that still need to completed such as the bed extension, wiring/battery and ceiling panels, but other then these, overall very pleased with the CT conversion so far. I also had a few tours by some of the other campers here and they all liked what they seen. In fact after I told one woman how much the CT and actual conversion cost, she mentioned to here husband "See I told you we did not need to spend $19,000.00 on our trailer just to sleep in it..." That made my day!


A few more photos taken on the return trip
Image


As mentioned, the road is carved out of the side of hills and mountains. The possibility of a rockslide is very high and having extra food and water on hand is mandatory as this road can and has been closed for days. The only alternative route out is back down the other end of the lake and then over a 6500 mountain pass on a forest service road that is still closed due to winter conditions.
Image


Slowly descending down the valley
Image


Looking back into the valley.
Image


Note sure what the name of this canyon is but you can actually walk down there via a trail.
Image


Descending from Cayoosh pass at 4400' back down to 670' feet was uneventful. With this descent and others encountered along the way, electric brakes on the trailer really help a lot and even with a lighter CT such as mine, I cannot see why people don't spend the extra $200.00 to have the factory install electric brakes.


Even though it is May and only just over 4000' elevation, there is still snow up here but this day it was sporadic rain here which helped clean up the CT and TV.
Image


Once back onto the highway, the drive home, albiet pouring rain at times was fine. I did notice at highway speeds (50-60 mph) that there was a slight ossilation/lightness on the steering wheel and I think the weight balance on the trailer was off and the front end was a bit light as compared to the trip up. This is probably because the CT was carrying much less drinking water on the return so this is something I need to keep in mind and redistribute some weight as needed.

Next big trip is 5 weeks so in the meantime, work on the CT and progress updates will continue until then.
BC_Explorer
Teardrop Master
 
Posts: 162
Images: 19
Joined: Tue Aug 16, 2011 10:11 pm
Top

Re: West Coast 6x10 V-Nose Conversion

Postby David_L6 » Tue May 22, 2012 8:55 pm

Great scenery! :thumbsup:
User avatar
David_L6
Donating Member
 
Posts: 150
Images: 16
Joined: Wed Jun 01, 2011 10:09 pm
Location: Northwest Louisiana
Top

Re: West Coast 6x10 V-Nose Conversion

Postby Trainman45 » Tue May 22, 2012 10:05 pm

Hi BC,
Looks like you had a great first trip. Love the pics, beautiful up there. Nice to get some dirt on the truck and trailer, your camping now .... lol.
Ride the Rails,
Trainman
User avatar
Trainman45
Teardrop Advisor
 
Posts: 69
Images: 57
Joined: Mon Oct 24, 2011 2:50 pm
Location: Southwest Traveler USA
Top

PreviousNext

Return to Cargo Trailer Conversions

Who is online

Users browsing this forum: No registered users and 1 guest

cron