The Poet Creek Express - Foamie Hybrid

Canvas covered foamies (Thrifty Alternatives...)

Moderator: eaglesdare

Re: The Poet Creek Express - Foamie Hybrid

Postby Oldragbaggers » Tue Jul 10, 2012 7:15 pm

KC, I loved that post, and I love your philosphy about the build, your integrity and your honesty. And you are right, you have to pick your battles. I too started out wanting something perfect, and believing that if I just tried hard enough I could achieve it. And I started out doing things over (and over, and over) to try and make my flawless dream a reality. But I have since come to embrace the imperfections, knowing that if I ever want to actually have a camper and use it, and hopefully before going bankrupt. I am going to recognize when enough is enough and live with the best I can do, be content with it and proud of it because I gave it my best effort. I am building a camper, pretty much by myself. That's not something you hear from everyone everyday.

You are doing a great job, and I would like to thank you for taking the time to document your build so thoroughly so that we can all learn from it, your successes and your errors.

I will start the applause.....and absolutely NO sarcasm intended.

:applause: :applause: :applause: :applause: :applause:
Life is sooooo good.........
Sail...camp....bike...repeat
Becky

Build Journal http://www.tnttt.com/viewtopic.php?f=50&t=45917
Visit our blog at http://www.oldragbaggers.com
Image Image
User avatar
Oldragbaggers
Gold Donating Member
 
Posts: 1842
Images: 331
Joined: Mon Aug 01, 2011 9:22 pm
Location: Essex, MD

Re: The Poet Creek Express - Foamie Hybrid

Postby KCStudly » Tue Jul 10, 2012 7:18 pm

Well, Tom, Thank you. I am truly humbled.

Truly. :worship:
KC
My Build: The Poet Creek Express Hybrid Foamie

Poet Creek Or Bust
Engineering the TLAR way - "That Looks About Right"
TnTTT ORIGINAL 200A LANTERN CLUB = "The 200A Gang"
Green Lantern Corpsmen
User avatar
KCStudly
Donating Member
 
Posts: 9640
Images: 8169
Joined: Mon Feb 06, 2012 10:18 pm
Location: Southeastern CT, USA

Re: The Poet Creek Express - Foamie Hybrid

Postby S. Heisley » Tue Jul 10, 2012 7:29 pm

Subject: The Poet Creek Express - Foamie Hybrid

[quote="Oldragbaggers"]KC, I loved that post, and I love your philosphy about the build, your integrity and your honesty. And you are right, you have to pick your battles. I too started out wanting something perfect, and believing that if I just tried hard enough I could achieve it. And I started out doing things over (and over, and over) to try and make my flawless dream a reality. But I have since come to embrace the imperfections, knowing that if I ever want to actually have a camper and use it, and hopefully before going bankrupt. I am going to recognize when enough is enough and live with the best I can do, be content with it and proud of it because I gave it my best effort. I am building a camper, pretty much by myself. That's not something you hear from everyone everyday.

You are doing a great job, and I would like to thank you for taking the time to document your build so thoroughly so that we can all learn from it, your successes and your errors.

I will start the applause.....and absolutely NO sarcasm intended.

Very well said, Becky. :thumbsup:

I'll add my applause. :applause: :applause: :applause: :applause: :applause:
User avatar
S. Heisley
Super Lifetime Member
 
Posts: 8866
Images: 495
Joined: Mon Sep 17, 2007 10:02 am
Location: No. California
Top

Re: The Poet Creek Express - Foamie Hybrid

Postby KCStudly » Tue Jul 10, 2012 8:45 pm

Wow, Becky, that's a lot better said than my comments. Again I am humbled. Thank you. Thank you very much.

Sharon, Thank you, too. After all you have experienced in building your masterpiece single handedly, the weight of your words holds significant value. No one will argue with that! Thank you again.

Oldragbaggers wrote:I am building a camper, pretty much by myself. That's not something you hear from everyone everyday.


How many times have you said, "I'm building a camper", to your friends, the people you work with, the proverbial man on the street, and been met with, "oh yeah, that's cool", and then nothing. No understanding of the complexity, no appreciation of the effort involved, and seemingly no further interest. Hell, Karl and my own wife aren't even following my build thread. Karl I get, he has first hand access, but the wife?

Don't mean to rant. My point is that you people get it, and I appreciate you so much for that support, understanding, and camaraderie. :thumbsup:

In the meantime, on a lighter note (?) I have been updated by my mom (who faithfully follows this thread) and have learned that, indeed, my sister will not be up for the trip to Poet Creek this year (the season is short there due to snowfall closing access early and a late thaw, so the opportunity is narrow).

I have mixed emotions, for my sister's situation vs. the reprieve in scheduling. Now I have to knuckle down and build (thankfully without the impending pressure of imminent deadline).

I hope that this gives me a new outlook on the build and allows me to spend just a bit more time working toward perfection! :lol:

Now, does anyone have any ideas on how to spend a week's vacation in New England on short notice, without reservations?

(The second week off will be spent on the build! :twisted: 8) )
KC
My Build: The Poet Creek Express Hybrid Foamie

Poet Creek Or Bust
Engineering the TLAR way - "That Looks About Right"
TnTTT ORIGINAL 200A LANTERN CLUB = "The 200A Gang"
Green Lantern Corpsmen
User avatar
KCStudly
Donating Member
 
Posts: 9640
Images: 8169
Joined: Mon Feb 06, 2012 10:18 pm
Location: Southeastern CT, USA
Top

Re: The Poet Creek Express - Foamie Hybrid

Postby RandyG » Wed Jul 11, 2012 6:22 am

Sorry KC I meant it as respect with humor but then after I thought about it last night, I thought on how it could be seen as sarcasm and felt bad. I always wanted to start a slow clap for someone that sticks up for themself, when I read your post, I thought it was good timing.
Randy
Aircraft fabricator, novice carpenter, electrical apprentice, audio engineer dropout.
Build thread - http://www.tnttt.com/viewtopic.php?f=50&t=54126
User avatar
RandyG
500 Club
 
Posts: 695
Images: 115
Joined: Thu May 10, 2012 6:52 pm
Top

Re: The Poet Creek Express - Foamie Hybrid

Postby GPW » Wed Jul 11, 2012 6:38 am

OK, how about this ? We will reserve the standing ovation till project completion ... :D
Attachments
clapping-gif.gif
clapping-gif.gif (100.34 KiB) Viewed 2226 times
There’s no place like Foam !
User avatar
GPW
Gold Donating Member
 
Posts: 14920
Images: 546
Joined: Thu Feb 09, 2006 7:58 pm
Location: New Orleans
Top

Re: The Poet Creek Express - Foamie Hybrid

Postby KCStudly » Wed Jul 11, 2012 2:52 pm

You guys are too much. :lol: :lol: :lol: :lol:

RandyG, no need to apologize. It's all good. Just needed to check and see that my head wasn't getting too big for my body (swelled head syndrom :lol: ).

Glad you are enjoying the build.

Thanks, GPW. It will be interesting to see how it turns out. Even though I now have another season to complete the build, I want to stay on it, stay focused, and try to keep the "Teradrop Time" at bay. I could easily go back to being a couch potato! :thumbdown:

From the Death Star attack scene in Star Wars Episode IV (the first one): X-Wing Pilot - "Almost there". Flight Controller - "Stay on target". Pilot - "Almost there". Controller - "Stay on Target". :FNP
KC
My Build: The Poet Creek Express Hybrid Foamie

Poet Creek Or Bust
Engineering the TLAR way - "That Looks About Right"
TnTTT ORIGINAL 200A LANTERN CLUB = "The 200A Gang"
Green Lantern Corpsmen
User avatar
KCStudly
Donating Member
 
Posts: 9640
Images: 8169
Joined: Mon Feb 06, 2012 10:18 pm
Location: Southeastern CT, USA
Top

Re: The Poet Creek Express - Foamie Hybrid

Postby KCStudly » Wed Jul 11, 2012 11:00 pm

Here are some pics of the layout I did for the door corner blocks.
Image

Karl thought that I should be able to just cut these out using the jigsaw, but when I tried that I could see that it was not going to be accurate enough.
Image

That's how I arrived at the upstairs-downstairs method described earlier to get these.
Image

The radii are just rough cut for now, but I did hit some of the rougher edges with the Surform rasp to knock down some of the steps that the jig saw left.

That was Monday. Tonight I started laying out and dry fitting one of the door assemblies. Once I had that situated, and had worked out where all of the biscuits needed to be I started cutting biscuit slots.
Image

The corner blocks do have a small flat area at the tangent point, but I was not crazy/stupid/daring enough to try to hold such a small unstable piece while plunging the biscuit cutter blade toward my little pink digits. So I took Karl's small machinist vise and used it to clamp each side of each corner block square to the table.
Image

That allowed me to hold the part securely while operating the joiner.
Image
(Posed photo.)

The door hardware (latch/lock/bolt mechanism) blocking is made up out of two pieces of 2x4 ripped to 3 inches wide x 6 inches long (actually a little less than 3 wide because I decided to rip off the remaining factory edge radius, after already ripping to 3 wide. Karl had a scrap piece of 2x10 or 12 that I could have gotten these out of in one piece, but it was fir and had some splits and checks in it, so I decided to use the fresher pine stud material on hand. The latch blocks will be joined using several No. 20 biscuits, while the rest of the door frame will get No. 0 biscuits. The ones in the vertical edges of the corner blocks needed to be cut down about 3/16 inch on each end so that they did not extend out of the slots and potentially interfere with the frame laying flat on the table during glue up.

Here is the completed dry fit up with all biscuits in place (after missing some slots in the wall sill, no more skipping the complete dry fit step with all biscuits installed).
Image

The outside radius blocks in the corners of the window opening are just the off cuts from the door surround corner blocks and will eventually be template cut to inside radii using the same inside corner template as before. The header at the top of the window opening intersects the tops of the jamb and latch stiles, so I could not use a biscuit at this location without cutting the corners off of the stiles with the joiner, so these joints will be glued and screwed with no biscuit.

The No. 0 biscuits that I have seem to fit the slots loosely compared to the larger biscuits, so the corner blocks are not as stable a fit as I would like them to be. This will make it harder to get the alignment right during the glue up. If I had it to do over I would have designed the corner blocks differently, but I was trying to save a little weight... not going back.

My original thought was to use 1/4 inch shims on two adjacent sides of the door frame and clamp those sides into the wall frame opening, then use wedged shape shims between the other two sides and the wall frame opening to drive the parts together during glue up. However, the corners being unstable and rough cut means that that won't work like I thought it might. At the moment I am thinking that I could tape freezer paper to the table, trace the door surround opening on to the paper, then build the door frame over the paper aligning to the tracing (ugh!). If I pre-glue some of the window frame parts first that would help stabilize the rest of the corners and I might be able to put a strap around the whole door to pull the corners in tight at glue up. Lot's of hard ways to do it with little assurance of success.

Need to noodle this one over before going over the falls in a barrel, so to speak.
KC
My Build: The Poet Creek Express Hybrid Foamie

Poet Creek Or Bust
Engineering the TLAR way - "That Looks About Right"
TnTTT ORIGINAL 200A LANTERN CLUB = "The 200A Gang"
Green Lantern Corpsmen
User avatar
KCStudly
Donating Member
 
Posts: 9640
Images: 8169
Joined: Mon Feb 06, 2012 10:18 pm
Location: Southeastern CT, USA
Top

Re: The Poet Creek Express - Foamie Hybrid

Postby KCStudly » Sun Jul 15, 2012 10:24 pm

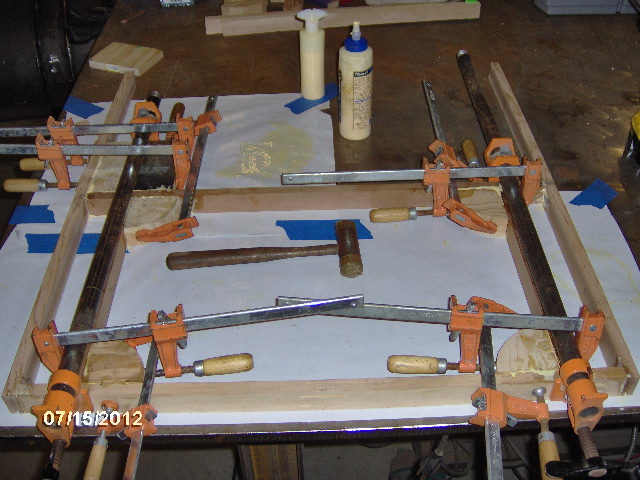
After discussing the many options for gluing up the door frames with Karl, I decided the most practical way was to just glue the door frame up by itself on the bench, making it as square as I could, then fit them to the door surround as best as I can either by planing or sanding the door.

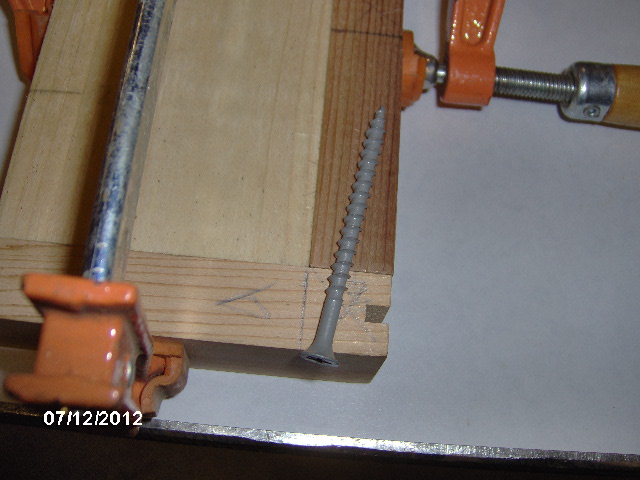
One of the things I noticed during the dry fit up and biscuit cutting of the door parts was that the window header, being flush with the top of the jamb and striker stiles, could not be biscuit joined to the stiles. If I were to cut slots for both the window header and top corner blocks, the slots would intersect and cut the corner off of the stiles. So the window header would need to be screwed and glued. So as to miss the biscuit with the screw and to have the screw go through the end grain at an angle I set up the joint like this.
Image

The block in the corner is just being used to square the joint temporarily.

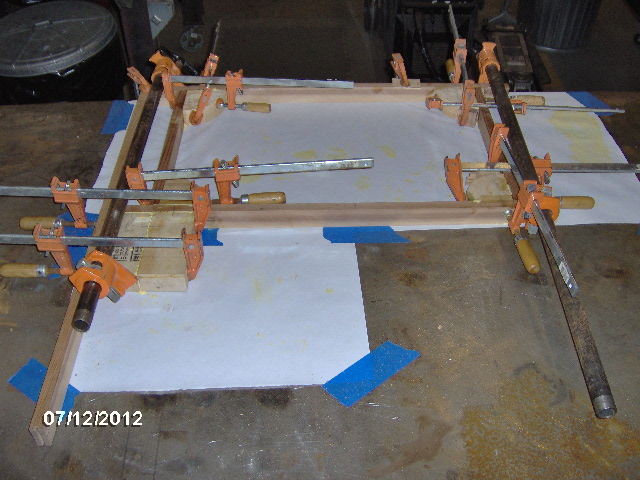
Here's the window frame with the blocking for the latch hardware and the striker stile glued and clamped.
Image

At some point during the glue up, when I put one of the pipe clamps on, it shifted the joint at the window sill by about 1/8 inch (there's that number again). I measured everything and I couldn't find anything else that was more than 1/16 inch out, including the diagonals, so I sunk a screw in to lock it down. Later I was able to figure out that I had not put the pipe clamp in a direct line with the window stiles (side verticals) and that had actually bowed the window sill about 1/16 inch in the middle, but about the 1/8 inch at the latch blocking. The window will fit fine, and there will be no outward evidence, so it will be fine.
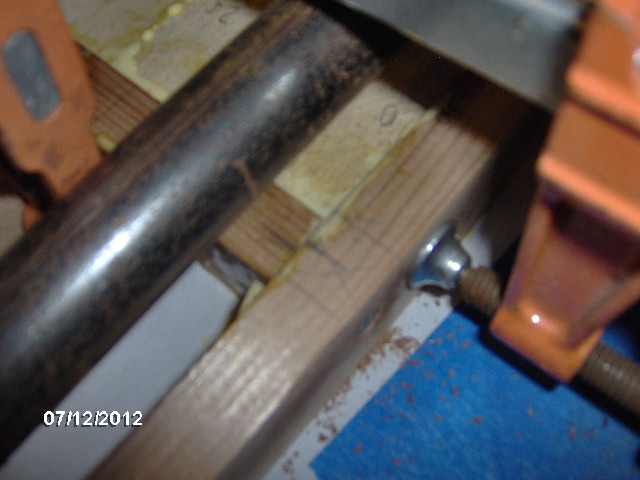
Image

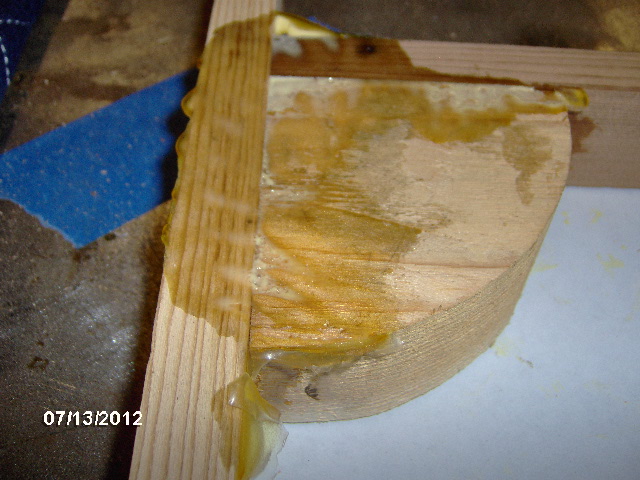
Here is the partial door (window frame, latch block and striker stile) prior to scraping excess glue (top of window is to the right).
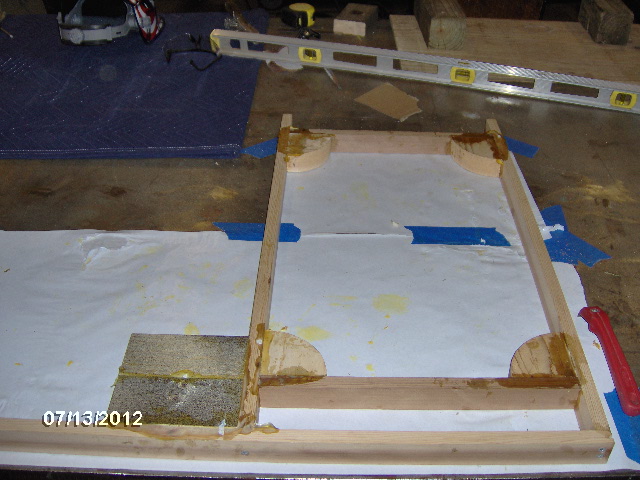
Image
Image

Here I have glued the top header and upper corner blocks onto the window section.
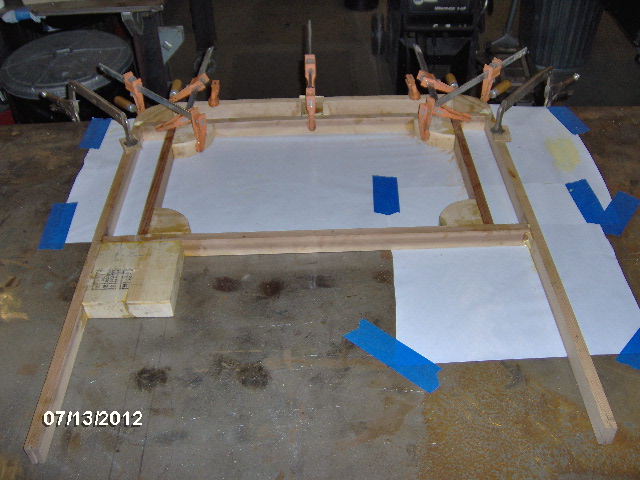
Image

In this close up you can see that I have added a middle block to help stabilize the header. The corner blocks were not stable enough by themselves in dry fit to hold square. (Top of door is to the right.)
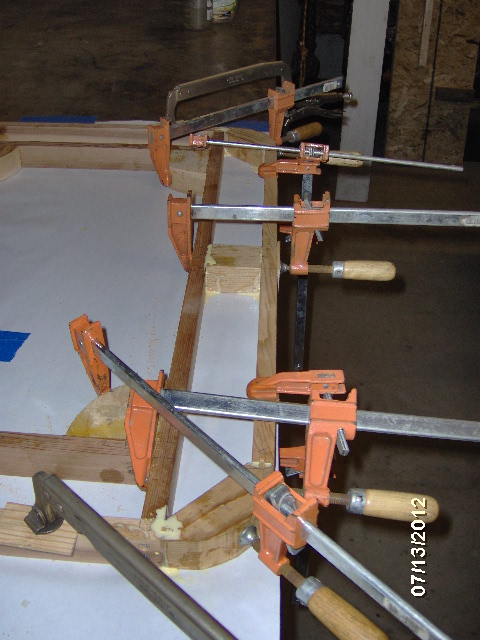
Image

That was Friday evening. Saturday was spent taking Rocky (the new kitten) for a checkup and then home to start acclimating him to our other two cats. With Rocky set up in his "condo" (our back bathroom) we had a nice enjoyable afternoon at my sister in law's B-Day celebration.

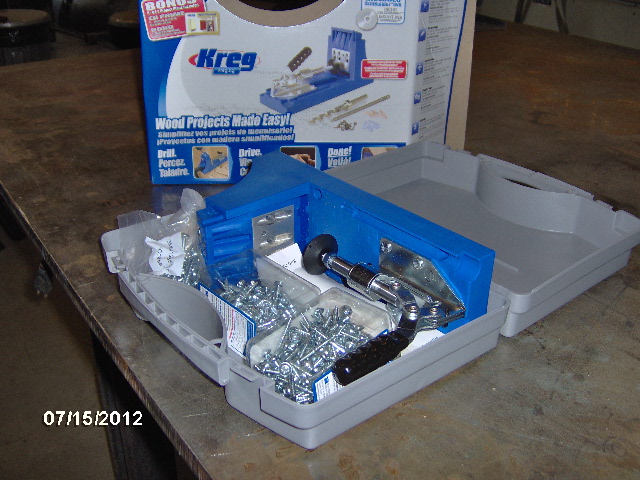
Today (Sunday) I stopped at Ho-De-Po for some more #20 biscuits, pneumatic staples, and a Kregg pocket hole screw jig kit. Here it is assembled and with the extra screws I bought.
Image

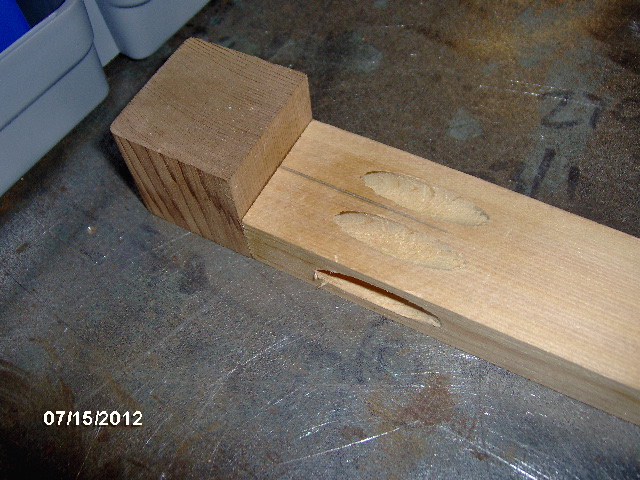
Tested it on some scraps.
Image

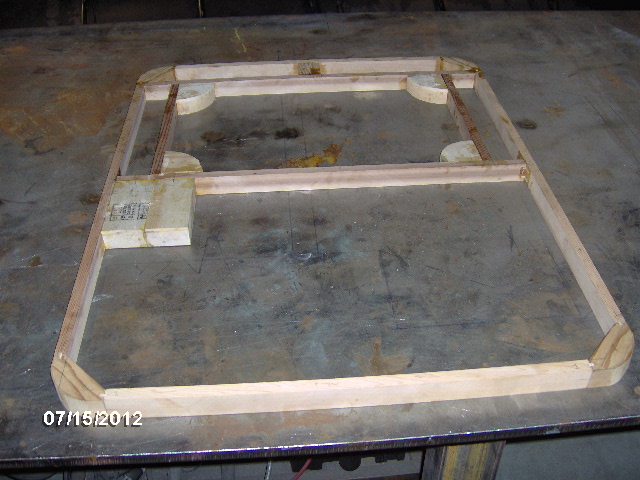
Back to building door frames. Here I have scraped down the excess glue and dry fit the partial door frame with the bottom plate and corner blocks.
Image

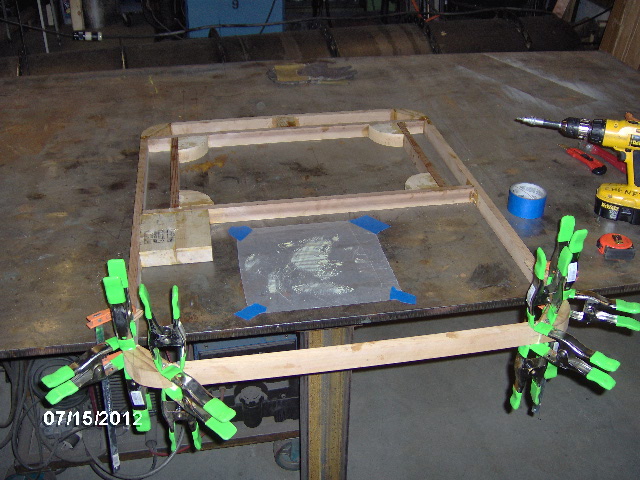
I decided that the most stable way to glue up this bottom part, without resorting to extra blocking, would be to use my spring clamp and dry wall screw clamping technique.
Image

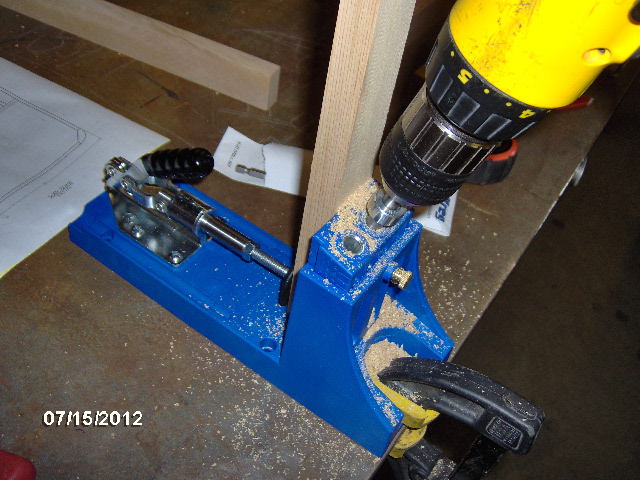
On the second door frame I decided to use the Kregg to lock the window stiles to the window header and sill, and to tie the window header into the side stiles.
Image

Here is the second door, shown upside down, with all but the corner blocks, and sill and header plates installed.
Image
Came out great after the learning curve from the first door.

Tomorrow I should be able to get at least the header on the second door, if not the sill plate, too.
KC
My Build: The Poet Creek Express Hybrid Foamie

Poet Creek Or Bust
Engineering the TLAR way - "That Looks About Right"
TnTTT ORIGINAL 200A LANTERN CLUB = "The 200A Gang"
Green Lantern Corpsmen
User avatar
KCStudly
Donating Member
 
Posts: 9640
Images: 8169
Joined: Mon Feb 06, 2012 10:18 pm
Location: Southeastern CT, USA
Top

Re: The Poet Creek Express - Foamie Hybrid

Postby RandyG » Tue Jul 17, 2012 6:48 am

Not saying anything bad about your framing before but I was going to suggest that you get a Kreg, then I scrolled down and saw you had bought one. I chuckled a lil'
Randy
Aircraft fabricator, novice carpenter, electrical apprentice, audio engineer dropout.
Build thread - http://www.tnttt.com/viewtopic.php?f=50&t=54126
User avatar
RandyG
500 Club
 
Posts: 695
Images: 115
Joined: Thu May 10, 2012 6:52 pm
Top

Re: The Poet Creek Express - Foamie Hybrid

Postby GPW » Tue Jul 17, 2012 7:02 am

KC, you making your own windows ??
There’s no place like Foam !
User avatar
GPW
Gold Donating Member
 
Posts: 14920
Images: 546
Joined: Thu Feb 09, 2006 7:58 pm
Location: New Orleans
Top

Re: The Poet Creek Express - Foamie Hybrid

Postby KCStudly » Tue Jul 17, 2012 12:52 pm

RandyG, I like the biscuit joints because I don't have to worry about placement of any screws that come along later. They will only find wood, not another screw. A couple of good examples of this would be where the walls get attached to the floor, or where the windows get screwed into the door frames.

GPW, On the windows, I have new Heir flush mount units. They have a small fixed upper glass with a tilt out/up lower section that is screened.
Image

Thanks for watching. :thumbsup:
Last edited by KCStudly on Tue Jul 17, 2012 2:19 pm, edited 1 time in total.
KC
My Build: The Poet Creek Express Hybrid Foamie

Poet Creek Or Bust
Engineering the TLAR way - "That Looks About Right"
TnTTT ORIGINAL 200A LANTERN CLUB = "The 200A Gang"
Green Lantern Corpsmen
User avatar
KCStudly
Donating Member
 
Posts: 9640
Images: 8169
Joined: Mon Feb 06, 2012 10:18 pm
Location: Southeastern CT, USA
Top

Re: The Poet Creek Express - Foamie Hybrid

Postby linuxmanxxx » Tue Jul 17, 2012 1:39 pm

With the biscuits you trade a lot of time vs the time you might spend if a screw hits another one. Time lost clamping and waiting on glue to dry vs drive a screw and move on.
User avatar
linuxmanxxx
500 Club
 
Posts: 802
Images: 10
Joined: Fri Sep 10, 2010 1:50 am
Location: Abilene TX
Top

Re: The Poet Creek Express - Foamie Hybrid

Postby KCStudly » Tue Jul 17, 2012 2:32 pm

linuxmanxxx wrote:With the biscuits you trade a lot of time vs the time you might spend if a screw hits another one. Time lost clamping and waiting on glue to dry vs drive a screw and move on.


I see your point. However, I think I have only run into one case where I had something all glued up taking up the bench and thought I still had time left in the day to work on something else. I think that because I am working only 2-3 hrs per week night, that things have pretty much fallen into line with my available work schedule.

I thought about using more of the screws on the second door, but there is only so much space between the window frame and the door jambs that I was concerned about being able to drive the screws (though I suppose Karl MUST have a 90 deg drill and/or a square head hand driver). That and I did not want to have to fill the pocket holes on the outside rim (... even though I will have to do a little putty filling here and there).

I may see the light and become a full Kregg convert in time, but for now; I like my biscuit joiner. :FNP
KC
My Build: The Poet Creek Express Hybrid Foamie

Poet Creek Or Bust
Engineering the TLAR way - "That Looks About Right"
TnTTT ORIGINAL 200A LANTERN CLUB = "The 200A Gang"
Green Lantern Corpsmen
User avatar
KCStudly
Donating Member
 
Posts: 9640
Images: 8169
Joined: Mon Feb 06, 2012 10:18 pm
Location: Southeastern CT, USA
Top

Re: The Poet Creek Express - Foamie Hybrid

Postby linuxmanxxx » Tue Jul 17, 2012 3:02 pm

I only use screws joining walls floor and roof. All other things are glue and air nailed or stapled and on to the next thing which usually includes the previous nailed item. Its not a matter of bench space, but how much can be done in the 2 to 3 hrs you do have. Biscuits and nailed would make fast strong building. I lack a good router setup before I go biscuit hopping which I plan in the future.
User avatar
linuxmanxxx
500 Club
 
Posts: 802
Images: 10
Joined: Fri Sep 10, 2010 1:50 am
Location: Abilene TX
Top

PreviousNext

Return to Foamies

Who is online

Users browsing this forum: No registered users and 11 guests