Another foam standie...

Canvas covered foamies (Thrifty Alternatives...)

Moderator: eaglesdare

Re: Another foam standie...

Postby mezmo » Mon Oct 01, 2012 11:56 pm

It's taking shape !

Don't cut the table to make it smaller, just cut the corner diagonally and hinge that so that
it' fold up to allow entry/egress, or cut the table "in half" and hinge that to fold up and lay
back on the other half. That will give incidental table space for general use and allow easy
access/egress again. Then when needed for more table top space, fold out the 'stored'
half of the table top.

Just a possible solution...

Cheers,
Norm/mezmo
If you have a house - you have a hobby.
User avatar
mezmo
1000 Club
1000 Club
 
Posts: 1817
Images: 194
Joined: Fri Jan 01, 2010 4:11 am
Location: Columbia, SC

Re: Another foam standie...

Postby bonnie » Tue Oct 02, 2012 3:07 am

What KC said I'd leave it long too, unless it won't fit. Love the retro design in the table top. :)
Remember, the turtle won. :)
User avatar
bonnie
Donating Member
 
Posts: 1390
Images: 107
Joined: Sun Jul 24, 2011 4:14 pm
Location: Roxana, IL

Re: Another foam standie...

Postby Wobbly Wheels » Tue Oct 02, 2012 10:56 am

I guess the other thing is that, if that table came out of an 8' camper (a few pages back), there certainly should be room for it. I haven't built anything inside yet but I'm already thinking that I'm running out of space!
:lol:

I want to get the sidewall sections taped in this week, and maybe get going on the bed platform while the next two wall sections are curing. I'll lose this weekend for building because of a family reunion/Thanksgiving dinner (Canada). I have a big extended family and, oddly enough, we're all friends...

EDIT:
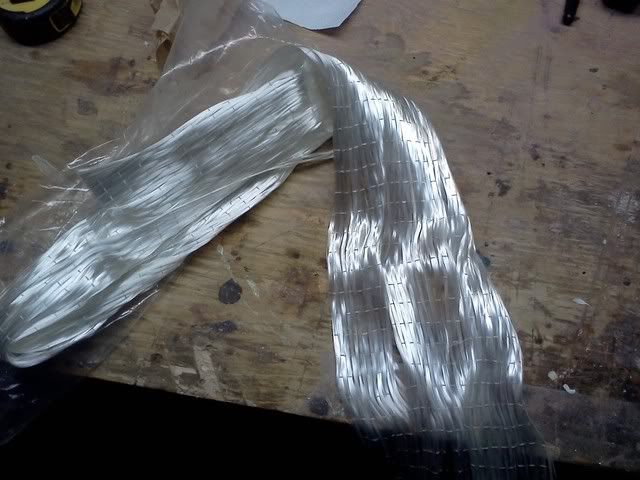
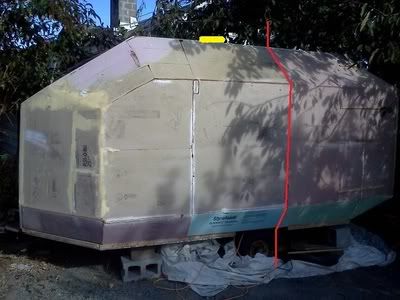
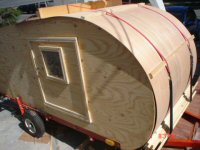
Sidewall section are glued to the floor framing so once the foam has done expanding I can trim it, sand it and glass it. For the moment, the sidewalls are getting glassed with only the first (8") layer of tape. Once all the wall sections are in, I'll run the a 19" width of cloth (half the roll width) down the entire side. That will keep the long fibers continuous rather than having a seam in both layers of tape every 38". It's not as critical with glass as it is with...say...canvas because the tensile strength of two overlapping epoxied glass fibers is actually stronger than a single fiber. What I'm avoiding is having ALL the seams line up at the section joints, especially since those section seams are symmetrical from one side to the other.
I will be putting some sort of paneling inside, so if the taped seams are a bit bulky it won't show the way it would through paint because the paneling will float over it. That said, a couple extra layers of 6oz cloth are of insignificant thickness.

I switched my pumps over to the new resin & hardener jugs and propped up the old ones to drain every last precious drop...
Tomorrow night, it's a couple strips of tape and cutting out one of the last two wall sections. The rest of the shell (basically the nose) will be done as a single piece...probably in place on the trailer. Before then I'll need more cloth: I'm buying it in 25yd lengths -that's the minimum for a price break. So far my usage has been right where I figured once I allow for the extra wide tape on the rear floor.
That's the thing about glassing: get ALL the prep work done ahead of time because it's always right after you mix the resin (starting the countdown) that you realize what you forgot to do.

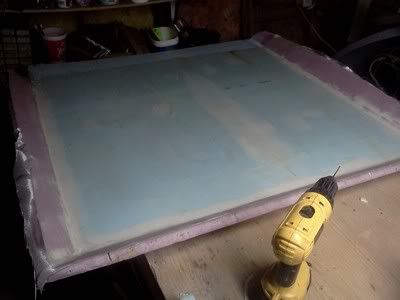
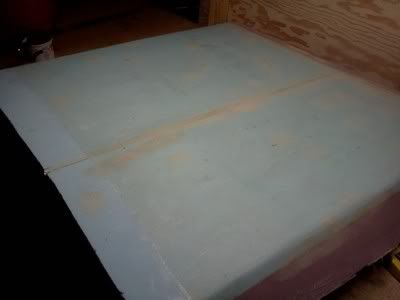
Some gratuitous (and marginally relevant) foam porn:

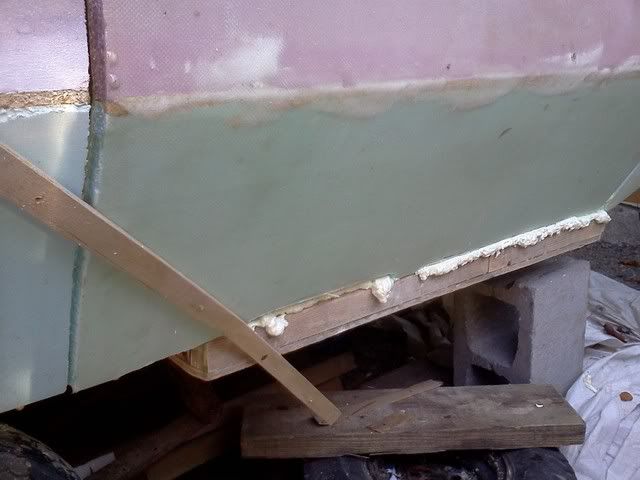
The strips are screwed in to gently clamp the styrofoam under the potential pressure of the canned foam (on the inside as well)
Image

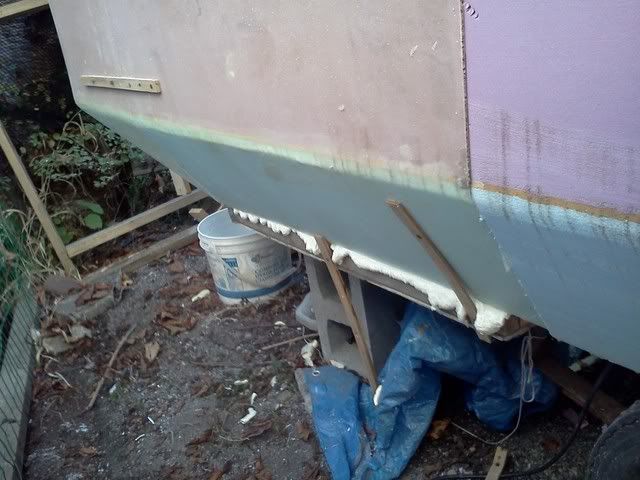
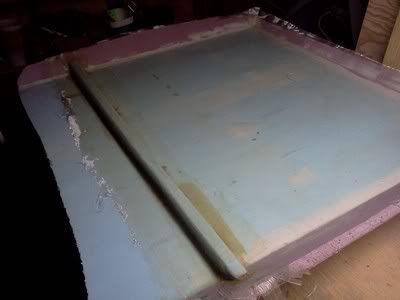
Here you can really see the standoff 'legs' I was talking about to hold most of the joint up off the framing to make room for the foam to expand and still maintain the same outside dimensions. I'll go back and sand out those areas so I can get foam in there too: that's one of those things you don't want to forget until after you've mixed the resin !
Image

Once again, I gotta say how impressed I am with canned foam's value as an adhesive. When you build any kind of a shell, you go from a bunch of flimsy parts and, as those parts get locked together, the shell gets stronger exponentially. I'm seeing that already just from the foam. I think it was Louella (?) who posted the link to the Halloween Lady's video of glue testing ?
After seeing that, I did a couple test pieces and I was sold. One place it excels is in panel bonding (which makes sense since it's essentially super-expanding PU glue) as long as you control the expansion. I used concrete pavers and it worked like a charm...though I was testing it against cheap luan ply that delams when you look at it...
Still, the foam-on-foam bond wound up breaking the foam before the bond: what more can you ask for ?
It's also a fraction of the cost of GG.
User avatar
Wobbly Wheels
Donating Member
 
Posts: 1080
Joined: Tue Mar 15, 2011 9:51 am
Top

Re: Another foam standie...

Postby GPW » Wed Oct 03, 2012 6:11 am

8) 8) 8) :thumbsup: Coming along now !!!
There’s no place like Foam !
User avatar
GPW
Gold Donating Member
 
Posts: 14920
Images: 546
Joined: Thu Feb 09, 2006 7:58 pm
Location: New Orleans
Top

Re: Another foam standie...

Postby atahoekid » Wed Oct 03, 2012 9:57 am

Just a question on the "can o' foam". How do you keep it from clogging the nozzle as it dries. I've noticed that unless I work quickly, the stuff dries in the nozzle and the rest of the can is useless.
Mel

"Believe in your abilities... Remember amateurs built the ark, professionals built the Titanic"

"Indecision may or may not be my problem" Jimmy Buffet

Image

The Road Foamie Build Thread: viewtopic.php?t=45698
User avatar
atahoekid
Platinum Donating Member
 
Posts: 1773
Images: 158
Joined: Sat Jul 24, 2010 2:49 am
Location: Incline Village, NV
Top

Re: Another foam standie...

Postby Wobbly Wheels » Wed Oct 03, 2012 8:43 pm

Two good ways I've found, Mel.

First is to let it harden, then cut the tip off when you're ready to go again. It doesn't harden all the way down the tube and it'll be good for a week or so before it eventually hardens around the valve.

Second is a little bit more work. I keep acetone in a squirt bottle (from contact lens solution) to cut down on waste and spillage. I rarely meed more than a little squirt of the stuff at a time. With the cans, I unscrew the nozzle and put a couple drops into the valve then a squirt to clear out the nozzle/trigger and tube. A bamboo skewer helps with that too....works like a tiny bottle brush.
Dump the solvent out of the valve, reattach the nozzle and squirt in an ounce or so from the tip. I keep the valve submerged in solvent so any residue can't harden. I've been able to keep an open can usable for months that way.
User avatar
Wobbly Wheels
Donating Member
 
Posts: 1080
Joined: Tue Mar 15, 2011 9:51 am
Top

Re: Another foam standie...

Postby atahoekid » Thu Oct 04, 2012 1:49 am

Good to know. For me it's been a case of one and done. I hadn't even try to save my last few cans after having the first few turn un-useable even after a couple hours.
Mel

"Believe in your abilities... Remember amateurs built the ark, professionals built the Titanic"

"Indecision may or may not be my problem" Jimmy Buffet

Image

The Road Foamie Build Thread: viewtopic.php?t=45698
User avatar
atahoekid
Platinum Donating Member
 
Posts: 1773
Images: 158
Joined: Sat Jul 24, 2010 2:49 am
Location: Incline Village, NV
Top

Re: Another foam standie...

Postby Wobbly Wheels » Thu Nov 15, 2012 9:27 pm

I've been working on this thing off and on for almost a year and a half...sure doesn't seem like it !

I lucked into a bunch of nice clear straight grained fir to use for trim and I have another table pedestal kit that I'll be using for the dinette seat next to the door. I'll build up a barrel chair to mount to it.

I've just put the inside glass on the aft roof section.
Image

This is the roof that's going to support the 4 - 15W solar panels. There will be three foam/glass stringers running legthwise on top of the roof to mount the panels to. The weight will be carried to the outer walls at the roof/back wall corner and the cabinet carcasses/door 'pod' framing on the inside will support the front edge of the stringer. Because it's a flat roof, I figured a crossmember in the middle was probably a good idea as well.

I made up a piece of foam as a core and sorted through my odds and ends of glass for a piece of unidirectional cloth I could use to give me a hat section that would span across the roof.
Image

The finished product
Image

Here's what the layup looks like:
Image

I'll flip it over and probably tomorrow glass the outside. Because the stringers are longer than this roof section, they won't go on until both roof sections are joined. Once this section is in, everything behind the red line is glassed. The yellow bit is about where the roof vent will be and the panels (and their stringers) will run up to there.
Image

I got everything ready and timed the layup to get the cross member glassed in while the resin was still 'green' (soft) but I was a little surprised by how fast the glass set up before I realized: I've been used to glassing outside !
Gotta remember to break each task into smaller pieces for the rest of the winter.


I have been thinking more an more about nixing the extra layer of glass on the outside of the shell. I have allowed generous taping over the seams (1 @ 6" wide x 6oz + 1 @ 12" x 6oz) both inside and out and, while the trailer will be plenty rigid without it, I'll run some bed liner compound along the rocker panels for puncture resistance. Field repairs will be a piece of cake so I'll keep some resin and some cloth in the spares kit.
Since you guys are getting so much out of paint and canvas, I'm not too worried about my trailer's 'hard candy shell'. I'm trying to avoid overbuilding as much as I can without sacrificing structural integrity. The rule of thumb is that the inner layup on a glass sandwich is about 70% of the outer skin's weight. I'm using 6oz in and out but I think 6oz is overkill for the inside, especially since the cabinet carcasses will be foam and glass as well. I would have no qualms about using a 4oz cloth but I'd rather buy and work with just one roll at a time.
User avatar
Wobbly Wheels
Donating Member
 
Posts: 1080
Joined: Tue Mar 15, 2011 9:51 am
Top

Re: Another foam standie...

Postby GPW » Fri Nov 16, 2012 6:10 am

After all this , it would appear that the Outer skin is the Important one , inner not so much ... ( I used bedsheets old inside .. no problems ) ;)
There’s no place like Foam !
User avatar
GPW
Gold Donating Member
 
Posts: 14920
Images: 546
Joined: Thu Feb 09, 2006 7:58 pm
Location: New Orleans
Top

Re: Another foam standie...

Postby bonnie » Fri Nov 16, 2012 7:20 am

I have learned so much watching your build. I love the shape.
Remember, the turtle won. :)
User avatar
bonnie
Donating Member
 
Posts: 1390
Images: 107
Joined: Sun Jul 24, 2011 4:14 pm
Location: Roxana, IL
Top

Re: Another foam standie...

Postby GPW » Fri Nov 16, 2012 8:31 am

Star Trek space shuttle !!! :thumbsup: 8) 8) 8)
There’s no place like Foam !
User avatar
GPW
Gold Donating Member
 
Posts: 14920
Images: 546
Joined: Thu Feb 09, 2006 7:58 pm
Location: New Orleans
Top

Re: Another foam standie...

Postby eaglesdare » Fri Nov 16, 2012 9:06 am

GPW wrote:After all this , it would appear that the Outer skin is the Important one , inner not so much ... ( I used bedsheets old inside .. no problems ) ;)


and i don't even have the inside skinned. :lol:
Louella
May the foam be with you.
User avatar
eaglesdare
Donating Member
 
Posts: 3168
Images: 13
Joined: Tue Aug 26, 2008 7:06 pm
Top

Re: Another foam standie...

Postby GPW » Fri Nov 16, 2012 9:27 am

Really huh ? It’s the Outside skin that does most of the real work ... The “Sock” ... :thumbsup:
There’s no place like Foam !
User avatar
GPW
Gold Donating Member
 
Posts: 14920
Images: 546
Joined: Thu Feb 09, 2006 7:58 pm
Location: New Orleans
Top

Re: Another foam standie...

Postby Wobbly Wheels » Fri Nov 16, 2012 11:56 am

Thx bonnie. I've done this before but, even so, I'm learning quite a bit as I go. It's interesting to see the differences when you're doing it for yourself rather than in a production environment.

GPW wrote:Star Trek space shuttle !!! :thumbsup: 8) 8) 8)


You know, I can see that !
This is one from the original series that sold for $70k and is set to be be restored.
Image
Seriously: who wouldn't LOVE to embrace their inner geek and have something like that as a trailer ?
The sucker's 14' wide though...
I was watching an episode of Stargate Atlantis the other night and they had their equivalent. When I saw the show first time around, I wasn't thinking 'potential foamie shapes' when I saw it:
Image
The side 'pods' would be a slideout galley, of course :lol:

I was trying to remember who had the unfinished foam on the inside of their trailer - given how much you've used yours Loella, it goes to show that road and wind stresses are something to be addressed but aren't worth overbuilding, especially since my build is on a diet to keep the weight down. I could drop a bunch of weight on the appliances I'm putting in (RV stuff), but I'll be camping by myself if I don't include a few creature comforts like an oven, a fridge instead of a cooler, enclosed toilet, etc.
I have no problems with camping a couple extra days to dodge a storm....or putting off the trip till the weather's better.

And...the glass on the outside.
Image
I should be able to fit it this w/e and, if it warms up a bit, glass it in. I have an IR heater I can put inside the trailer for a couple hours but I don't know if it'll warm through the foam enough to warm the outside enough to glass it.
User avatar
Wobbly Wheels
Donating Member
 
Posts: 1080
Joined: Tue Mar 15, 2011 9:51 am
Top

Re: Another foam standie...

Postby GPW » Sat Nov 17, 2012 7:00 am

Just sayin’ .... a really Cool paint job and you’ll be the envy of all the SF people .... 8) 8) 8) :thumbsup:
There’s no place like Foam !
User avatar
GPW
Gold Donating Member
 
Posts: 14920
Images: 546
Joined: Thu Feb 09, 2006 7:58 pm
Location: New Orleans
Top

PreviousNext

Return to Foamies

Who is online

Users browsing this forum: DrAlvarez and 10 guests